
Installation
Packages
Experlogix Cloud Connect for Salesforce is a Salesforce 2nd Generation Managed package. 2nd generation packaging allows building modules, and Experlogix Cloud Connect for Salesforce leverages this feature by splitting into a core package and extension packages to enable specific functionality. The core package is designed to have minimum dependency on specific Sales or Service cloud features and can be used using Lightning Platform Starter or Sales/Service Cloud Pro Suite(lower-level editions do not support AppExchange) edition licenses.
See Cloud Connect Installers for links to the most up-to-date release.
|
Package |
Package Type |
Contents |
|---|---|---|
|
Core Package |
Managed |
Contains all the major features and APIs. Specific contents include:
|
|
Copy Config for Opp & Quote extension |
Unlocked |
Enables Copy configuration on Opportunity and Quote objects. Specific contents include:
|
|
Aura Quick Actions |
Managed |
Contains Experlogx CPQ control buttons components in Aura format. Used in some pages that are not LWC enabled. Currently only Experience Cloud pages. Once Experience Cloud pages will support LWC, this package will be obsolete. Specific contents include:
|
Installation Procedure
To install the Cloud Connect managed package, follow these steps:
-
Retrieve the latest installation details by visiting Experlogix Cloud Connect Salesforce. Every package, including extension packages, can be installed using a following link format: https://login.salesforce.com/packaging/installPackage.apexp?p0=PACKAGE_VERSION_ID , where PACKAGE_VERSION_ID has to be changed to a specific package version Id provided with each package.
The core package must be installed before extension packages. Extension packages can be installed in any order.
-
Select Install for admins only.
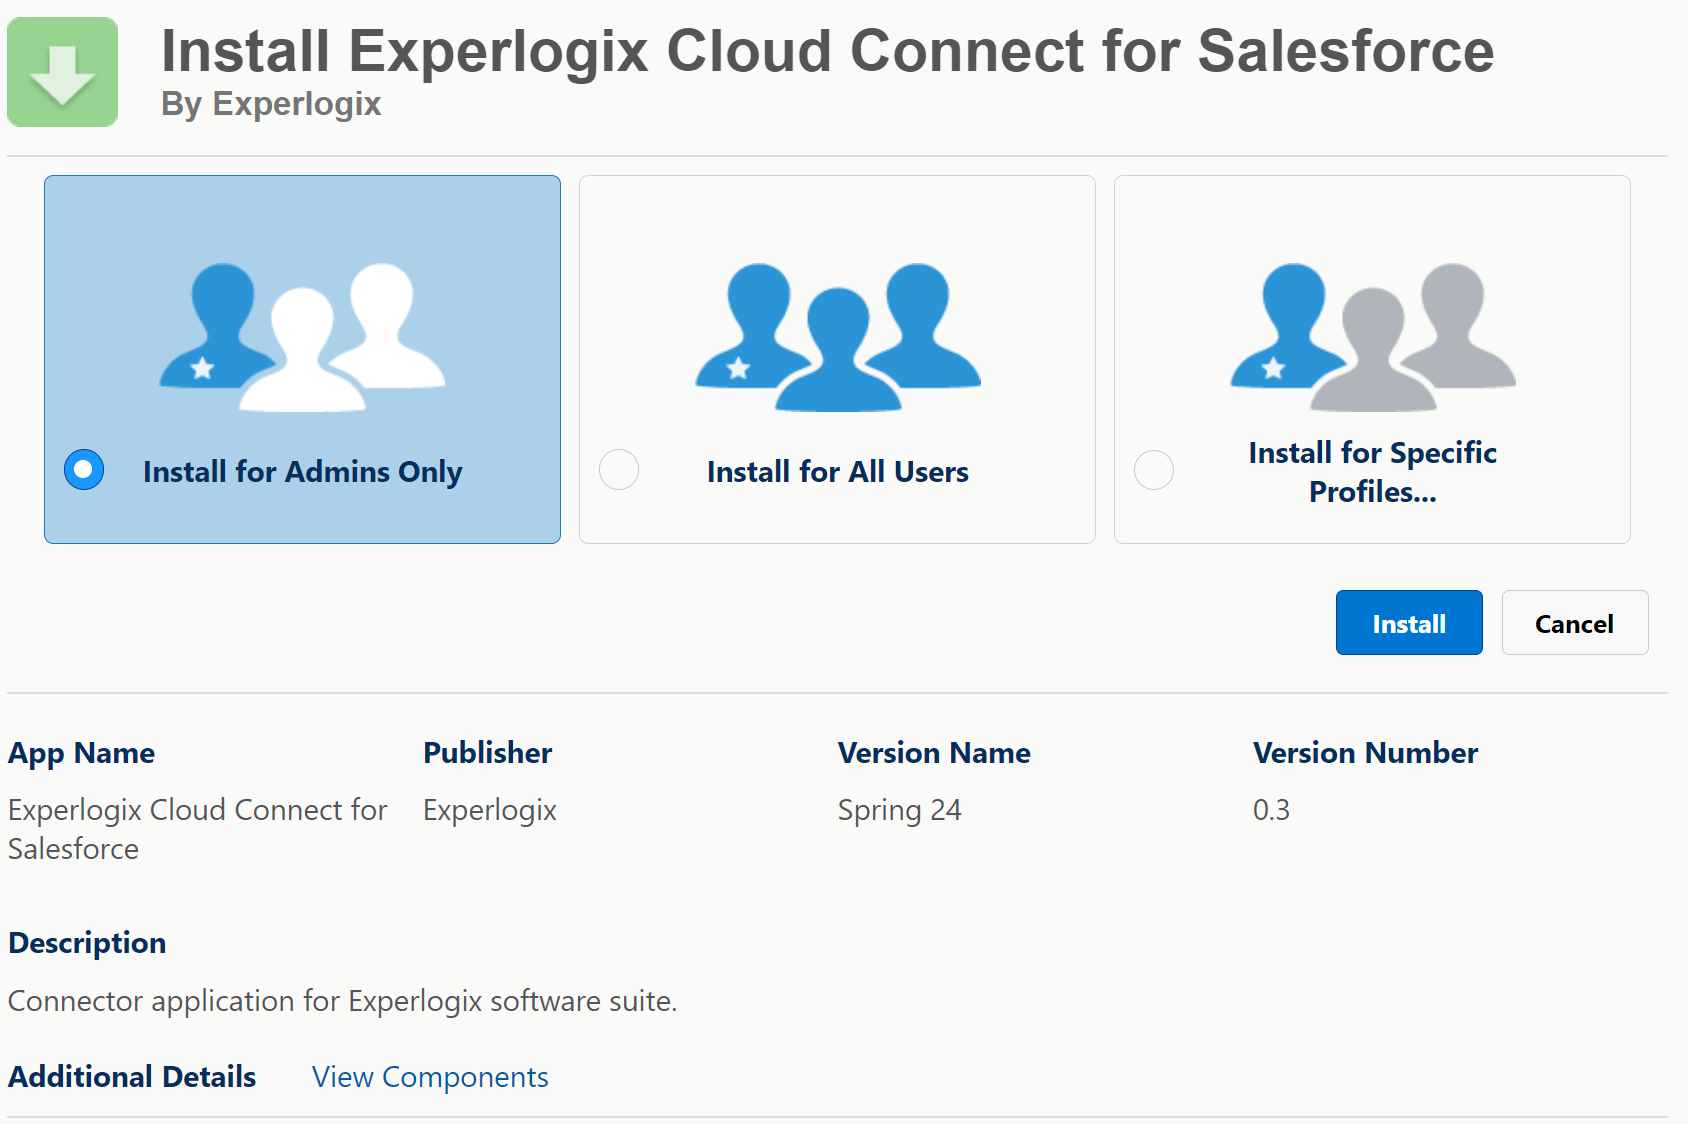
-
The installation might take a few minutes. You will receive an email once it completes.
Service Account Requirements and Setup
Configuration in the Admin Center requires a special user referred as Service User(Service Account). This user is used for all connections to Salesforce via the Cloud Connect Integrations API.
Minimal License and Profile Requirements
|
User License |
Profile |
Notes |
|---|---|---|
|
Salesforce |
Standard User, Minimum Access - Salesforce |
Use this user license when Standard Sales Cloud objects such as Opportunity, Quote and Product are used. Limitations apply to Minimum Access - Salesforce profile when used with Sales Cloud data model. |
|
Salesforce Platform |
Standard Platform User |
Use this license when Custom Solution is used that does not involve objects such as Opportunity, Quote, Product and Price Book |
|
Experience Cloud Licenses |
Varies per license |
Use this license when solution is based on one of Experience Clouds such as Customer Community or Partner community. |
Minimum Access profile has limitations—avoid it if you need to write to fields like OpportunityLineItem: Total Price.
Additional Permissions Required for Service Account
|
Permission type |
Name |
Notes |
|---|---|---|
|
Permission Sets |
Experlogix CPQ User |
Part of managed package |
|
System Permissions |
Apex REST services |
System permission that allows to use Salesforce REST API |
|
Object Permissions |
Varies depending on CPQ setup |
Access to every object that is used by CPQ for query or DML operations has to be provided |
|
Field Permissions |
Varies depending on CPQ setup |
Access to every field that is used by CPQ for query or DML operations has to be provided |
For more information, see the following Salesforce documentation:
User Platform Access Overview for Custom Applications
Experience Cloud User Licenses
Create a Permission Set for Experlogix CPQ Service Account
-
Navigate to Setup > Permission Sets.
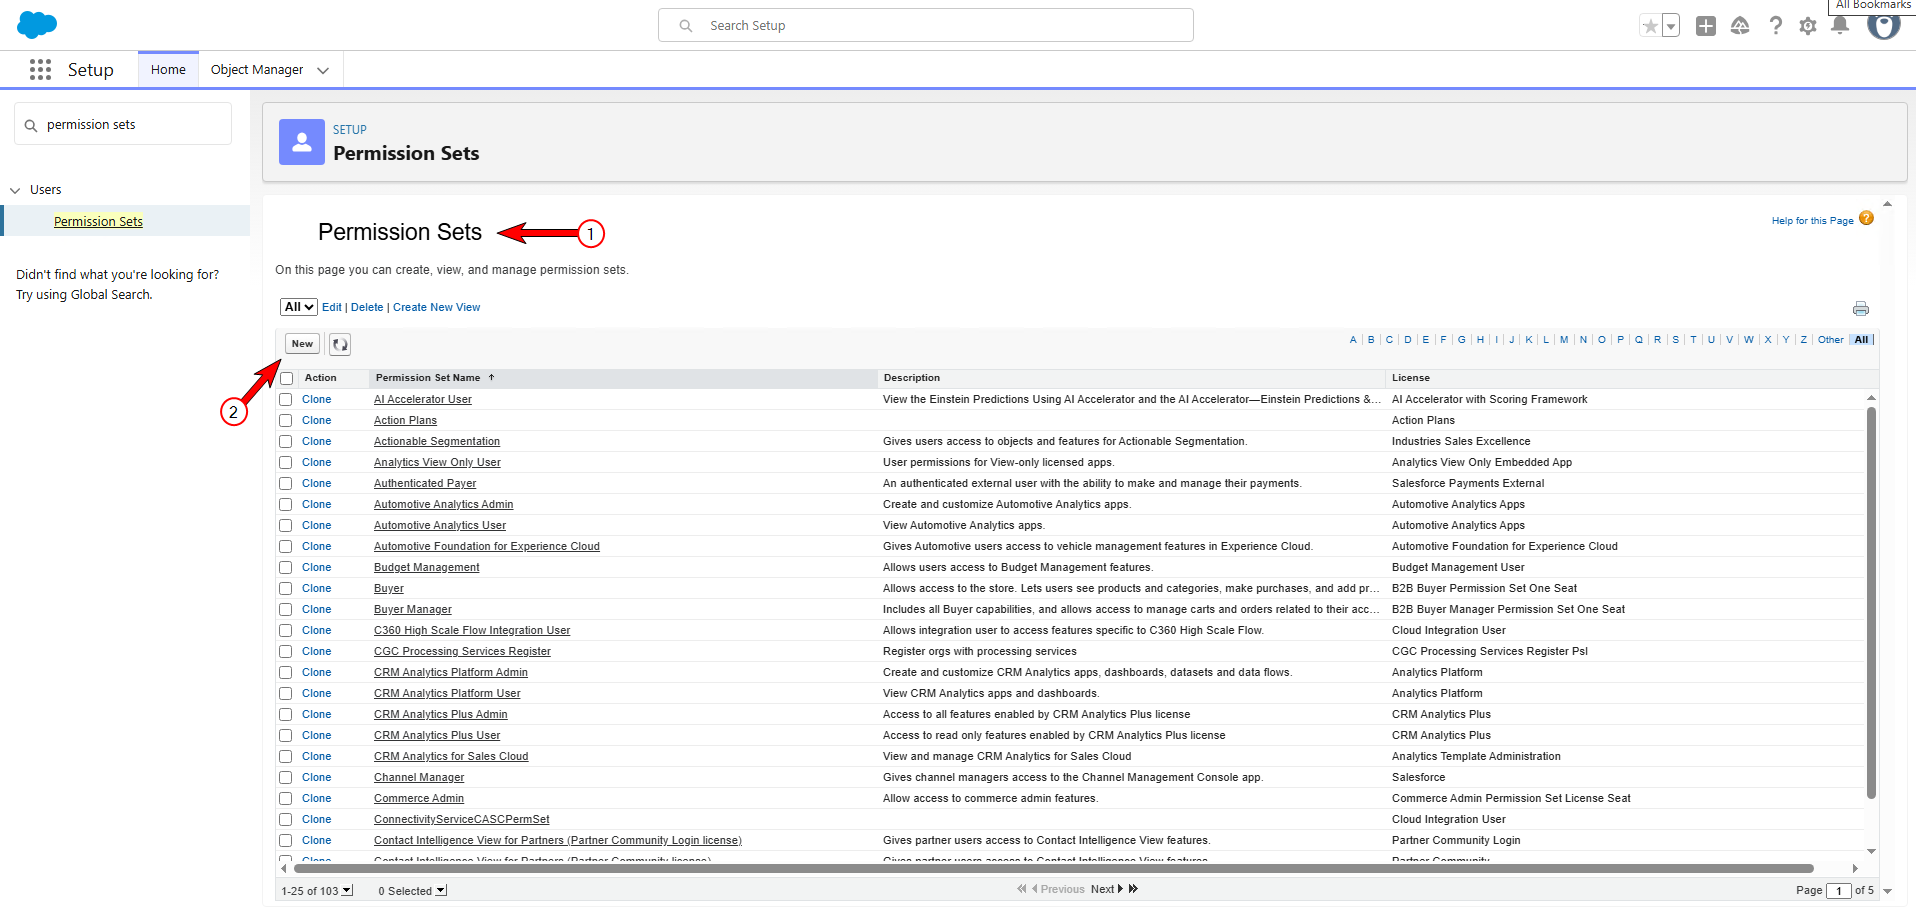
-
Select New.
-
In the Label field, enter Experlogix CPQ Service Account. The API Name field is populated automatically.
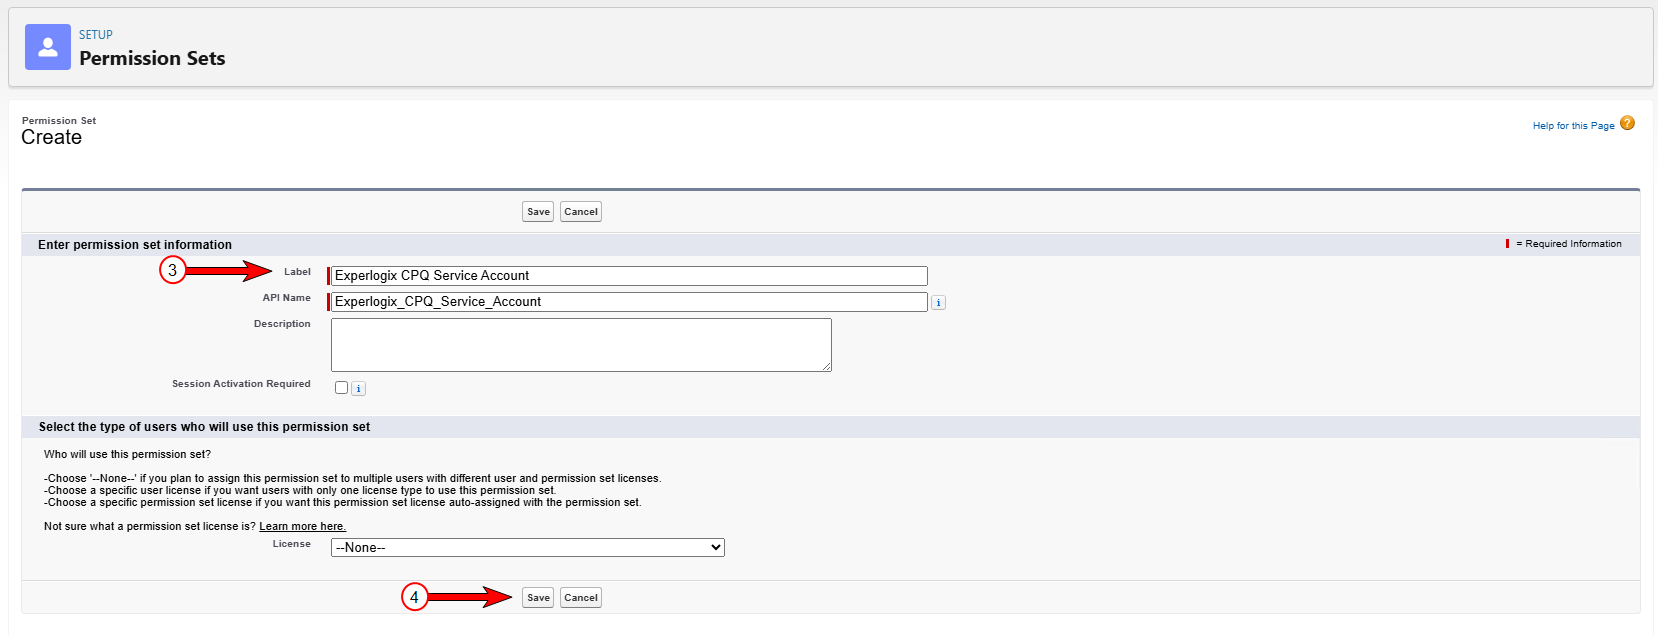
-
Select Save.
Add Object and Field Permissions
-
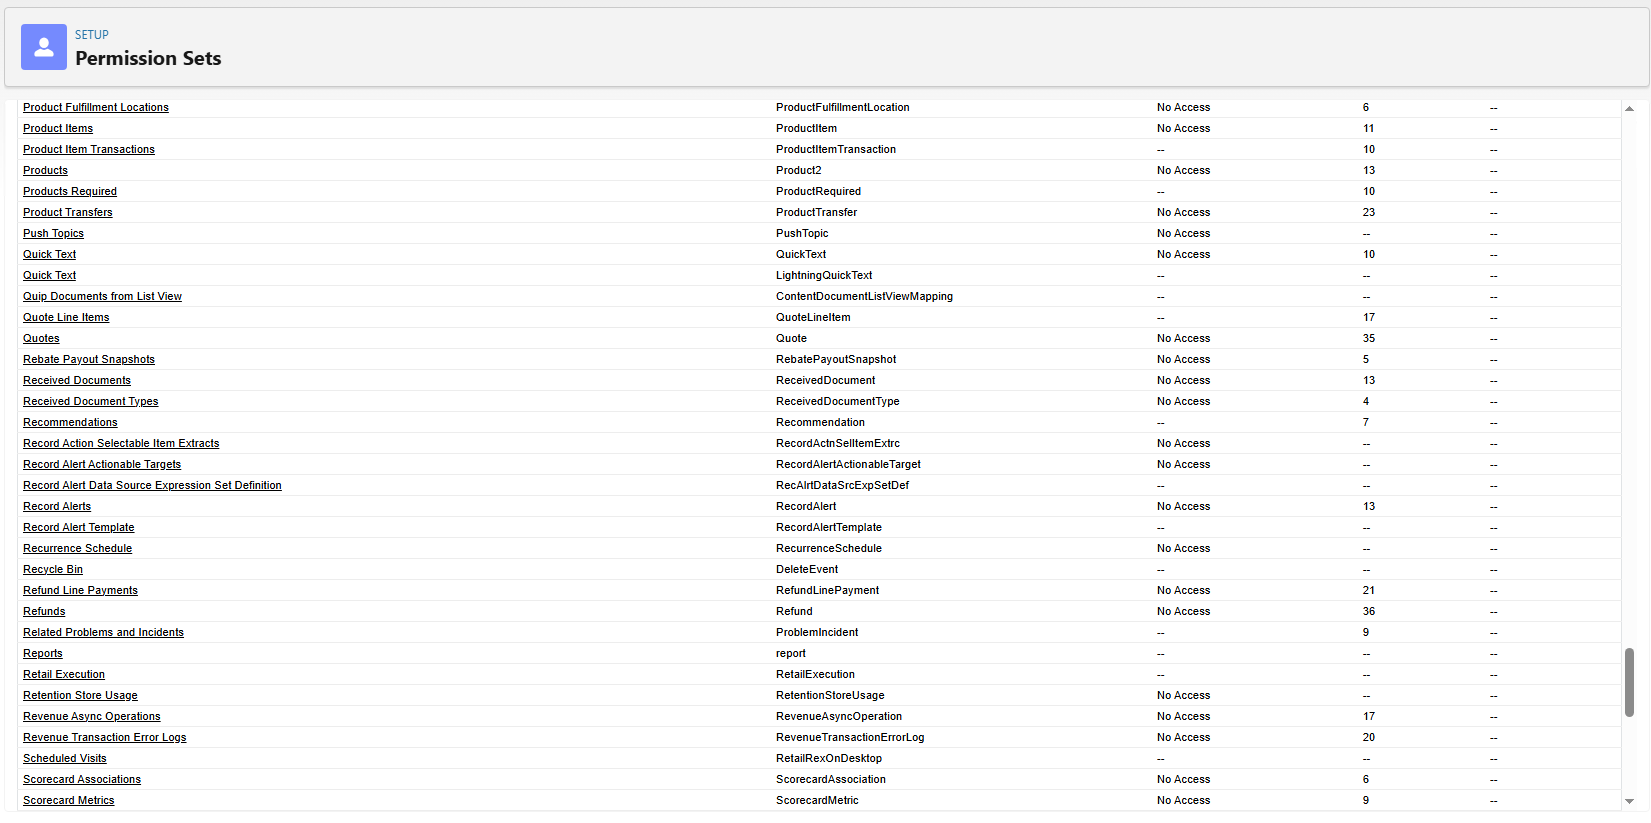
Within the Experlogix CPQ Service Account permission set, navigate to Object Settings.
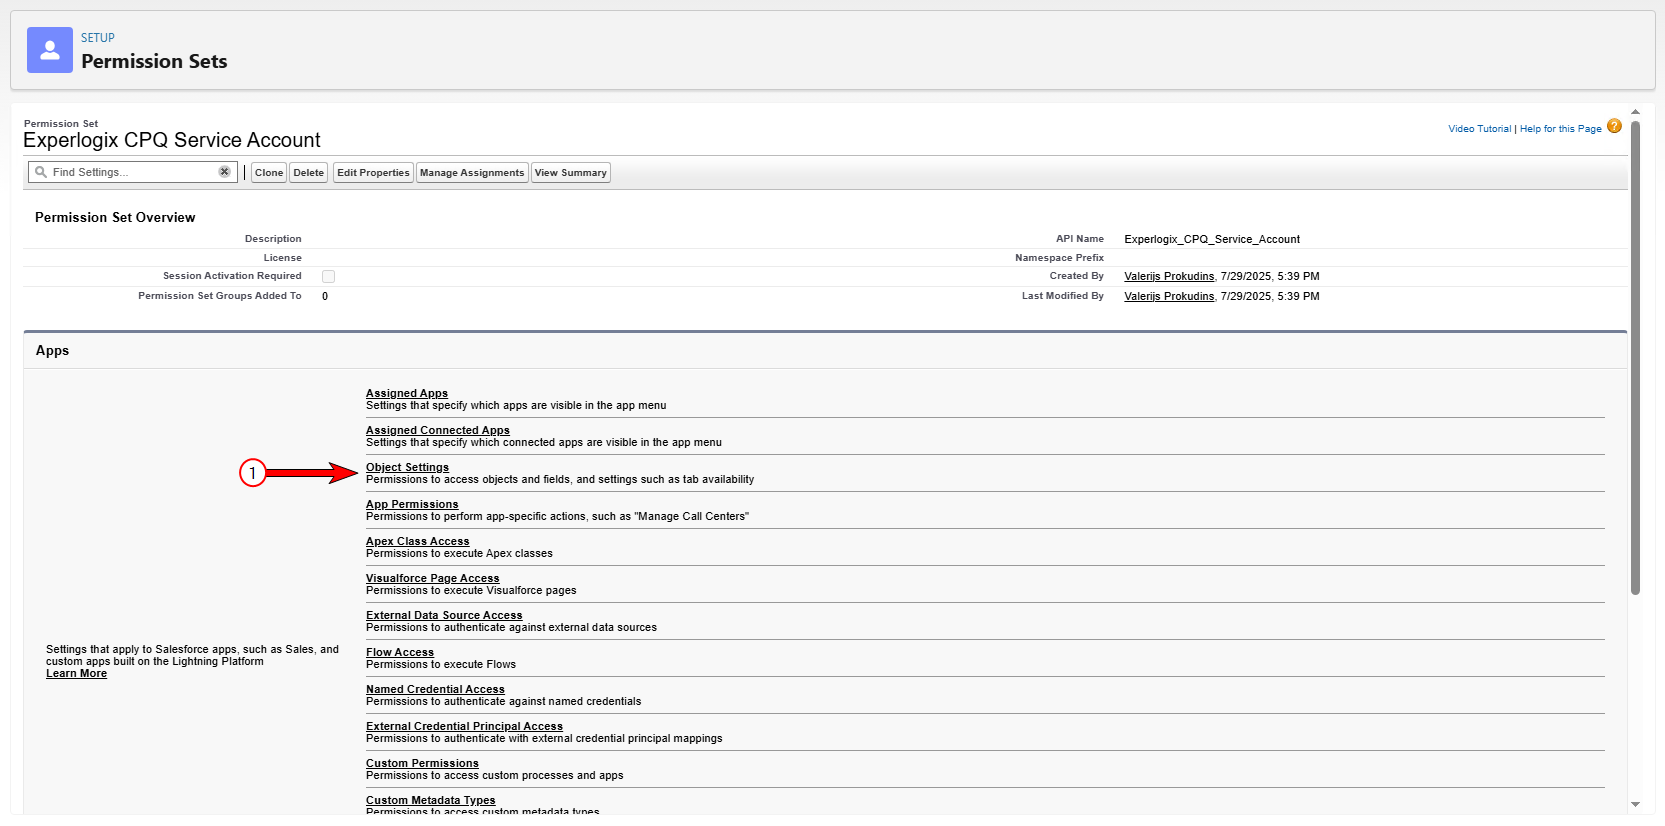
-
Select the required Object (e.g. Quotes).
-
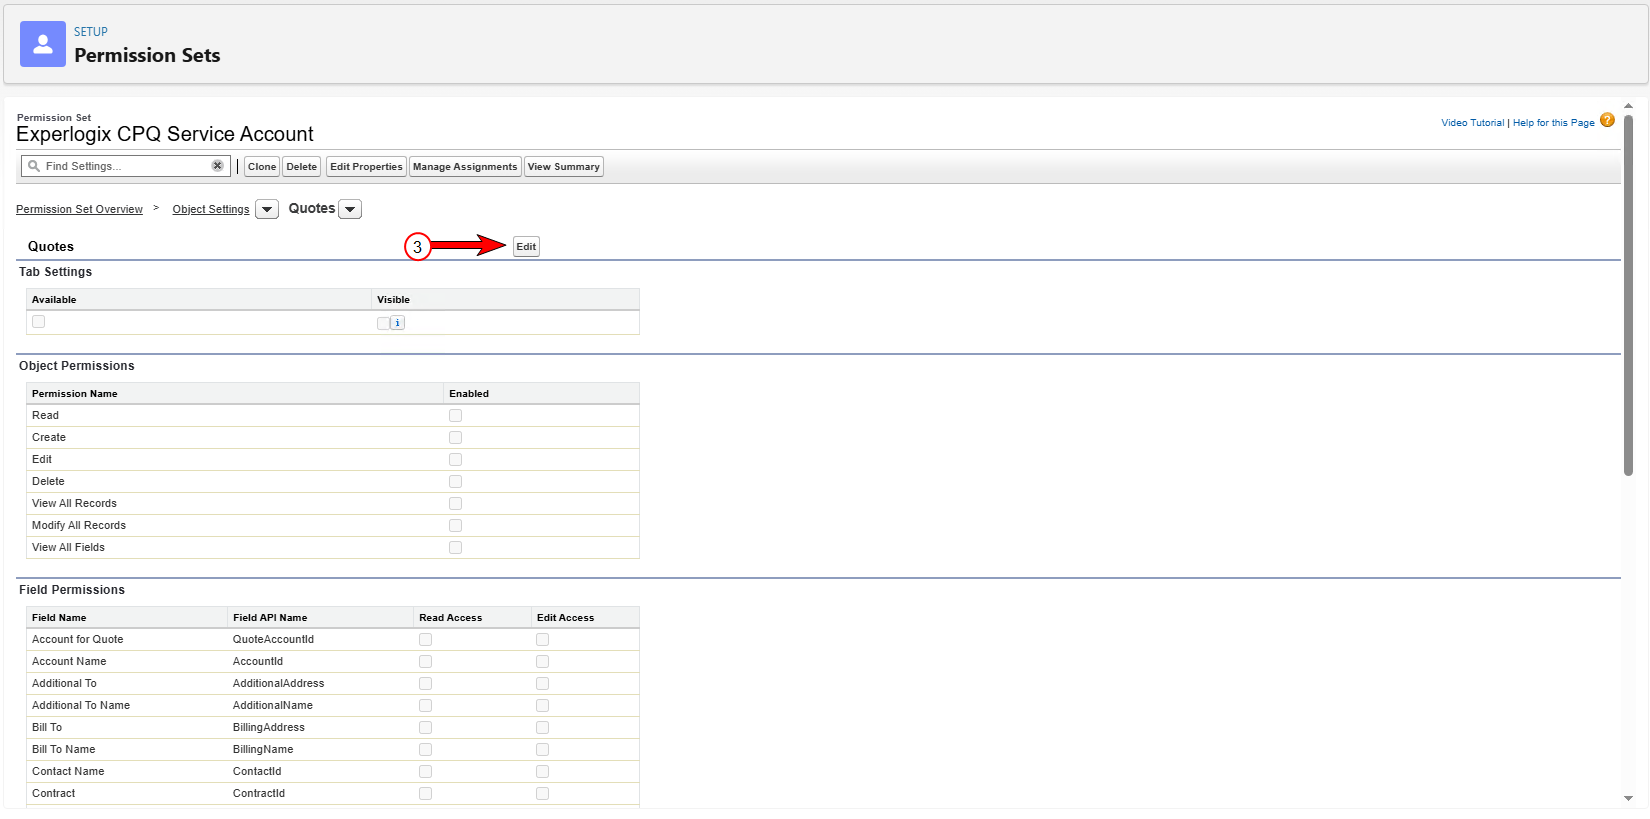
Select Edit.
-
Select the checkboxes to add permissions.
-
Select Save.
-
Repeat Steps 2-5 for each Object used by Experlogix. For standard Sales Cloud setup, the Object list would be as follows:
-
Product
-
Price Book
-
Price Book Entry
-
Opportunity
-
Opportunity Product
-
Quote
-
Quote Line Item
-
Create a Service Account User and Assign Necessary Permissions
-
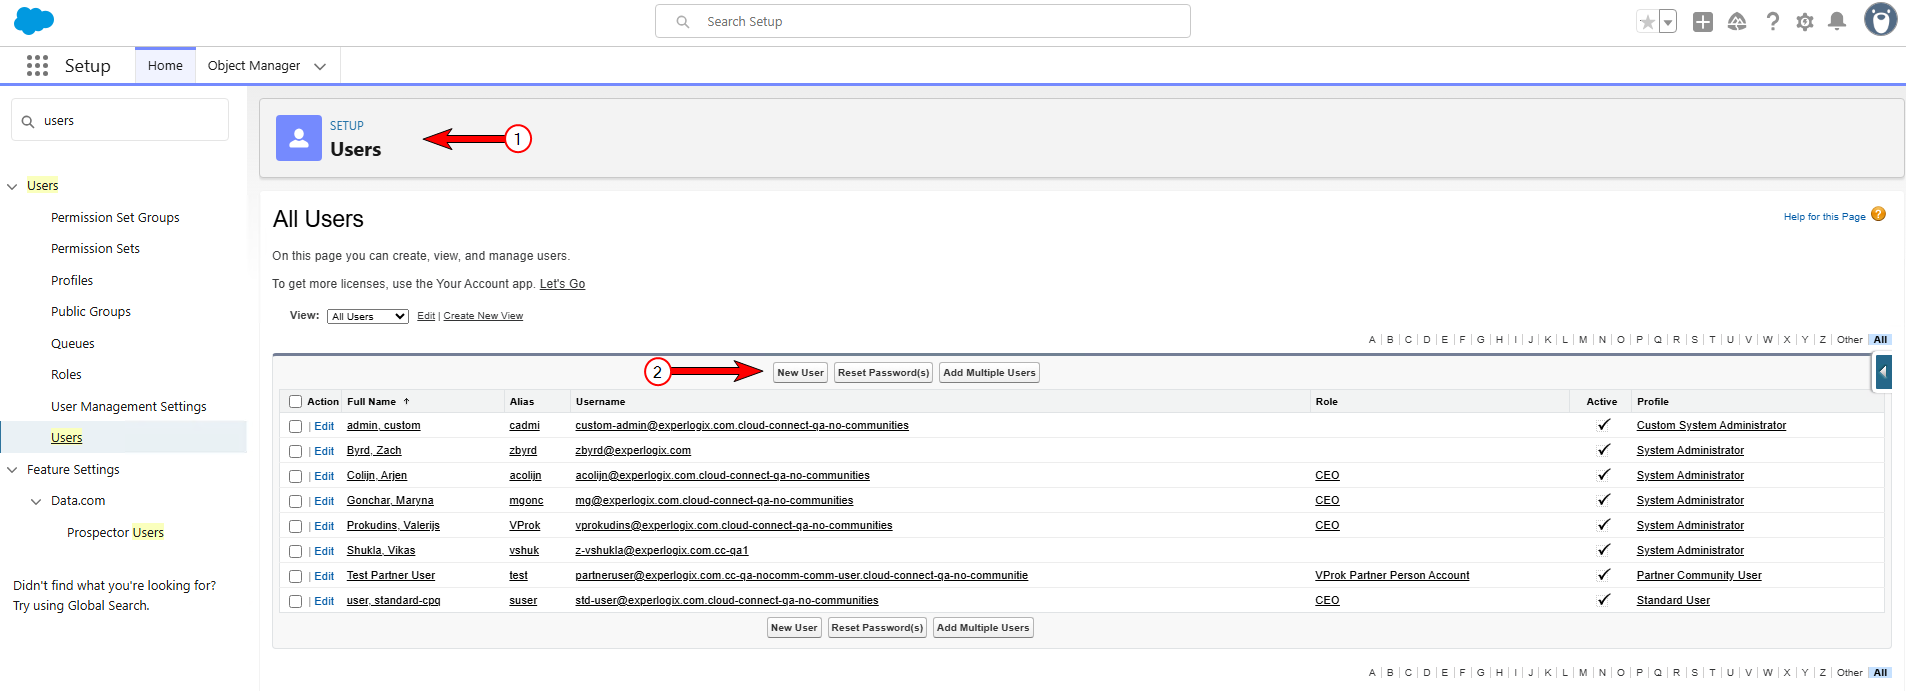
Navigate to Setup > Users.
-
Select New User.
-
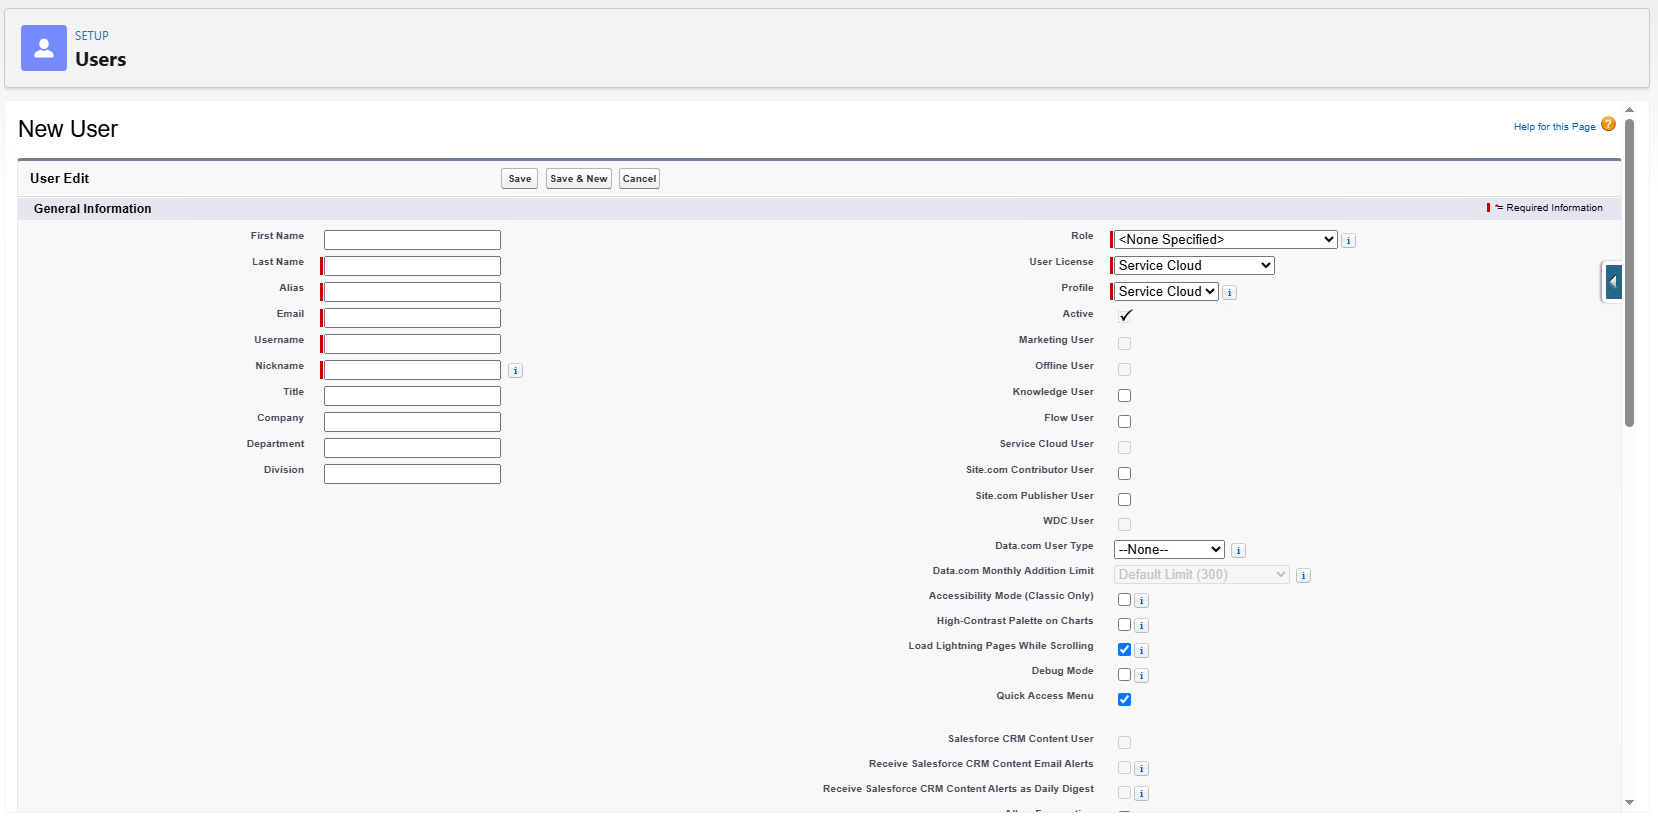
In the First Name field, enter a name.
-
In the Last Name field, enter a name.
-
In the Email field, enter an email.
-
In the Username field enter the desired username.
Don't use an Email as a username. Instead, it's recommended to follow a naming convention throughout the environment.
-
In the Role field, verify it is set to None Specified.
-
In the User License field, select the required license. If standard Sales Cloud Objects will be used by CPQ, select Salesforce.
-
In the Profile field, select one of the following
-
Standard User
-
Minimum Access - Salesforce
-
Minimum Access profile has limitations — avoid it if you need to write to fields like OpportunityLineItem: Total Price.
Users with minimum access must further modify their permission set. See Additional Permissions for Minimum Access Users for more information.
-
Select Save.
-
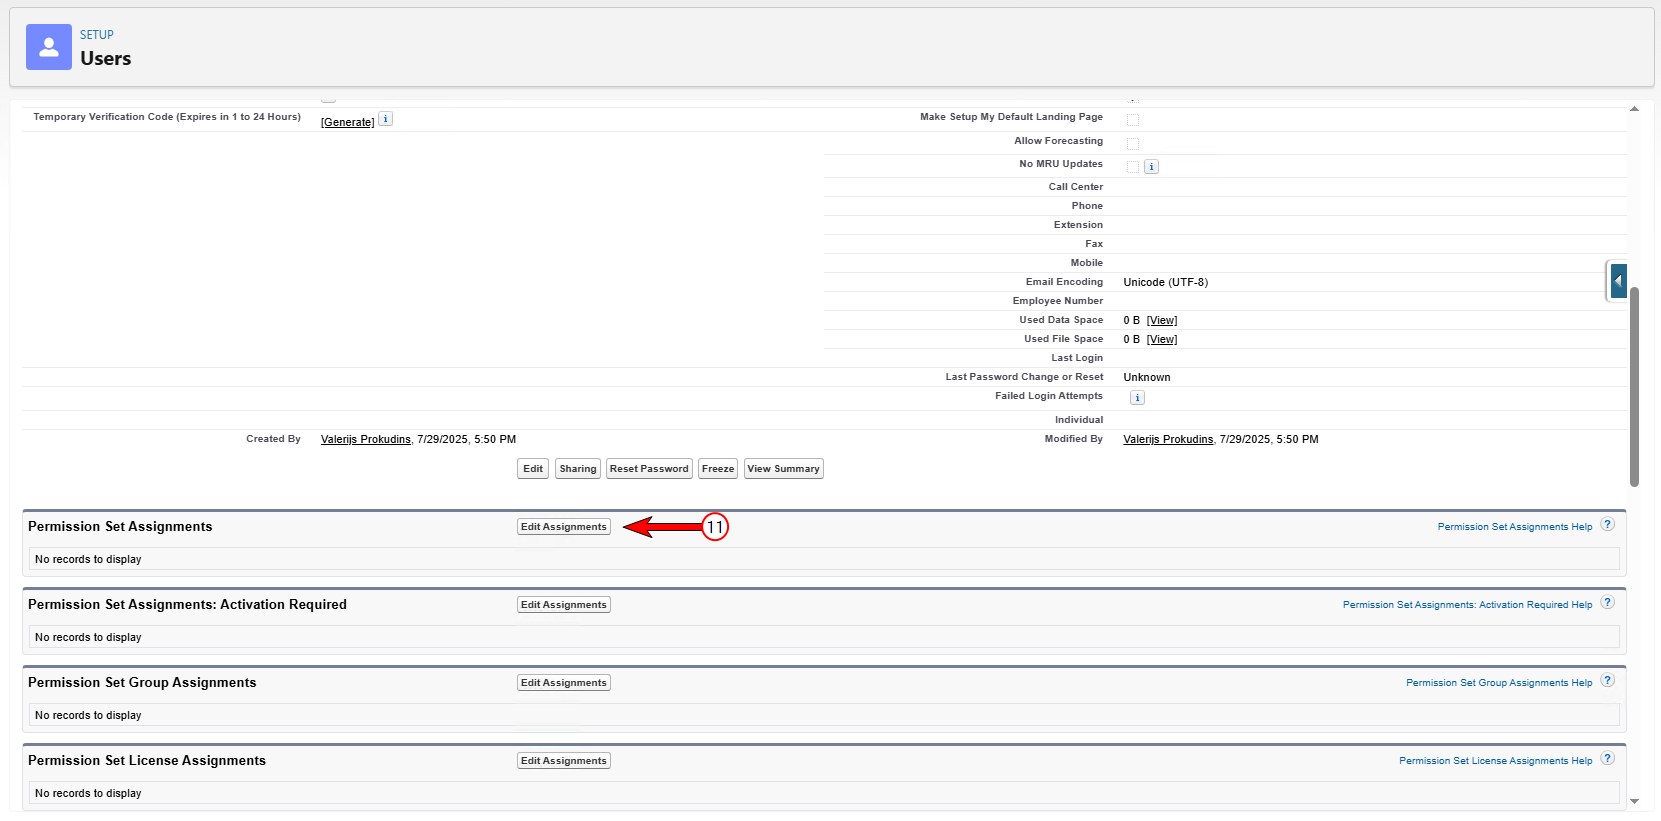
Scroll to the Permission Set Assignments section at the bottom of the page and select Edit Assignments.
-
Assign the Experlogix CPQ User and the newly created Experlogix CPQ Service Account permission sets.
-
Select Save.
Additional Permissions for Minimum Access Users
The following section guides you through updates required to the permission set if you're using a service account user with the minimum access profile.
-
Navigate to Setup > Permission Sets.
-
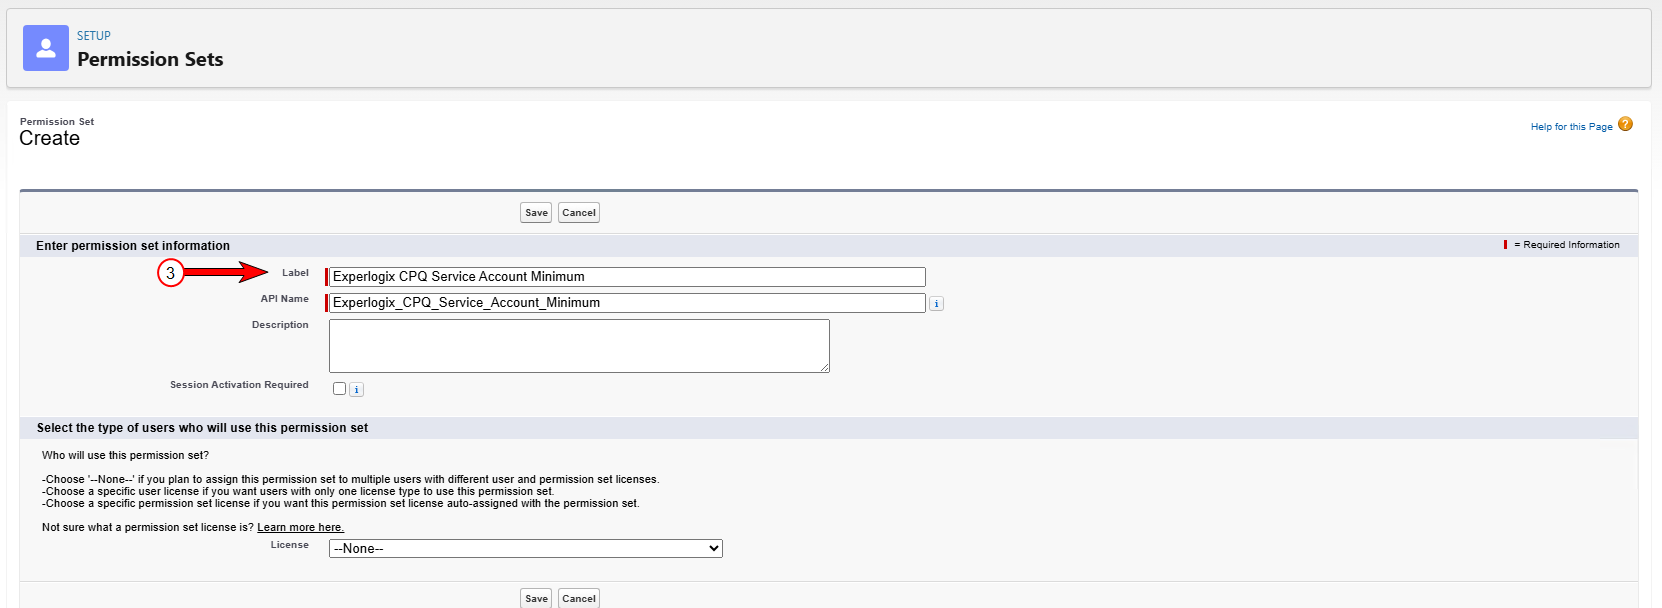
Select New.
-
In the Label field, enter Experlogix CPQ Service Account Minimum. The API Name field is automatically populated.
-
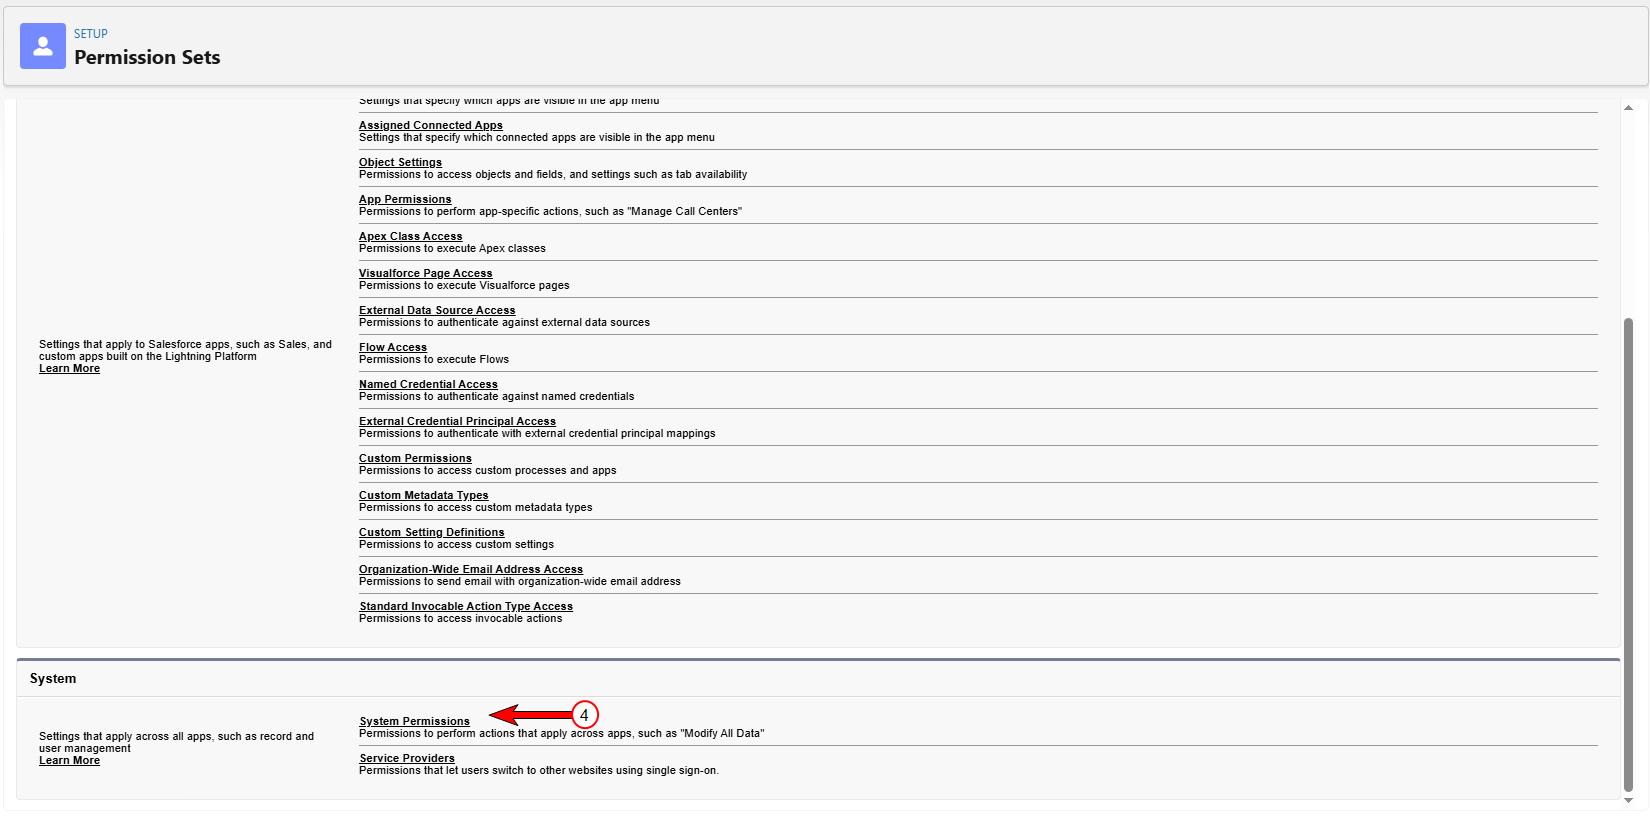
Scroll to the System section at the bottom of the page and select System Permissions.
-
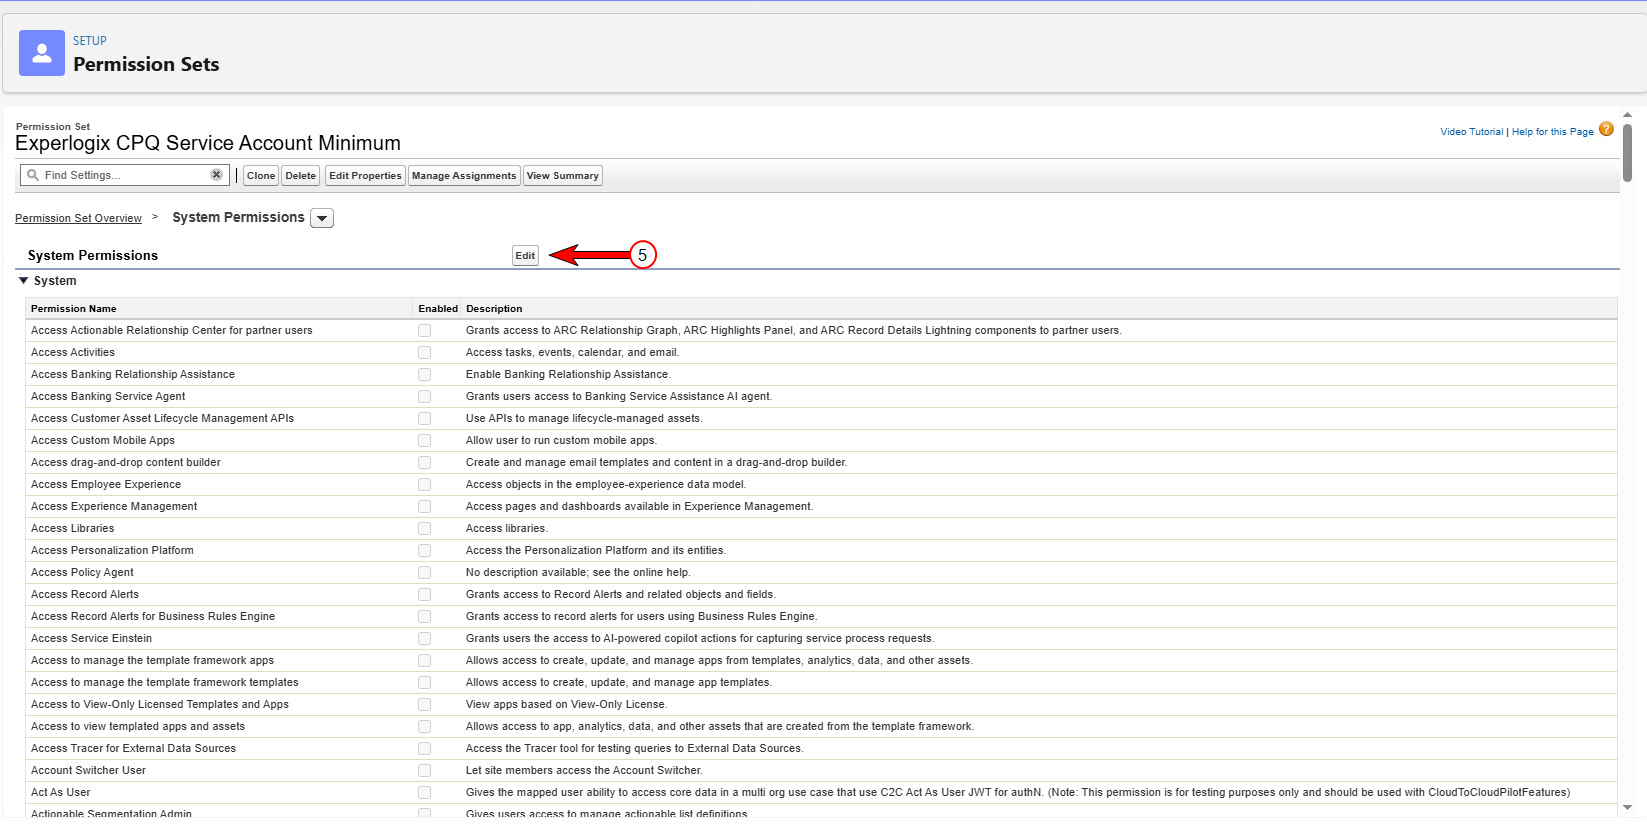
Select Edit.
-
Check the following checkboxes:
-
Apex REST Services
-
View Roles and Role Hierarchy
-
View Setup and Configuration
-
-
Select Save.
-
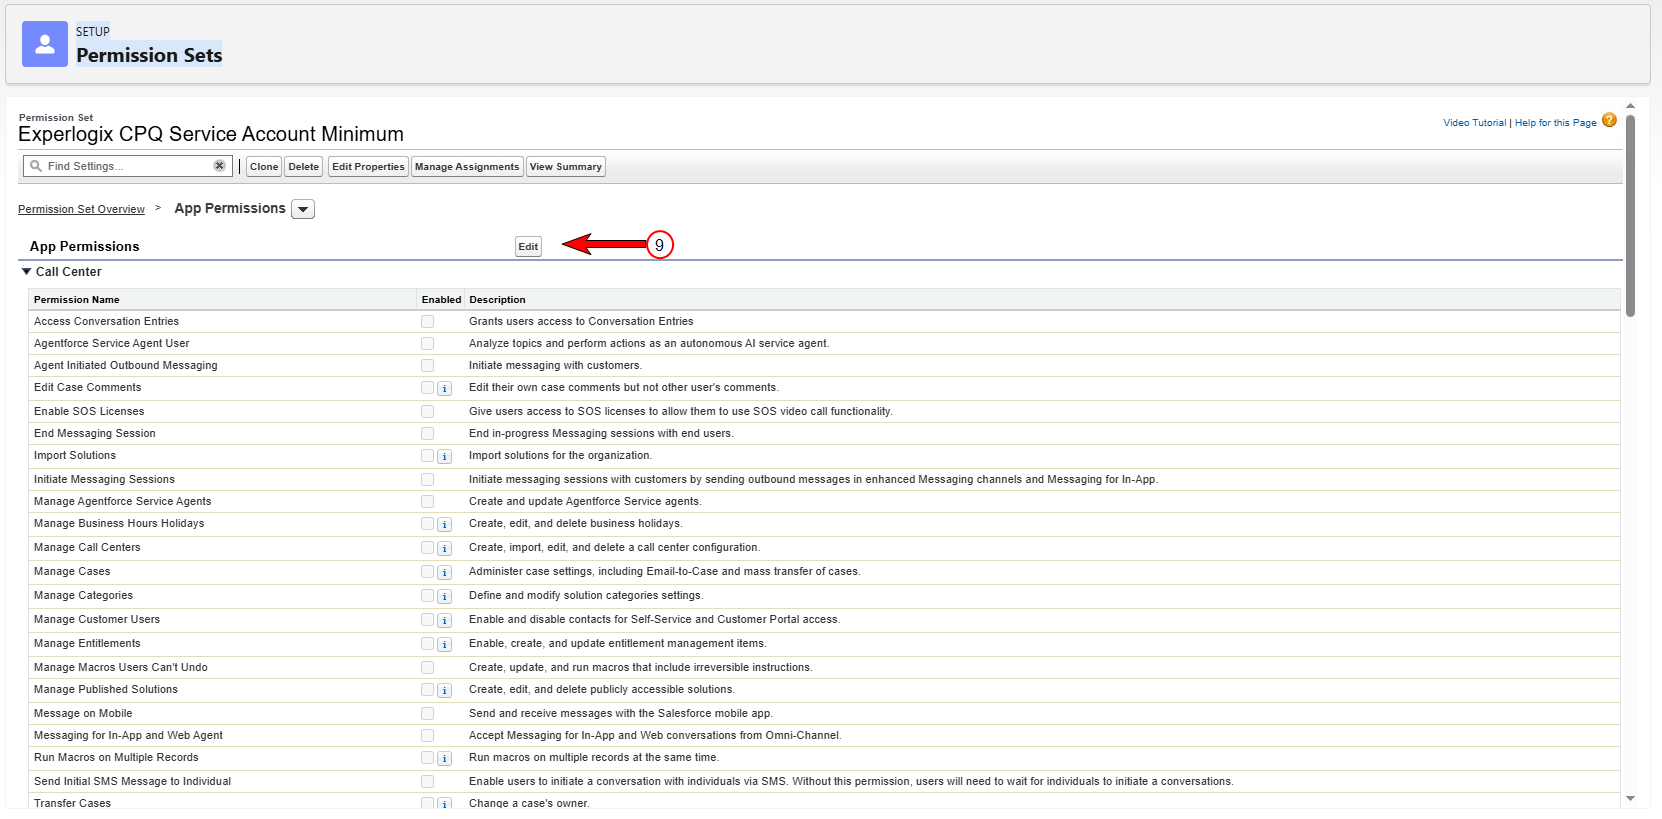
Back on the Permission Set screen, select App Permissions.
-
Select Edit.
-
Check the Edit Opportunity Product Sales Price permission.
This is only required if the standard Sales Cloud data model is used.
-
Select Save.
-
Proceed to add normal permission as needed as outlined in Add Object and Field Permissions.