
In order for Cloud Connect to work with Salesforce, some setup is required in the host system. This page includes steps for connected app creation and configuration, acquiring base URL, acquiring the security token, allowing username+OAuth flow, connection setup in Admin Center, and remote site settings in Salesforce.
Connected app creation and configuration
-
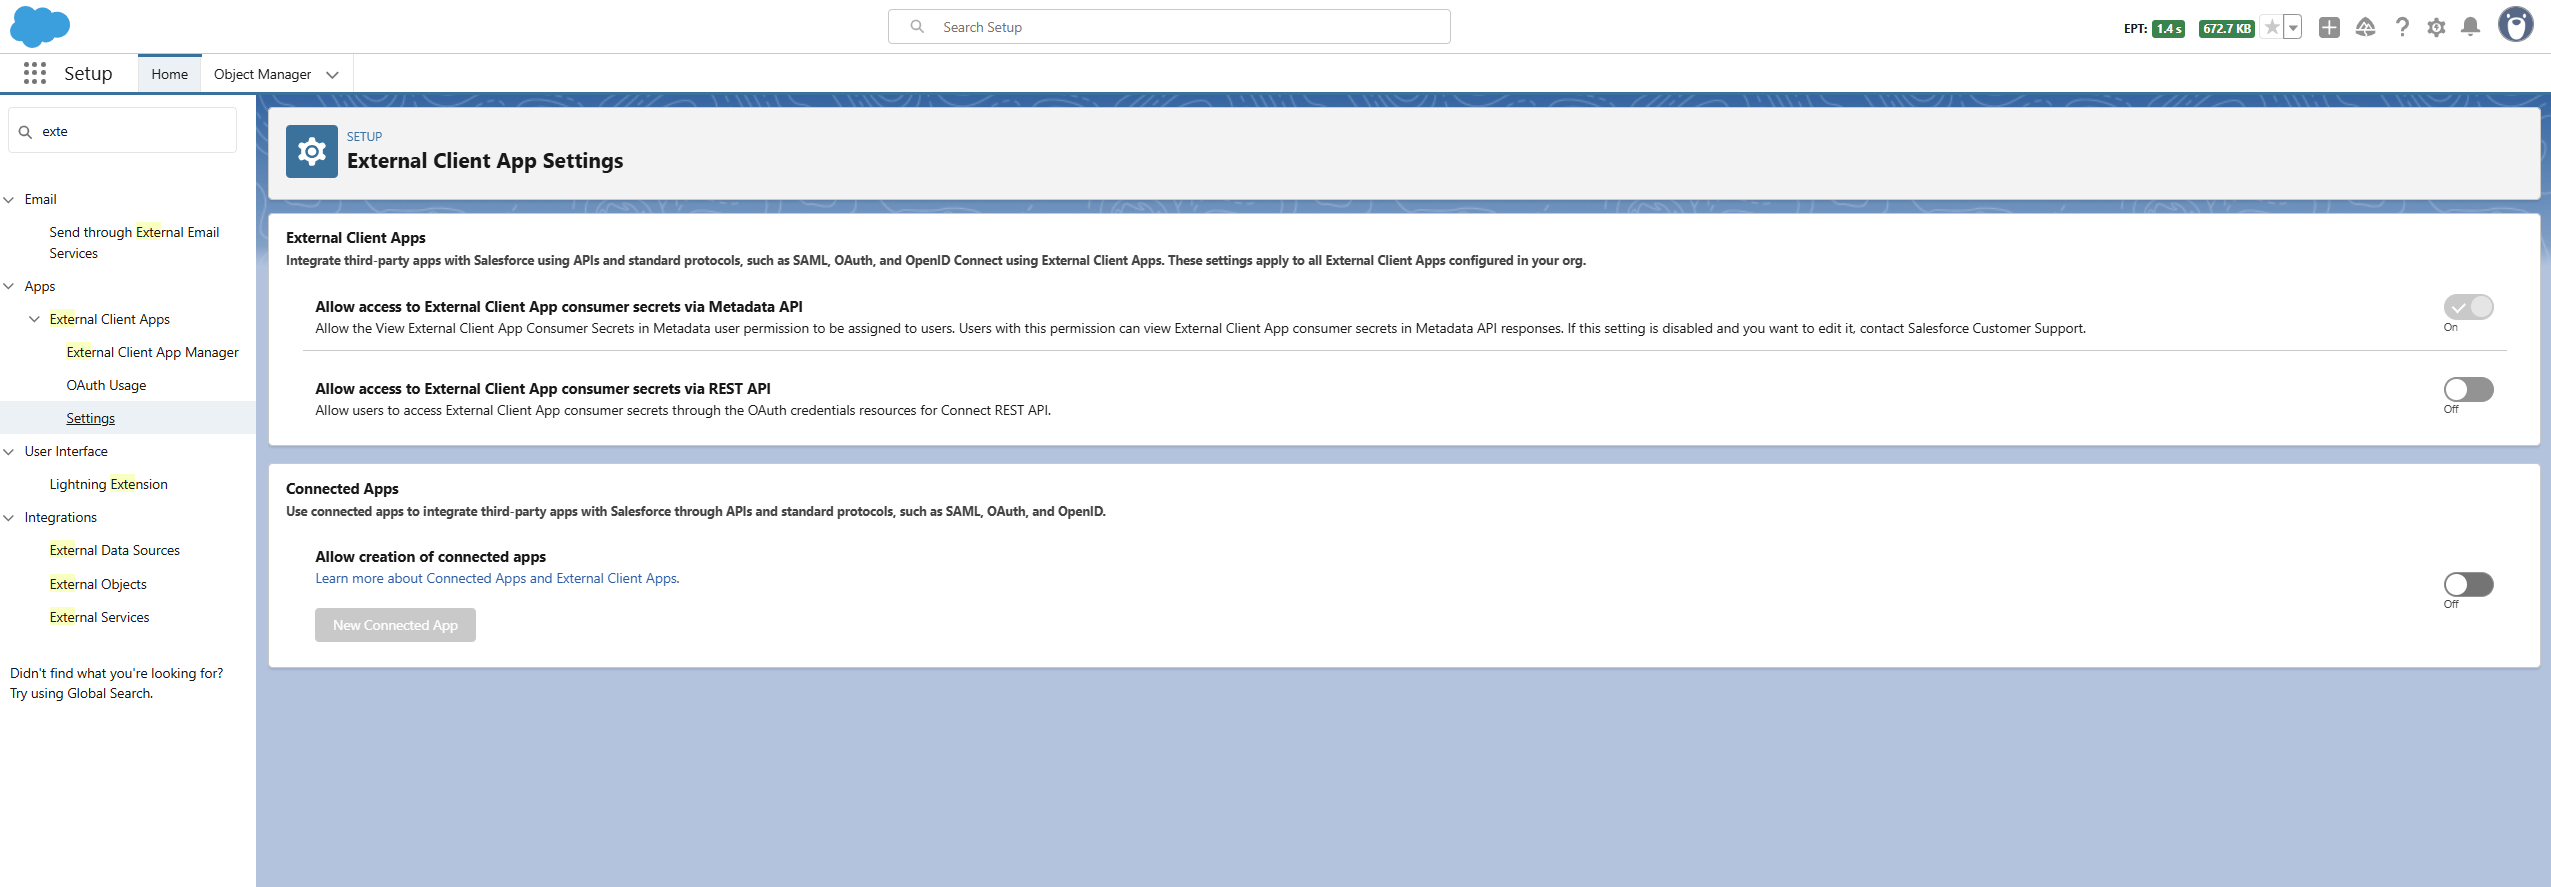
Navigate to Setup > Apps > External Client Apps > Settings.
-
In the Connected Apps section, enable Allow Create of Connected Apps.
-
Select New Connected App.
Starting in Spring ’26, Salesforce disables the creation of new Connected Apps by default. To enable this capability, customers must contact Salesforce Support. See Enable Connected App Creation for more details.
-
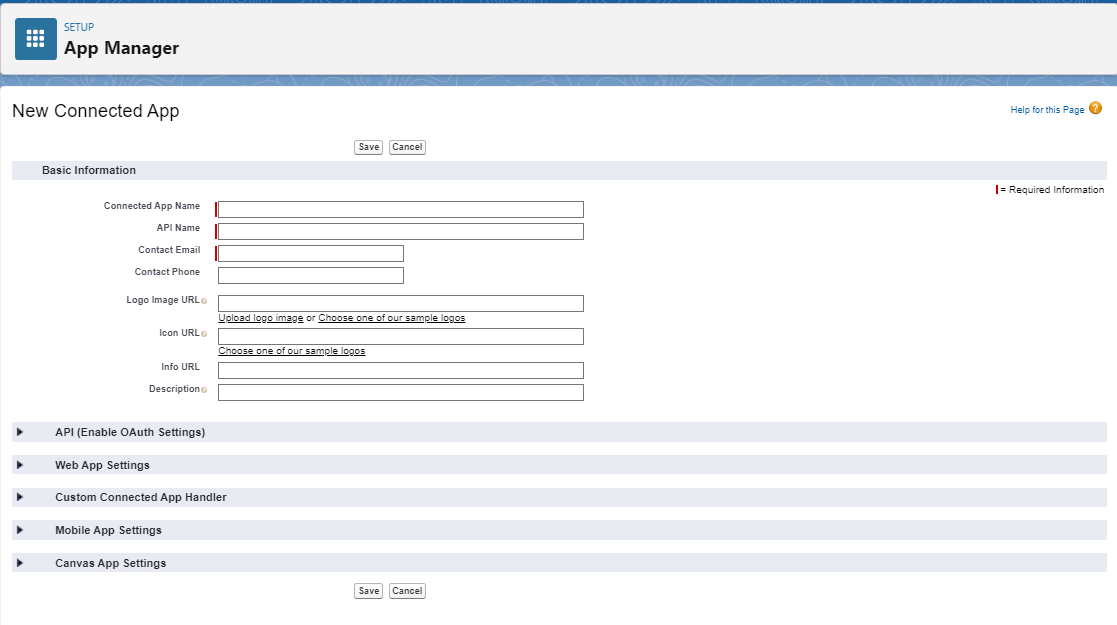
In the Connected App Name field, enter Experlogix
-
In the API Name field, enter Experlogix.
-
In the API (Enable OAuth Settings) section, select the Enable OAuth Settings checkbox. The fields to add the OAuth Settings display.
-
In the Callback URL field, enter your call back URL in the https://<your-domain>.experlogixonline.com/experlogix.sts/signin-salesforce format.
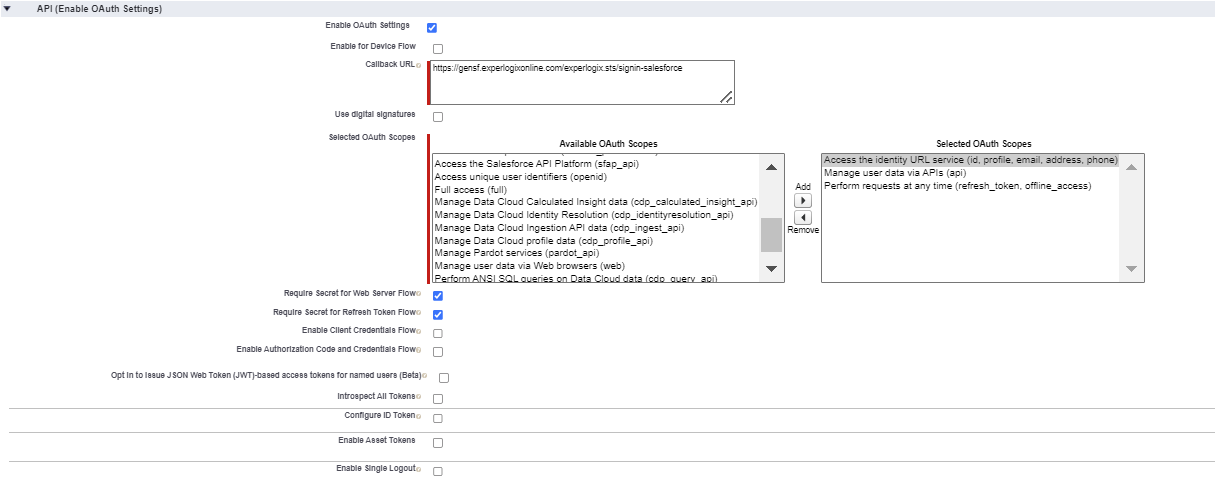
If your Configurator URL is https://gensfqa2.experlogixonline.com/experlogix/site/pages/ConfigureItem.aspx then your callback would be https://gensfqa2.experlogixonline.com/experlogix.sts/signin-salesforce
-
In the Available OAuth Scopes field, select the following scopes:
-
Access the identity URL service (id, profile, email, address, phone)
-
Manage user data via APIs (api)
-
Perform requests at any time (refresh_token, offline_access)
-
-
Select the Add button to move the selected scopes to the Selected OAuth Scopes field.
-
Select the Require Secret for Web Server Flow checkbox.
-
Select the Require Secret for Refresh Token Flow checkbox.
-
Clear the Require Proof Key for Code Exchange (PKCE) Extension for Supported Authorization Flows checkbox.
-
Select Save. The details are saved and the API (Enable OAuth Settings) section displays.

-
Select the Manage Consumer Details button. An email will be sent to you with the verification code.
-
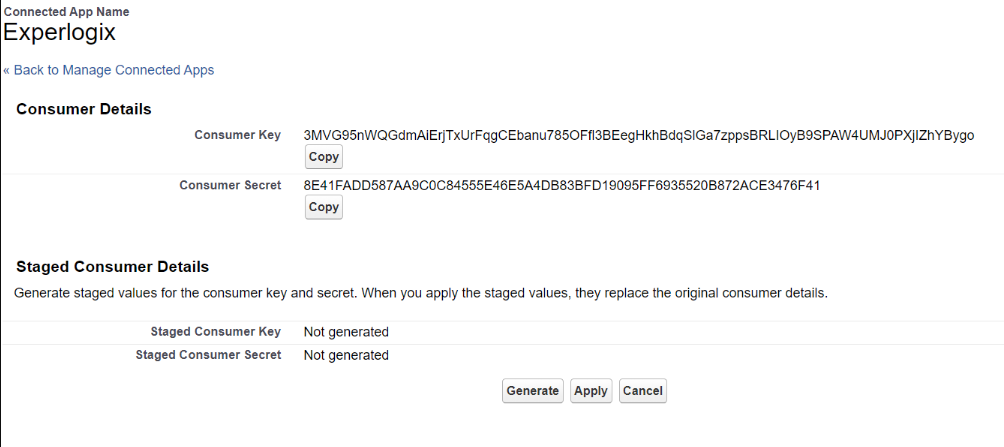
Provide verification code and select the Verify button. The Experlogix Connected App page displays.
-
Select the Copy button to copy the Consumer Key and Consumer Secret.
Save the copied Consumer Key and Consumer Secret as you will need them for connection in Admin Center.
-
Select the Back to Manage Connected Apps link. The Connected App page displays.
Relax IP restrictions
-
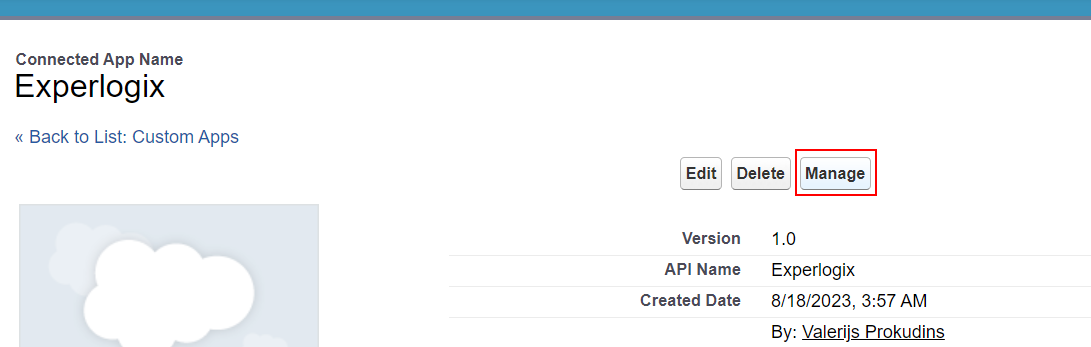
Select the Manage button.
-
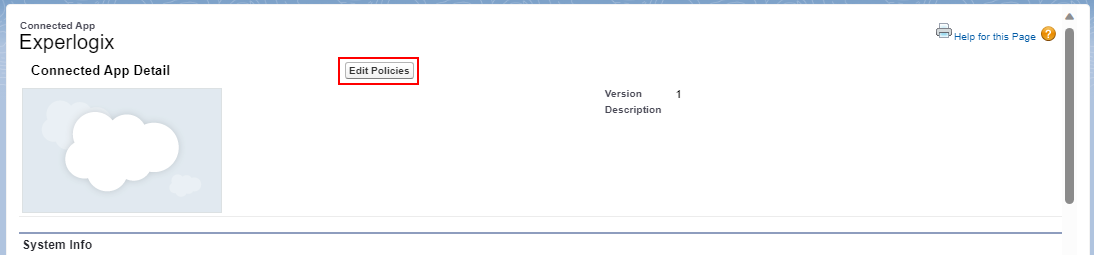
Select the Edit Policies button.
-
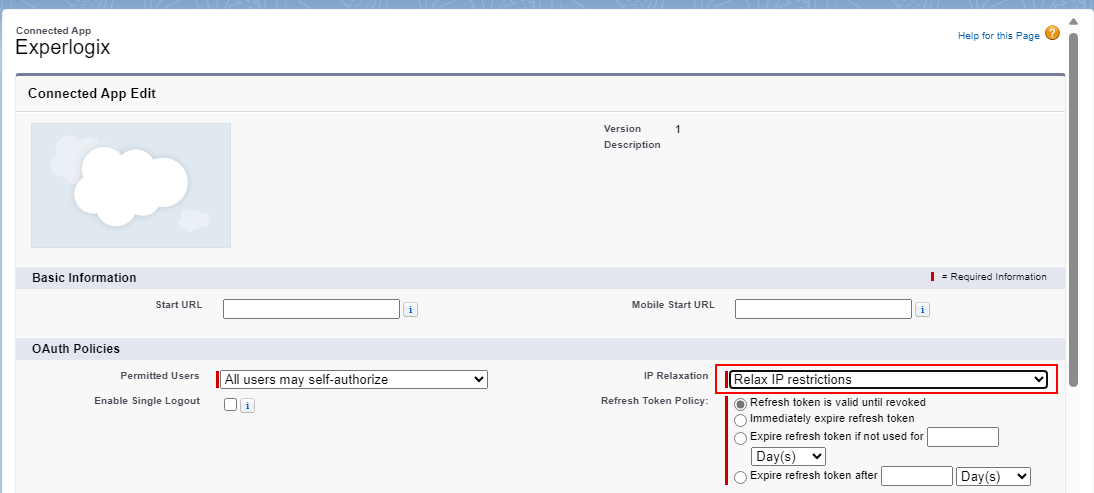
In the OAuth Policies section, from the IP Relaxation dropdown menu, select Relax IP Restrictions.
-
Select the Save button.
This completes the Connected app creation process. The next stage is to acquire the base URL.
Acquiring base URL
After you have created the Connected app, the next step is to acquire the base URL.
-
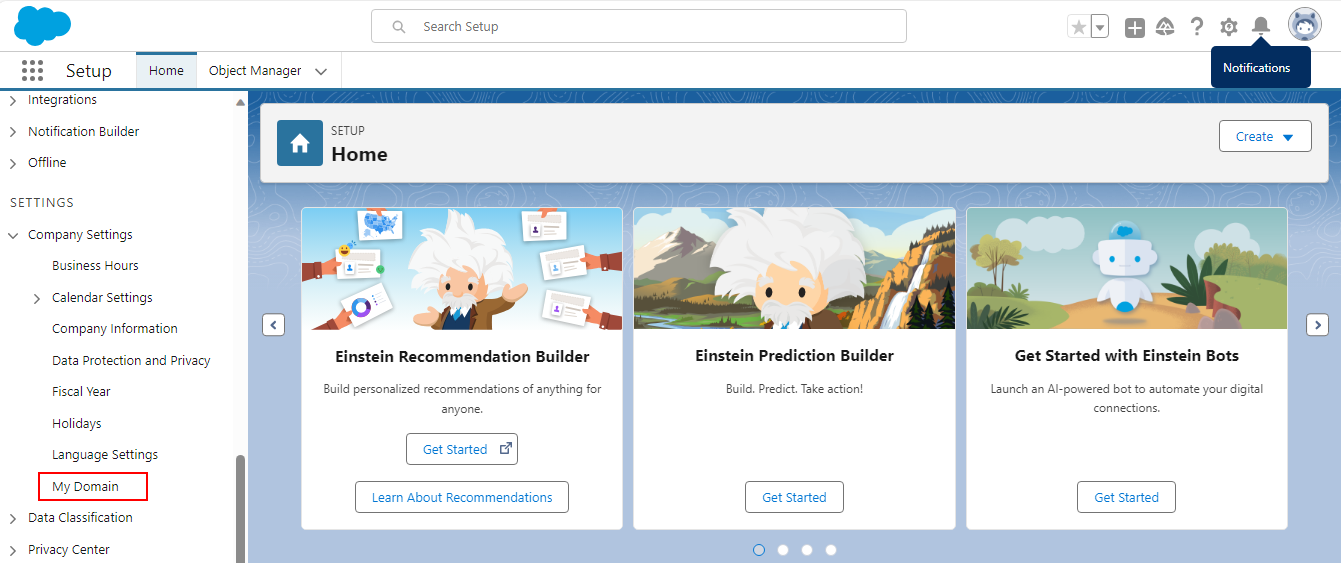
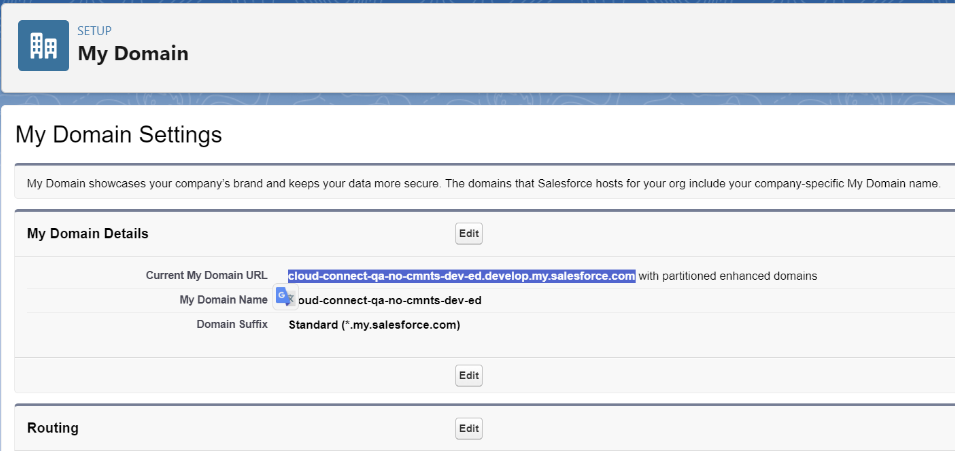
In the Setup page left pane, under Settings, expand Company Settings and then select My Domain.
-
Copy the URL from the Current My Domain URL field.
Ensure the Domain URL has https:// and a trailing /. Full URL Example: https://cloud-connect-qa-no-cmnts-dev-ed.develop.my.salesforce.com/
-
Note down the URL for use during setting up the connection in Admin Center.
The My Domain Settings page displays.
Acquiring the security token
The security token is required for the connection setup in Admin Center.
-
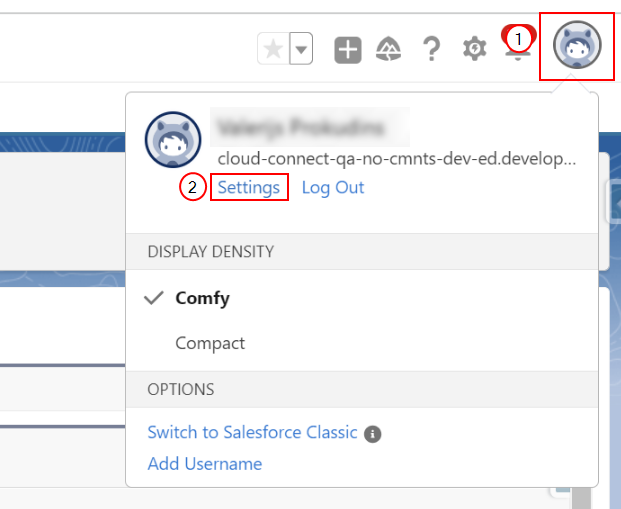
In Salesforce, at the upper-right corner, select View Profile.
-
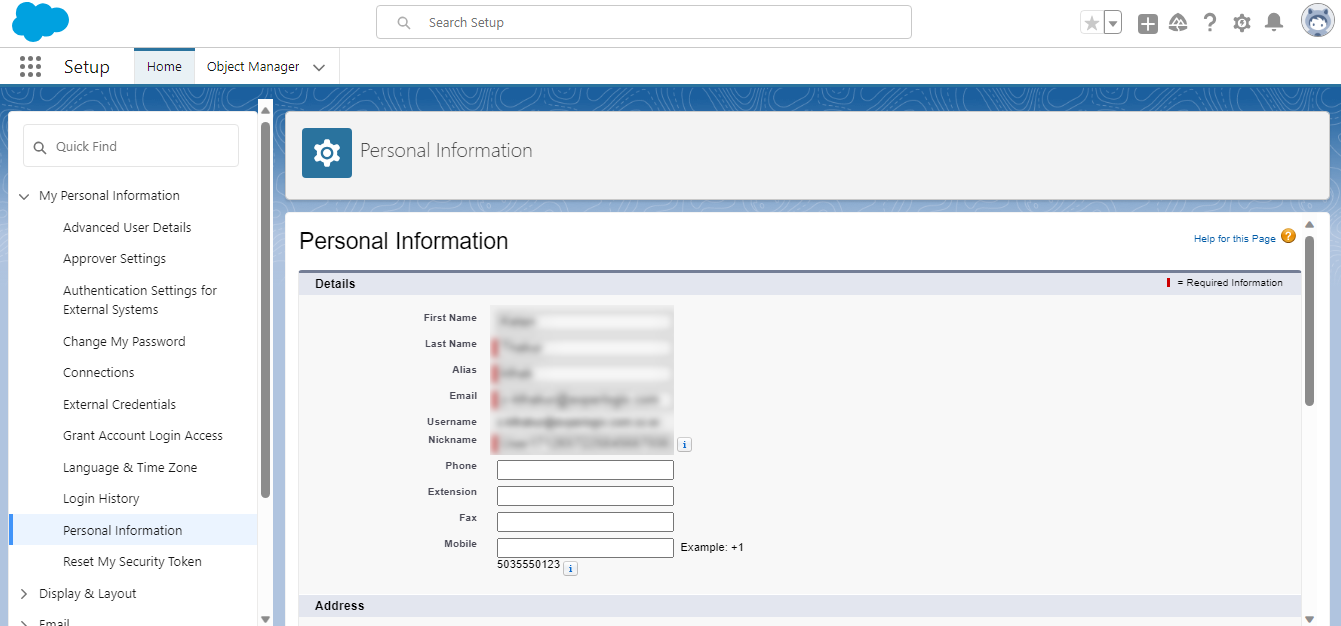
Select Settings. The Personal Information page displays.
-
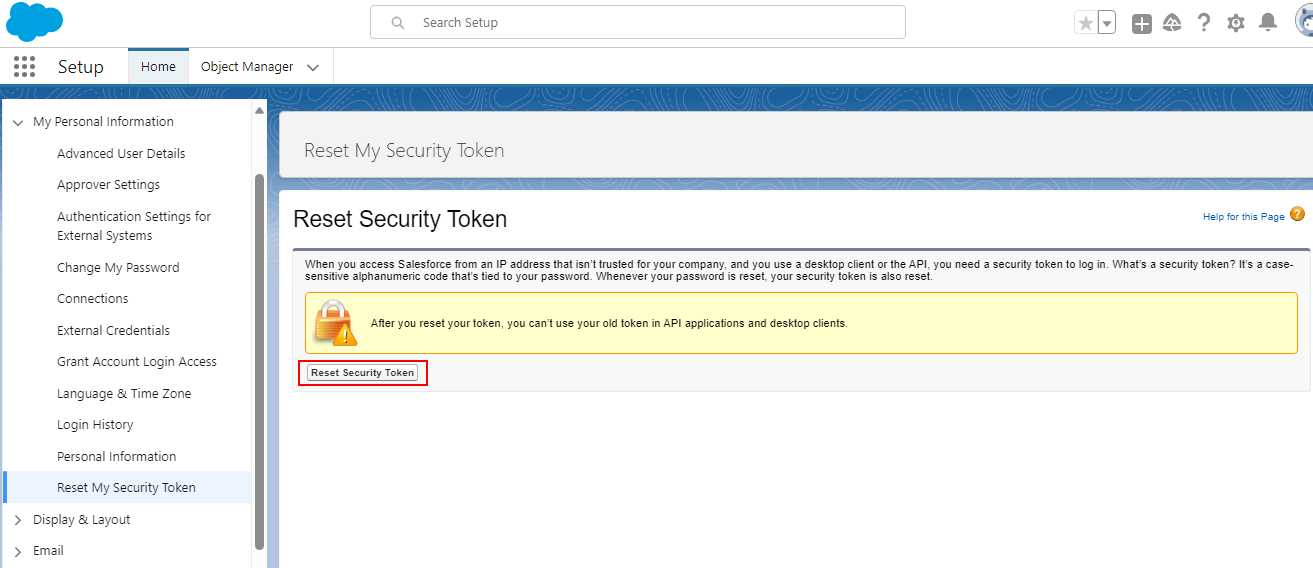
In the left pane, select Reset My Security Token.
-
Select the Reset Security Token button.
-
Note down the security token for use during setting up the connection in Admin Center.
Allowing Username - Password OAuth flow
You need to allow the username and password OAuth flow to setup your connected app,
-
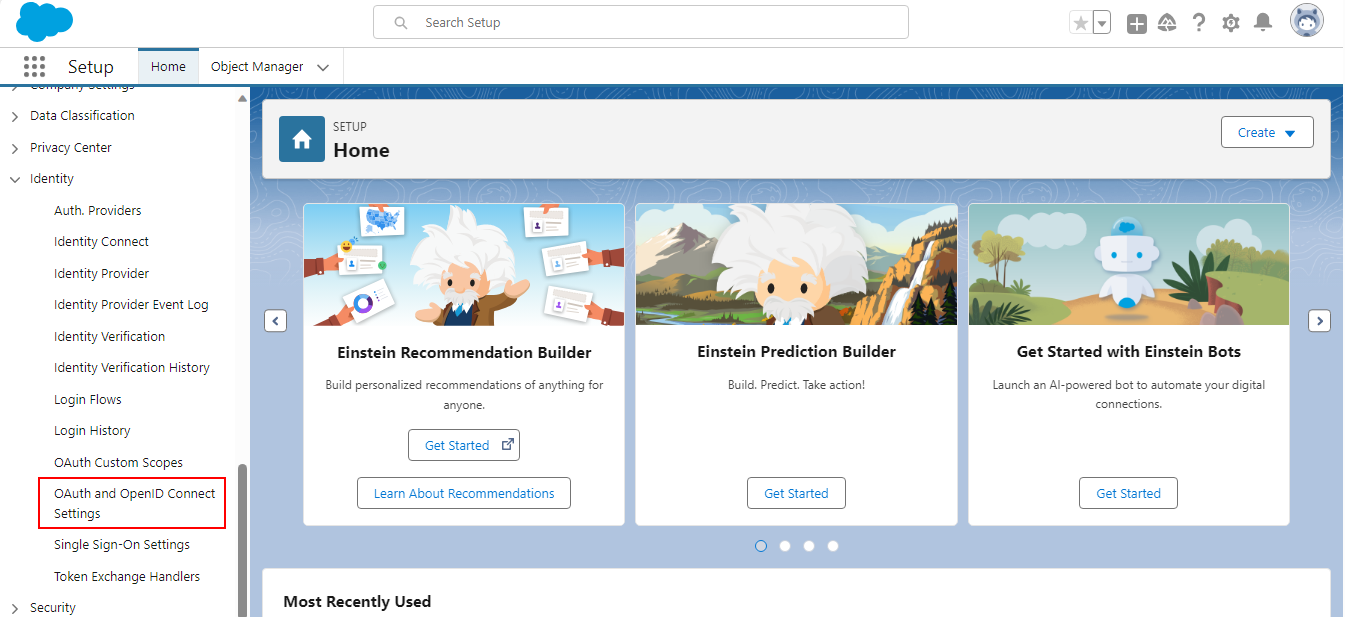
In the Setup page left pane, under Settings, expand Identity and then select OAuth and OpenID Connect Settings.
-
Select the Allow OAuth Username-Password Flows button so that it is switched on.
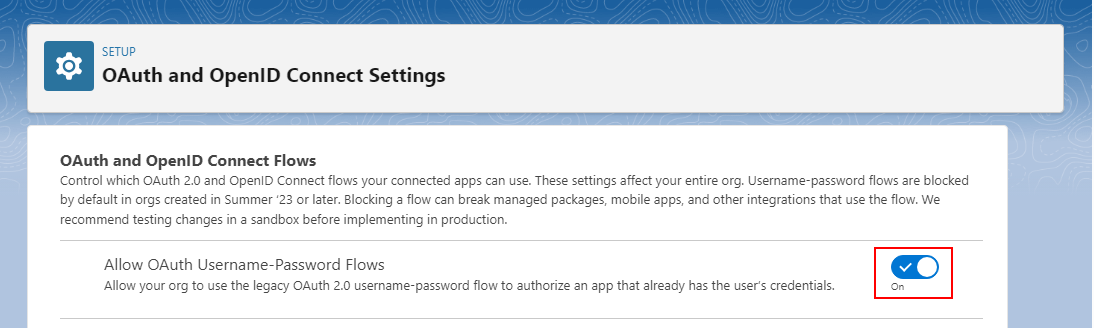
Switching on the flow allows your org to use the legacy OAuth 2.0 username-password flow to authorize an app that already has the user’s credentials.
Connection Setup in Admin Center
Use the following steps to complete the connection setup in Admin Center.
-
Login to Admin Center.
-
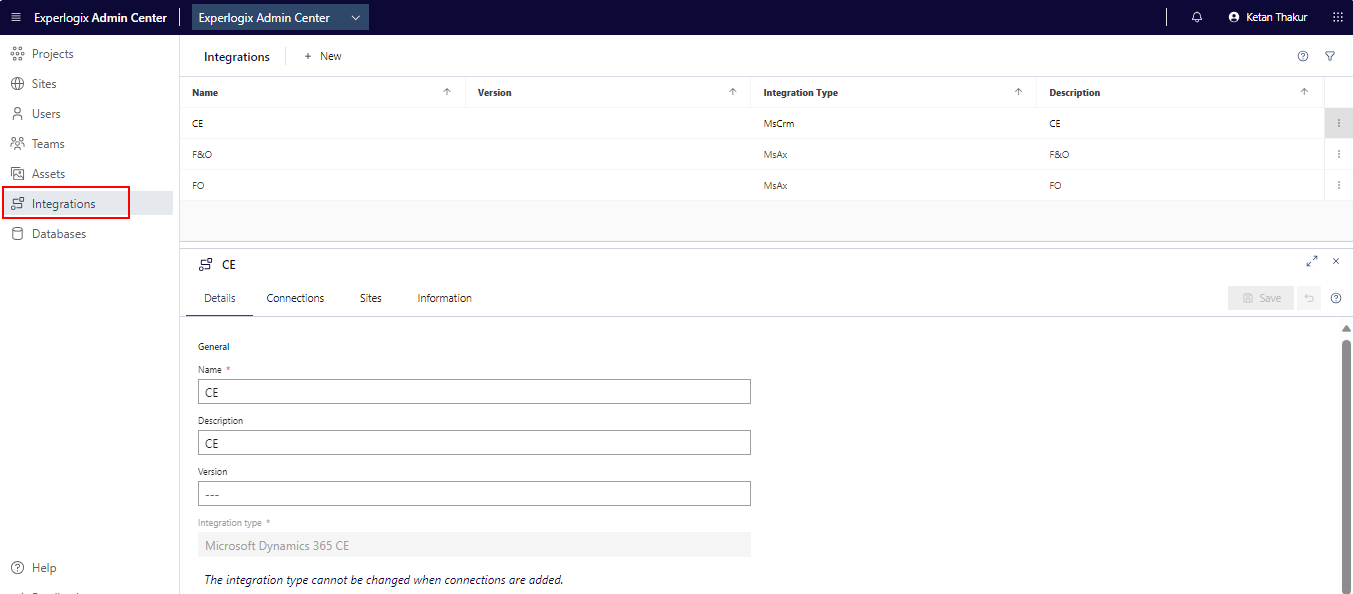
In the left pane, select Integrations.
-
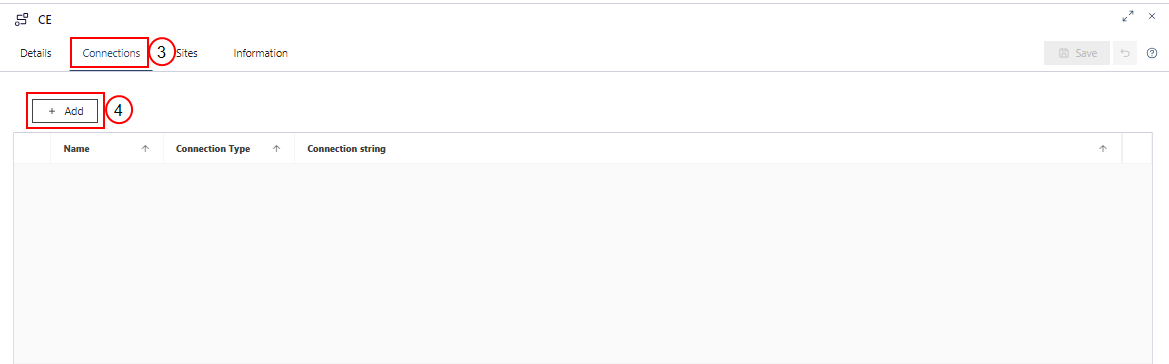
Select the Connections tab for the integration.
-
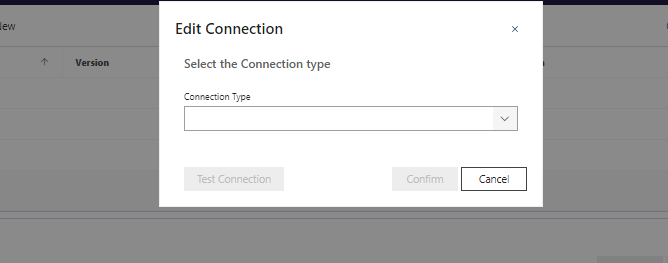
Select the +Add button. The Edit Connection dialog box displays.
-
From the Connection Type dropdown menu, select Host.
-
In the InstanceUrl field, enter the URL noted in the Acquiring base URL section.
-
In the ClientID field, enter the Consumer Key noted in the Connected app creation and configuration section.
-
In the Client Secret field, enter the Consumer Secret noted in the Connected app creation and configuration section.
-
In the Username field, enter the Service User name.
Enter the username of the Salesforce user that will be used for Cloud Connect integration.
-
In the Password field, enter the concatenated Service User password + security token noted in the Acquiring the security token section.
-
In the Namespace field, enter Xplx/.
-
Select the Sandbox checkbox only if the Salesforce instance is a sandbox environment.
For the remaining fields, retain the default values.
-
Select the Test Connection button to validate the connection.
-
Select the Confirm button after the connection is successfully validated.
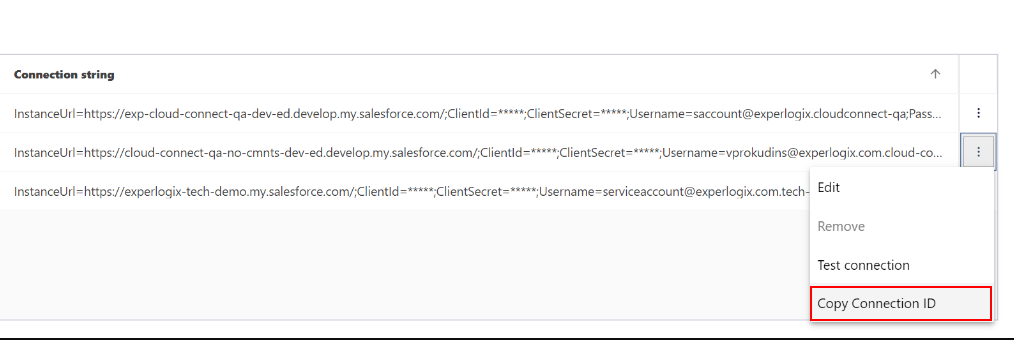
The connection is successfully created and listed in the Connections tab of the Integrations page.
-
Select the context menu for the created connection and select Copy Connection ID.
-
Note down the copied connection ID for parameter setup.
Remote Site Settings in Salesforce
After completing the connection setup in Admin Center, the next step is the remote site setup in Salesforce.
-
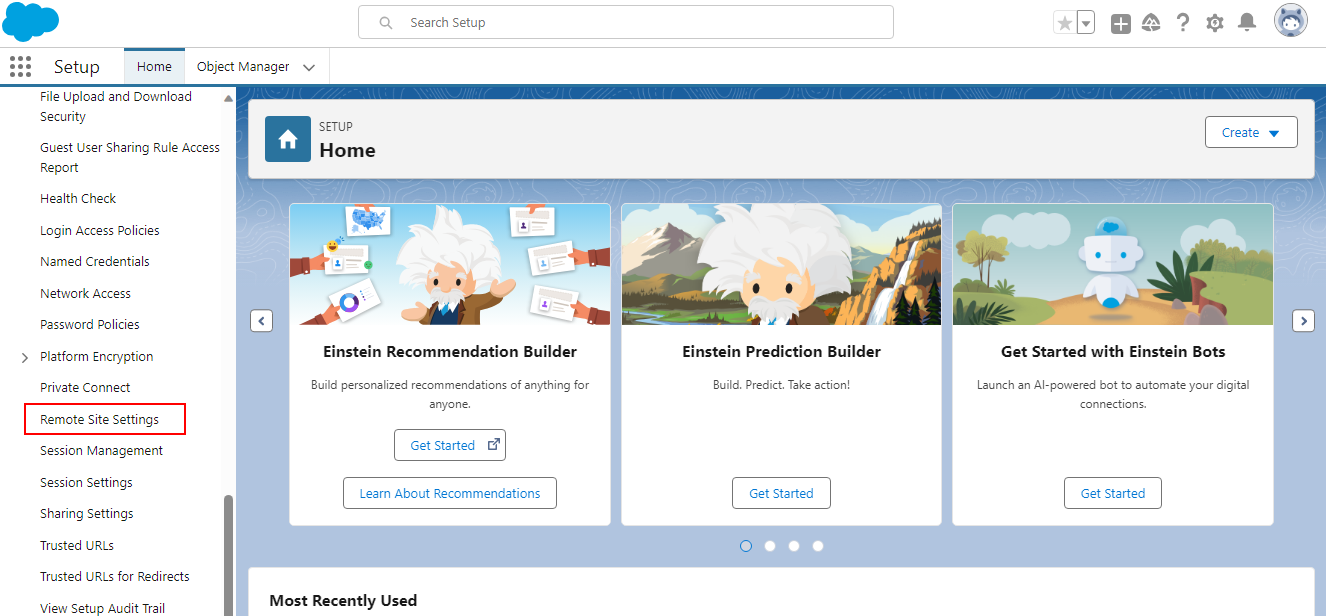
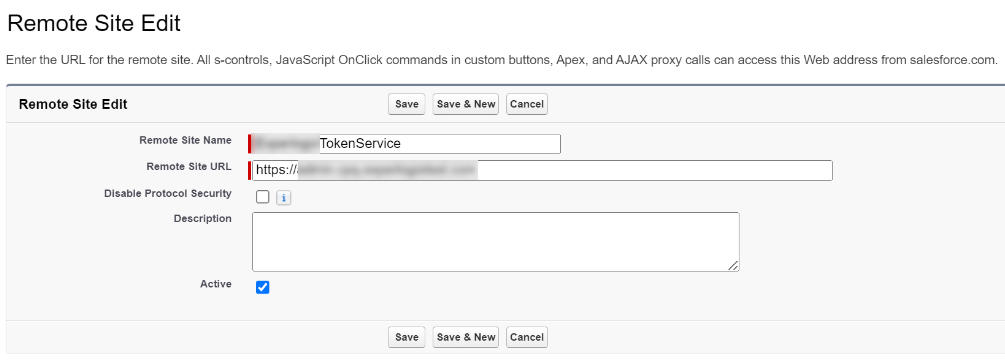
In the Setup page left pane, under Settings, expand Security and then select Remote Site Settings.
-
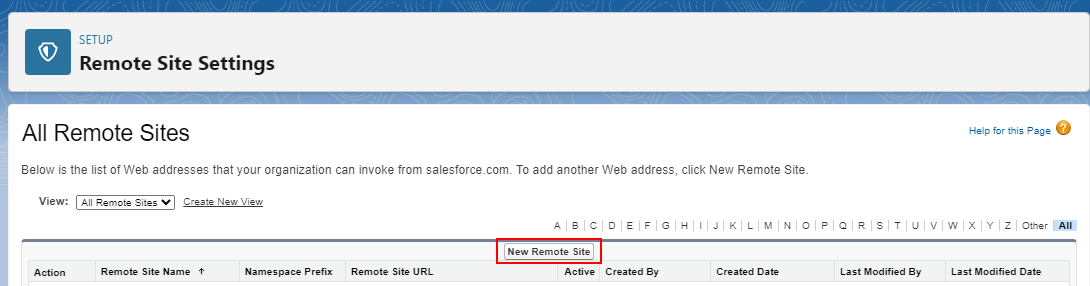
Select the New Remote Site button.
-
In the Remote Site Name field, enter the Token service name.
-
In the Remote Site URL field, enter the Token service URL.
-
Select the Active checkbox.
-
Select the Save & New button. The Remote Site Edit page displays.
-
Repeat the above steps 3 to 6 and add settings for Integration API.
-
Select the Save button. The remote site settings are added for Salesforce.
The next step is Salesforce Setting User and Admin Permissions.