
This topic provides information on the STS configuration required for setting up Cloud Connect. It includes the steps for registering the application in the Azure portal, App registration, authentication, Certificates & Secrets, API permissions, IIS setup, and Publishing Toolkit settings. After completing the STS configuration, the next step is to complete the Publisher Service Setup.
Register the application in Azure Portal
Registering your application establishes trust between your app and the Microsoft identity platform. Follow these steps to create the app registration
-
Sign In to https://portal.azure.com.
-
From the Portal menu at the upper-left corner of the screen, select Azure Active Directory.
-
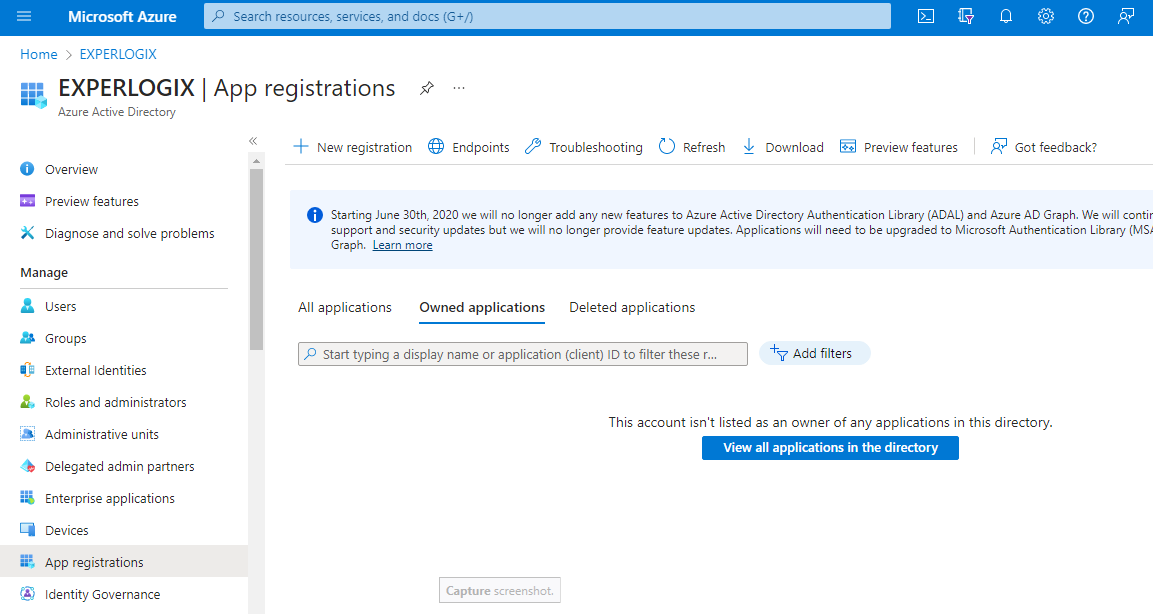
In the left menu, click App registration. The App registrations page displays.
-
At the upper-left corner of the App registrations screen, click New Registration.
-
In the Name field, enter a recognizable name. For example, Experlogix “Targetsite”.
-
In the Supported Account Types section, select the Accounts in this organizational directory only (EXPERLOGIX only - Single tenant) option.
-
In the Redirect URI section, in the Select a Platform dropdown list, select Web.
-
In the URL path, enter name.experlogixonline.com/experlogix.sts/Authorize.aspx.
-
Click the Register button. The Azure portal displays the app registration's Overview page.
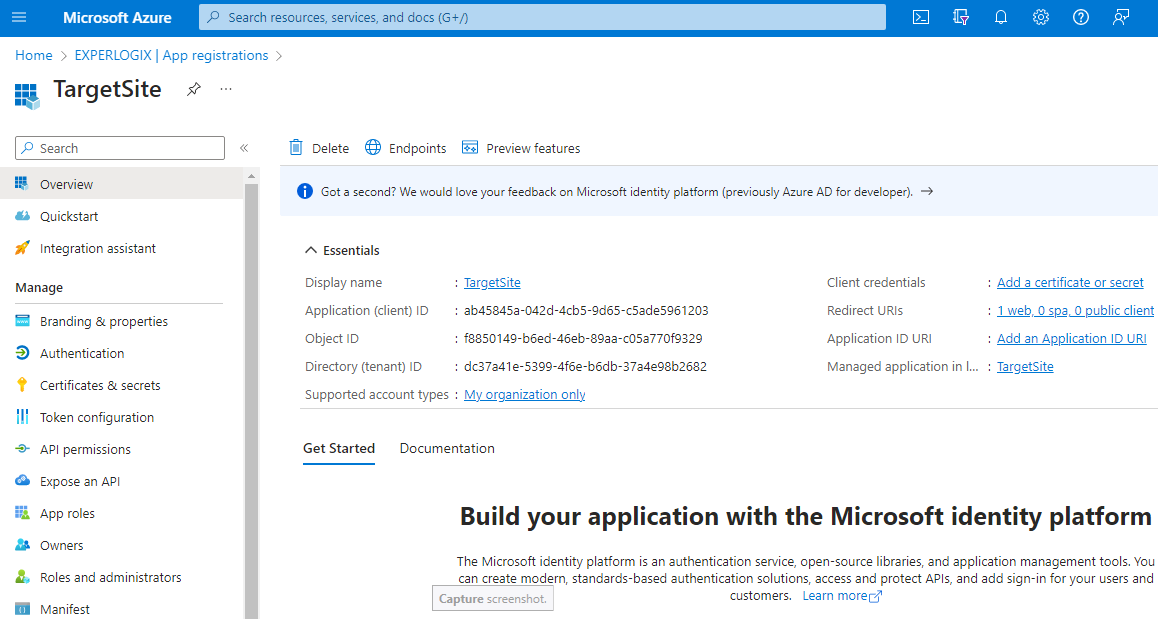
This completes the initial app registration. The Application (client) ID is displayed on the Overview page. Also called the client ID, this value uniquely identifies your application in the Microsoft identity platform.
Note down the Client ID for future use.
Authentication
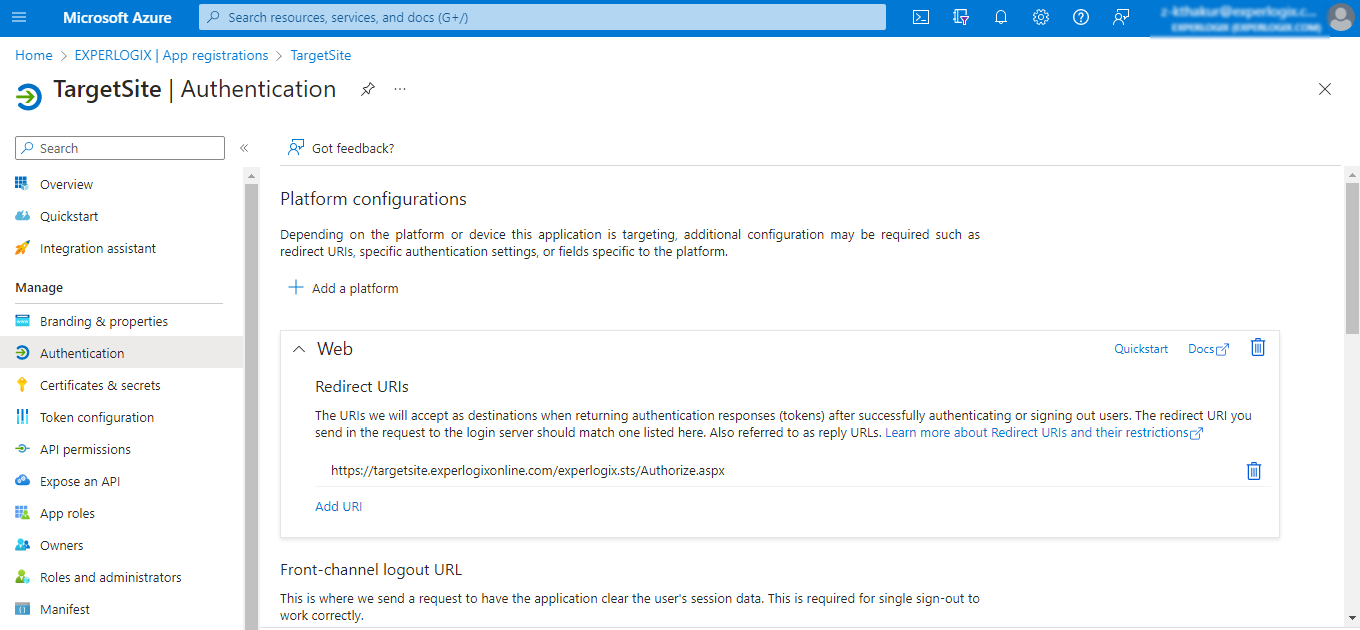
Settings for each application type, including redirect URIs, are configured in Platform configurations in the Azure portal. To configure application settings and authentication, follow the below steps:
-
In the left menu, under Manage, select Authentication.
-
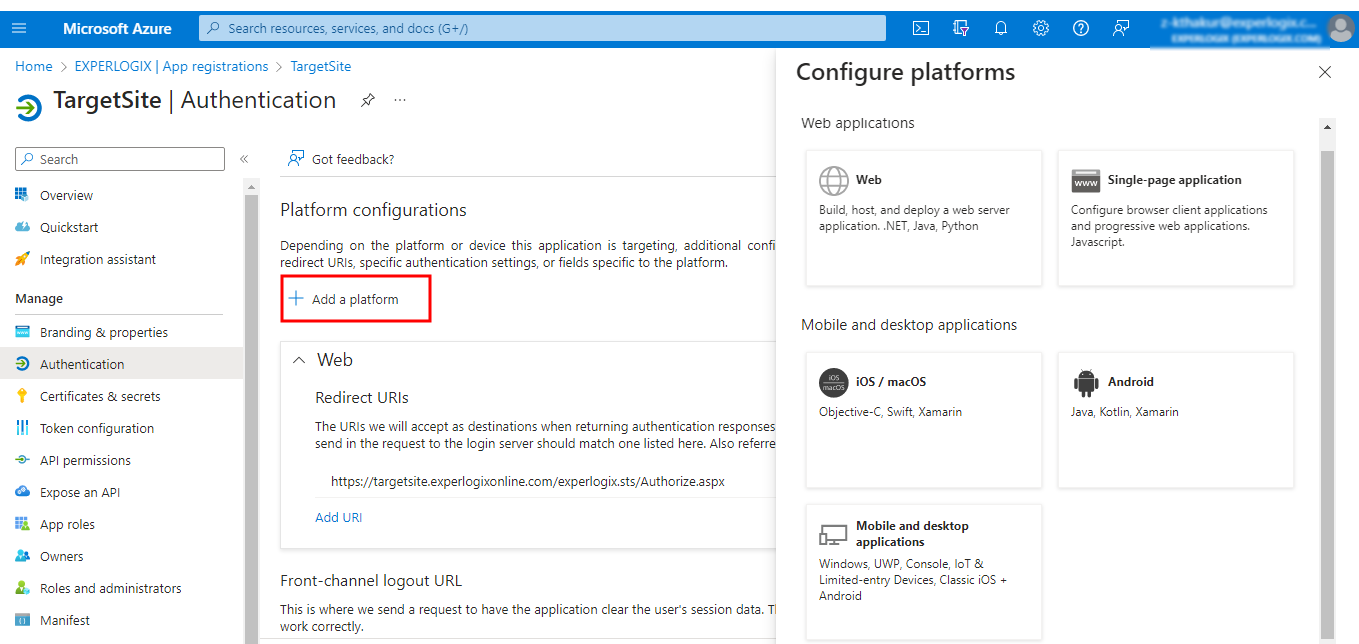
Under Platform configurations, click Add a platform.
-
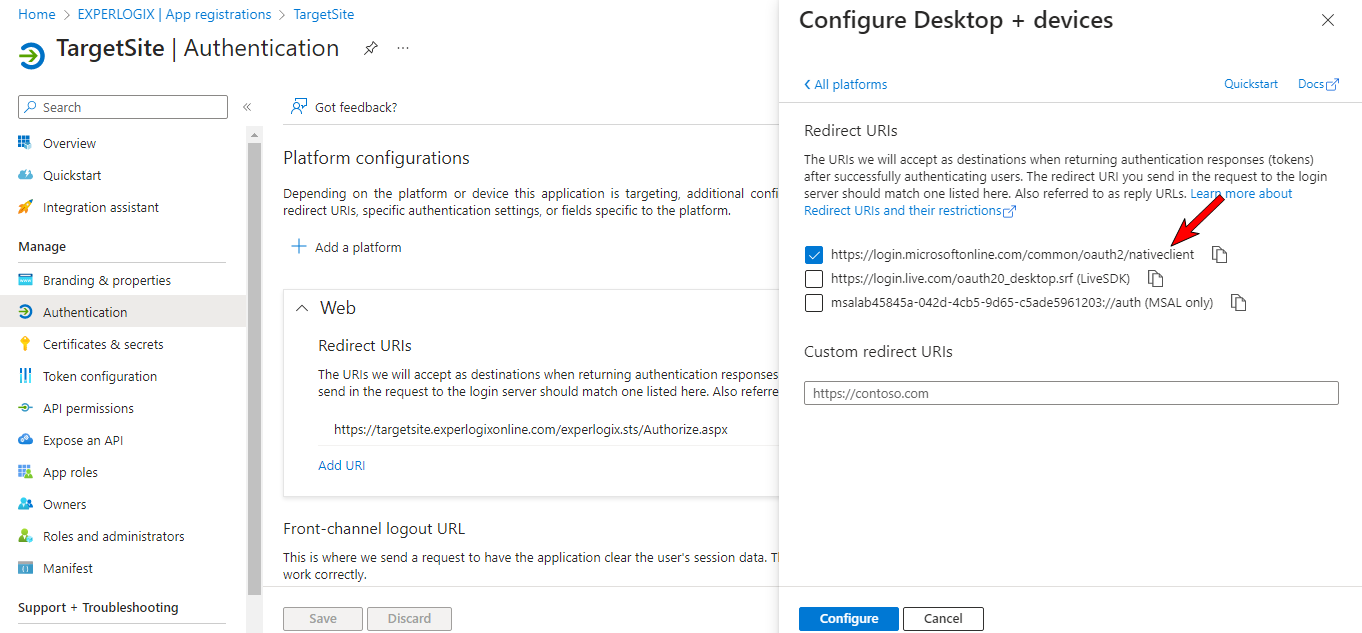
Select Mobile and desktop applications.
-
Under Redirect URIs, select the URI with nativeclient in its name.
-
Click Configure. The Authentication page displays.
This completes the Platform configuration.
Certificates and Secrets
Credentials are used by confidential client applications that access a web API. A client secret is a string value your app can use in place of a certificate to identify itself. Update the following settings in the Certificates and Secrets section
-
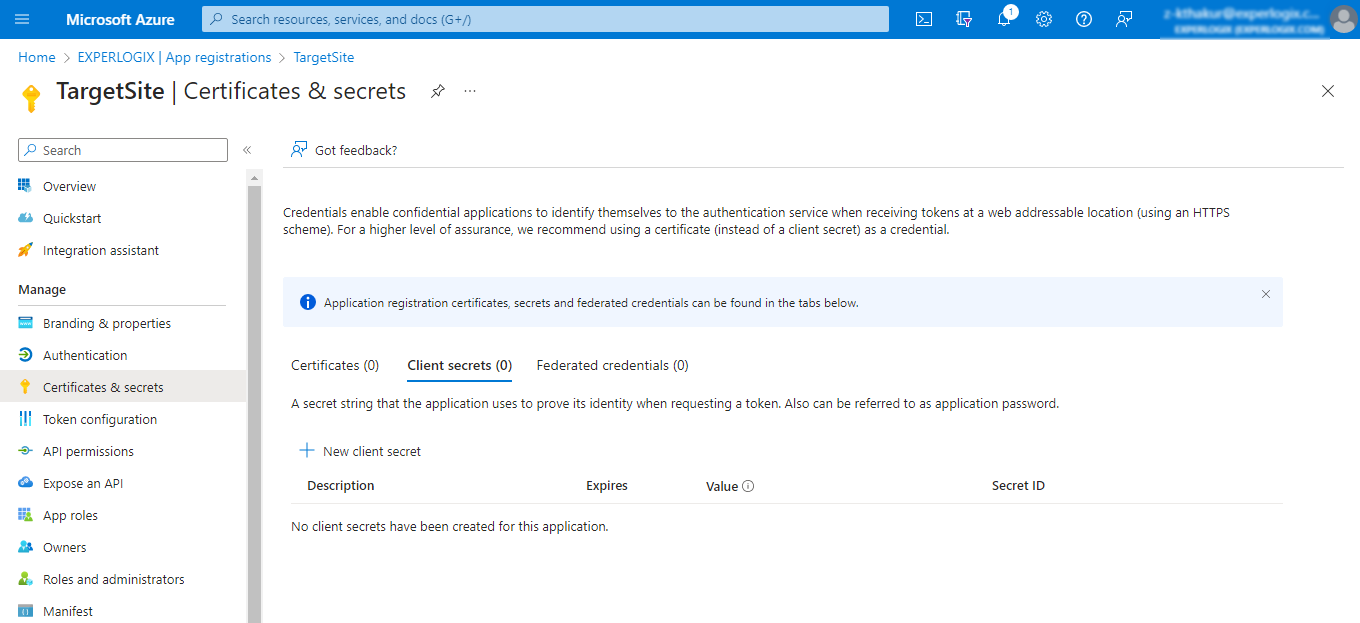
In the left menu, select Certificates & Secrets.
-
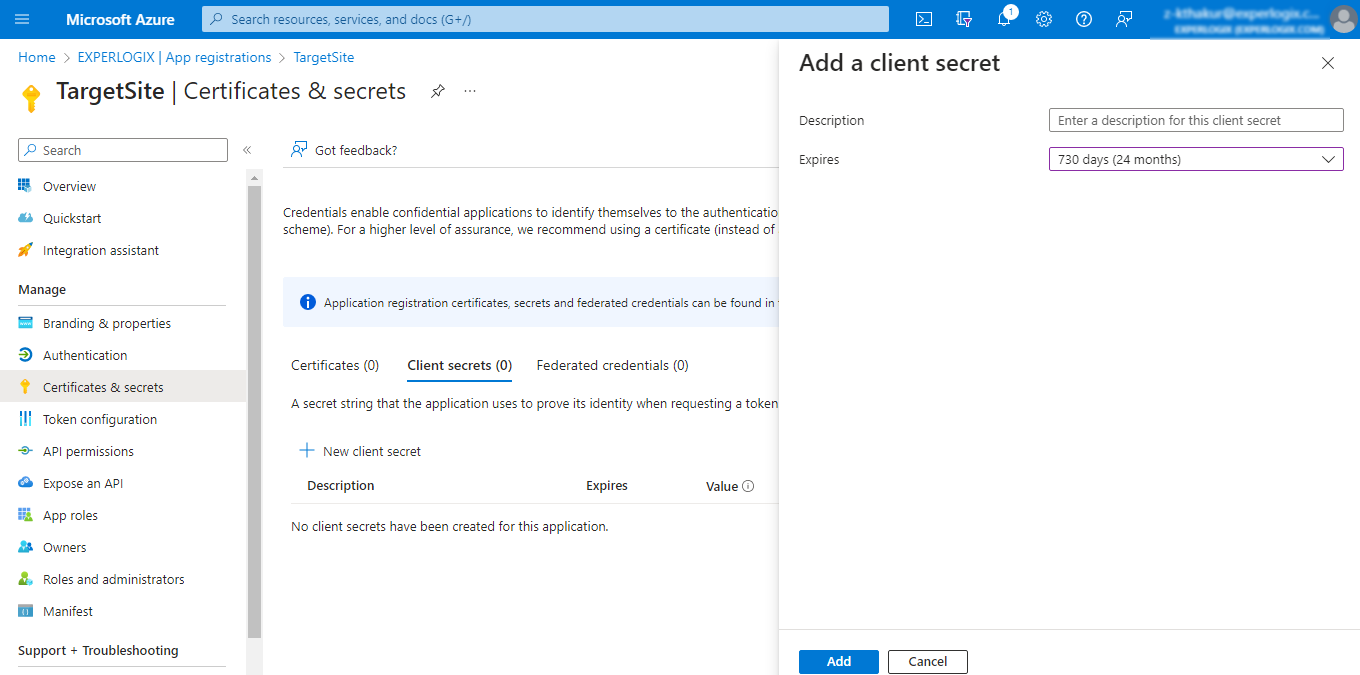
In the Client secrets tab, click New client Secret. The Add a client secret page displays.
-
In the Description field, add a description for your client secret.
-
In the Expires field, select 730 days (24 months).
-
Click Add.
-
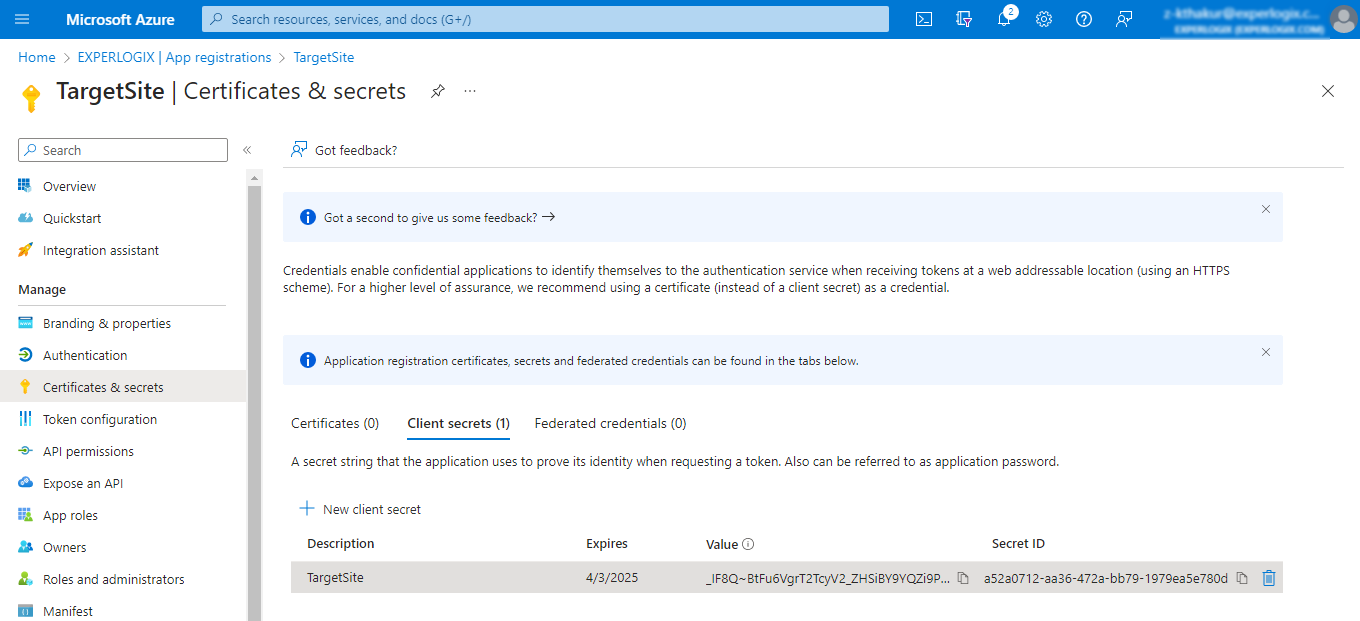
Record the client secret's value for use in your client application code.
Recording the Value (client secret value) is important as it is never displayed again after you leave this page.
This completes adding client secret in the Credentials & Secrets page.
API Permissions
Update the following settings in the API Permissions section.
-
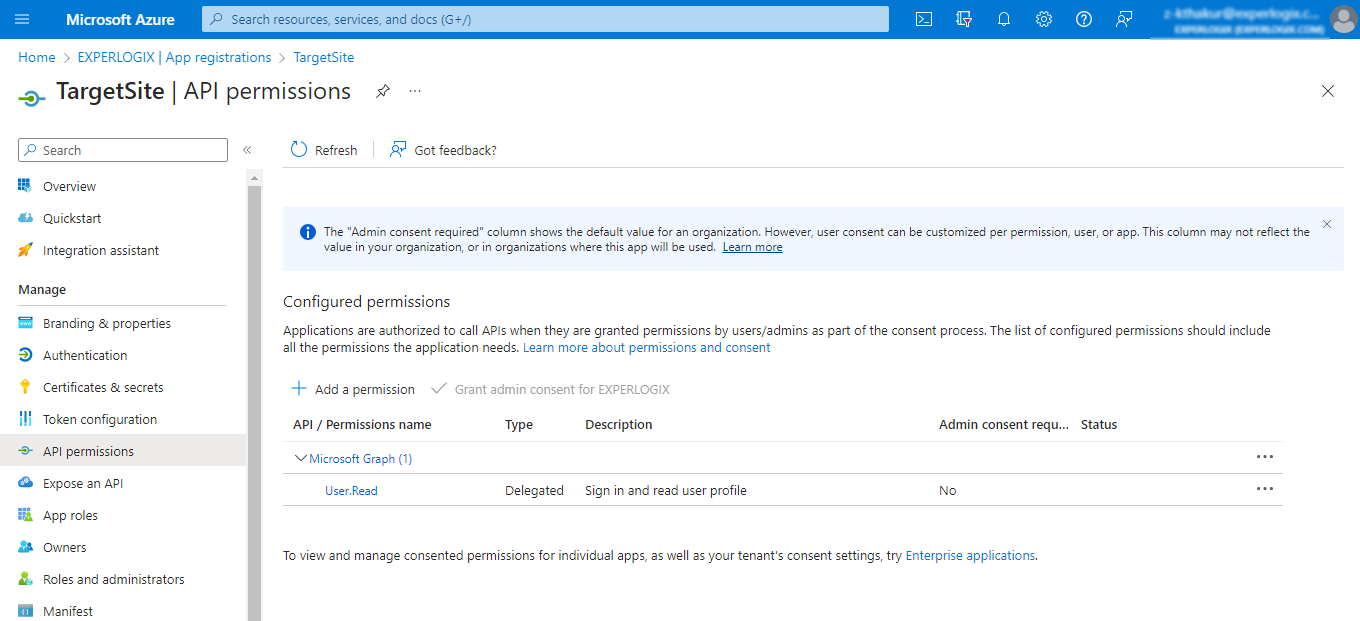
In the left menu, select API permissions.
-
Click Add a permission.
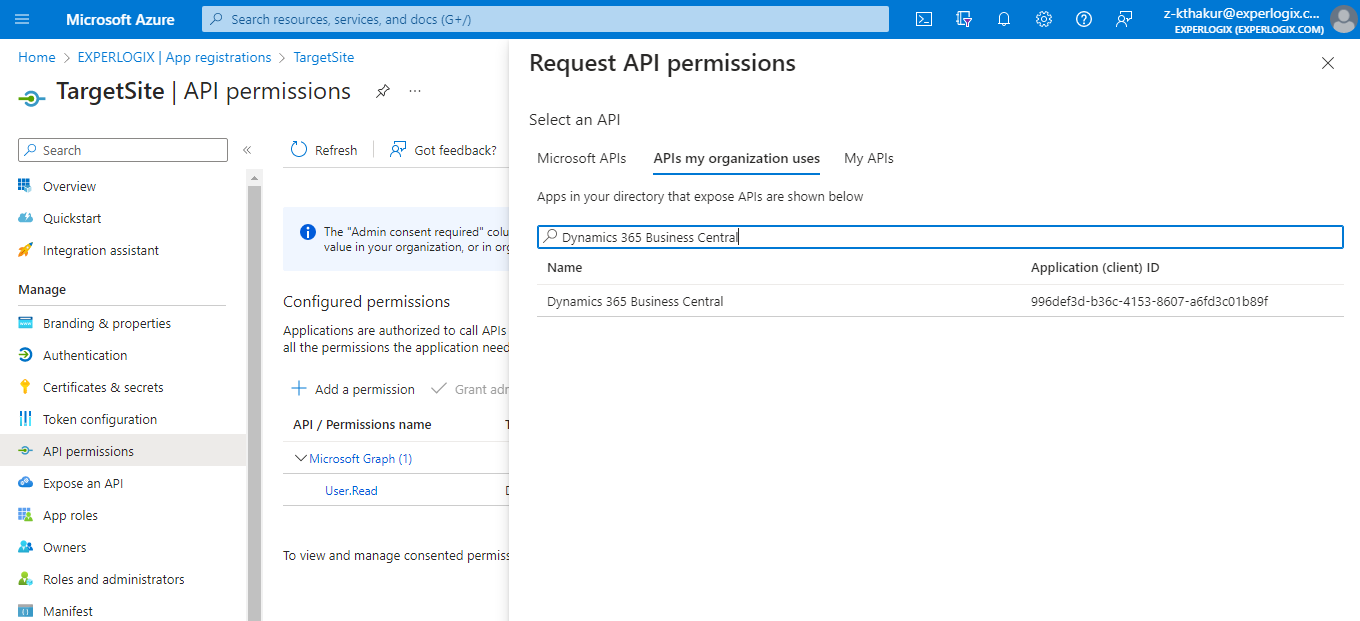
The Request API permissions page displays.
-
Under the APIs my organization uses, search for and select Dynamics 365 Business Central.
-
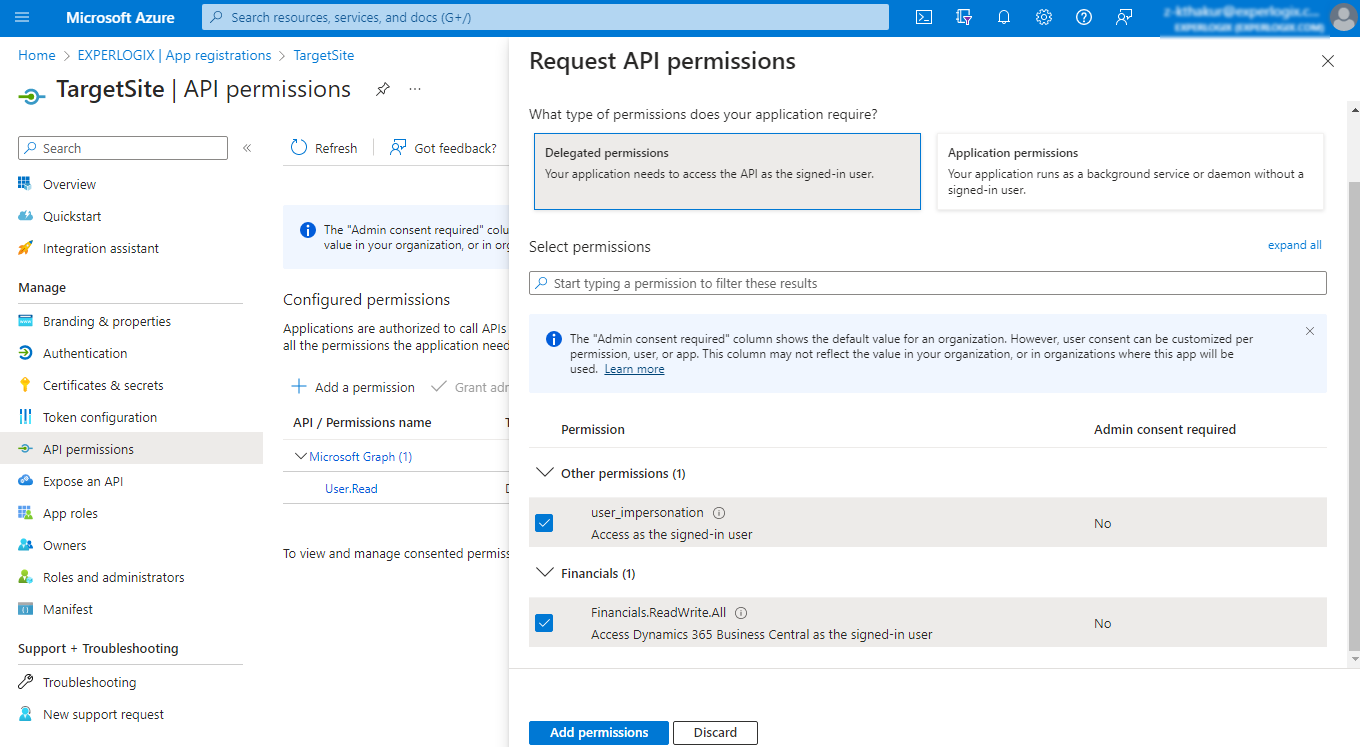
Select Delegated Permissions and all the permissions below it.
-
Click the Add permissions button. The API permission is added and listed on the API Permissions page.
-
Click Grant Admin Consent. A confirmation dialog box displays.
-
Click Yes. The API permission is added for the app.
IIS Setup
The IIS setup requires updating the web.config file.
-
Create folder C:\inetpub\sitename\experlogix.sts and copy the site files.
-
In the experlogix.sts folder, make the following updates to the web.config file:
-
Delete all the authentications except AzureAD on lines 35 and 78
-
Logpath on line 14
-
Experlogixsite url on line 23
-
Resource on line 29
-
Client ID on line 31
-
Secret value on Line 33
-
Create application
-
From the Start menu, open the Internet Information Services (IIS) Manager.
-
Create a separate application pool that runs as a Networkservice.
-
Right-click on the Experlogix.sts folder and select Convert to Application.
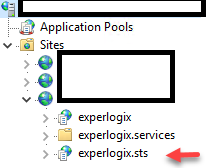
This completes the creation of the experlogix.sts application.
Publishing Toolkit
Complete the following changes in the Design Center Toolkit:
-
In Design Center, open the Publishing Toolkit.
-
On the Publishing Toolkit toolbar, click the Open button. The Target Site Settings page displays.
-
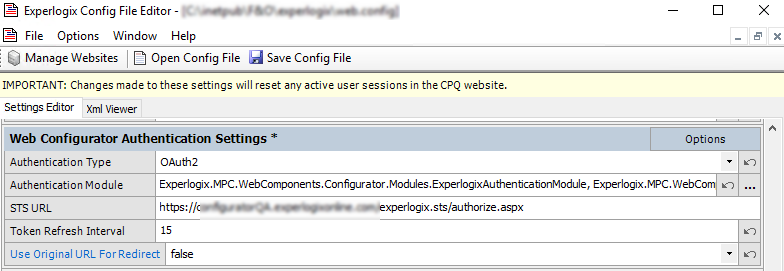
Click Website Settings. The Experlogix Config File Editor page displays.
-
In the Web Configurator Authorization Settings section, in the STS URL field, add https://created-dns-name.experlogixonline.com/experlogix.sts/Authorize.aspx
The STS URL is case-sensitive. It must be the same as in the Azure portal.
-
Click the Save Config File button. This completes the Publishing Toolkit update for STS Configuration.
The next step is to complete the Publisher service setup. For more information, see Publisher Service Setup.