
After completing the setup in host system, the next step is to setup user and admin permissions. This page provides steps for setting up user and admin permissions and parameter setup.
Select to display Salesforce User Roles and Permission Sets
Cloud Connect Salesforce User Roles
This table details the available Cloud Connect Salesforce permission sets, including the specific permissions granted to each role.
|
Role Name |
Permissions |
Description |
|---|---|---|
|
Experlogix CPQ User |
|
Users with this role can run CPQ and configure quotes, opportunities, sales orders, and invoices. |
|
Experlogix Settings Admin |
|
Users with this role have full access to CPQ settings, including modifications. |
|
Experlogix Settings User |
|
Users with this role can view settings but cannot modify them. |
|
Experlogix Logger Admin |
|
Users with this role can manage logging sessions and logs within the Experlogix application. |
Cloud Connect Salesforce Custom Permissions
This table lists the custom permissions available in the Experlogix CPQ package and their functions.
|
Custom Permission |
Description |
|---|---|
|
Experlogix_CPQ_User |
Used by buttons and the CPQ component to check access and control button visibility. |
|
Experlogix_Modify_Settings |
Used by the settings page to ensure only authorized users can modify settings. |
Profiles
There are no profiles in the Cloud Connect SalesforceExperlogix package.
User and Admin permission assignment
-
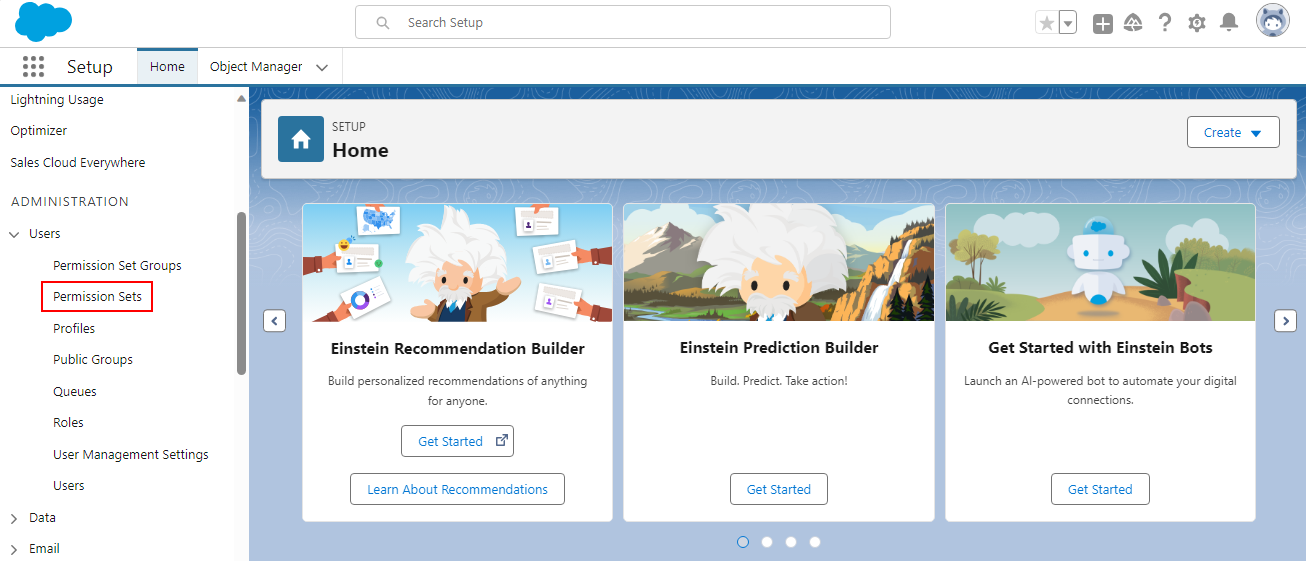
In the Setup page left pane of Salesforce, under Settings, expand Users and then select Permission Sets.
-
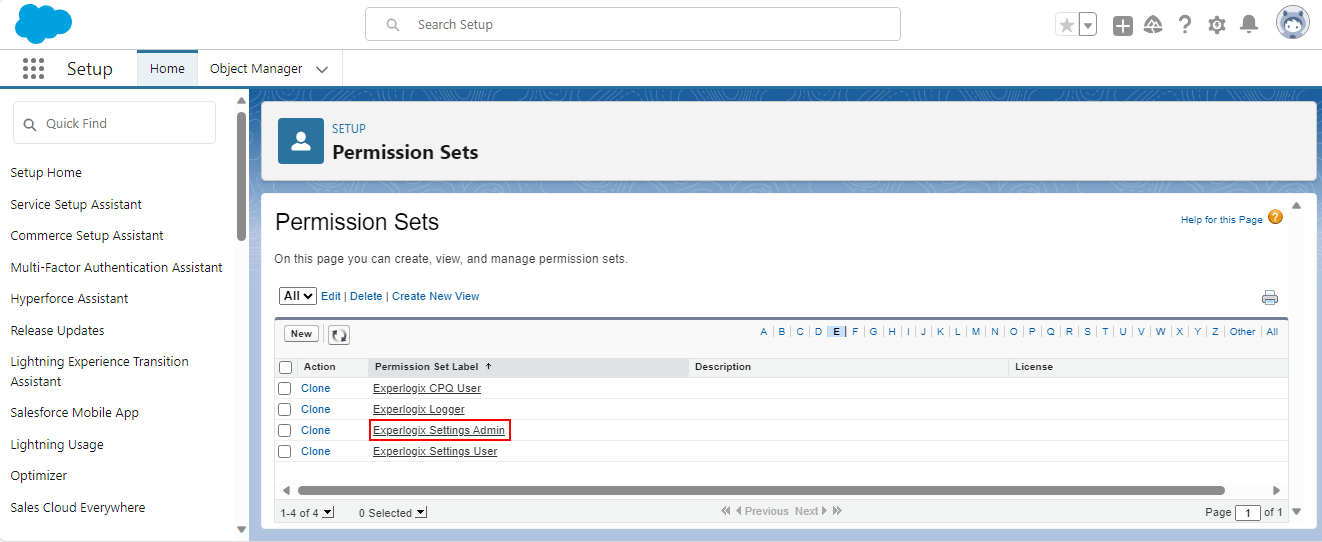
Select Experlogix Settings Admin.
-
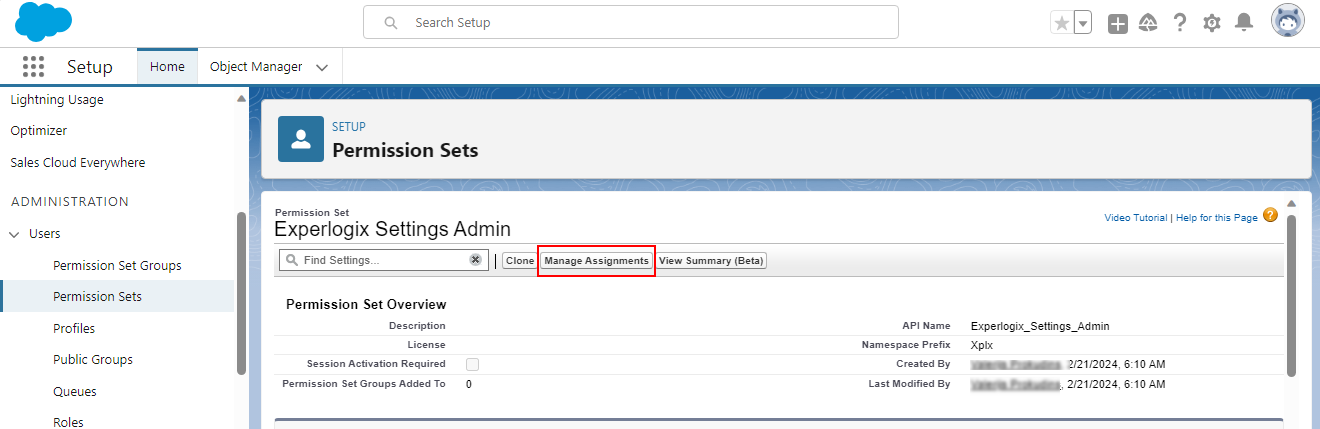
Select the Manage Assignments button.
-
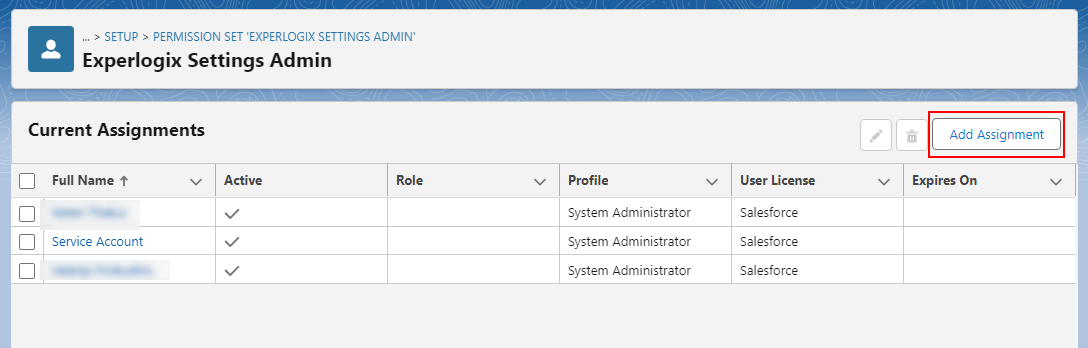
Select the Add Assignments button.
-
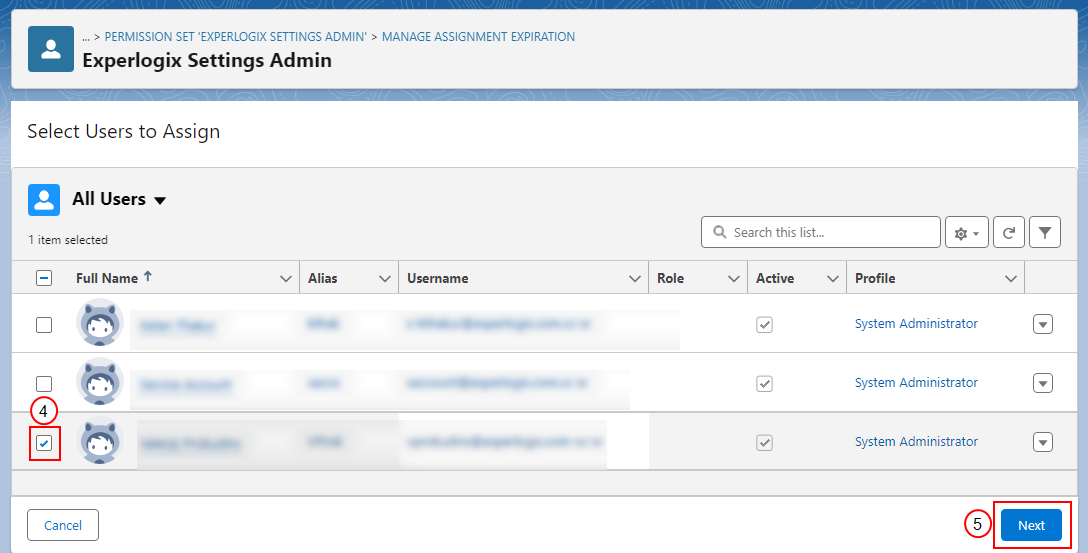
Select the checkbox for the users to whom you want to assign the modify settings rights.
-
Select the Next button. The Select an Expiration Option For Assigned Users page displays.
-
Select the Assign button.
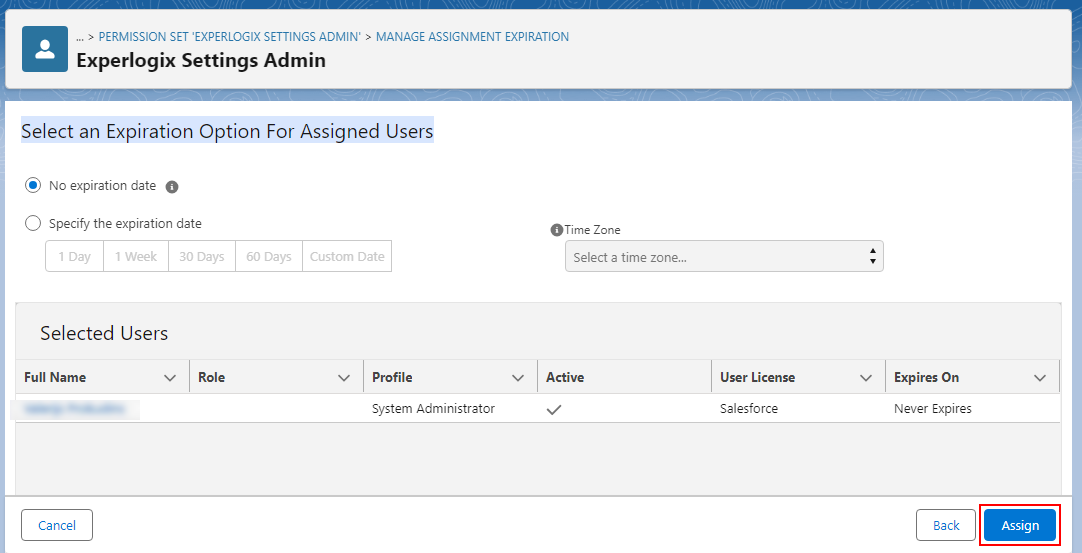
The settings are assigned to the selected user.
CPQ Permission
Every CPQ user must be granted Experlogix CPQ User Permission set. This section provides the steps for granting this permission.
-
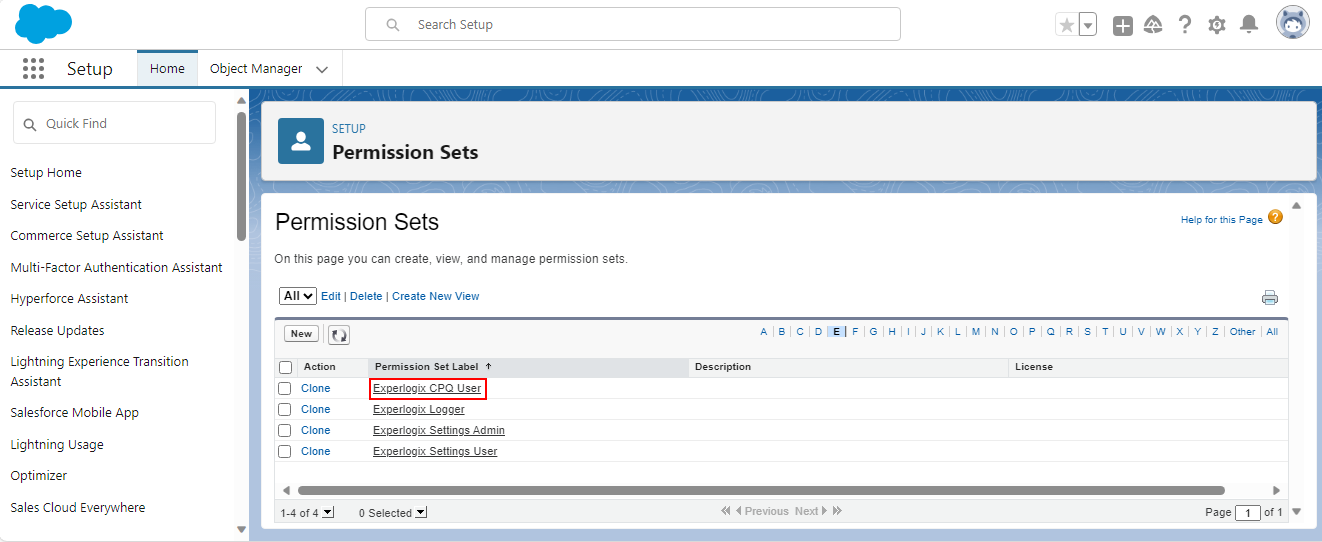
Access the Permission Sets page.
-
Select Experlogix CPQ User.
-
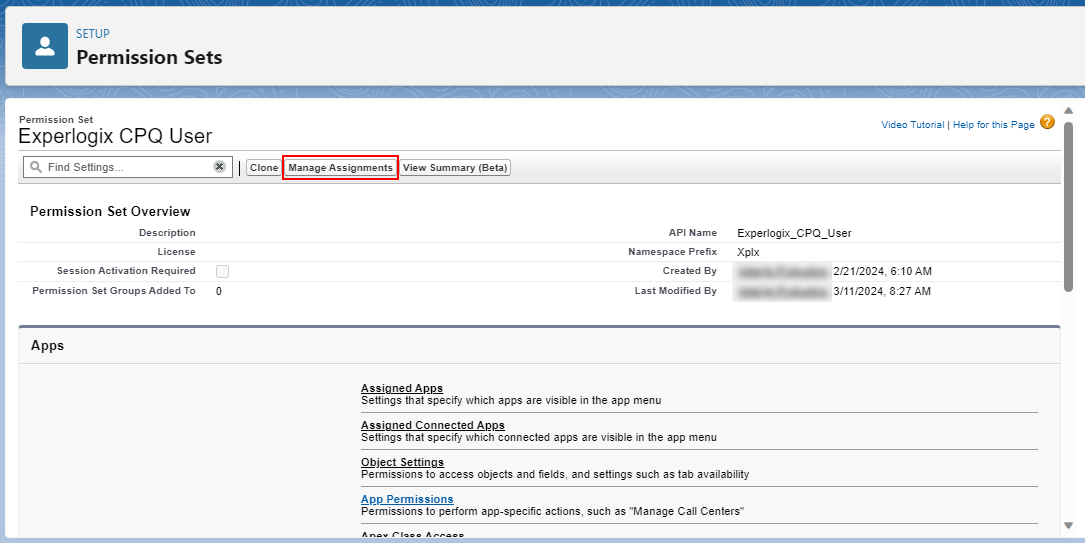
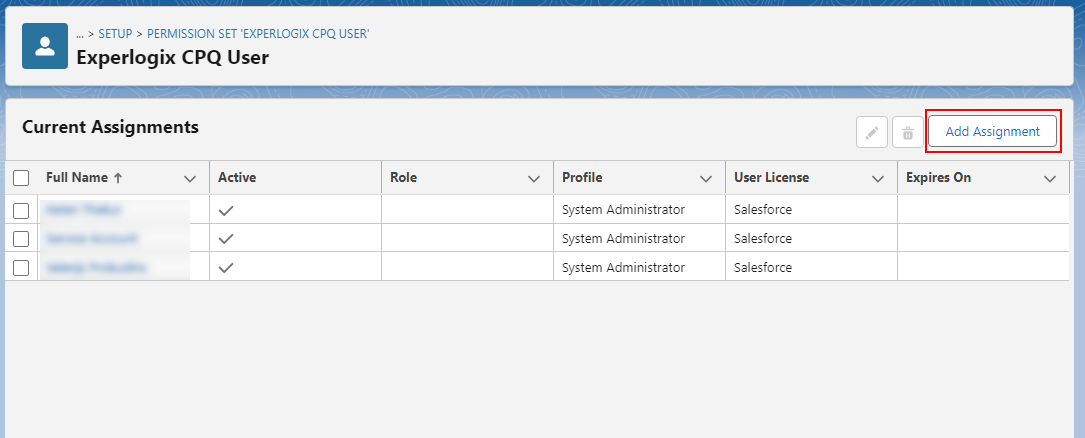
Select the Manage Assignments button.
-
Select the Add Assignments button.
-
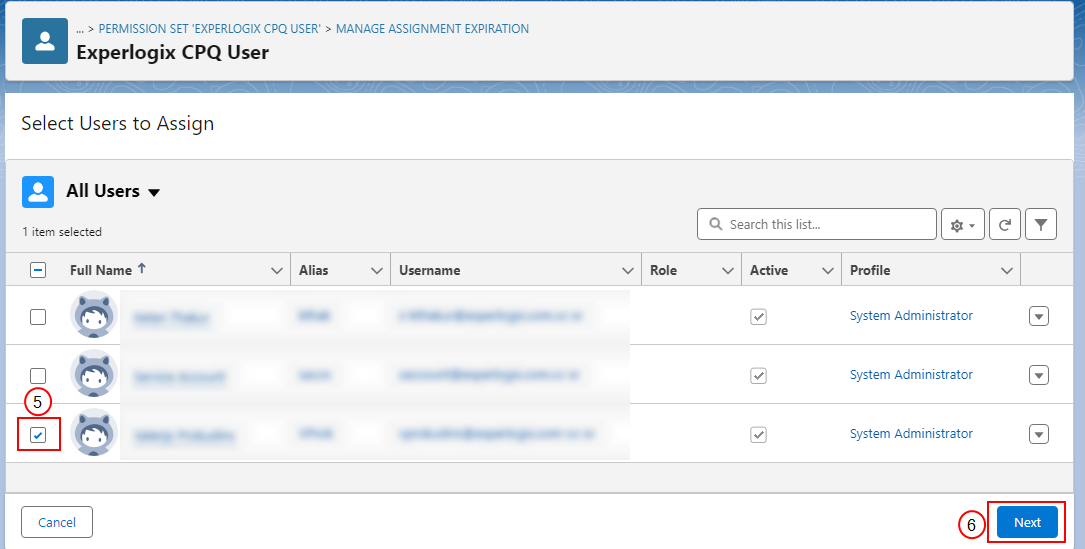
Select the checkbox for the users you want to assign the rights to.
-
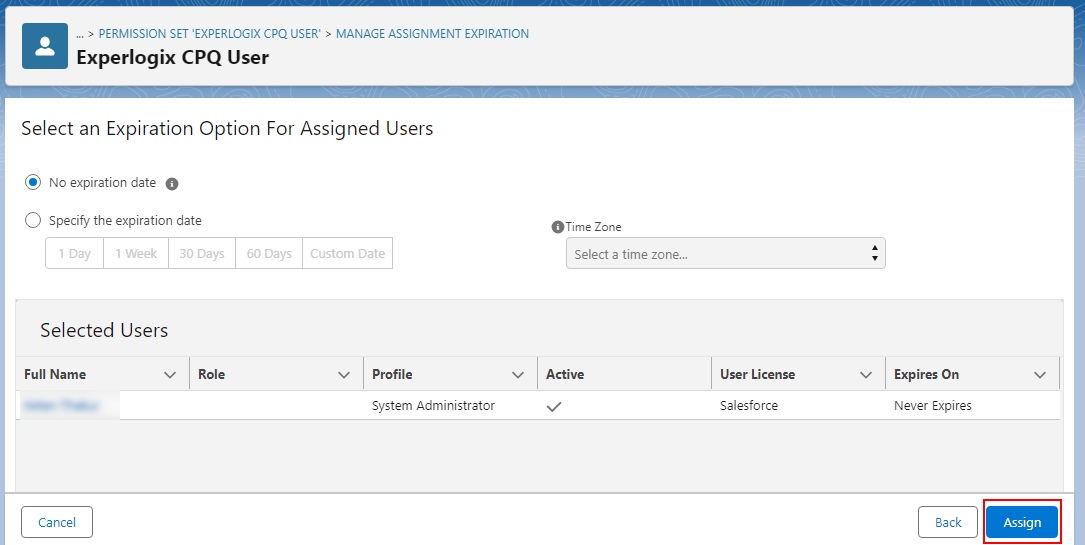
Select the Next button. The Select an Expiration Option For Assigned Users page displays.
Ensure that the default options are selected.
-
Select the Assign button. The Experlogix CPQ User permission set is assigned to the selected user.
Parameter setup
Use the following steps to complete the Parameter setup in Salesforce.
-
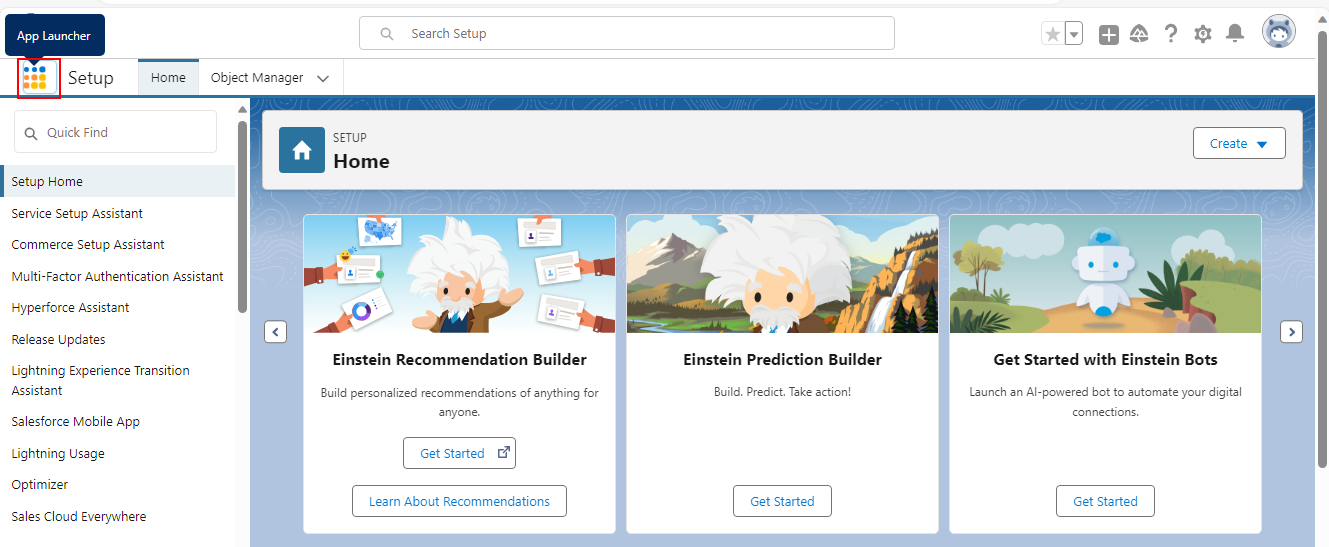
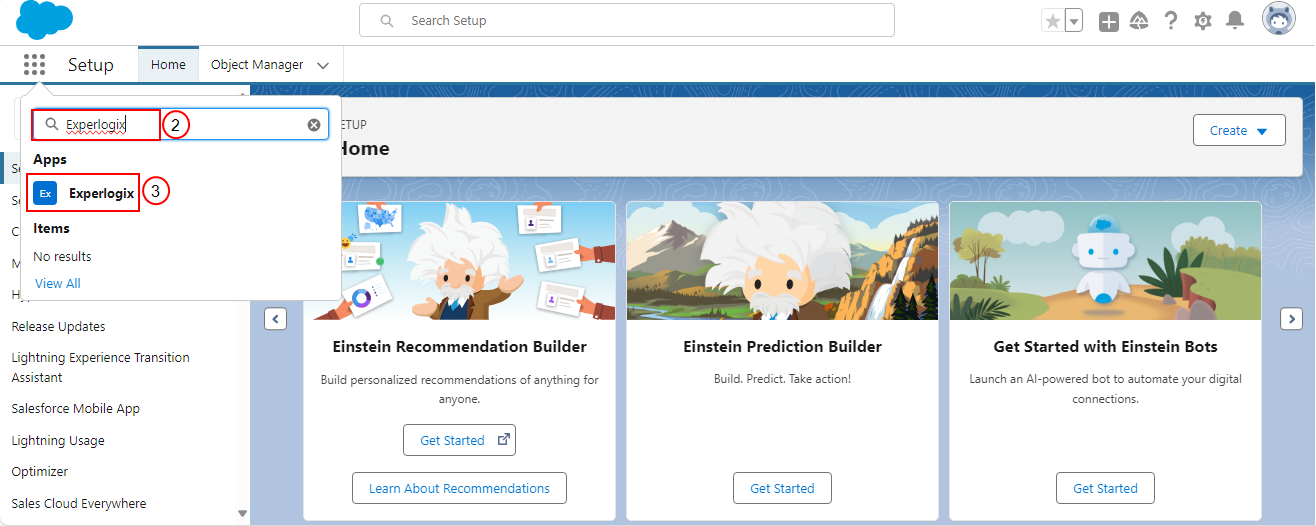
In Salesforce, in the upper-left corner, select the App Launcher icon.
-
In the Search field, enter Experlogix.
-
Under Apps, select Experlogix.
-
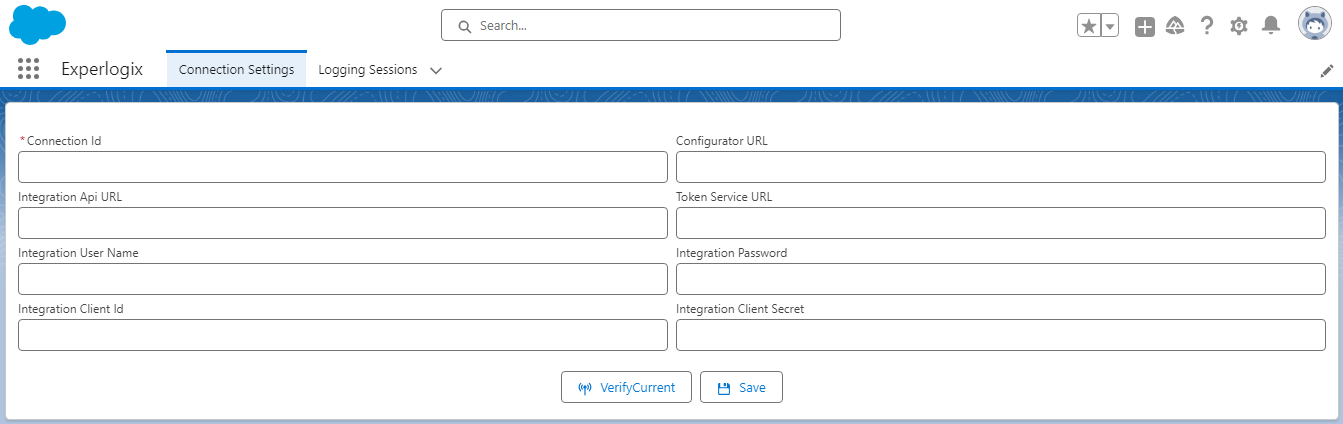
In the Connection ID field, enter the Connection ID saved during Connection setup in Admin Center.
-
In the Integration Api URL field, enter the Integration Api URL.
-
In the Integration User Name field, enter the Admin Center user name.
-
In the Integration Client Id field, enter the OAuth Client Id.
-
In the Configurator Url field, enter https://<your-domain>.experlogixonline.com/experlogix/site/pages/ConfigureItem.aspx.
In the Url, replace 'your-domin' with the domain name of your Configurator url.
-
In the Token Service Url field, enter the Token Endpoint Url.
-
In the Integration Password field, enter the Admin Center password.
-
In the Integration Client Secret field, enter the OAuth Client Secret.
-
Select the VerifyCurrent button to test the connection.
-
If the verification is successful, select the Save button.
The parameter setup is complete.