
When upgrading to the 25.12 release of Cloud Connect for Salesforce, to ensure a clean installation and avoid duplicate components, we recommend performing a fresh installation of the Experlogix package family rather than an upgrade. While the upgrade process requires nearly the same steps as a reinstall, it can leave behind outdated components in the Salesforce environment, resulting in a less clean setup.
This guide is suitable only for environments with currently installed package versions 25.7 and lower.
Reinstallation Workflow
To maintain a clean Cloud Connect environment and avoid component duplication when moving from legacy Experlogix Xplx versions, perform a full reinstallation rather than an upgrade. This approach removes residual legacy components left by upgrades and establishes a clean baseline without affecting business data or integrations.
This procedure applies only to environments currently running Experlogix package versions 25.7 or lower.
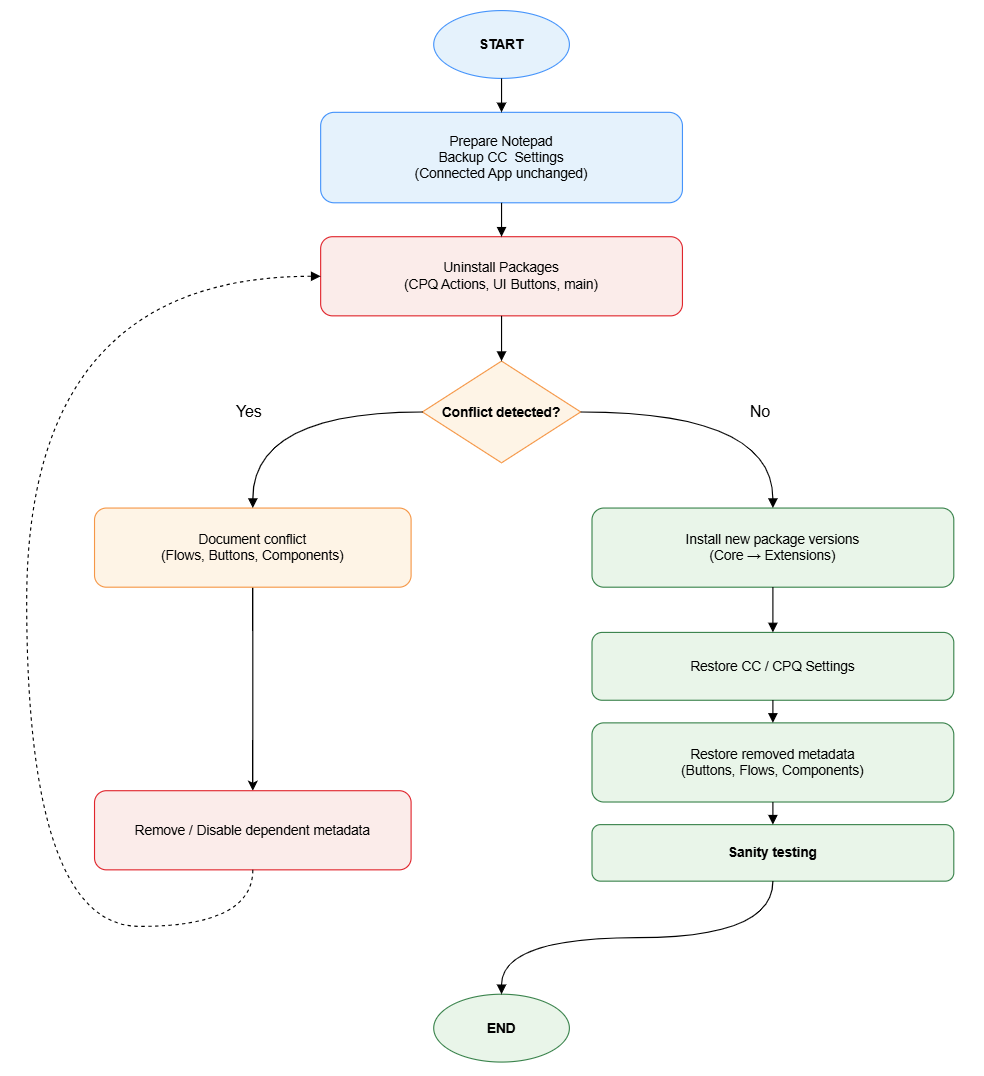
Process Flow Overview
The following flow illustrates the end-to-end sequence for uninstalling legacy packages, installing Cloud Connect 25.12, restoring settings, and validating functionality.
-
Preparation
-
Prepare a working note to track uninstall conflicts and metadata to restore later.
-
Back up Experlogix Settings stored in Salesforce (e.g., CPQ/Cloud Connect mappings).
-
Connected App configuration remains unchanged and does not require export.
-
-
Uninstall Existing Package
-
Uninstall extension packages first (e.g., CPQ Actions, UI Buttons), then uninstall the main Experlogix package.
-
Expect uninstall blocks when dependent metadata references packaged components.
-
-
Resolve Dependency Conflicts
-
Document each conflict reported by Salesforce: (Flows, Buttons, Lightning pages, Process Builder/Flow, Apex references).
-
Remove or temporarily disable the dependent metadata (deactivate flows, remove buttons, edit Lightning pages, remove references).
-
Retry the uninstall and iterate until all Experlogix packages are removed.
-
-
Install New Package
-
Install the latest core package.
-
Install required extension packages, if applicable.
-
-
Restore Settings and Metadata
-
Re-enter the Experlogix Settings backed up during preparation.
-
Recreate or restore metadata removed during conflict resolution (Buttons, Flows, Lightning components/pages, etc.).
-
-
Sanity & Functional Validation
-
Validate (Cloud Connect communication and CPQ configuration synchronization.
-
Create a test Quote and run core user flows.
-
Verify all restored components (buttons, flows, UI) function as expected.
-
Data & Integration Impact
-
No Salesforce or CPQ data is modified or deleted during this procedure.
-
Integration between Salesforce and CPQ remains intact (Cloud Connect and Connected App).
-
Only Experlogix Settings within Salesforce require re-entry after the reinstall.
Upgrade Process Description
Considerations
The Experlogix (Xplx) packages do not store configuration data within the managed package itself.
If the setup references the CopyConfig flow or invocable Apex classes, verify that these references remain valid after reinstallation. Existing DevOps processes will not be affected, as all component names and namespaces remain unchanged.
Before reinstalling, export all Connection Settings. Secret values (such as authentication tokens or passwords) cannot be exported or imported and must be manually saved.
Before performing any manual updates, use Salesforce Workbench to retrieve all relevant Flows, Quick Actions, Page Layouts, and FlexiPages.
Copy Configuration flows are impacted by the reinstall and must be manually updated. However, the CopyConfig button created following Experlogix instructions is implemented as a link and does not require modification; it will continue to function as expected after the reinstall.
Permission Set Assignments must be recreated, and Permission Set Groups should be reviewed and backed up before reinstallation.
All Lightning Web Component (LWC) buttons must be deleted and recreated. Retrieval and deployment using metadata tools will continue to work, as component names remain unchanged. The following buttons are affected:
-
PopUpCpqNewTab
-
PopupCpq
-
Recalculate
The following configurations are not affected by the reinstall and will remain intact:
-
Whitelisted URLs and Remote Site Settings
-
CPQ setup and CPQ server configuration
-
Connection IDs and other Admin Center settings
-
Process Designs
The migration must be performed by the System Administrator user.
Tools
Dataloader.io
Dataloader.io is part of the Salesforce ecosystem and has a link from the native setup application. It is an industry standard for small dataload operations.
Developer Workbench
Workbench is part of the Salesforce ecosystem and is often used by the Salesforce admins and developers to interact with Salesforce Metadata and APIs. It is an industry standard for quick metadata-related operations.
Text Editor
Notepad++ or another text editor is required to modify import files.
Preparations for Uninstallation
In this section, the main uninstallation preparations are made. These are applicable to any environment and are not dependent on any customer customizations.
Create a Working Folder
The process will include the creation and modification of multiple XML and CSV files. Create a working folder in a format <customerName>-core-migration-<EnvironmentName>. Use this folder for any exports and imports made during the migration process.
Experlogix Connection Settings backup
In this step, the Experlogix Connection Settings are backed up. Navigate to Experlogix App Connection Settings and export the settings.

Make sure that the Integration Client Secret & Integration Client Password are saved and ready.
Copy Configuration Flow Deactivation
In this step, we have to deactivate a packaged Screen Flow. Having active packaged flows will make uninstallation fail.
-
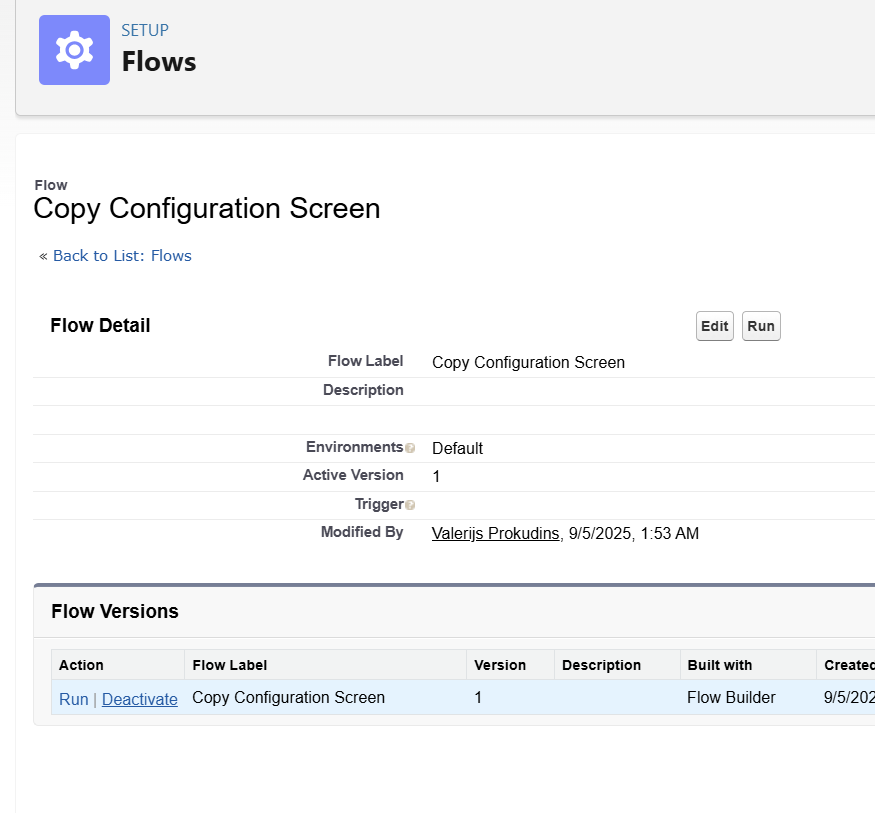
Navigate to Setup > Flows and locate the Copy Configuration Screen flow.
-
Select the drop-down to the right and select View Details and Versions.

-
Deactivate the active flow version.
Logging in to Dataloader.io
-
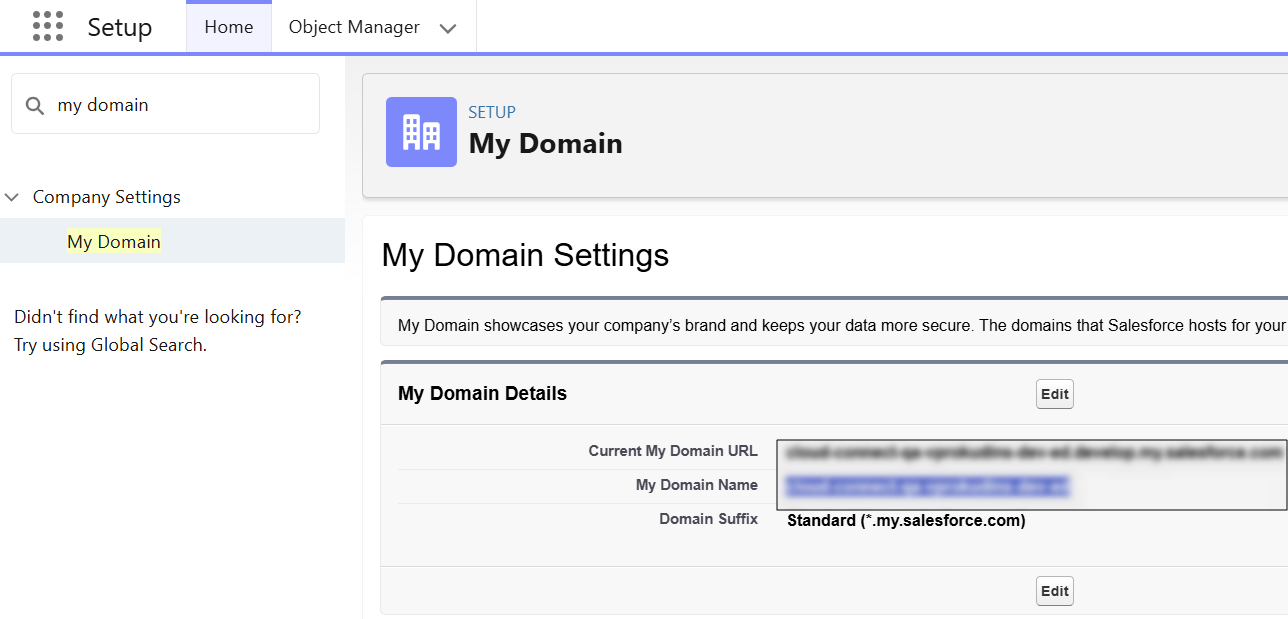
Navigate to Setup > My Domain and write down My Domain Name. This will be referred as OrgsMyDomain.
-
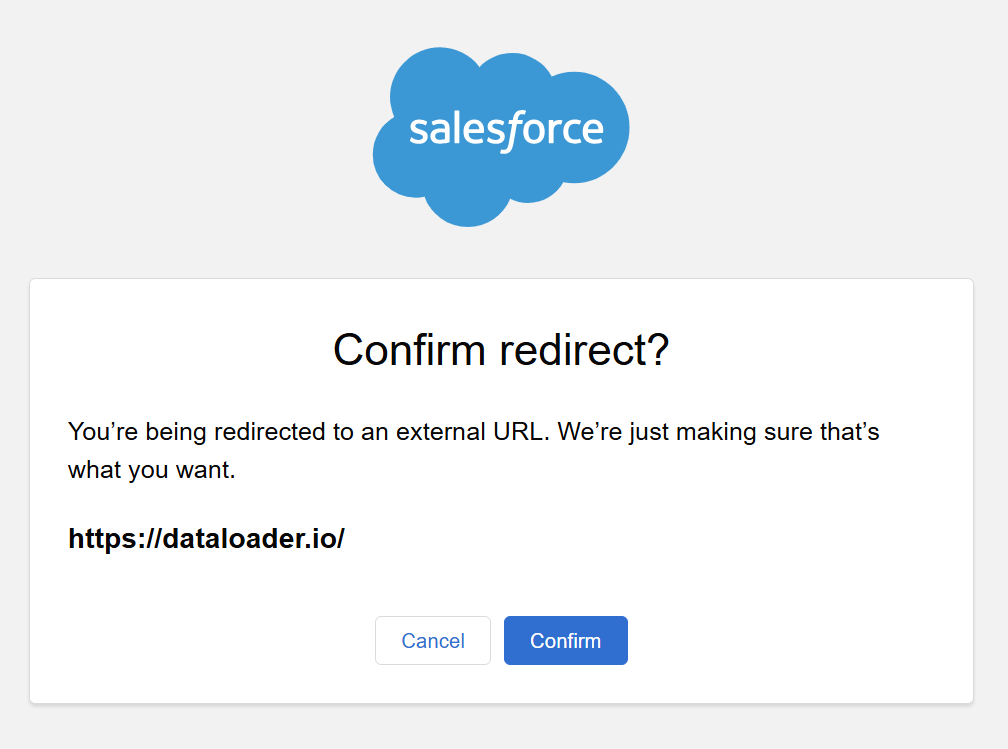
Navigate to Setup > Dataloader.io and Select Launch Dataloader.io.
-
Confirm the redirect.
-
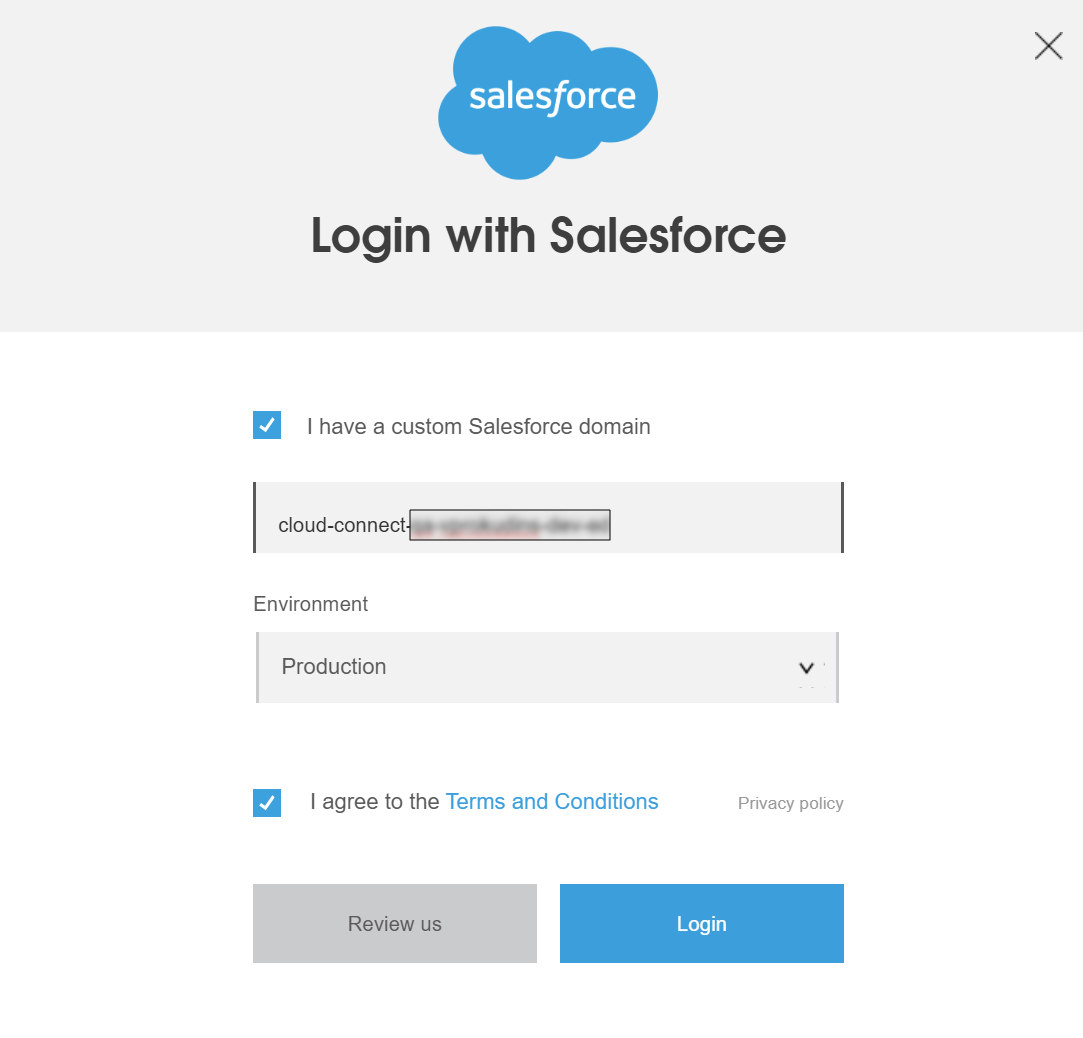
Select Login with Salesforce.
-
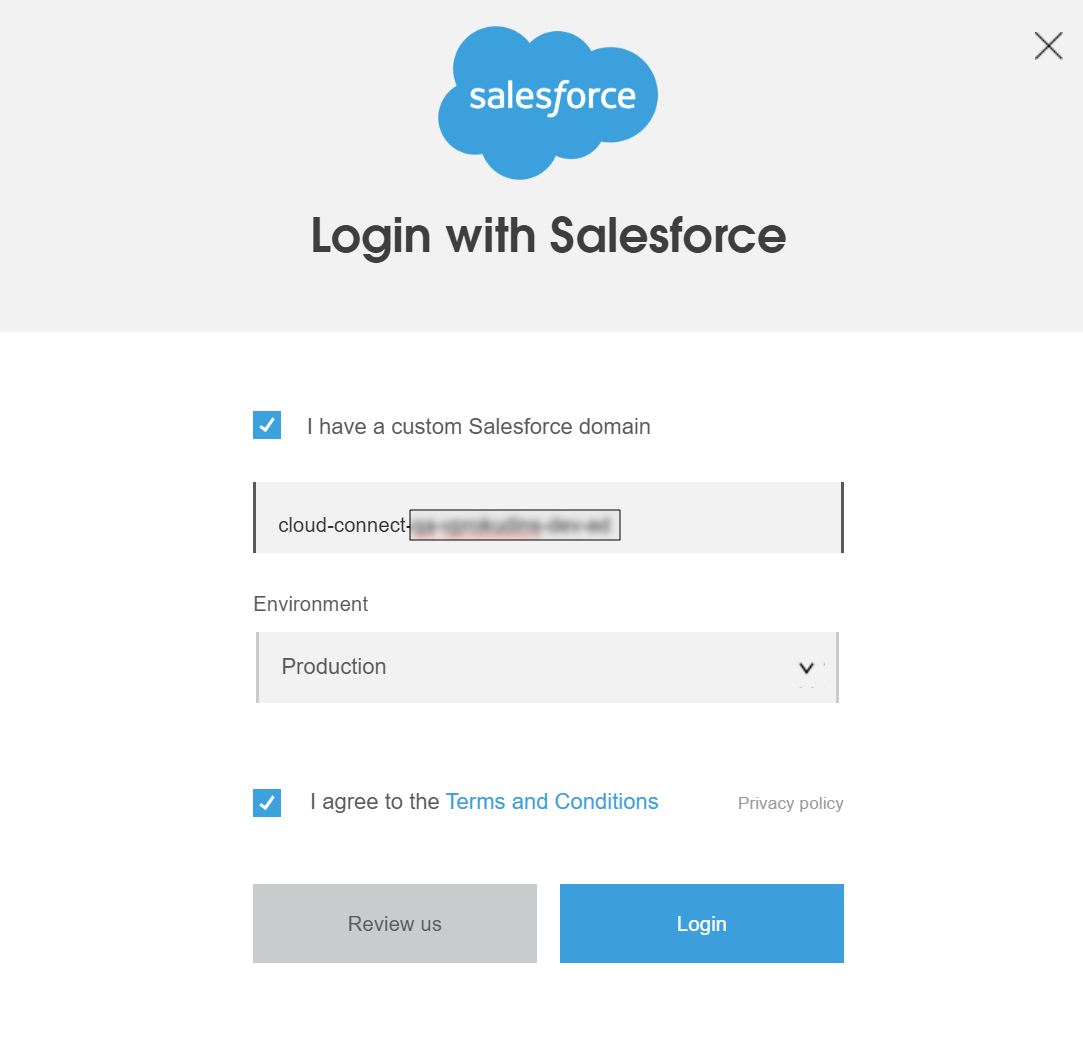
Select the Environment type(production/sandbox) and select Login.
If logging in doesn't work, try checking if you have a custom Salesforce Domain. Use OrgsMyDomain acquired before, the Domain must be in the format <OrgsMyDomain>.my.salesforce.com.
Backup Permission Set Ids for Future Reference
-
Navigate to Dataloader.io.
-
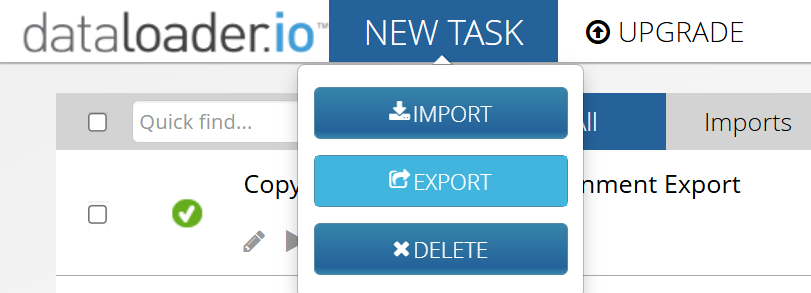
Select New Task & Export.
-
Select the
PermissionSetas the object and select Next.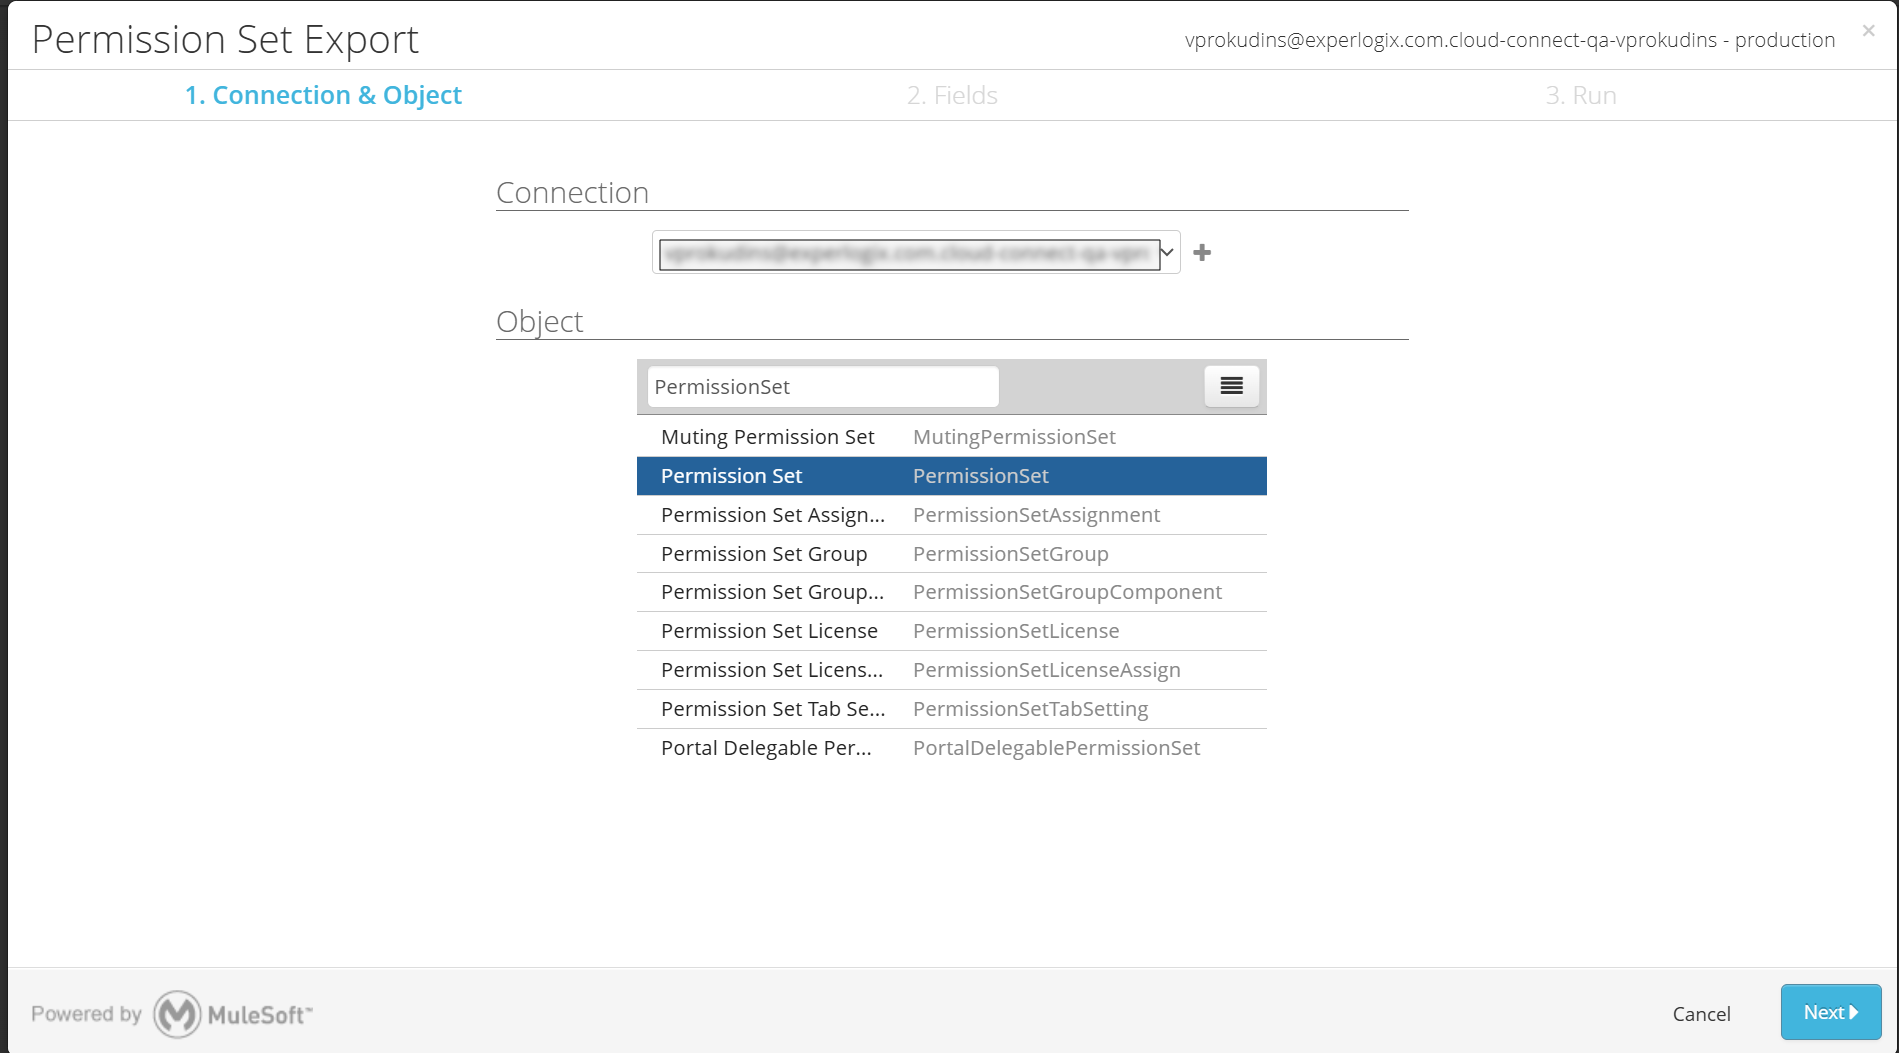
-
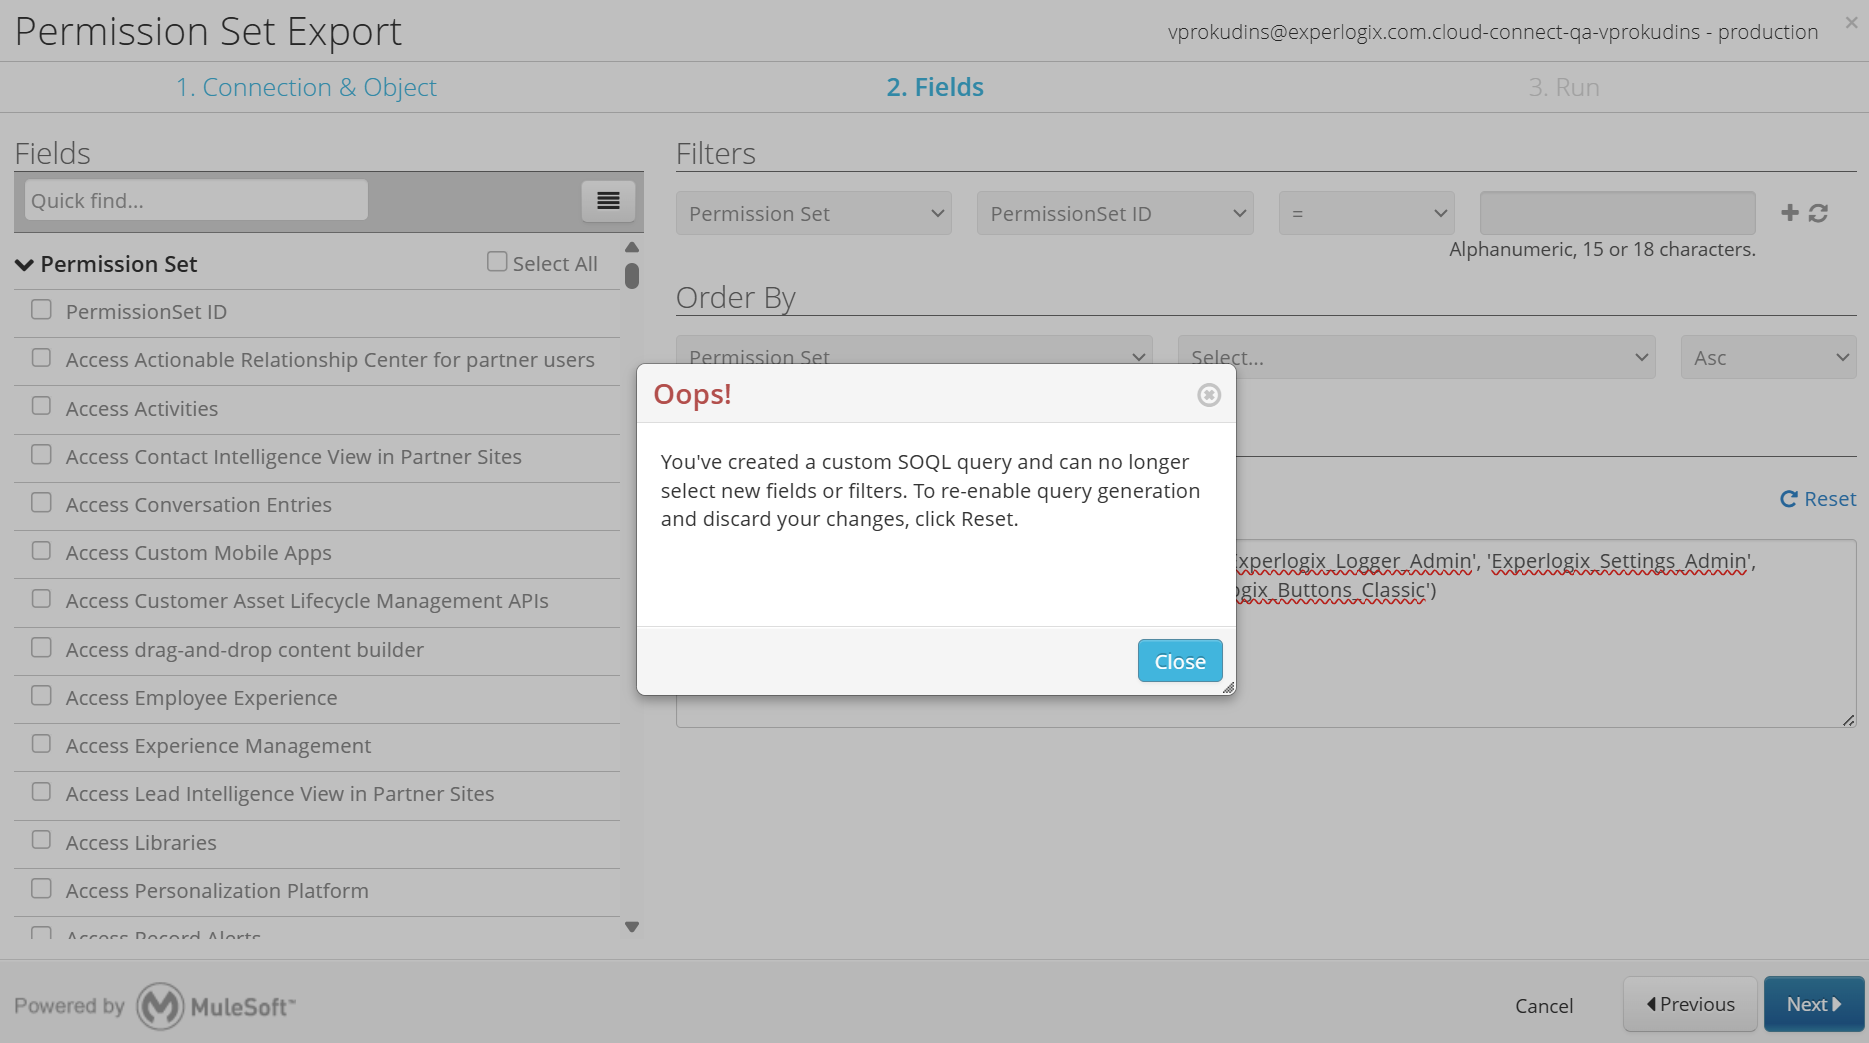
Expand the SOQL Query and paste in the following query:
SELECT Id, Name FROM PermissionSet WHERE Name IN ('Experlogix_Logger_Admin', 'Experlogix_Settings_Admin', 'Experlogix_Settings_User', 'Experlogix_CPQ_User', 'Experlogix_Buttons_Classic') -
Select Close and then Next.
-
Select Save & Run.
-
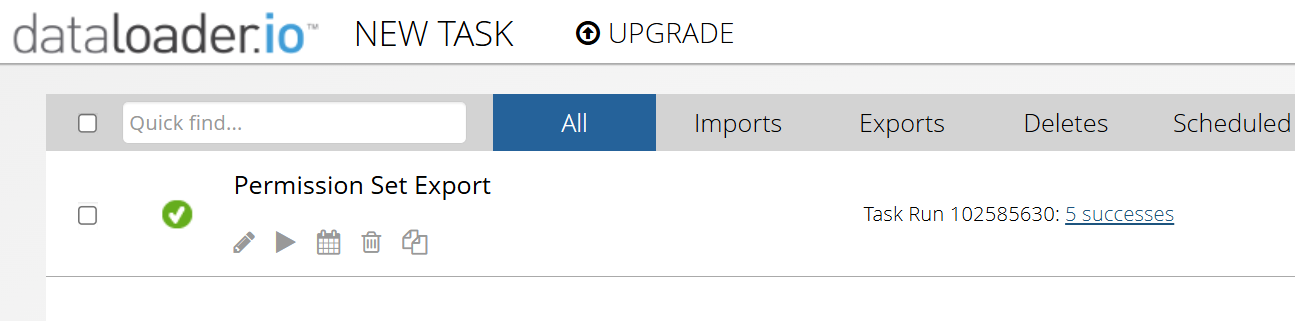
Wait for the job to finish (1-2min) and refresh the page.
-
Select Successes to download the export results.
-
Name this file OldPermissionSetIds.csv.
Permission Set Groups Settings Backup
In this step we use Dataloader.io to back up customer customizations related to Experlogix Permission Sets. After the package is reinstalled, these will be imported back.
-
Navigate to Dataloader.io.
-
Select New Task and then Export.
-
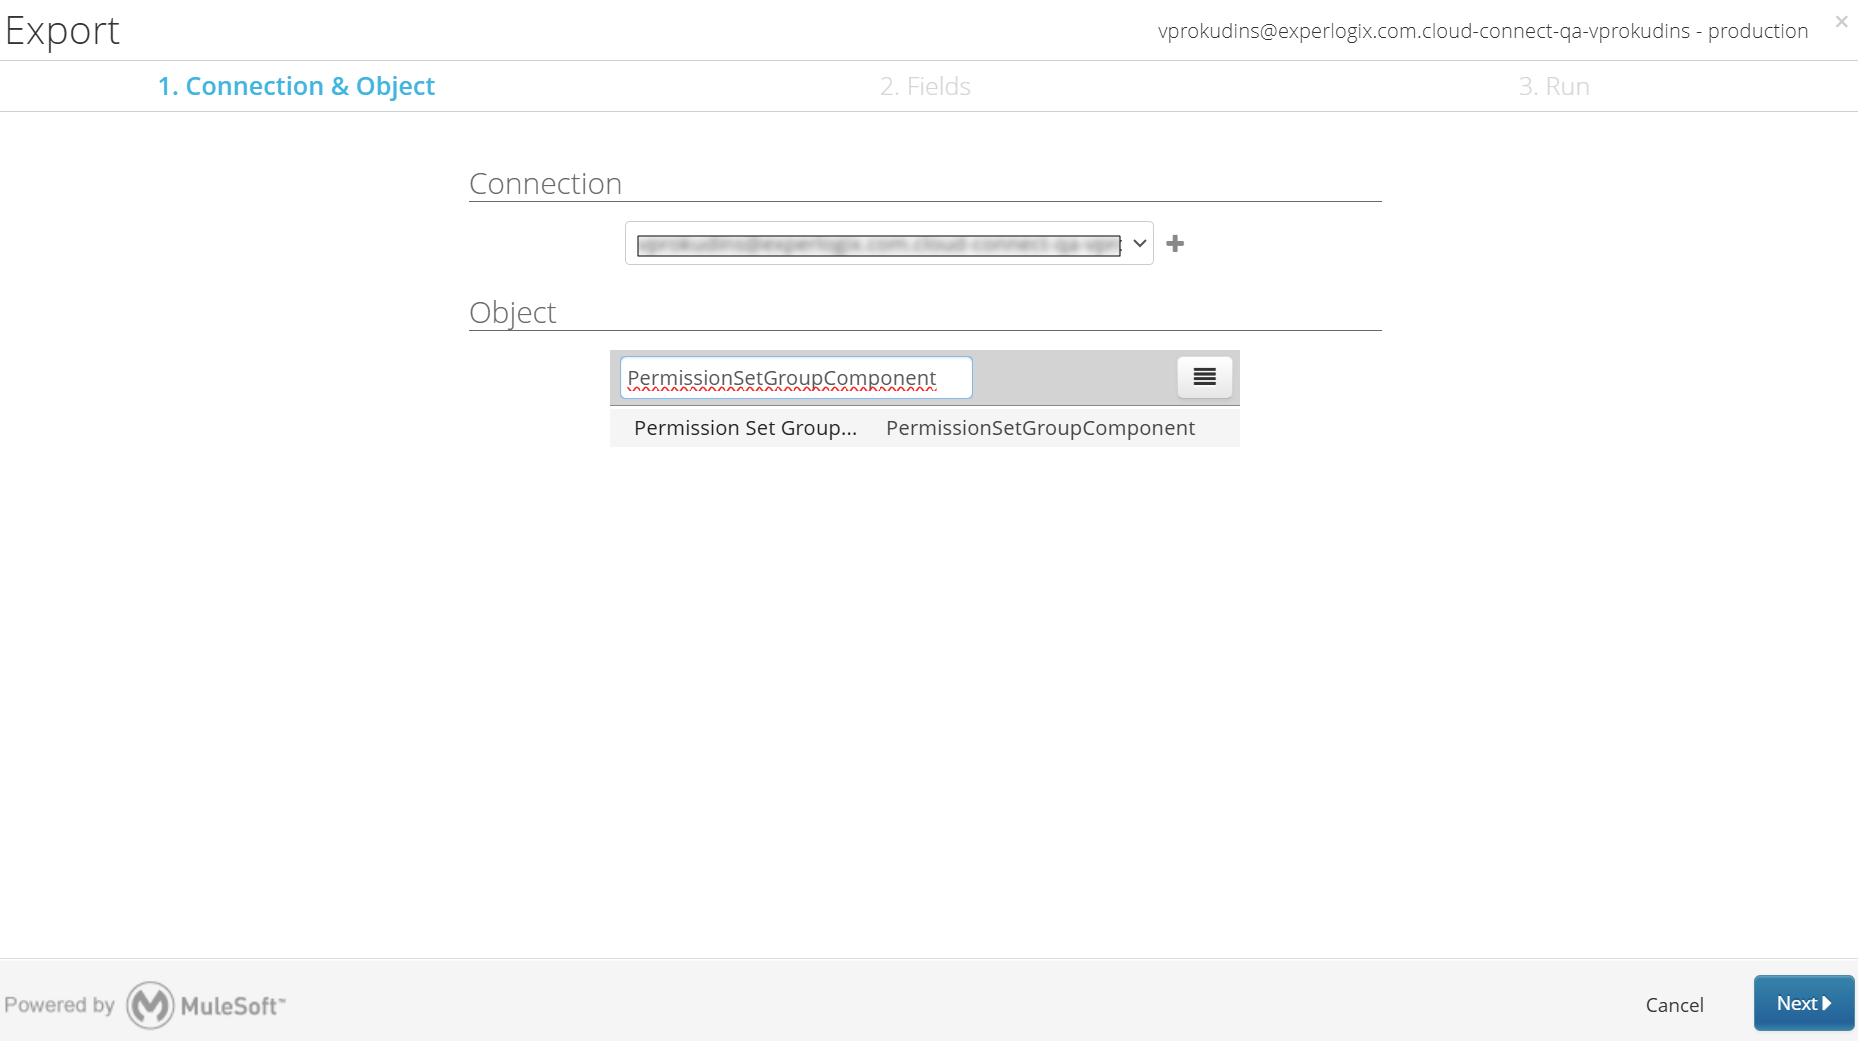
Search for and select the PermissionSetGroupComponent object.
-
Select Next.
-
Expand the SOQL Query and paste in the following Query:
SELECT Id, PermissionSetGroupId, PermissionSetGroup.DeveloperName, PermissionSetId, PermissionSet.Name FROM PermissionSetGroupComponent WHERE PermissionSet.Name IN ( 'Experlogix_Buttons_Classic', 'Experlogix_Settings_User', 'Experlogix_Settings_Admin', 'Experlogix_Logger_Admin', 'Experlogix_CPQ_User' ) -
Close the warning pop-up and select Next.
-
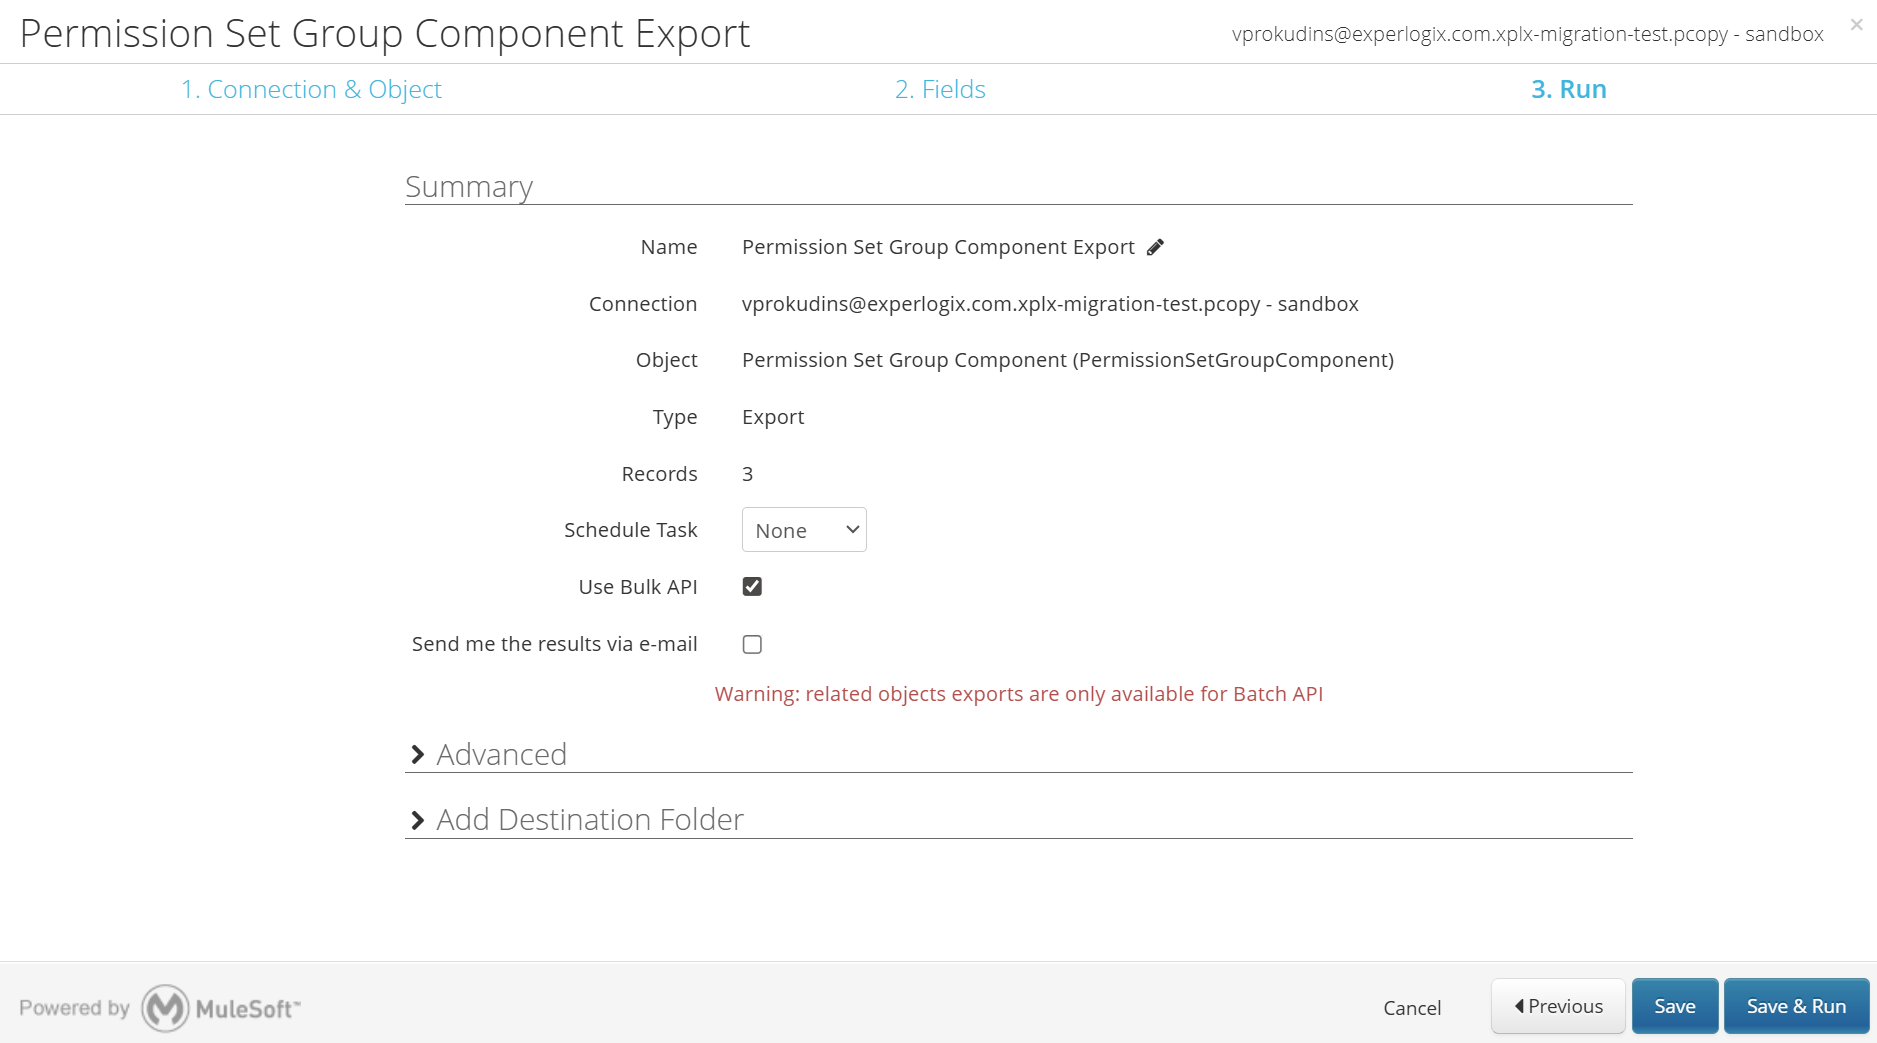
Select Save & Run.
-
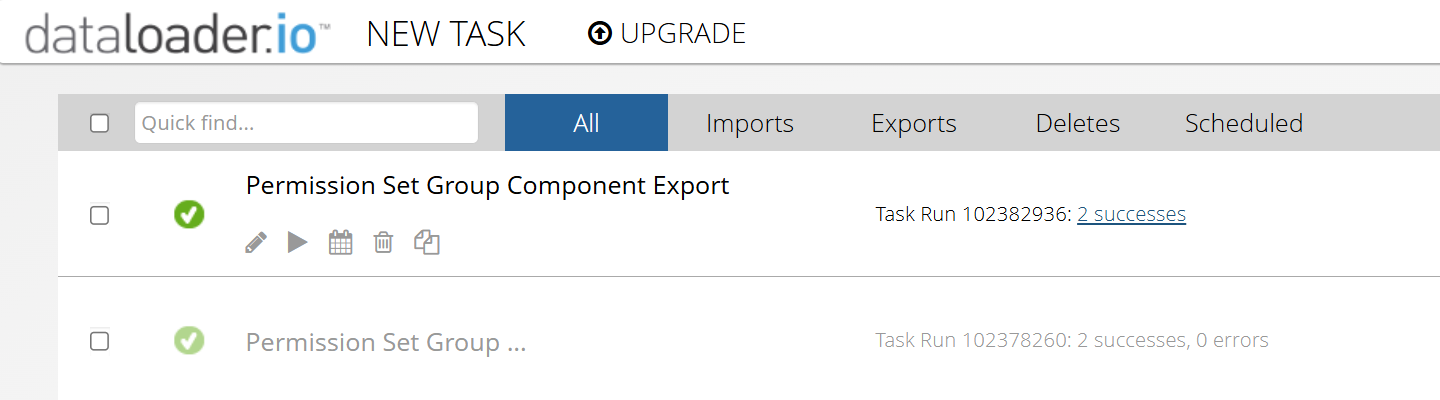
Allow the export to run 1-2 minutes and refresh the page to download the resulting *.csv file. After clicking the Successes link, the *.csv download begins.
-
Name this file PermissionSetGroupComponentExport.csv.
It is very important to keep this file, as it will be required in multiple steps later.
Deleting Experlogix Permission Sets from Custom Permission Set Groups
In this step we use the Dataloader.io PermissionSetGroups backup CSV file to delete references to Experlogix Permission Sets.
-
Navigate to Dataloader.io.
-
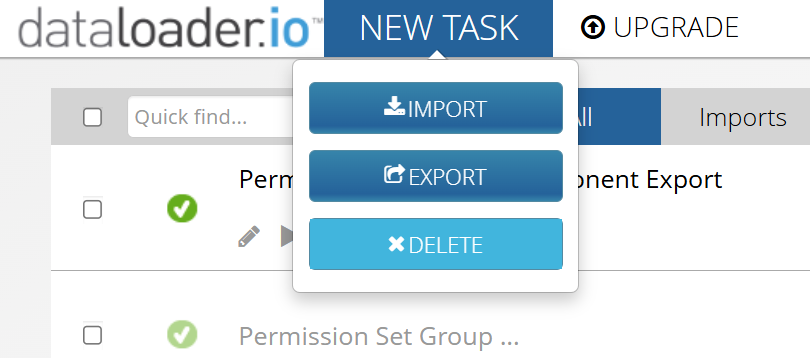
Select New Task and then Delete.
-
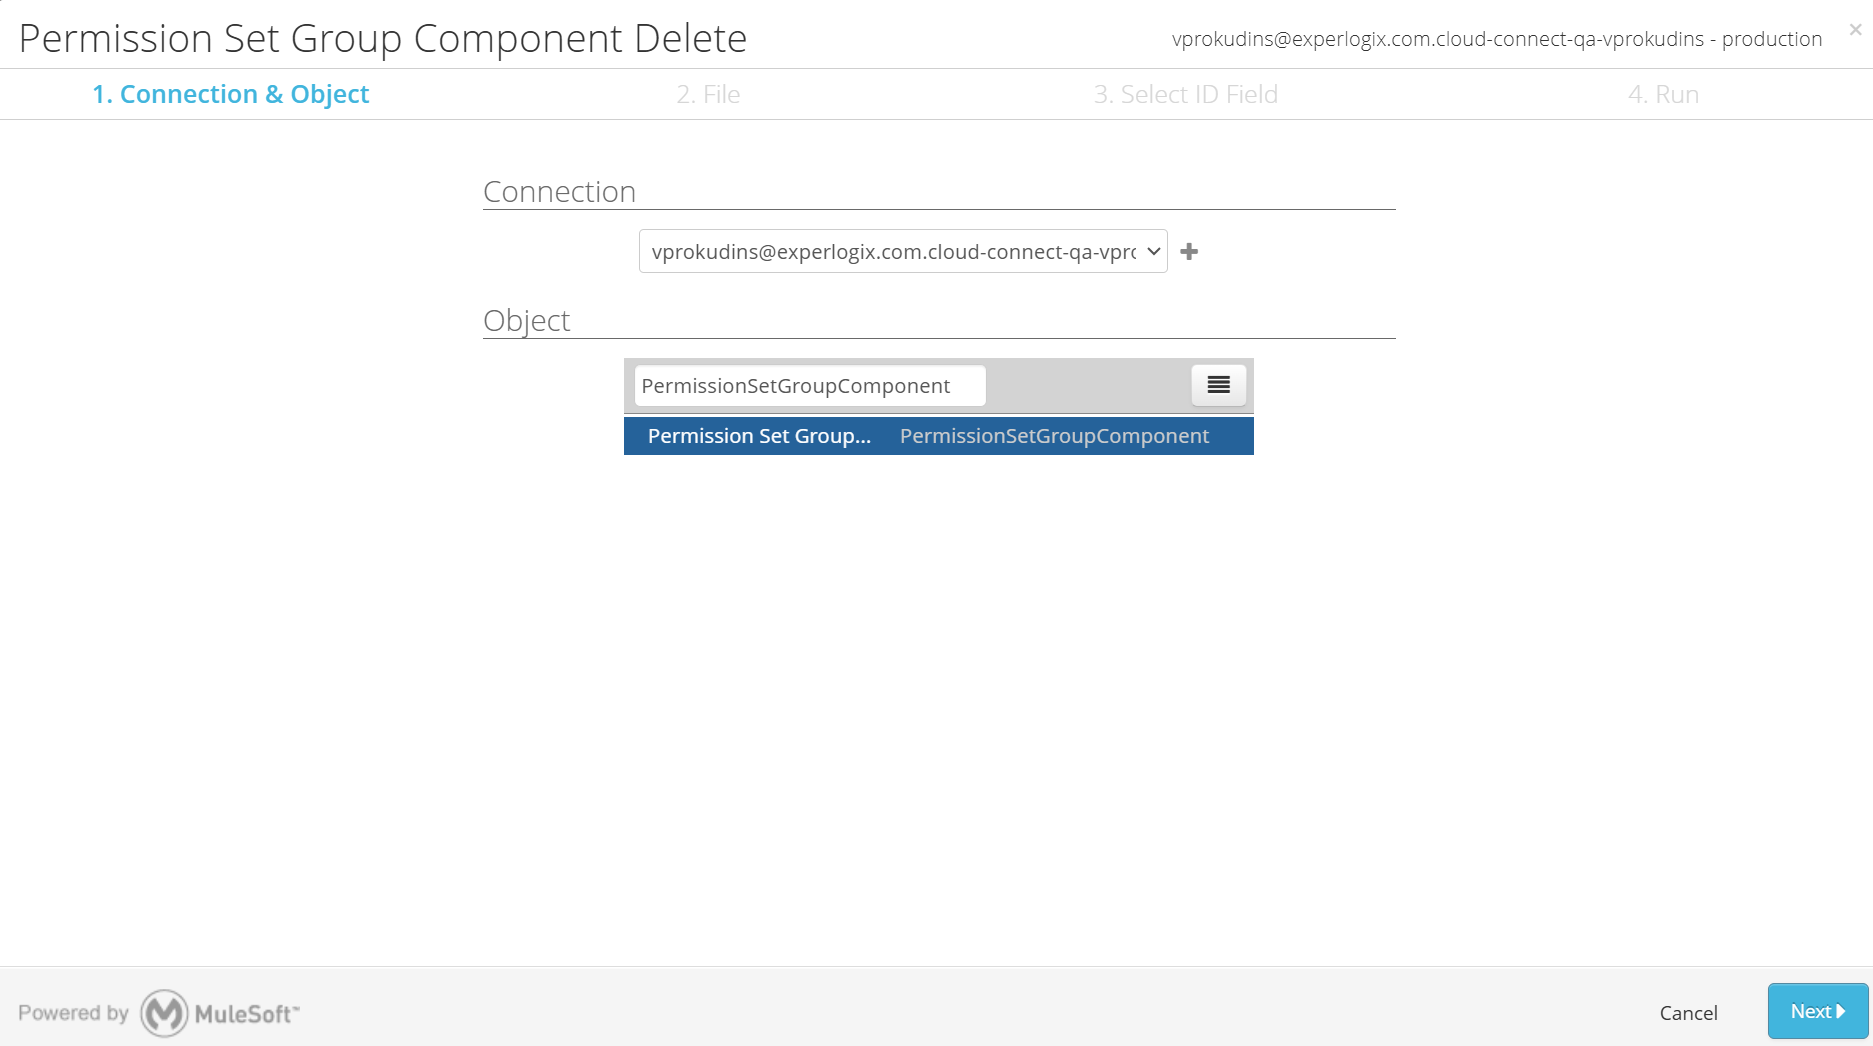
Search for and select the PermissionSetGroupComponent object.
-
Select Next.
-
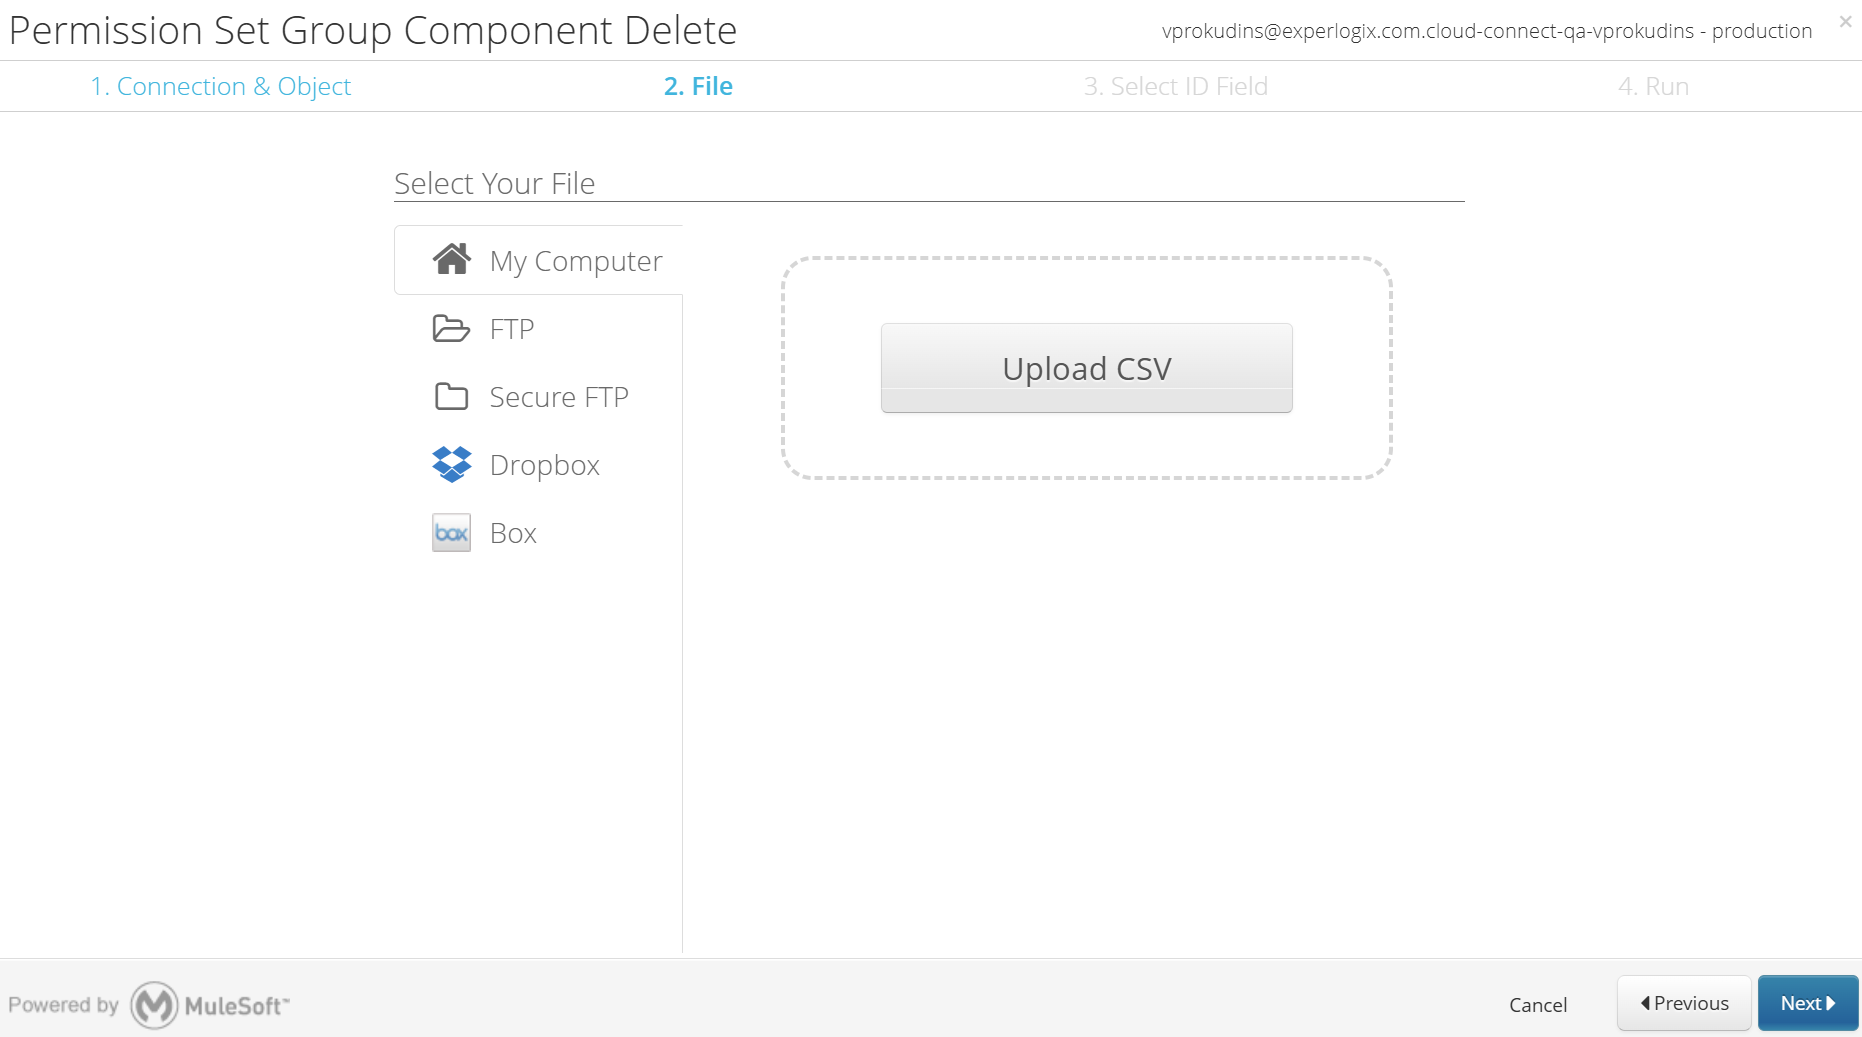
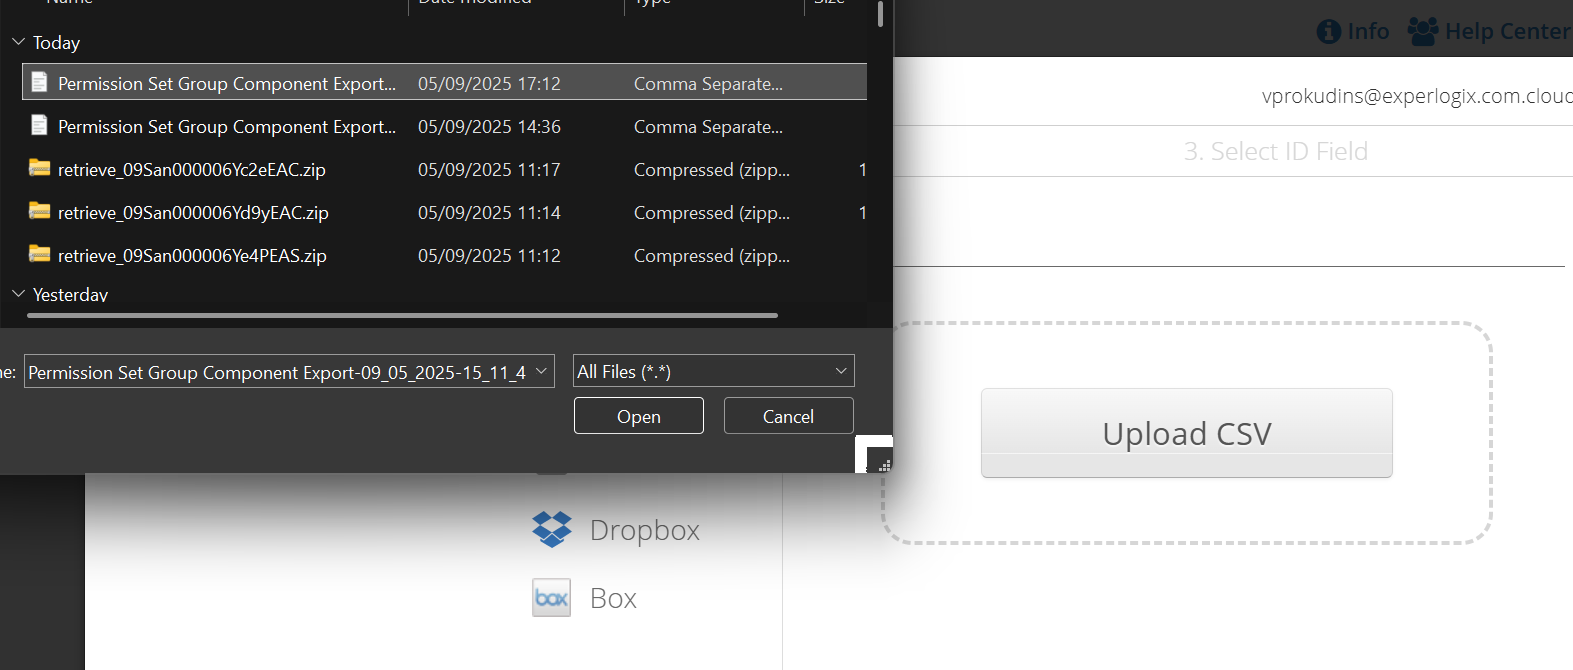
Select Upload CSV.
-
Select the file saved in the previous section.
-
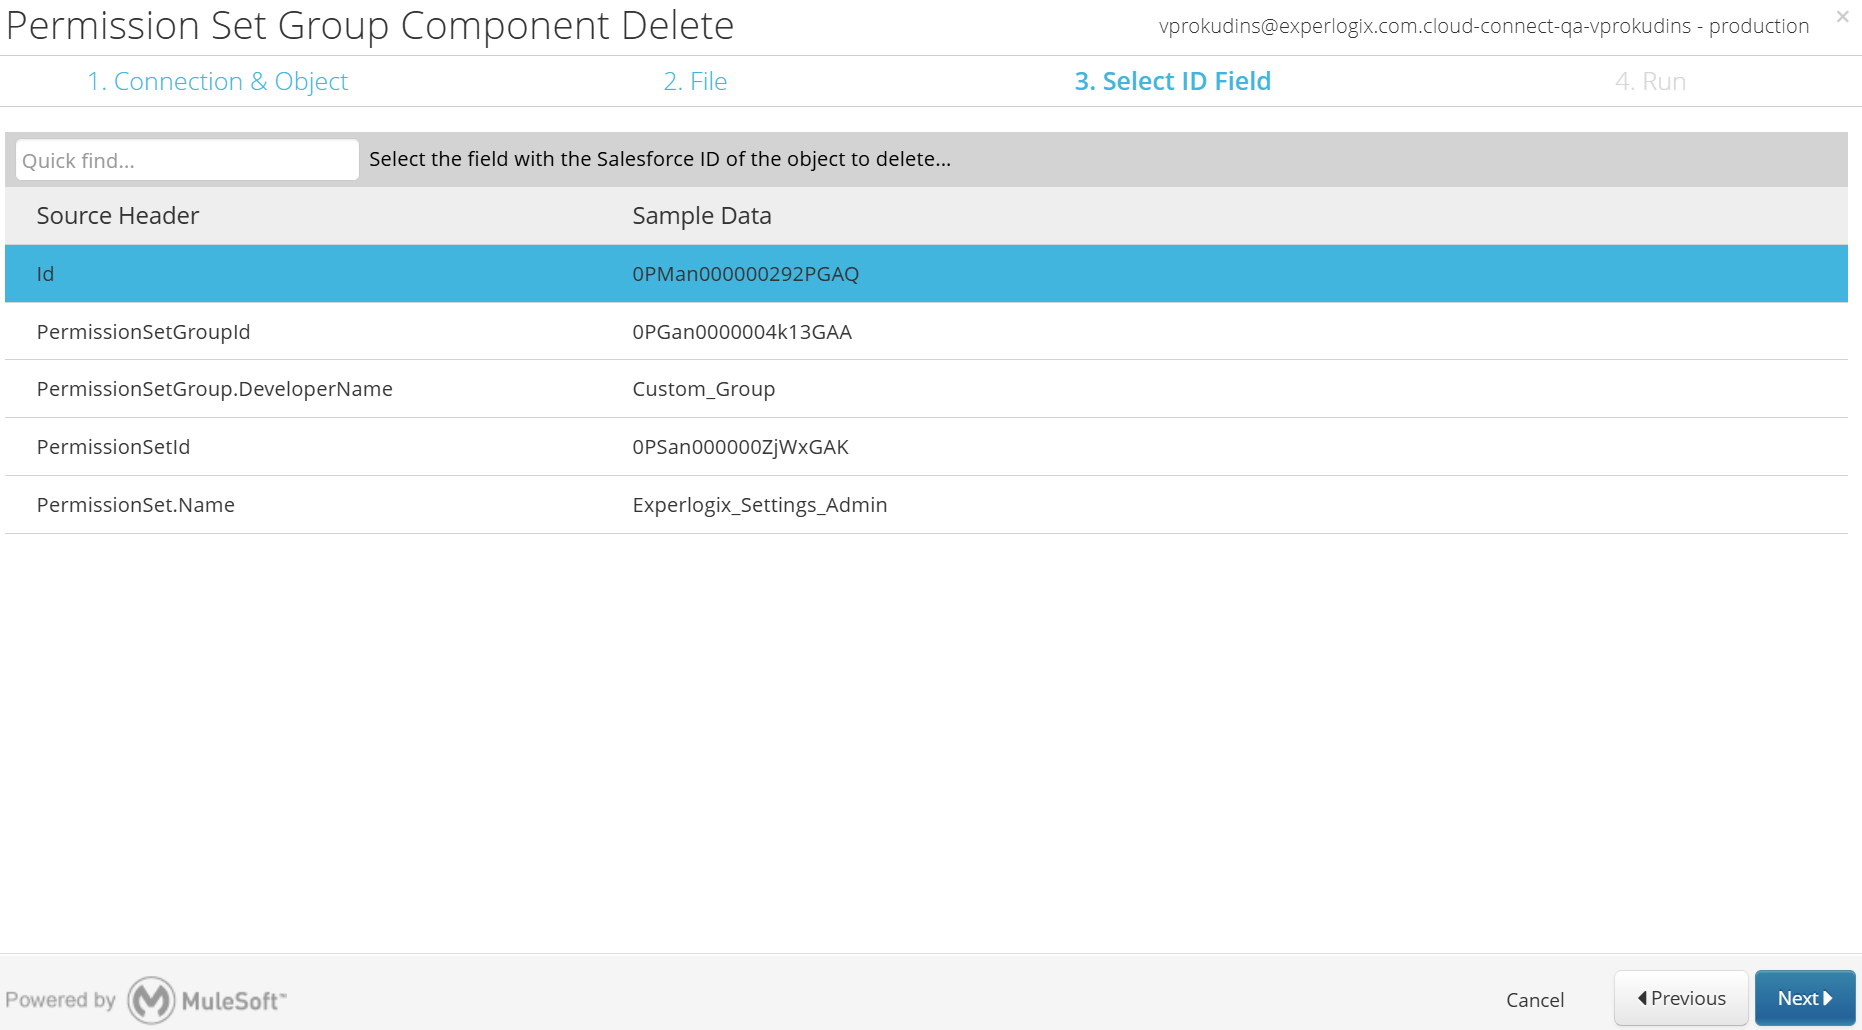
Map the first field as an ID field.
-
Select Next.
-
Select Save & Run.
Permission Set Assignment Backup
In this step, all users' assignments to Experlogix Permission Sets assignments are being backed up using Dataloader.io .
-
Navigate to Dataloader.io.
-
Select New Task & Export.
-
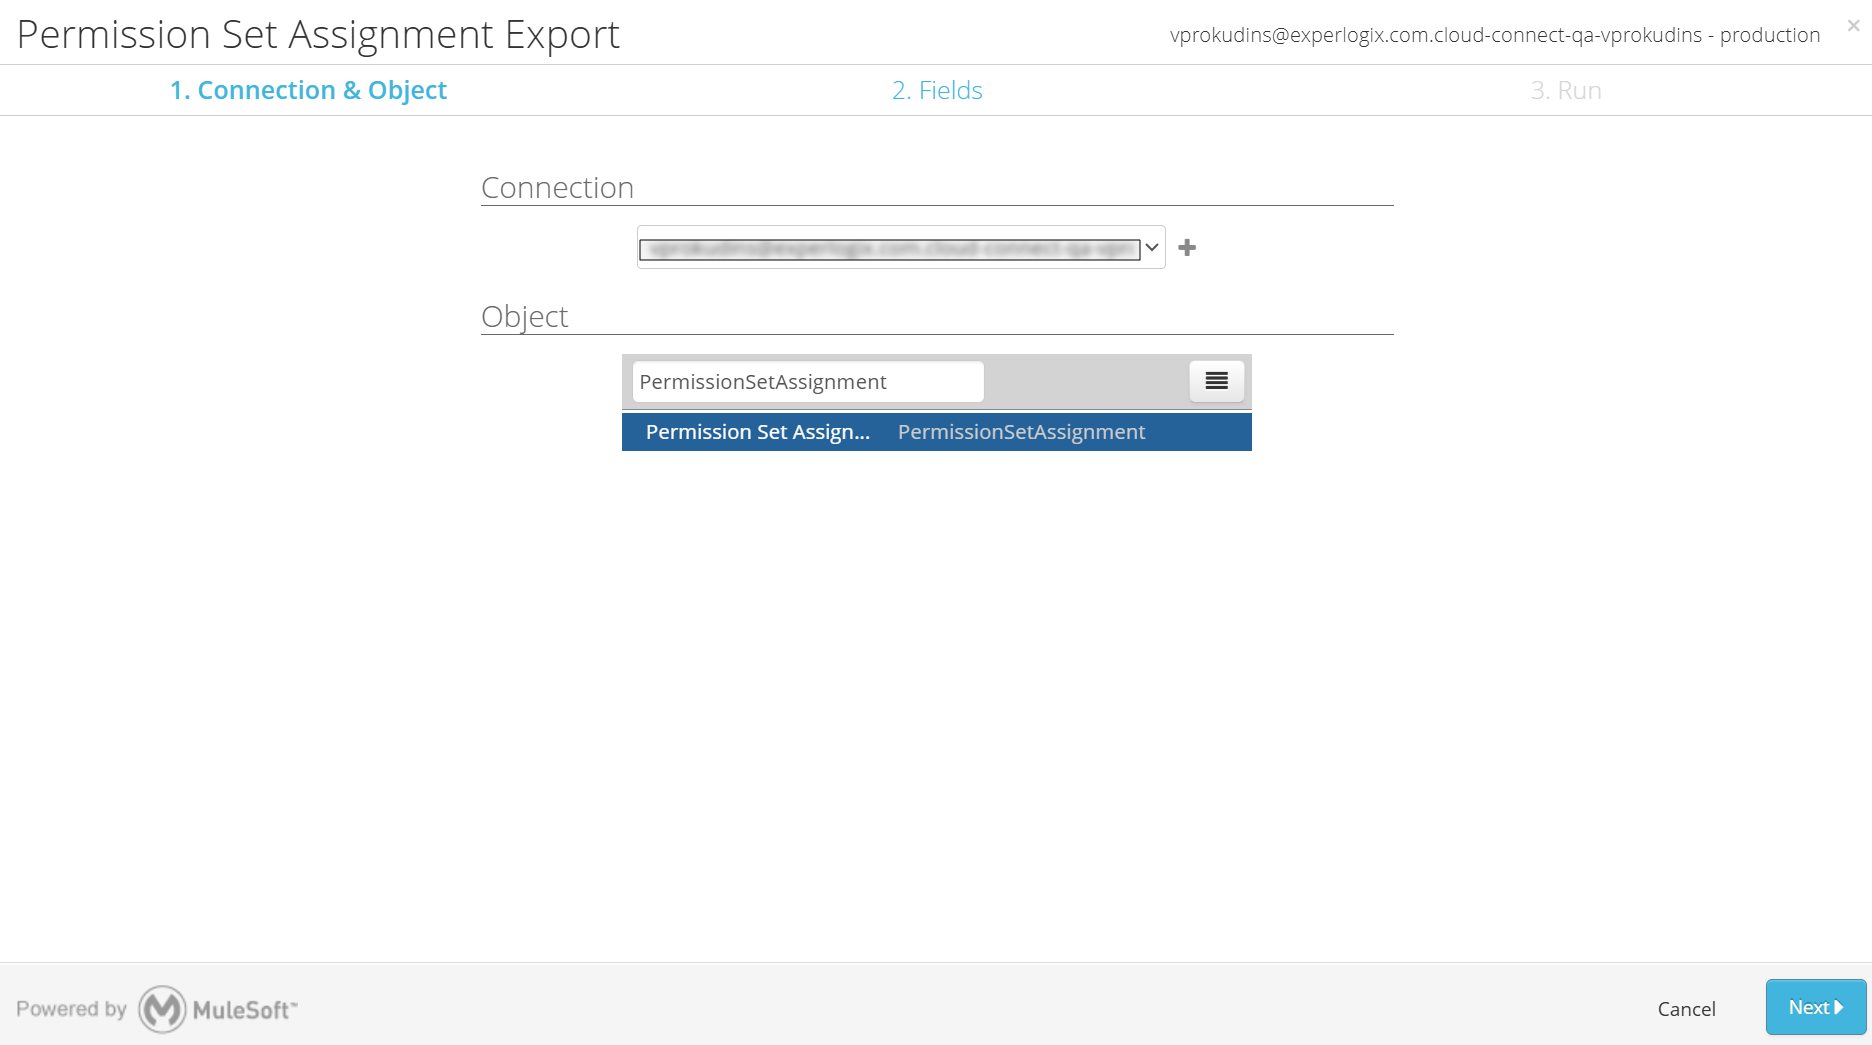
Search for and select the PermissionSetAssignment object.
-
Select Next.
-
Expand the SOQL Query and paste in the following query:
SELECT Id, PermissionSetId, PermissionSet.Name, AssigneeId, IsActive, ExpirationDate FROM PermissionSetAssignment WHERE PermissionSet.Name IN ('Experlogix_Buttons_Classic', 'Experlogix_Settings_User', 'Experlogix_Settings_Admin', 'Experlogix_Logger_Admin', 'Experlogix_CPQ_User') -
Close the warning pop-up and select Next.
-
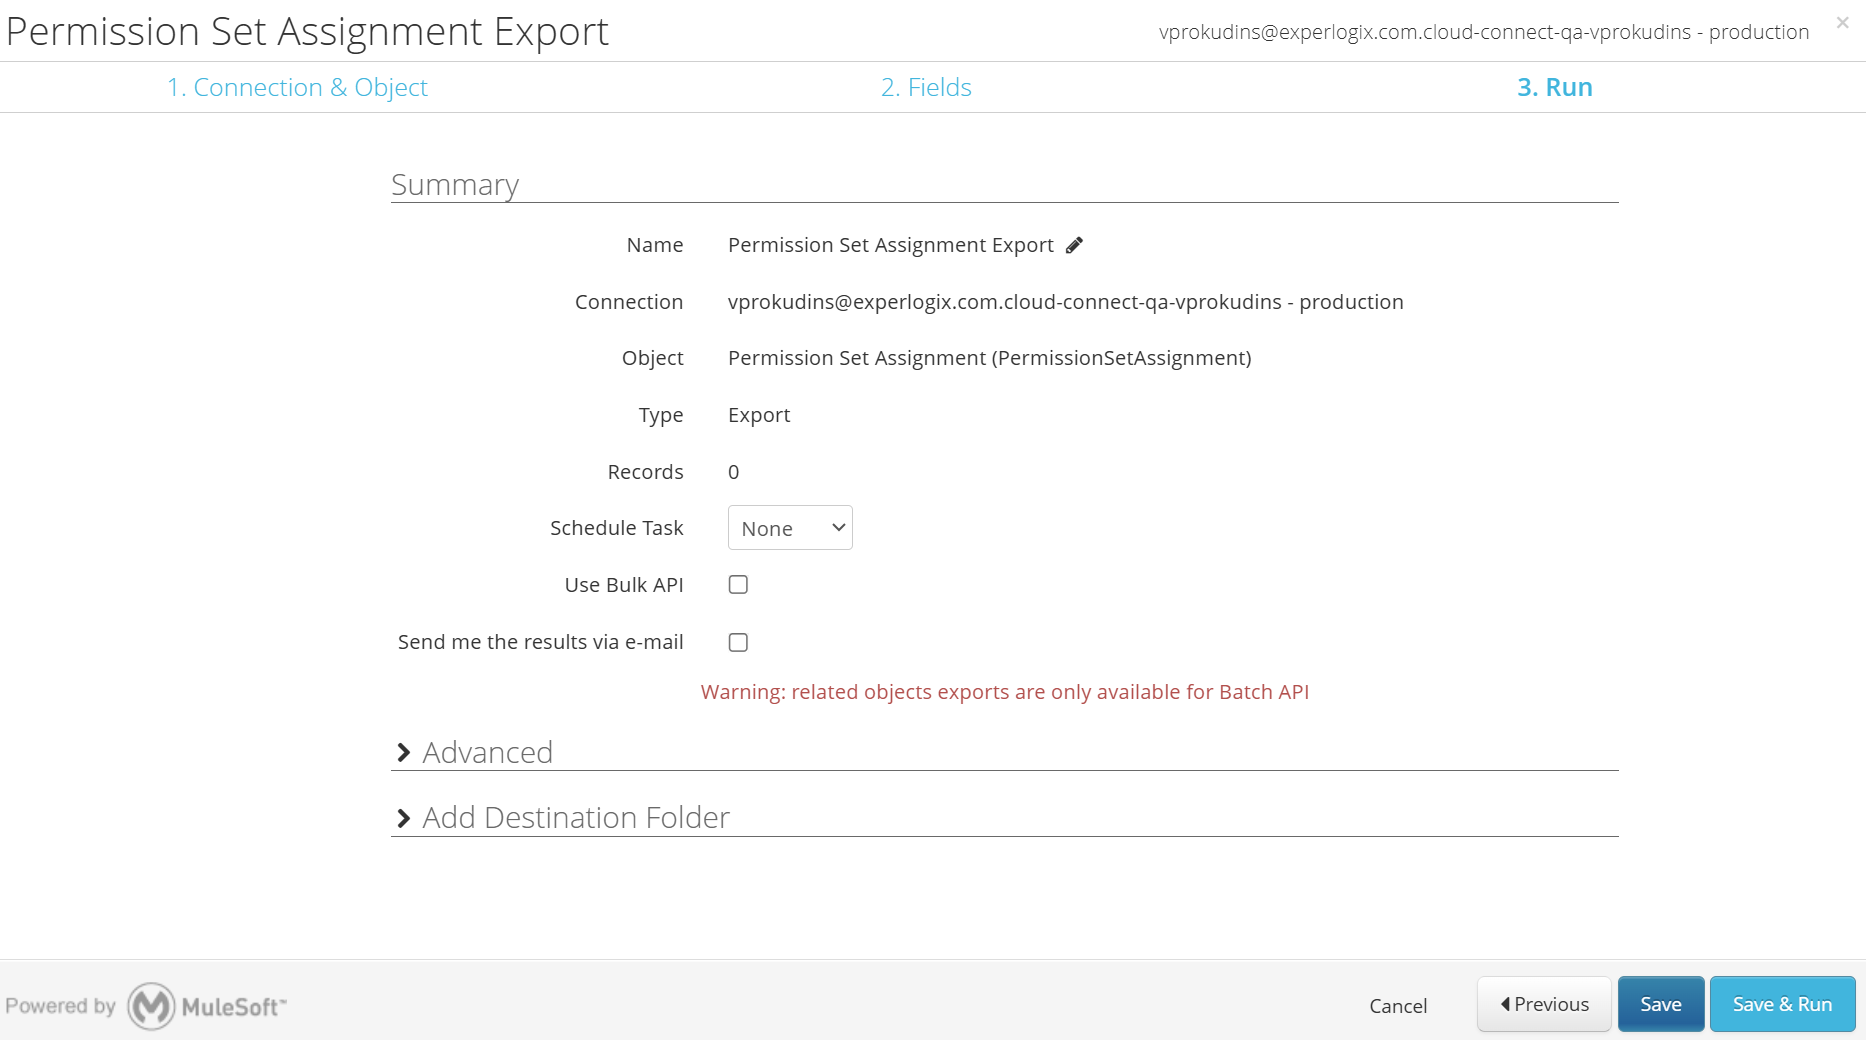
Select Save & Run.
-
Allow the export to run 1-2 minutes and refresh the page to download the resulting *.csv file. After clicking the Successes link, the *.csv download begins.

-
Locate this file and rename it to PermissionSetAssignmentExport.csv.
It is very important to keep this file, as it will be required in multiple steps later.
Permission Set Assignment Removal
In this step, we use Dataloader.io PermissionSetAssignments backup .csv file to delete references to Experlogix Permission Sets.
-
Navigate to Dataloader.io.
-
Select New Task and then Delete.
-
Search for and select PermissionSetAssignment object.
-
Select Next.
-
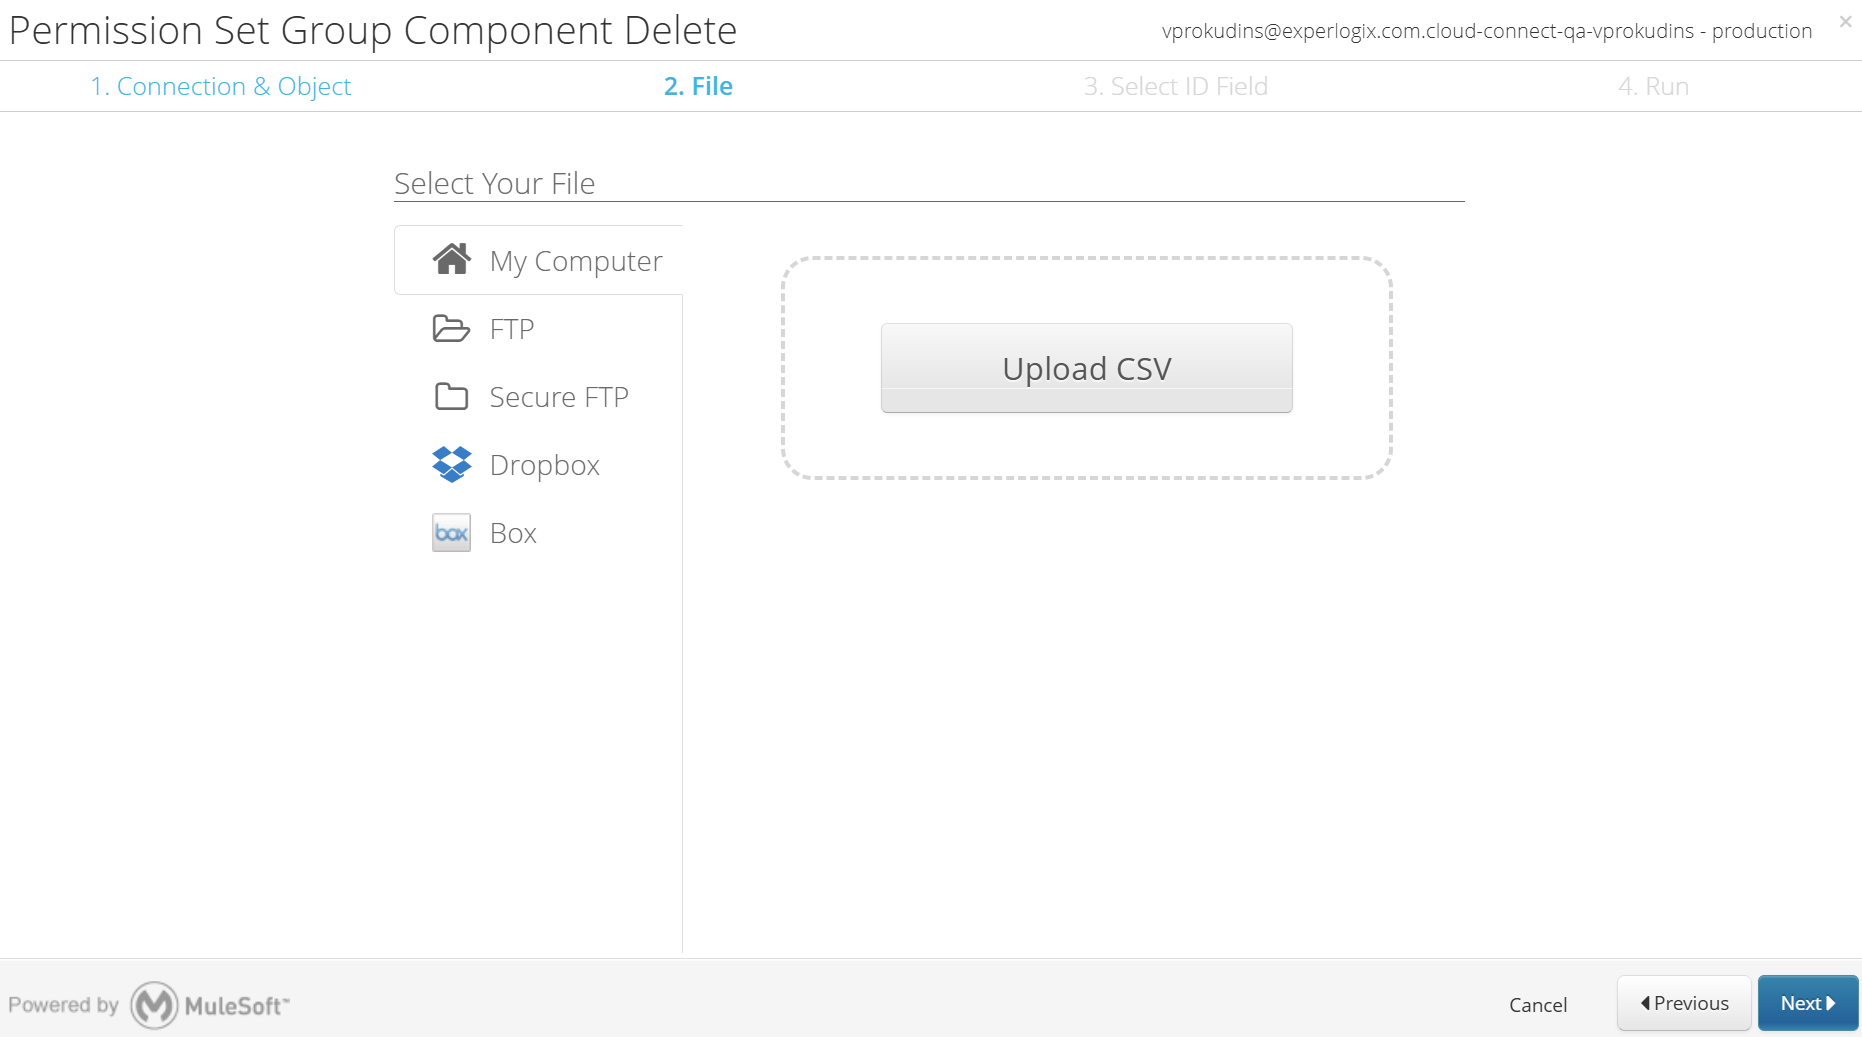
Select Upload CSV.
-
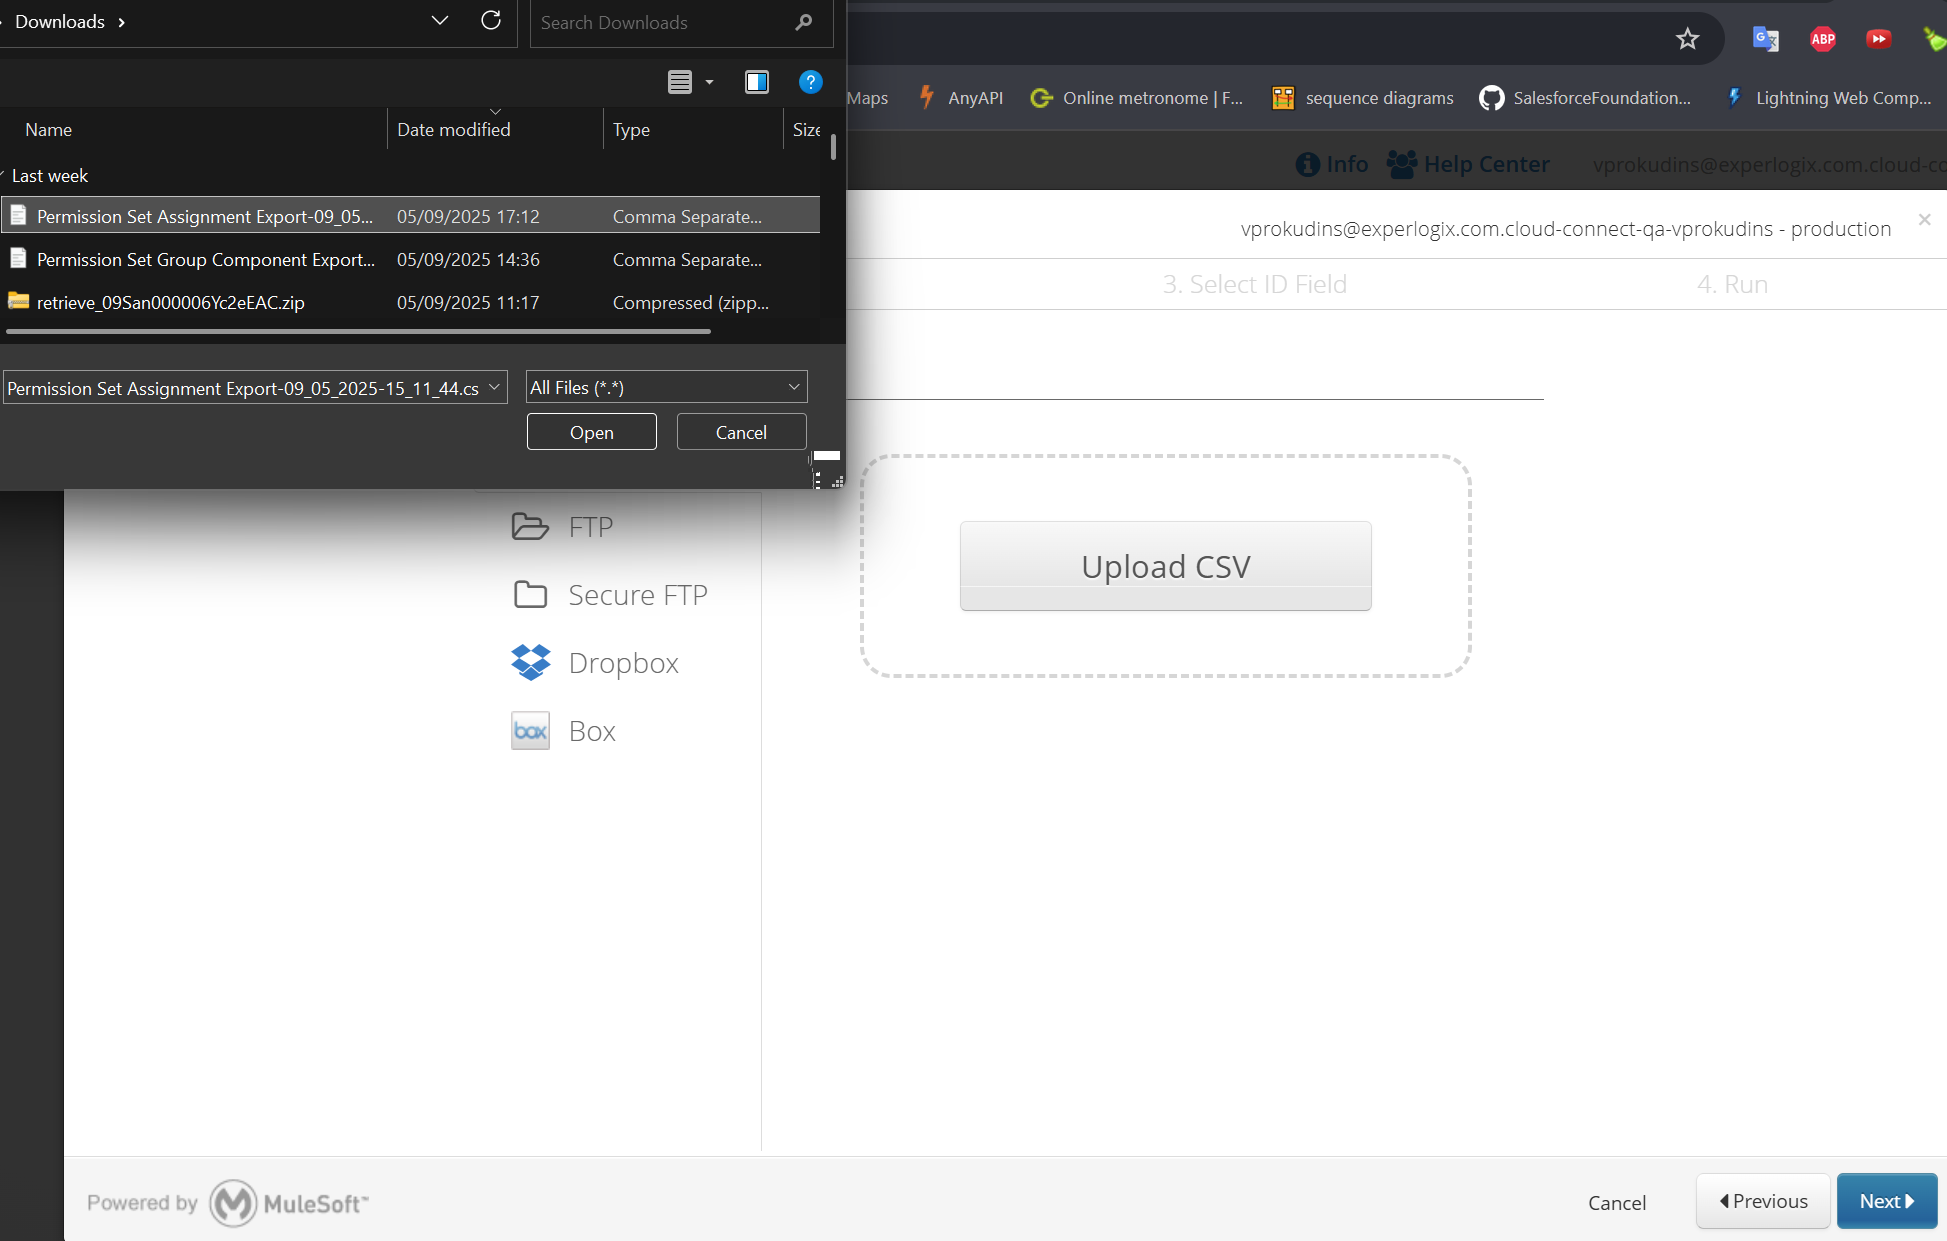
Select the file acquired in the previous section.
-
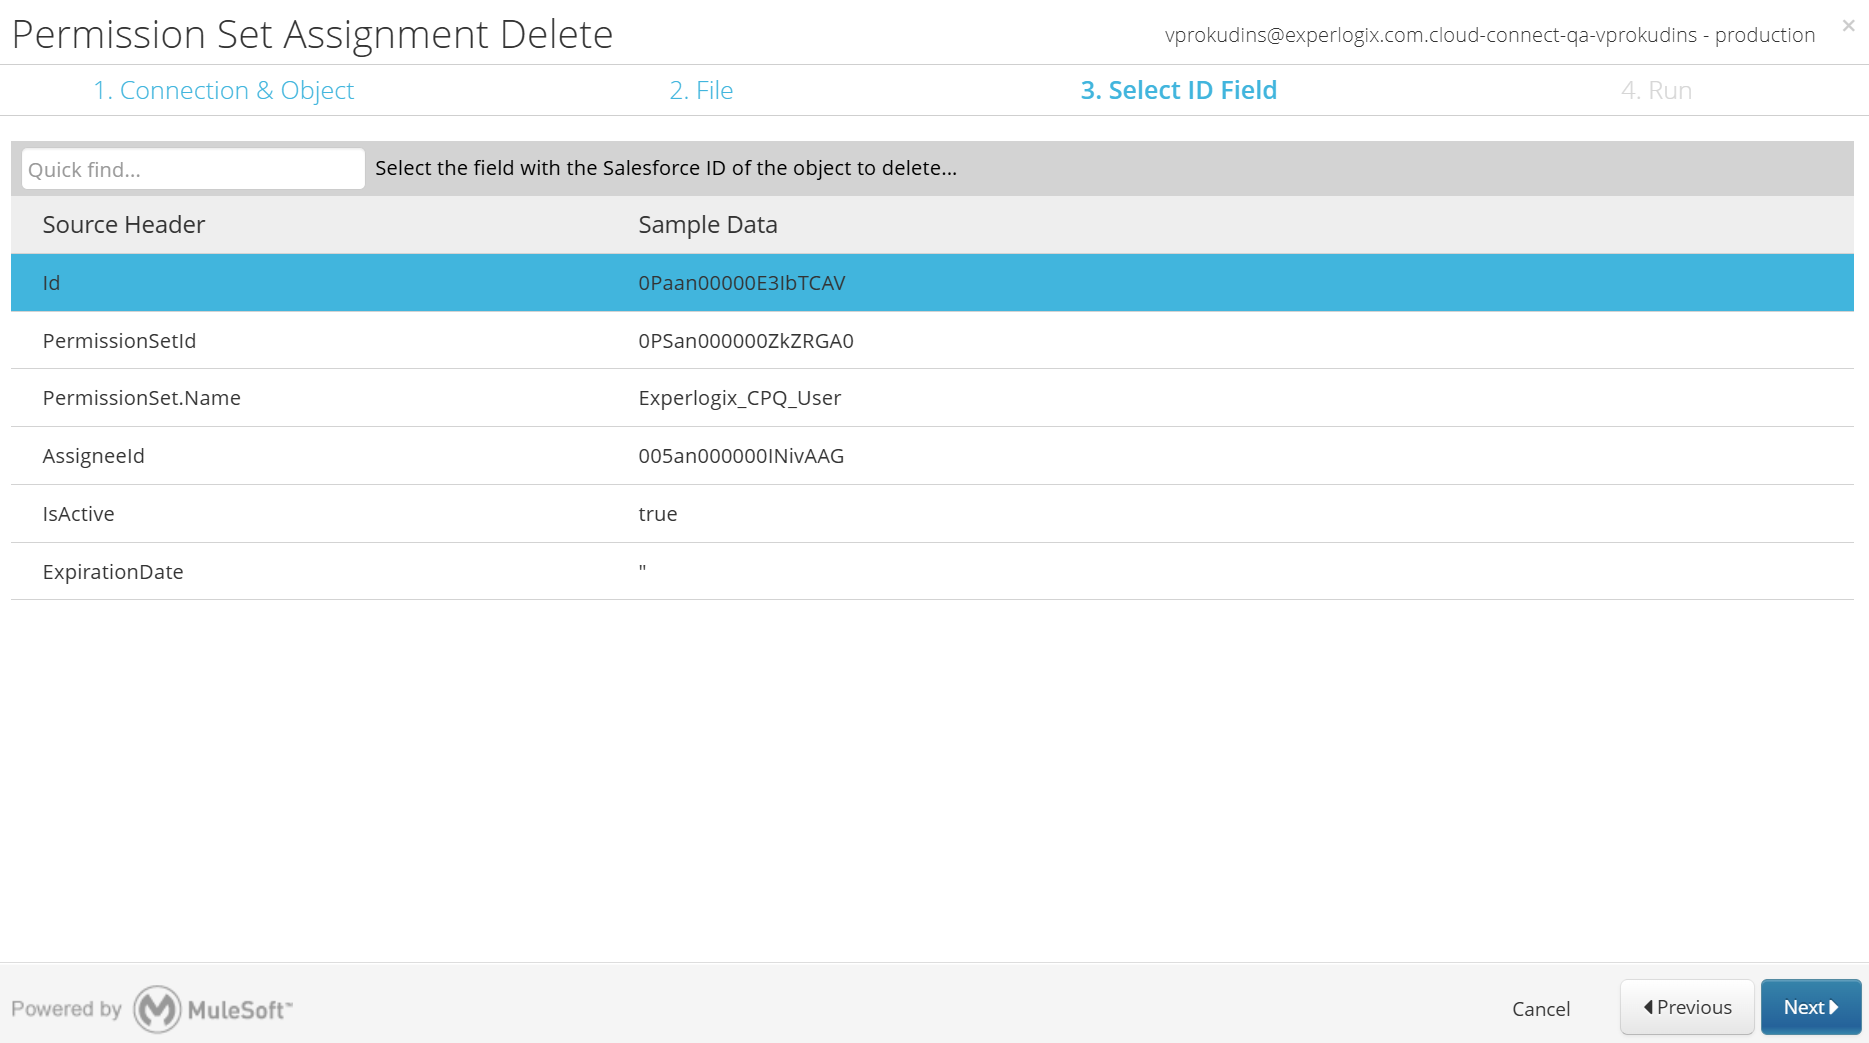
Map the first field as an ID field.
-
Select Next.
-
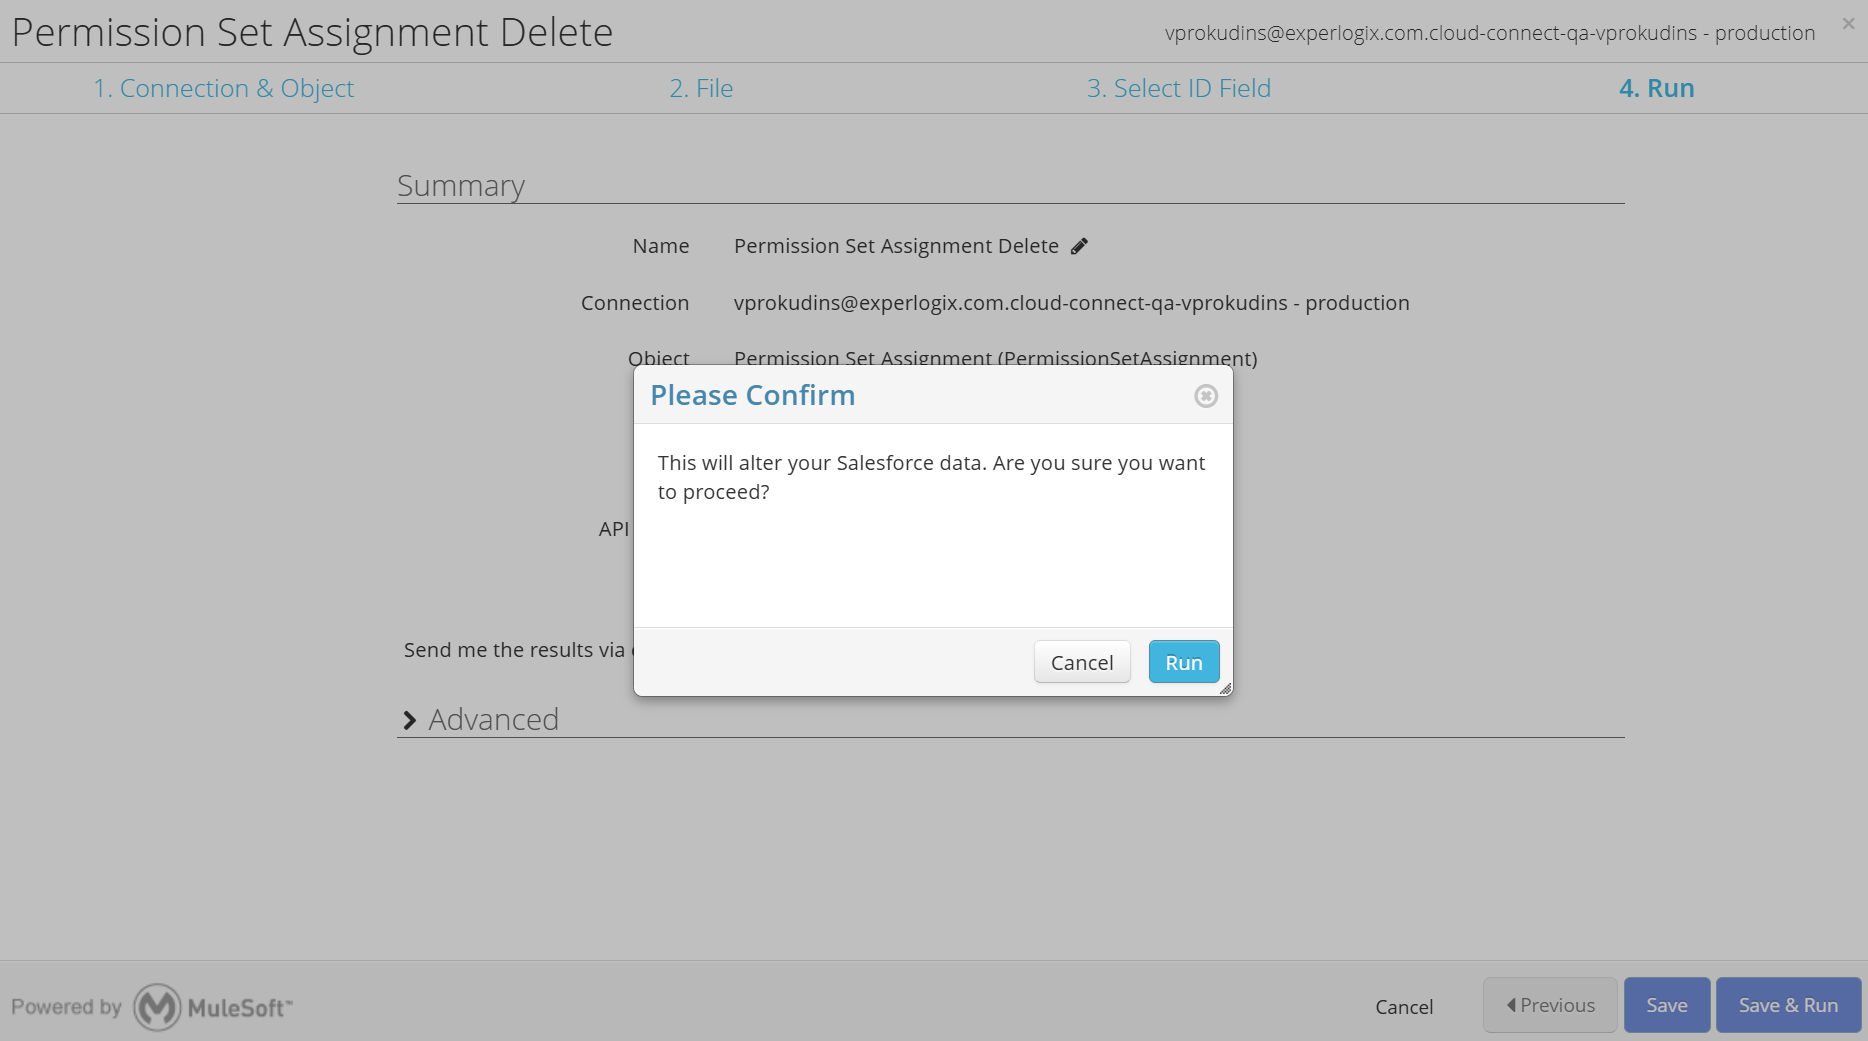
Select Save & Run, then Run in the confirmation dialog.
Packages Uninstallations and Further Backups Strategy
After the main settings have been saved, it can be difficult to identify all customizations that exist in the subscriber’s Salesforce environment. The recommended approach is to attempt the package uninstall and review any errors that occur. These errors typically indicate customizations that prevent the uninstall process from completing. Each blocking customization should be backed up and then removed before proceeding.
CPQ buttons for Salesforce Classic UI uninstallation
This package setup depends on links to our components instead of a direct reference, so the only potential failure could happen if Experlogix Buttons Classic is still assigned to users. If this happens, ensure both the Permission Set Assignment removal and the Deleting Experlogix permission sets from custom Permission Set Groups are successfully completed. If the setup was made according to Experlogix guidelines, the buttons will be available after the upgrade without any additional setup.
-
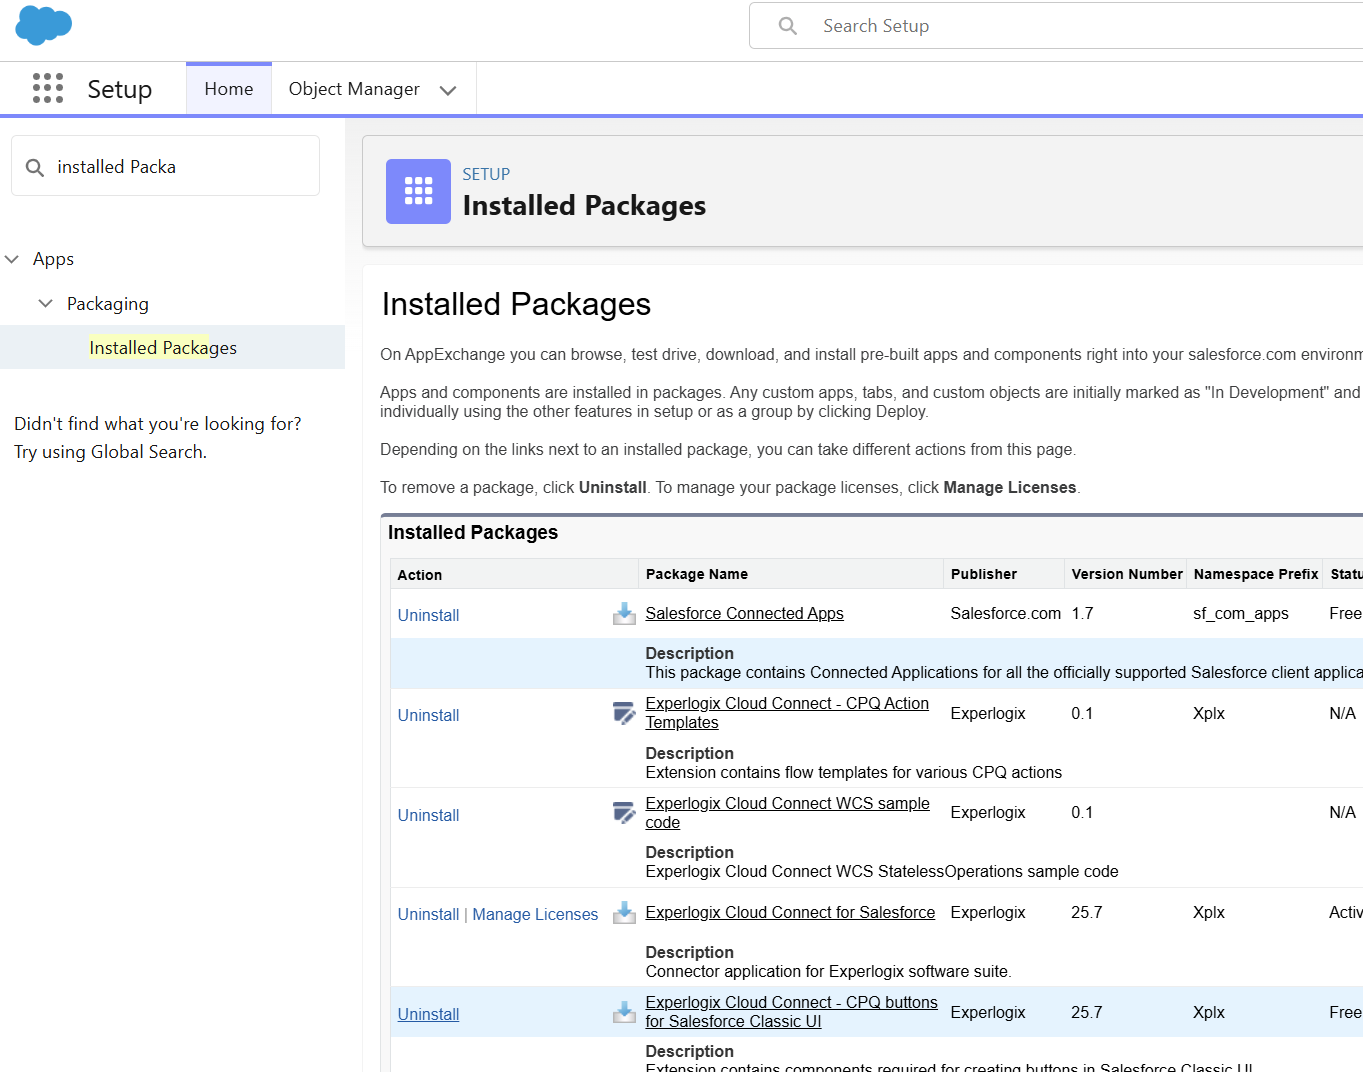
Navigate to Setup > Installed Packages.
-
Select the Uninstall link next to Experlogix Cloud Connect - CPQ buttons for Salesforce Classic UI package.
-
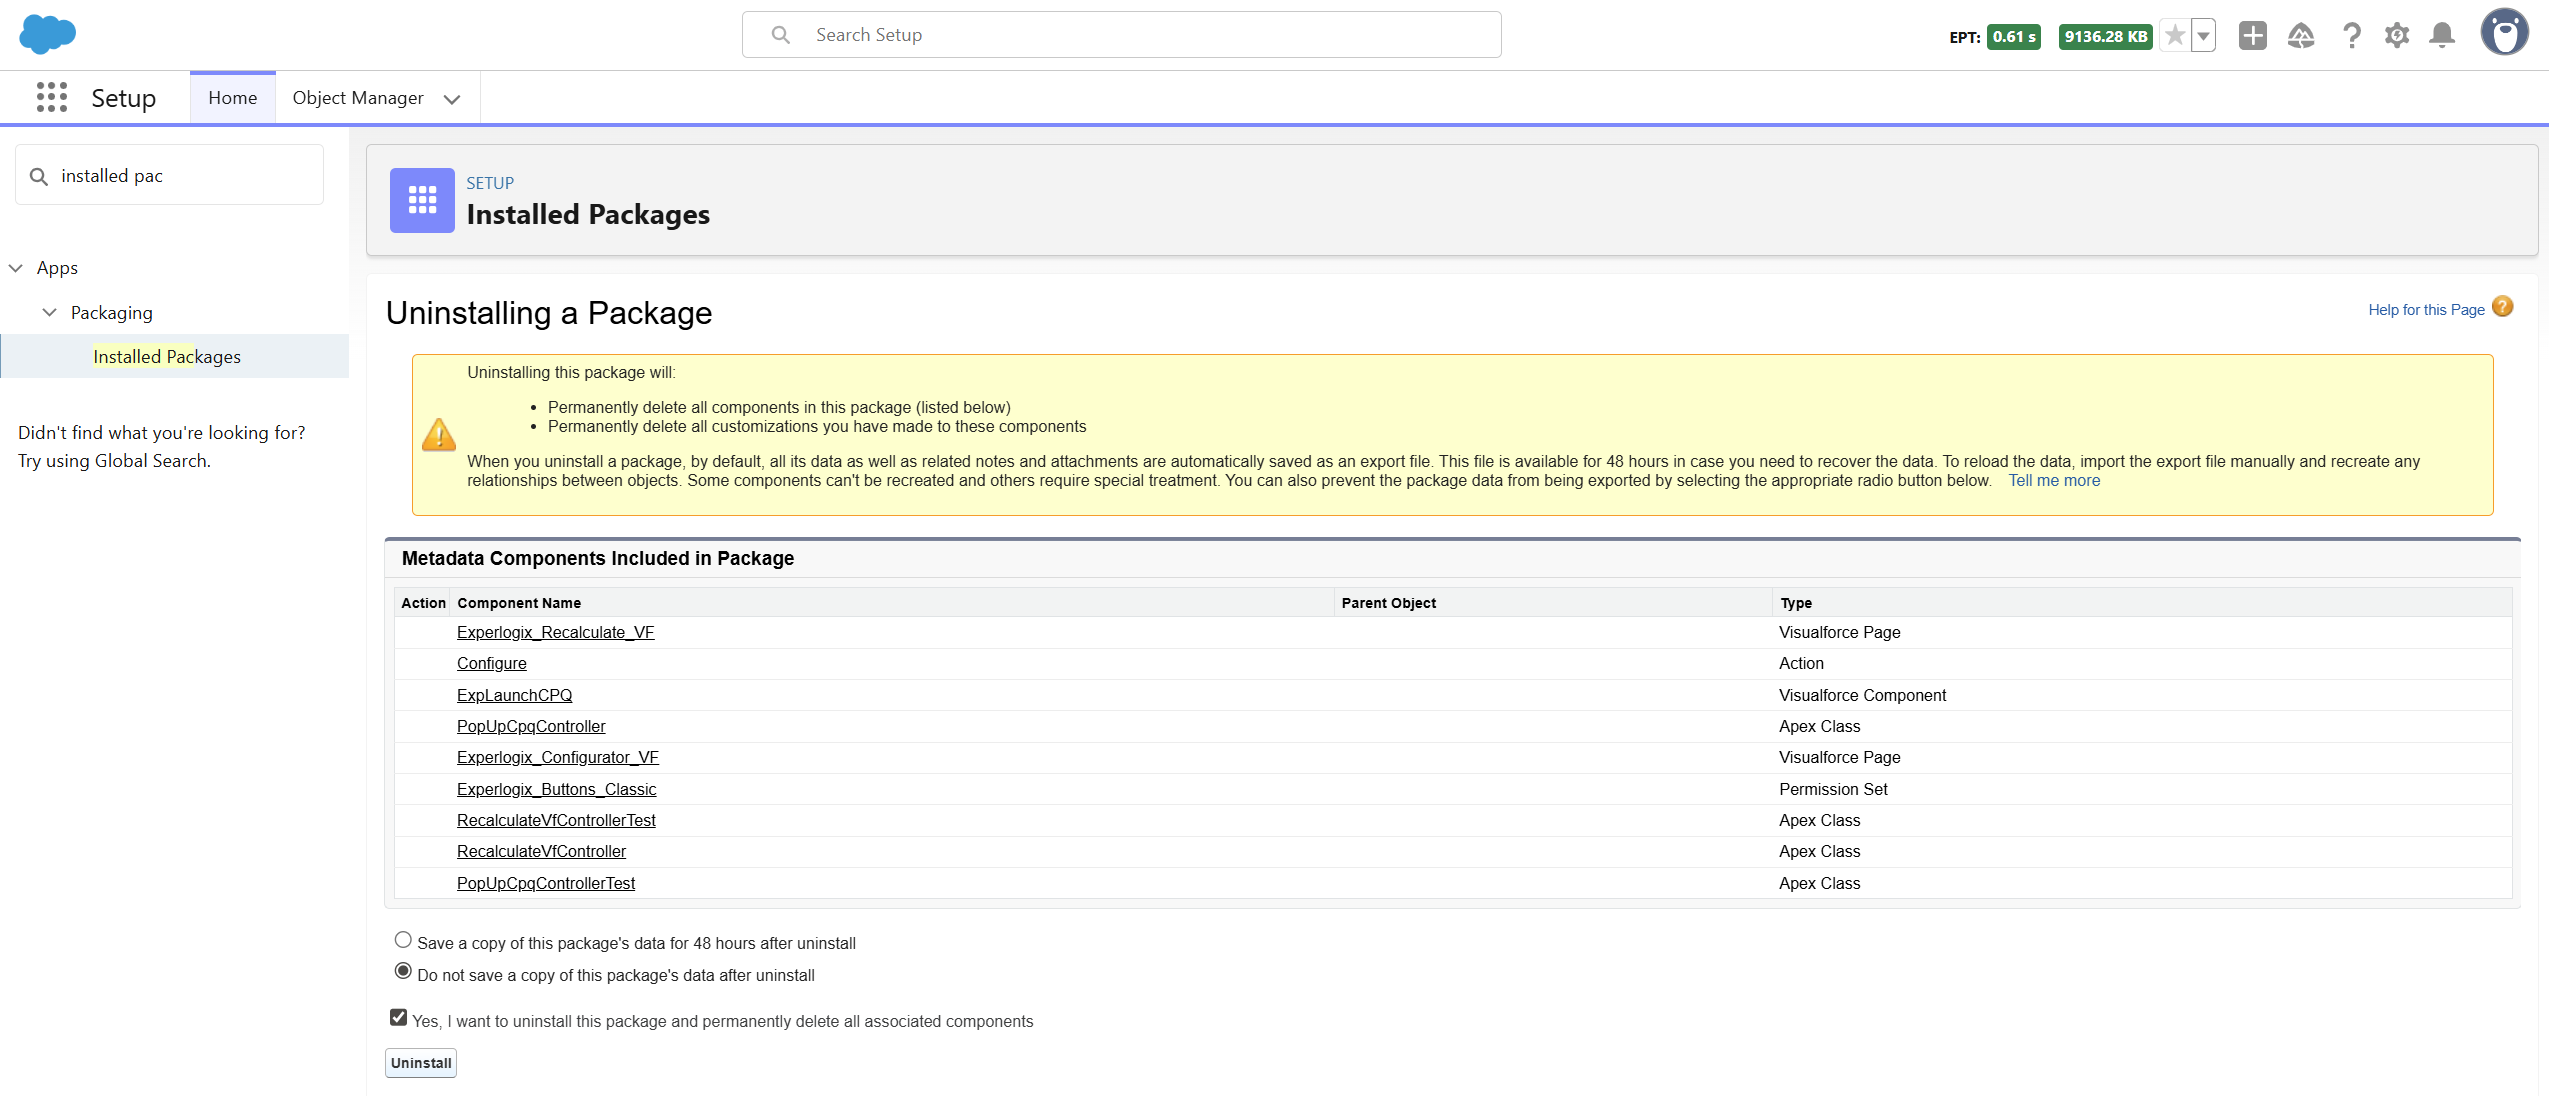
Select the Do not save a copy of this package's data after uninstall.
-
After the dialog displays, select OK.
-
Select Yes, I want to uninstall this package and permanently delete all associated components.
-
Select Uninstall.
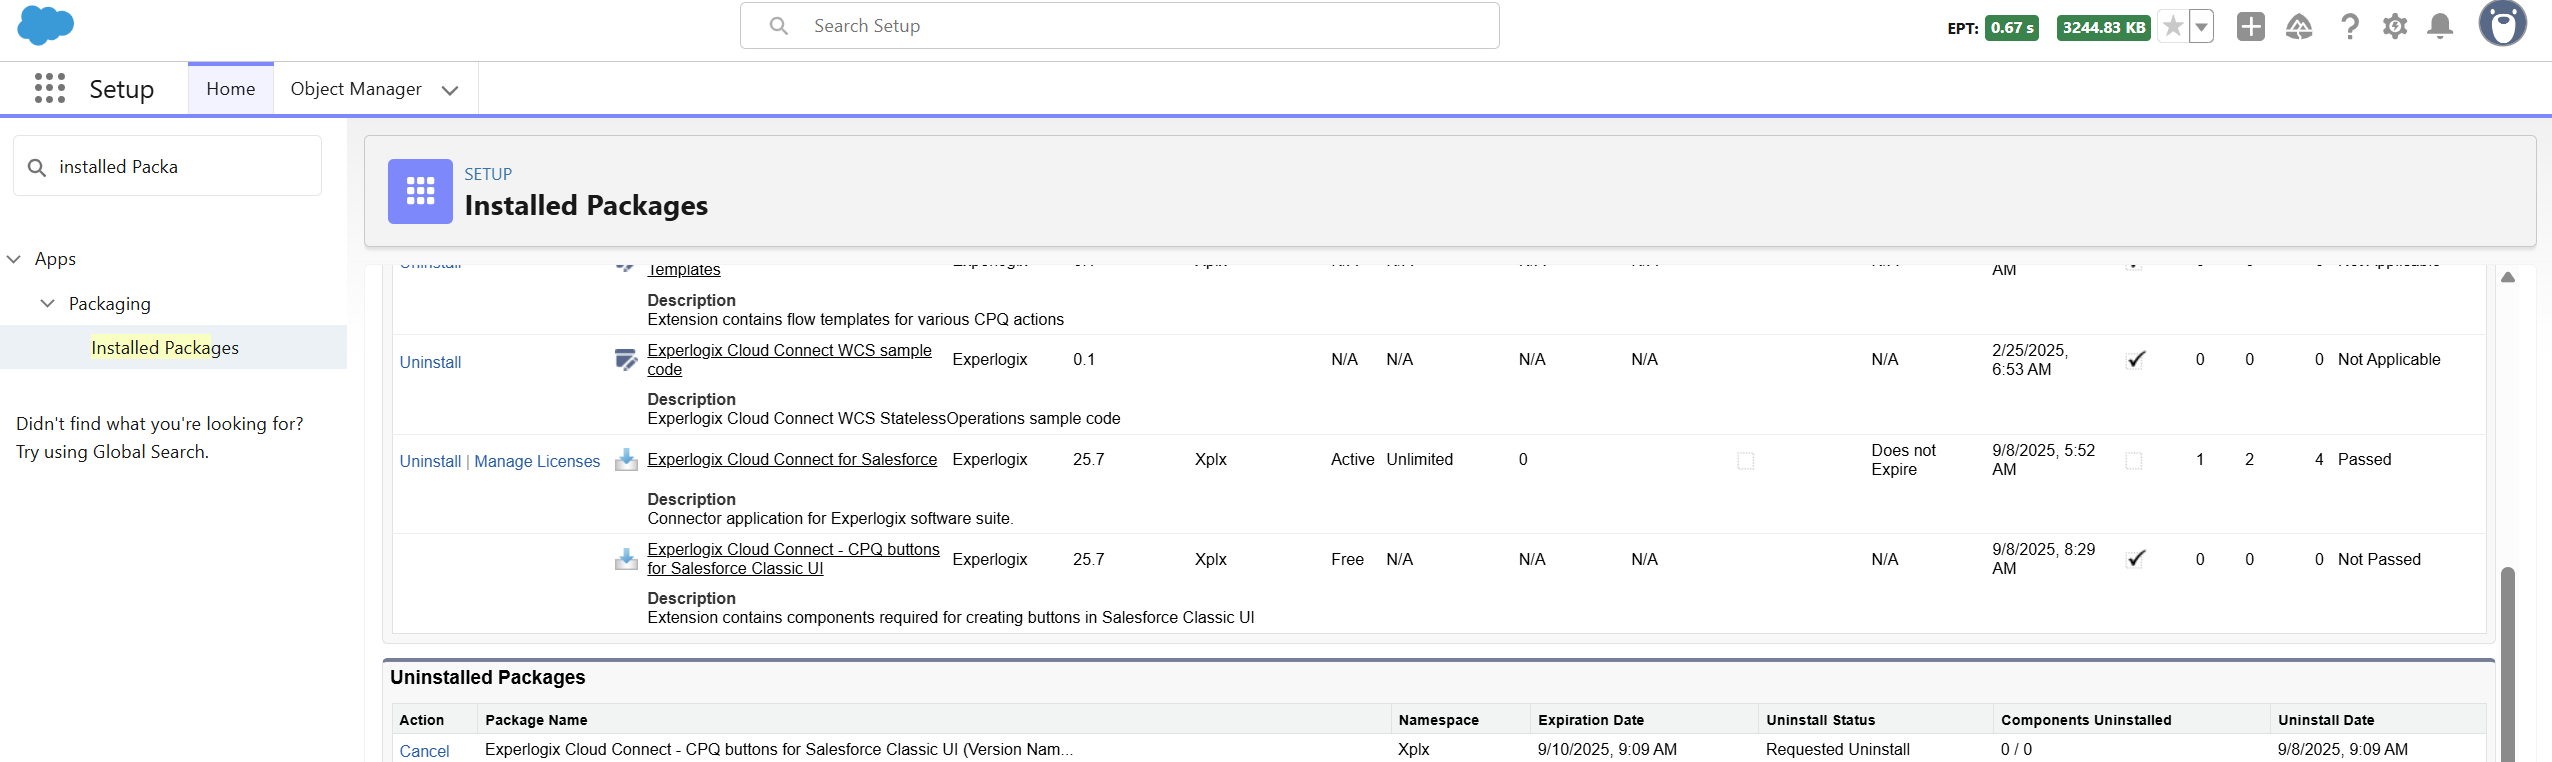
The uninstallation can be monitored in the Setup-Installed Packages.
CPQ Action Templates Uninstallation
Copy Configuration Flow Deactivation
Before uninstallation, flow templates that implement this feature should be verified. If there are new versions, we have to back up the last active version and restore it later.
-
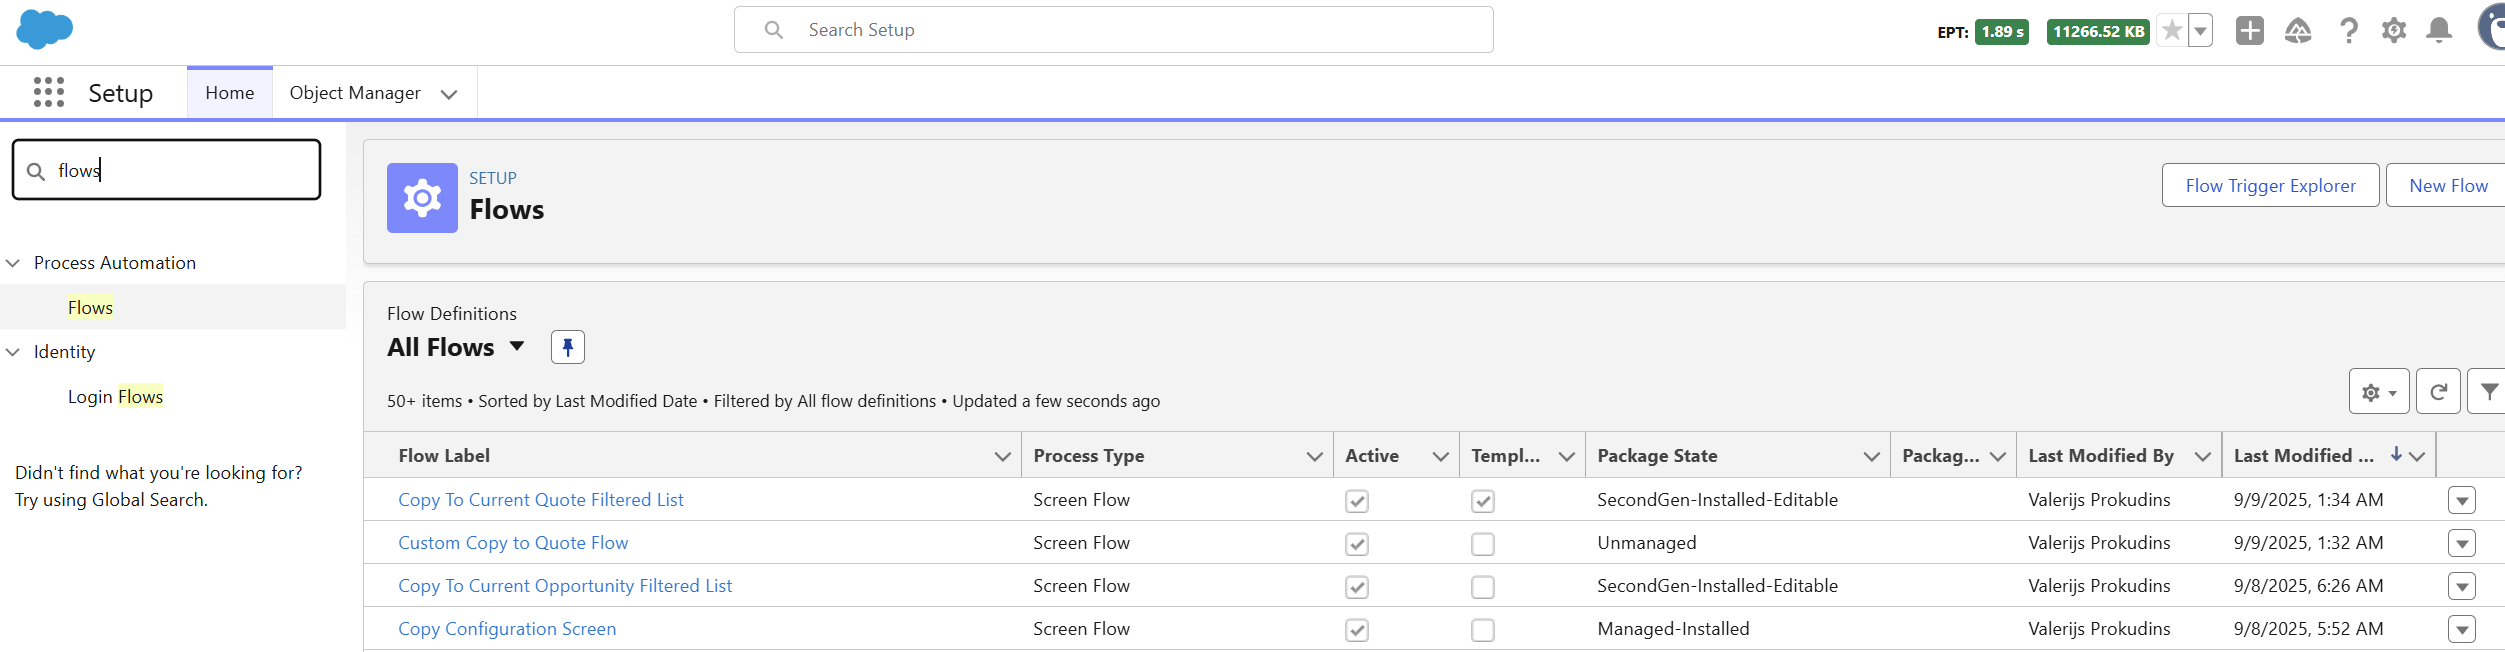
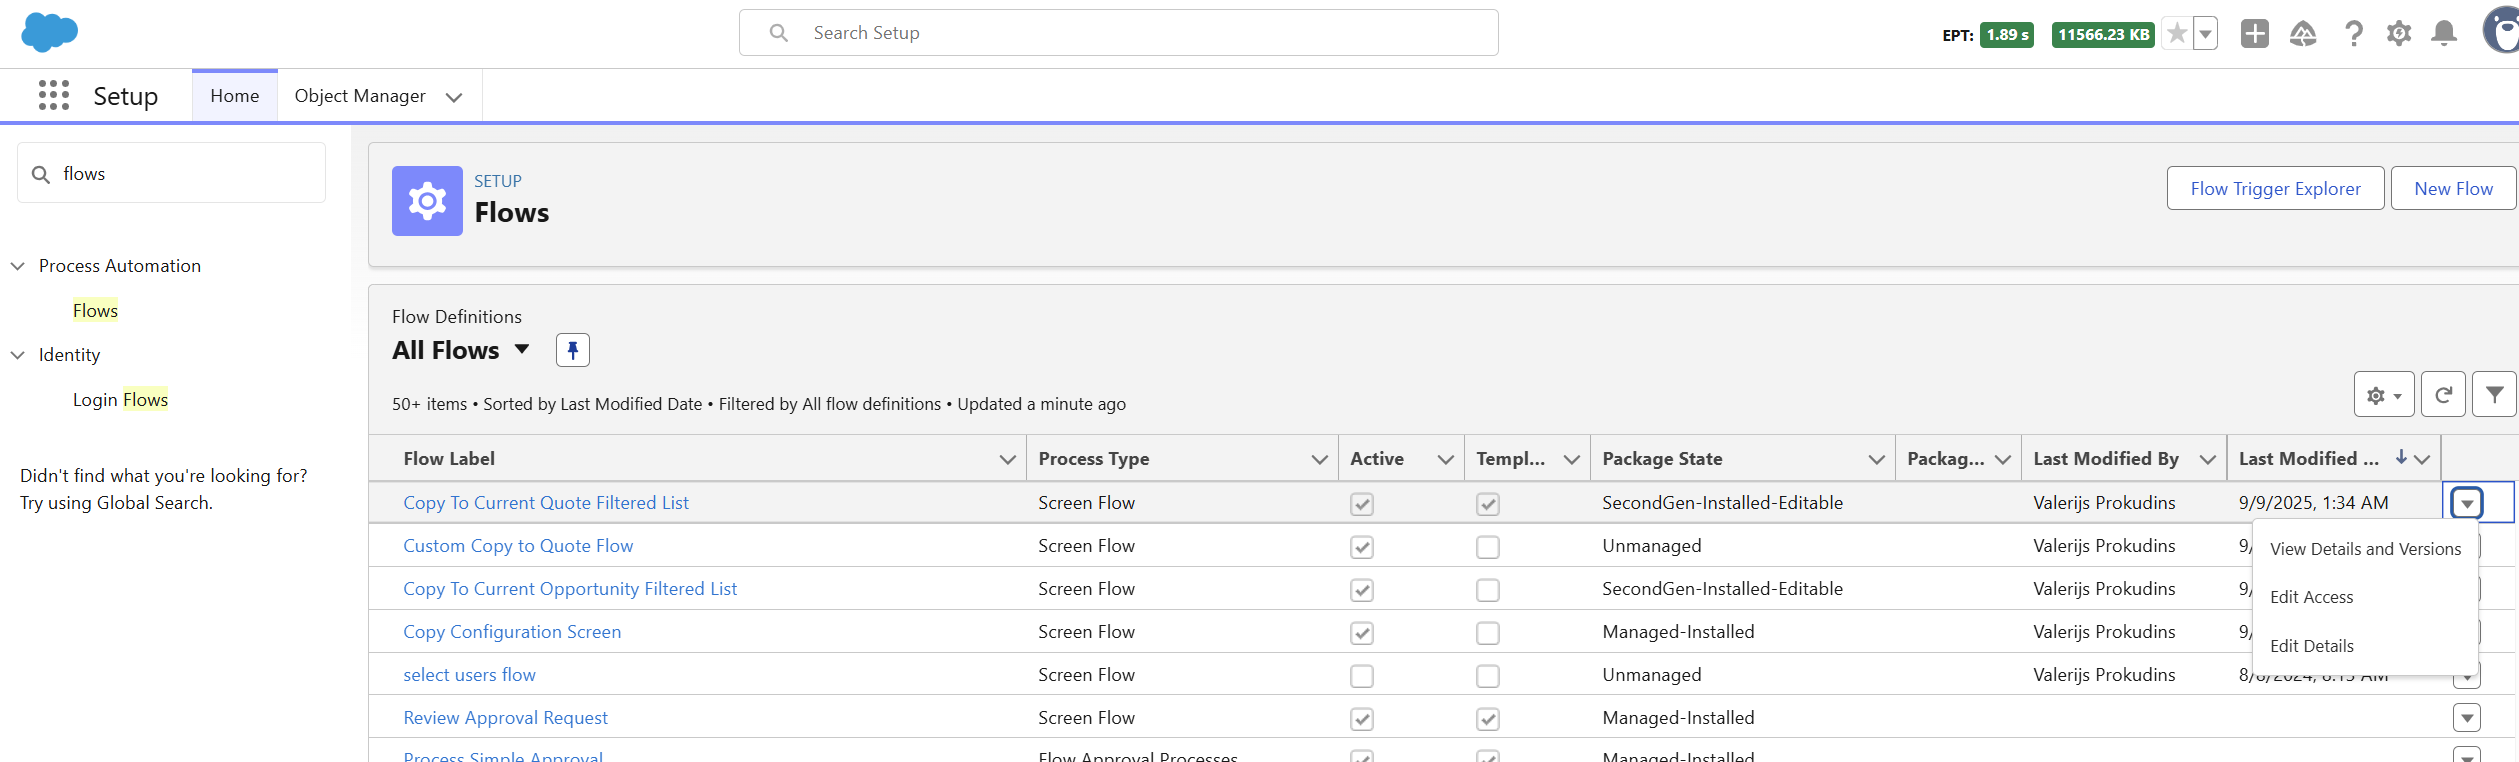
Navigate to Setup > Flows.
-
Locate Copy To Current Quote Filtered List and Copy To Current Opportunity Filtered List.
-
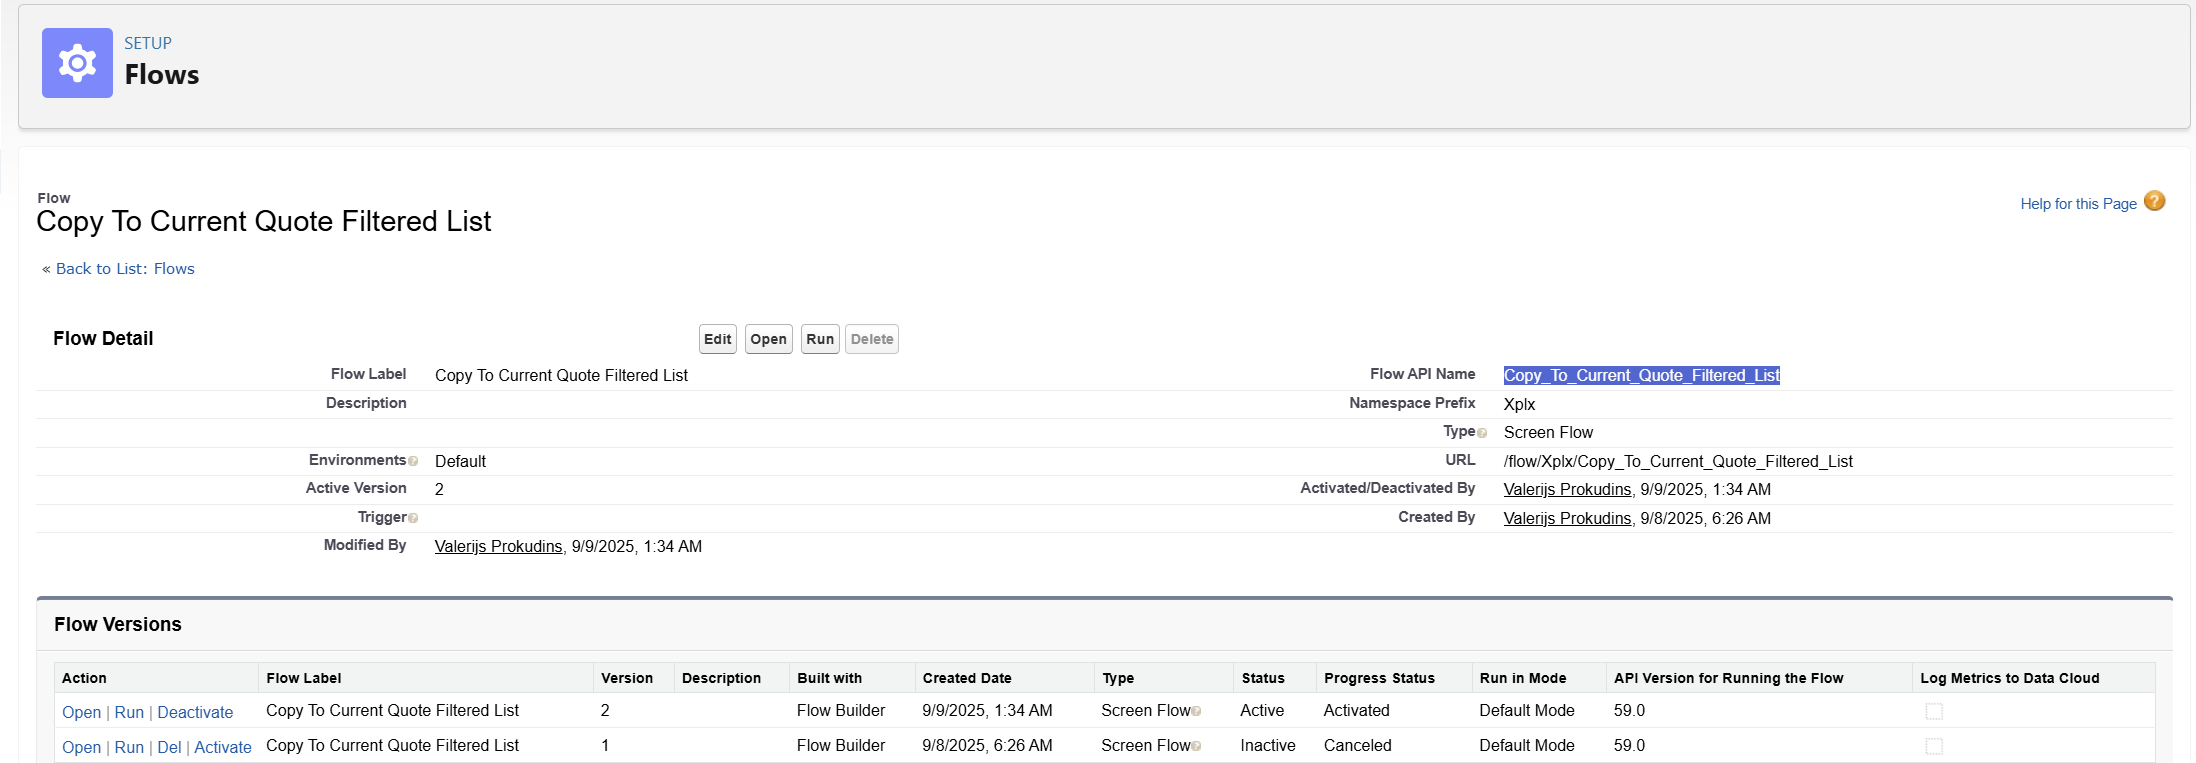
In the far right, select the drop-down icon and select View Details and Versions.
-
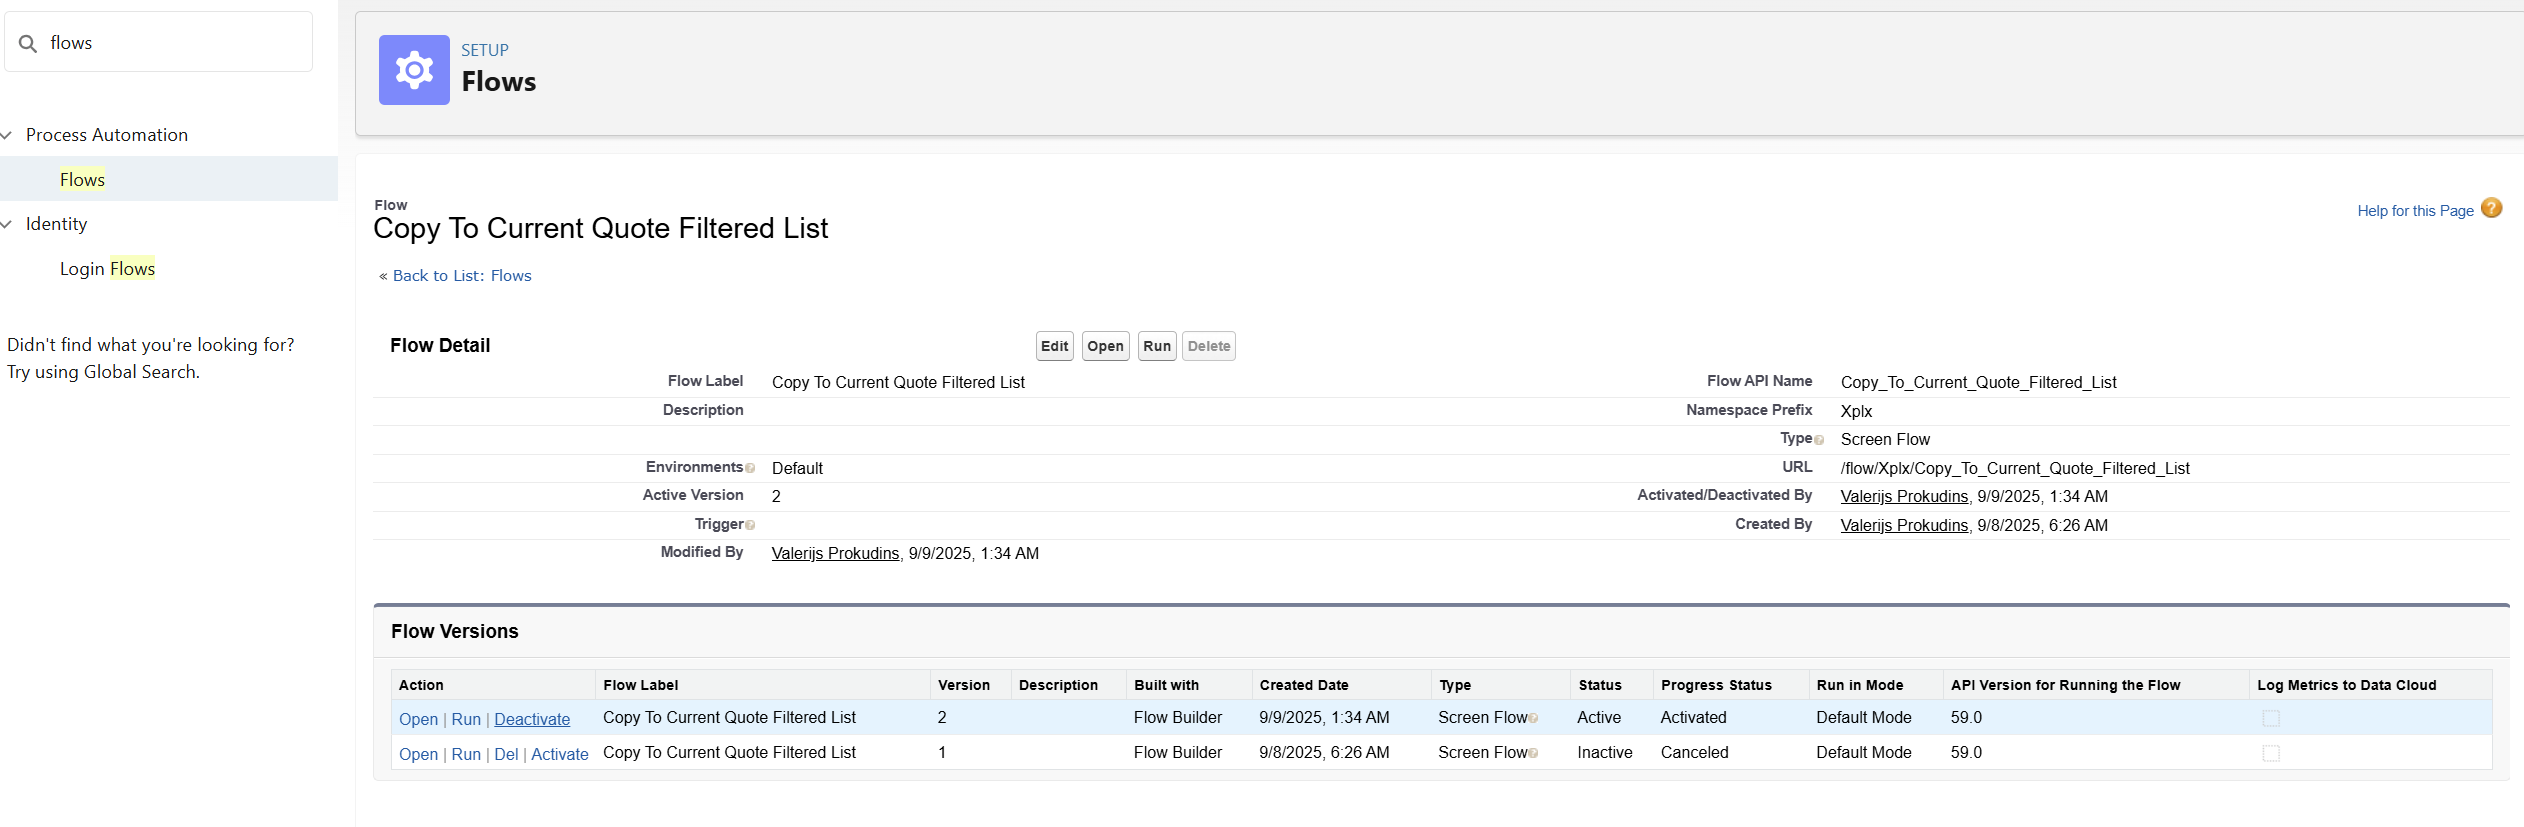
If the active version is not 1, make a note, that a deployment of the copy flow templates backup will be required.
-
Deactivate the active version.
-
Repeat the process for Copy To Current Opportunity Filtered List.
-
If the active version is not 1, make a note, that a deployment of the copy flow templates backup will be required.
-
Deactivate the active version.
Customer modified Copy Configuration Flow Template metadata backup
In this section, the Workbench is used to retrieve Flow metadata.
-
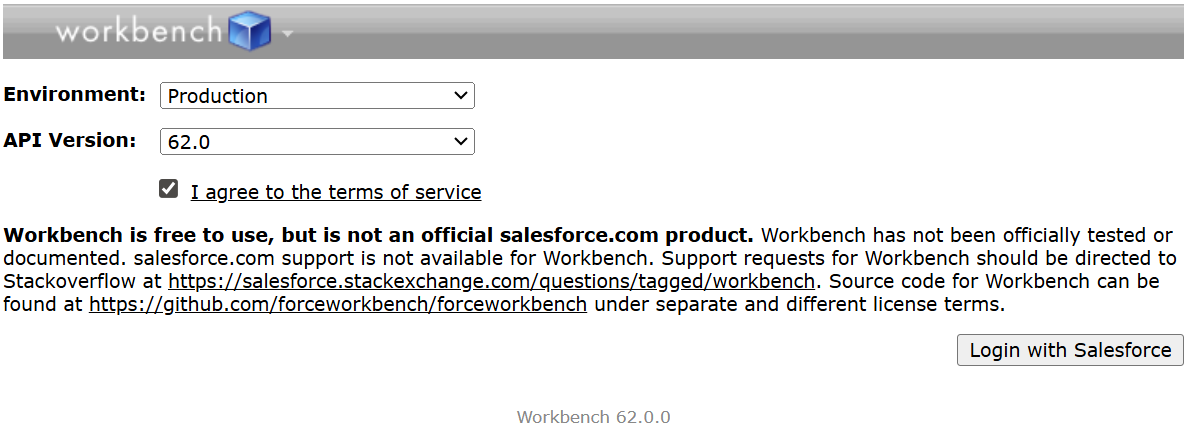
Navigate to https://workbench.developerforce.com/
-
Select the Environment type.
-
Select Login with Salesforce.
-
Select Migration > Retrieve.

-
Use attached file or create the retrieve-copy-flows-package.xml and use it in the workbench.
<?xml version="1.0" encoding="UTF-8"?> <Package xmlns="http://soap.sforce.com/2006/04/metadata"> <types> <members>Xplx__Copy_To_Current_Opportunity_Filtered_List</members> <members>Xplx__Copy_To_Current_Quote_Filtered_List</members> <name>Flow</name> </types> <types> <members>Xplx__Copy_To_Current_Opportunity_Filtered_List</members> <members>Xplx__Copy_To_Current_Quote_Filtered_List</members> <name>FlowDefinition</name> </types> <version>62.0</version> </Package> -
Select Next.
-
Select Retrieve.
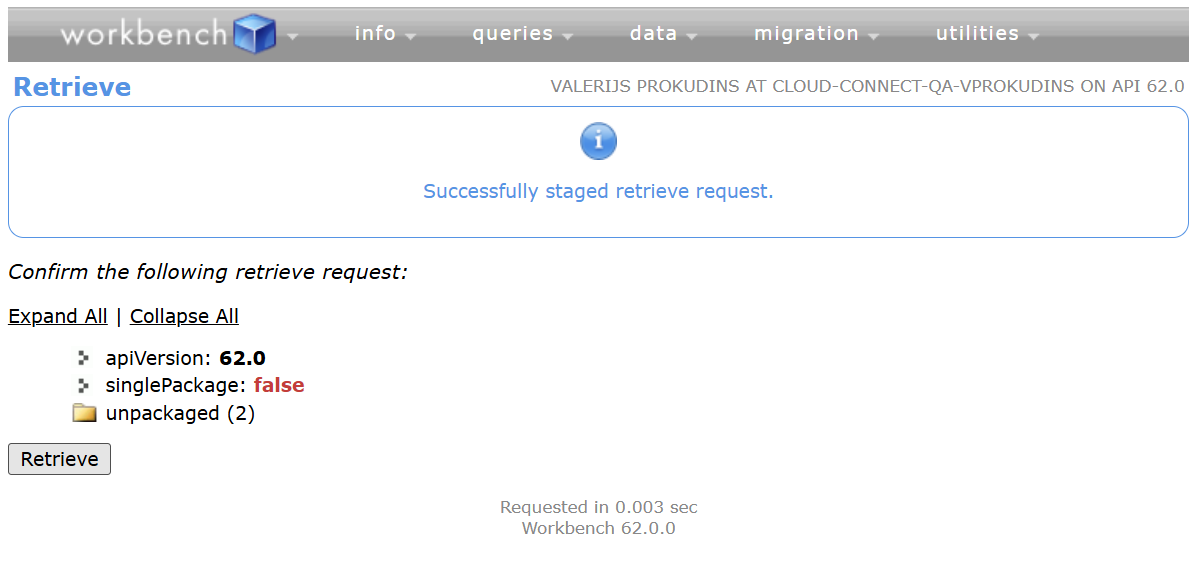
-
The retrieve request will run for some time, after which the results have to be downloaded using the Download ZIP File button.
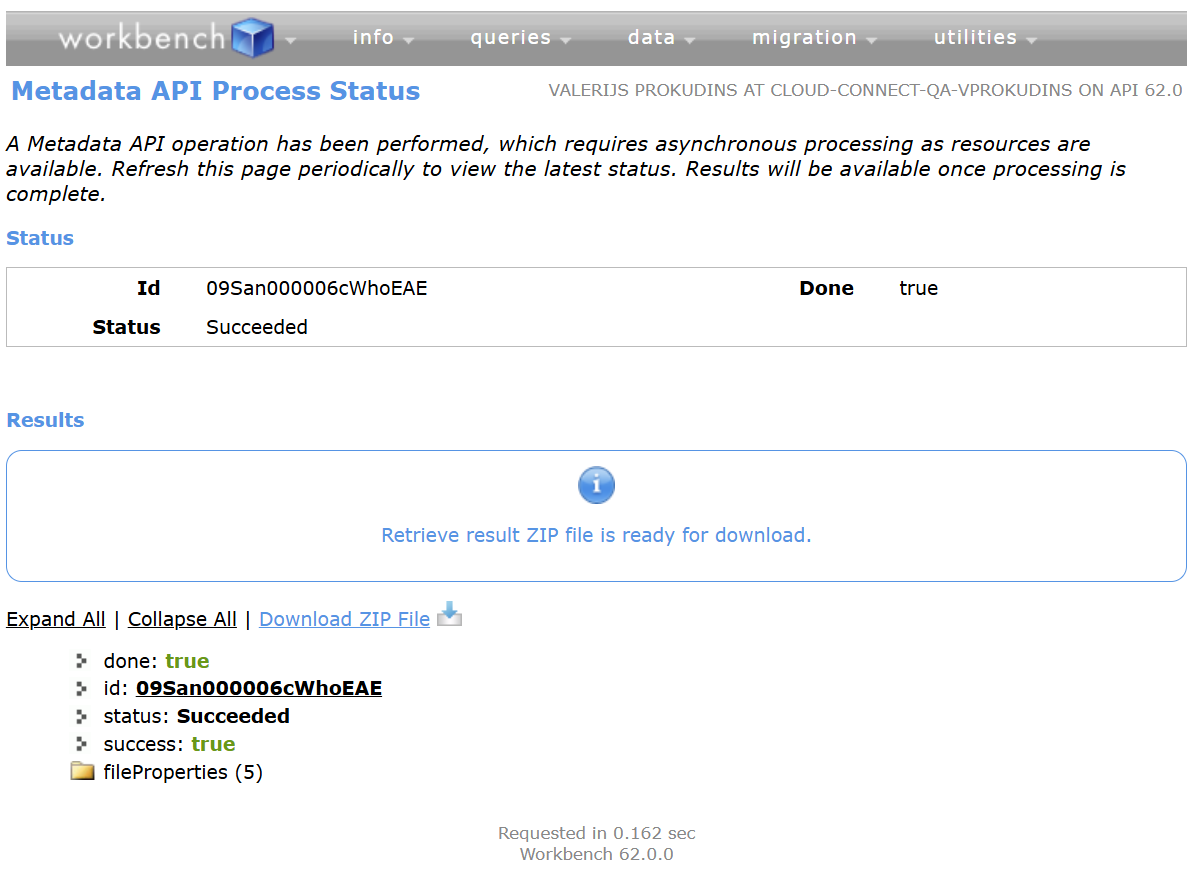
-
Name the file CopyConfigurationFlowTemplateBackup.zip.
Package uninstallation
In this step the package uninstallation will be initiated.
-
Navigate to Setup > Installed Packages.
-
Select Uninstall link next to Experlogix Cloud Connect - CPQ Action Templates package.
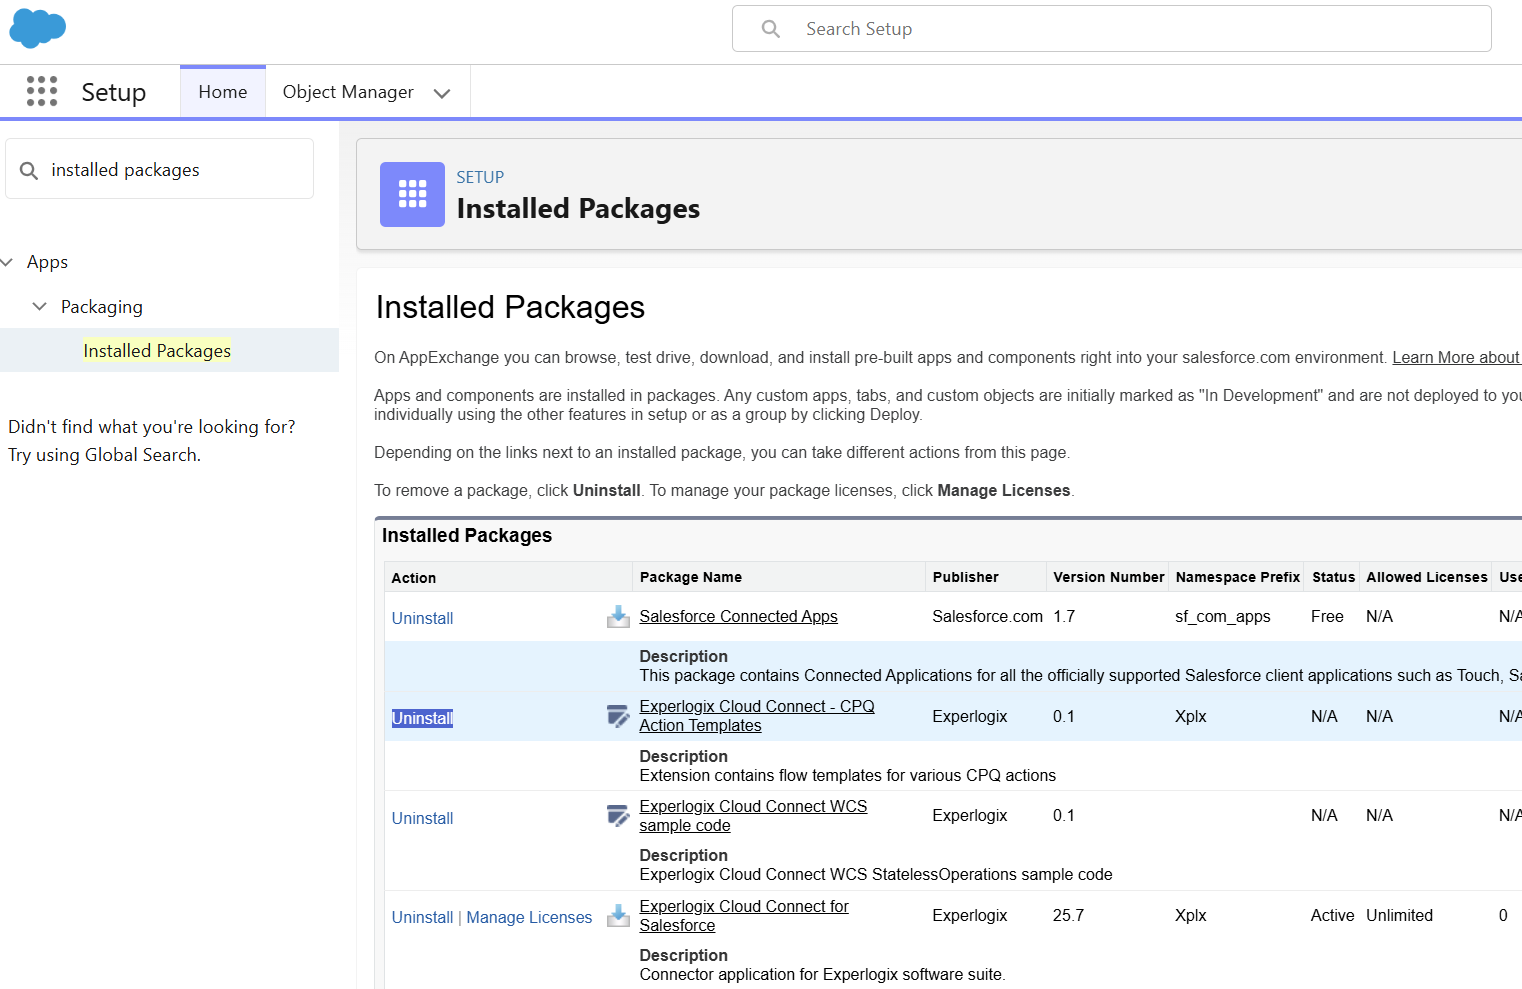
-
Select Do not save a copy of this package's data after uninstall. After dialog displays, select OK.
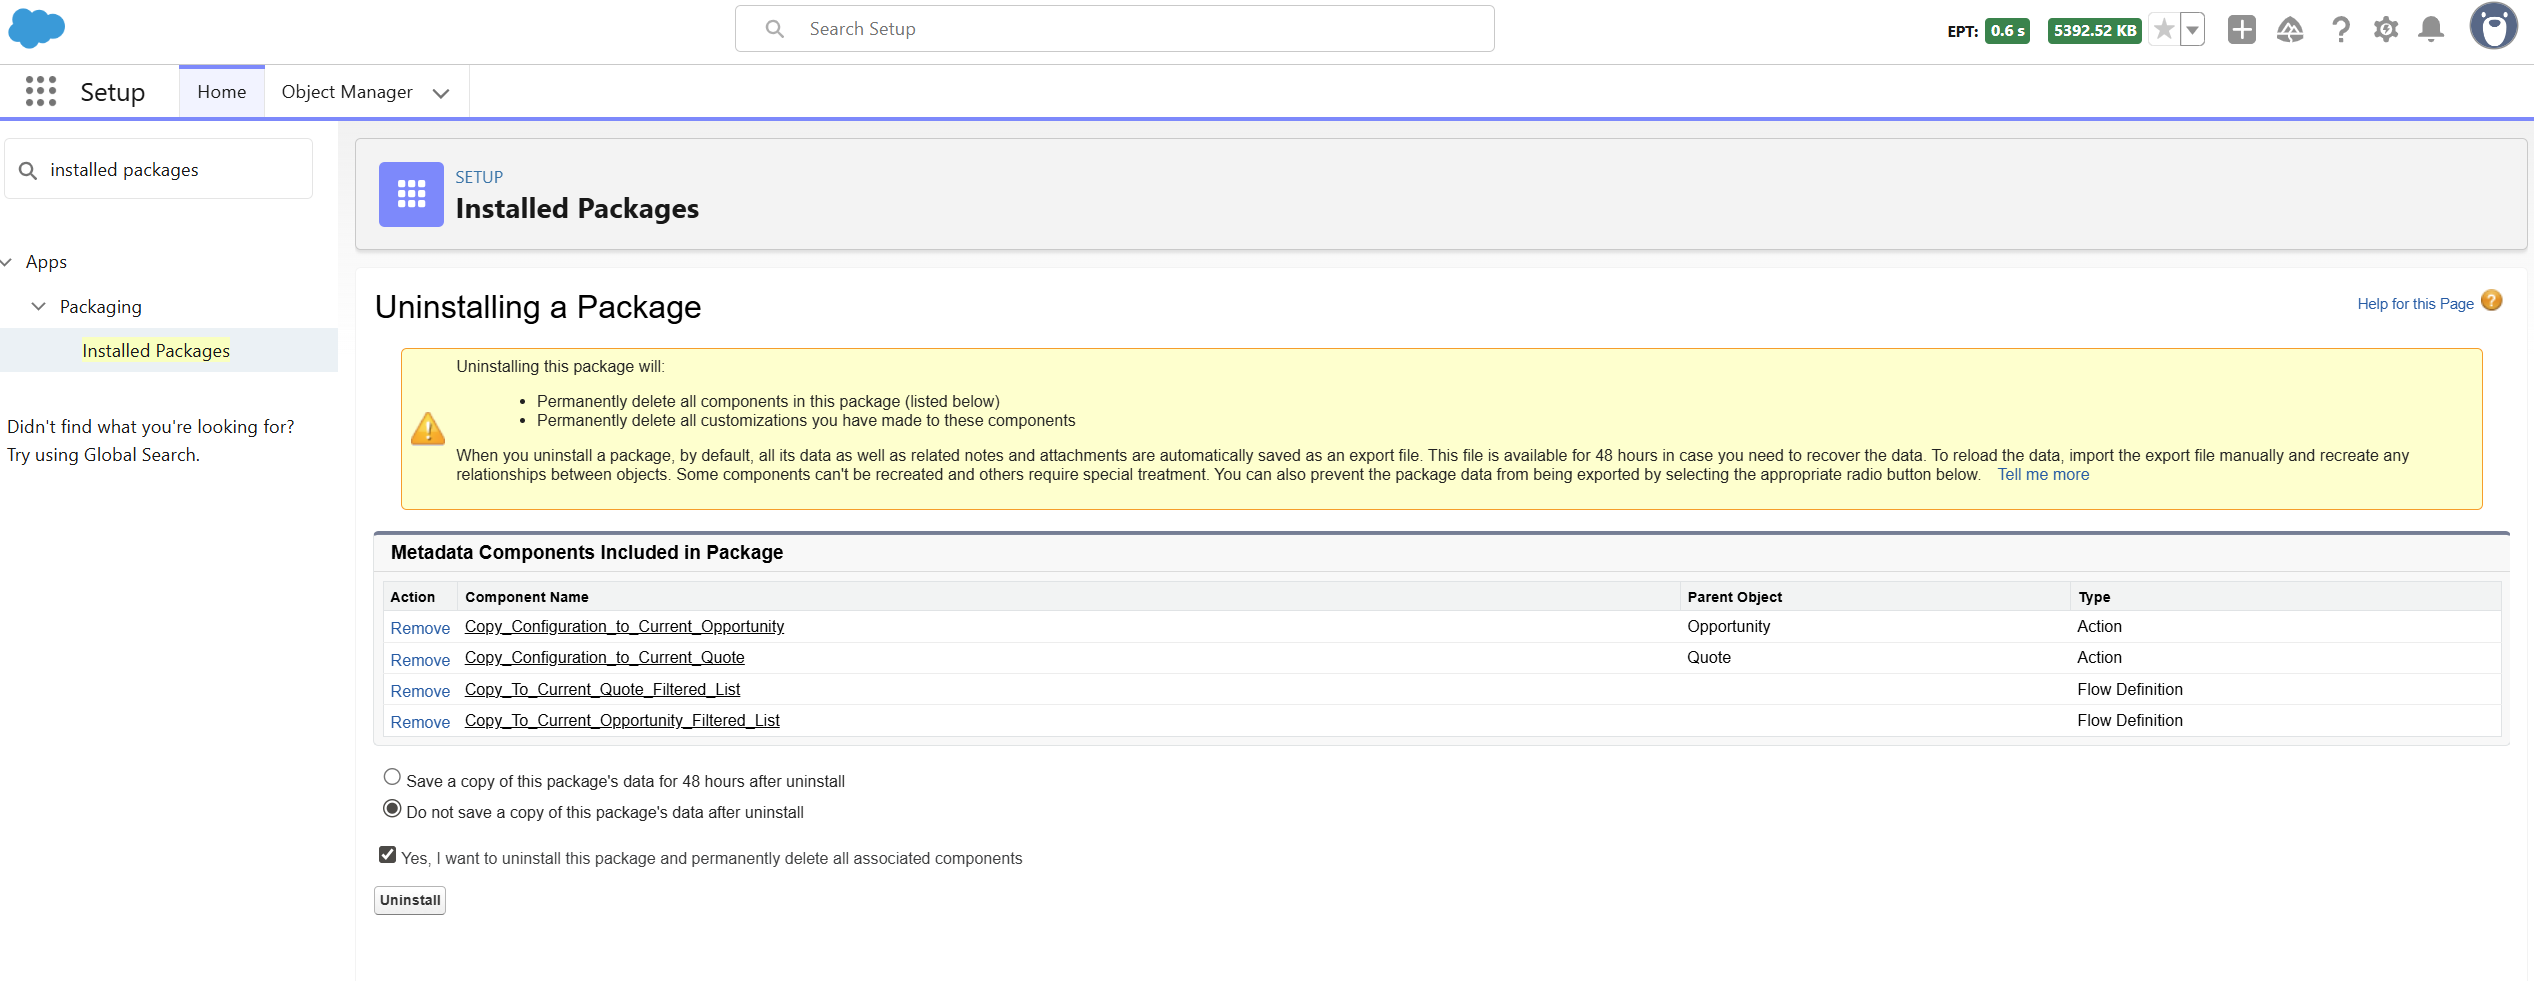
-
Select Yes, I want to uninstall this package and permanently delete all associated components.
-
Select Uninstall.
The uninstallation can be monitored in the Setup-Installed Packages.
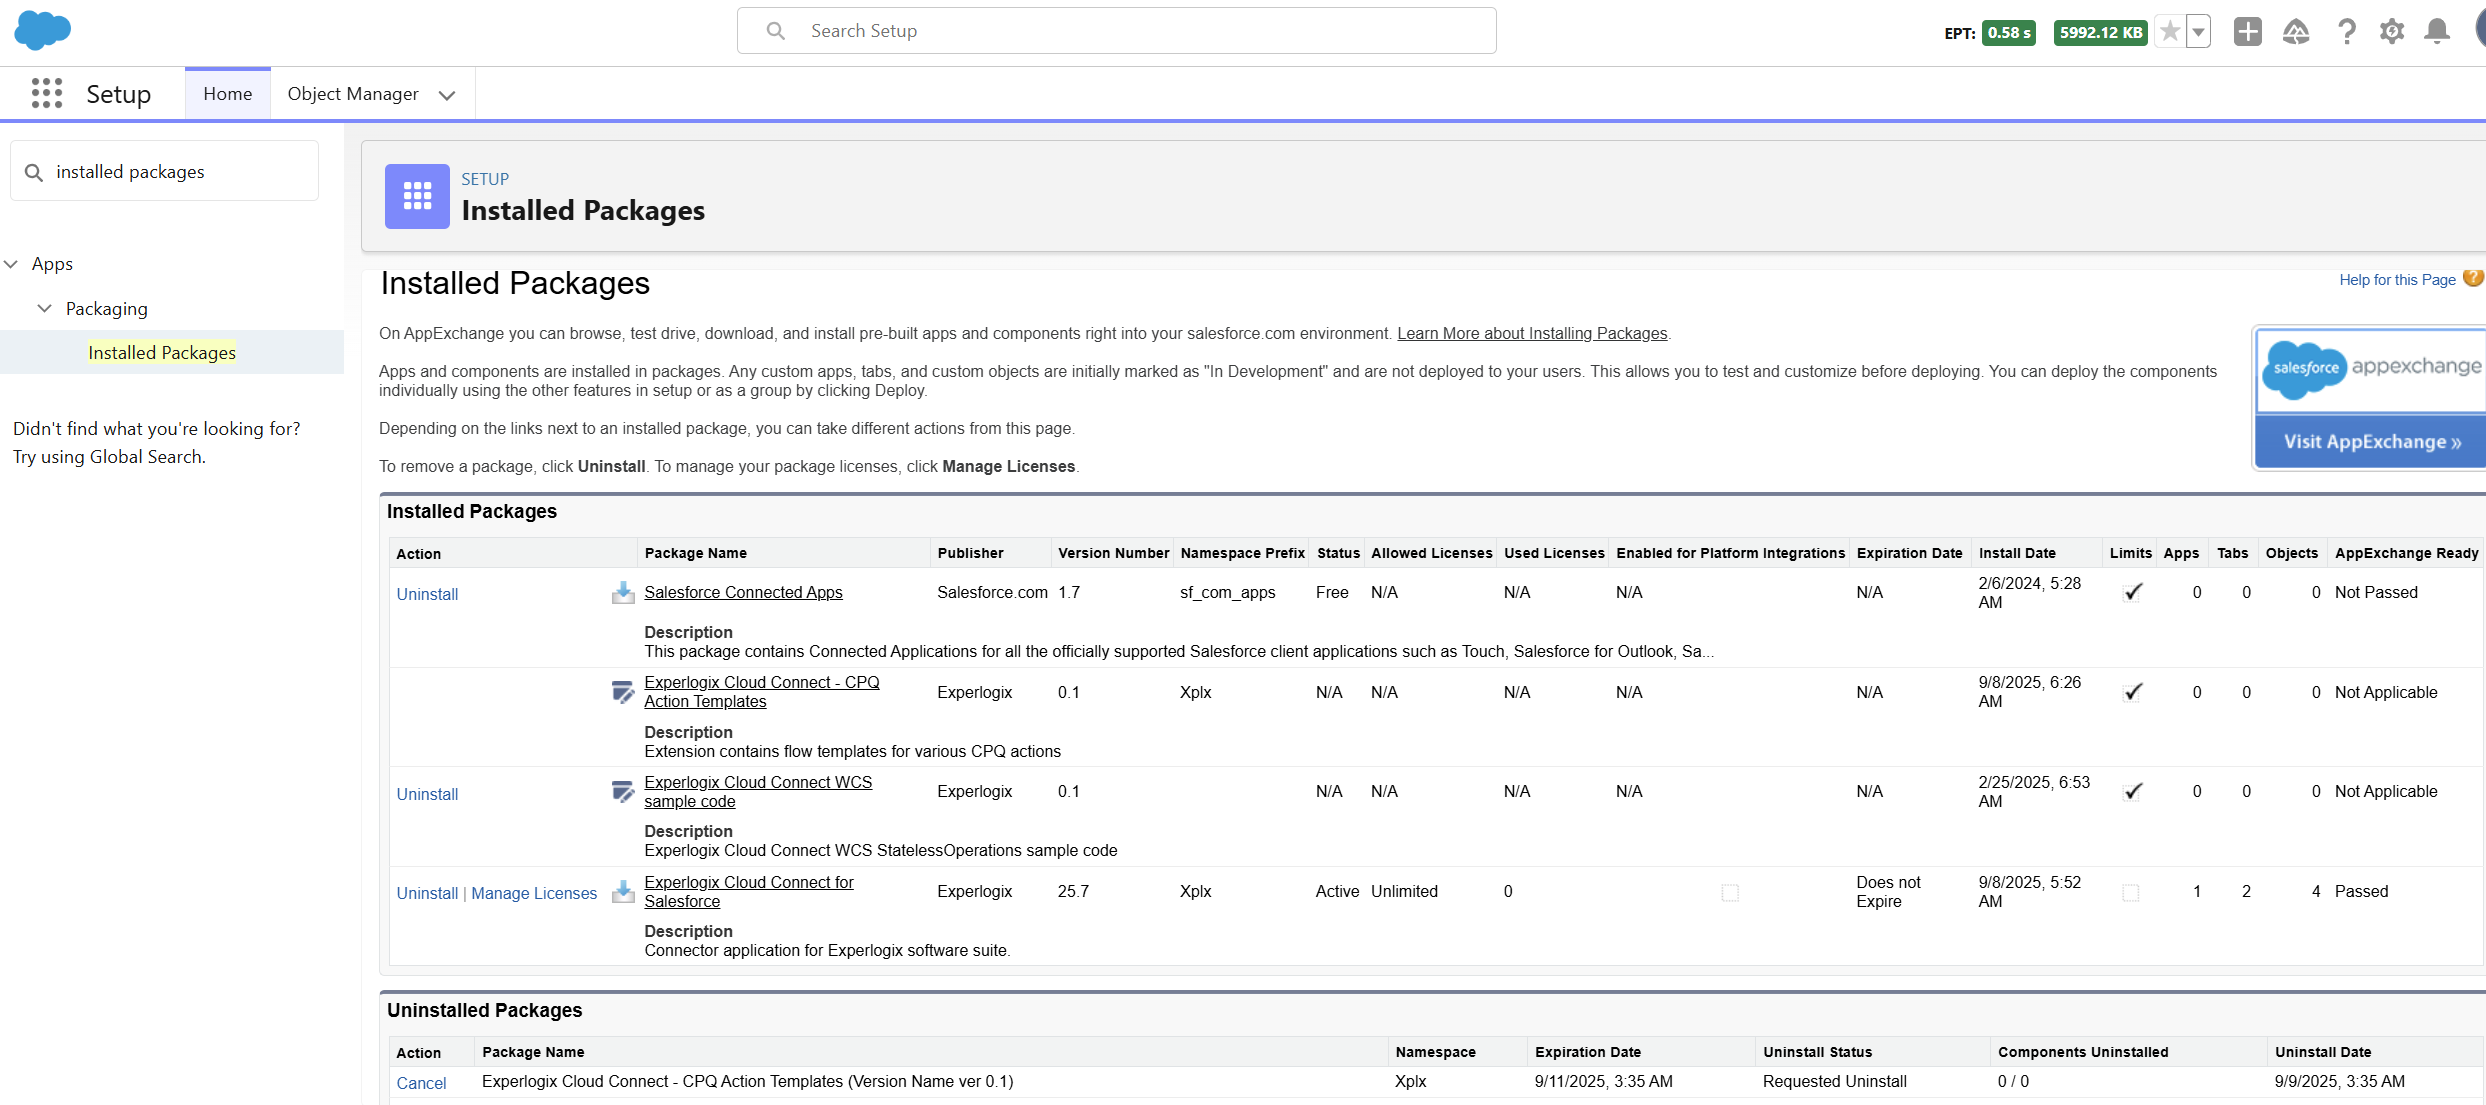
Experlogix Cloud Connect for Salesforce
During the initial uninstall attempt, the process will cancel just before starting. This is expected behavior and helps identify any customizations or dependencies that must be addressed before a successful uninstall. The following types of errors may occur:
-
Lightning Web Component (LWC) references: These components are typically used as Quick Actions (buttons) to run CPQ, Copy, or Recalculate features. Each referenced component should be backed up before removal.
-
CopyConfig flow references: This may occur if the customer has cloned one of the Copy Configuration templates, resulting in a custom flow that references Experlogix components. These custom flows should be backed up and restored after reinstallation.
-
Active CopyConfig flows: This error can occur if a prior step was missed and the CopyConfig flow remains active. Ensure all relevant flows are deactivated before proceeding.
-
Permission set-related errors: If permission set-related errors appear, confirm that all permission set assignments have been removed and that the corresponding Permission Sets have been removed from any Permission Set Groups. See Permission Set Assignment removal and Deleting Experlogix permission sets from custom Permission Set Groups for more information.
Initial Uninstallation Run
In this step, an uninstallation process of the main package is initiated for the first time. Multiple errors are expected.
-
Navigate to Setup > Installed Packages.
-
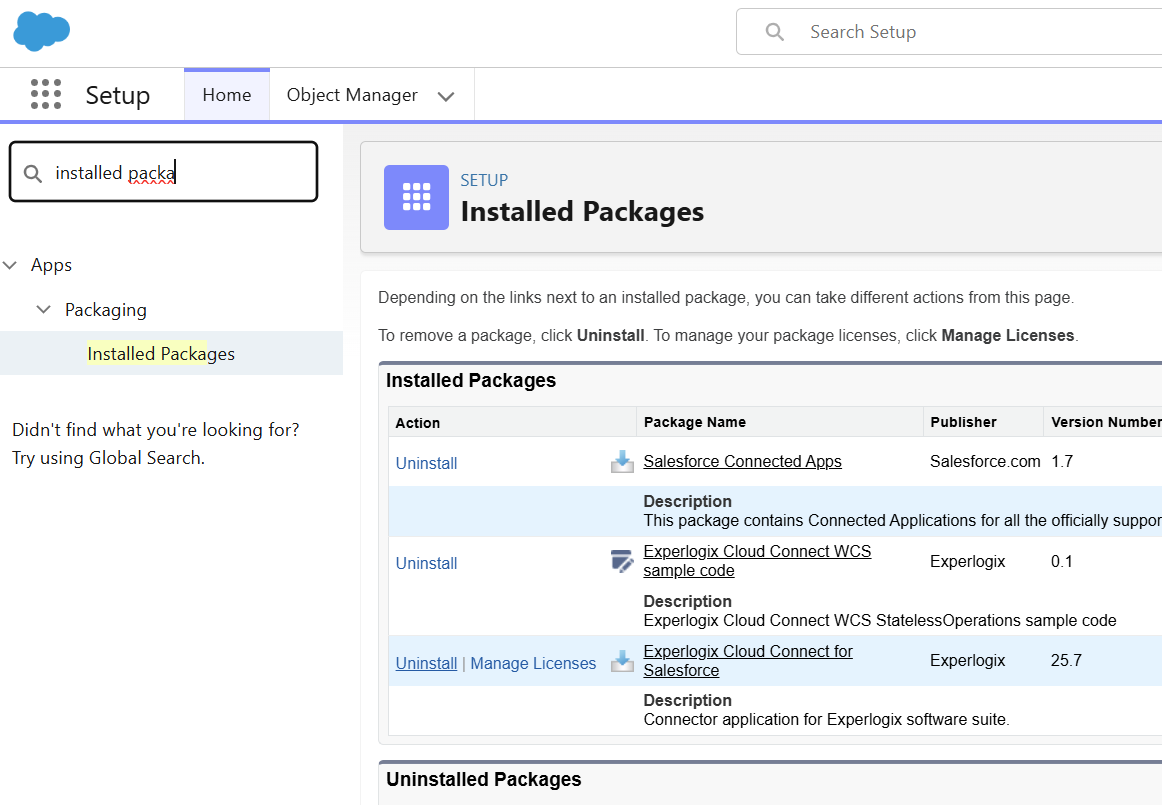
Select Uninstall link next to Experlogix Cloud Connect for Salesforce package.
-
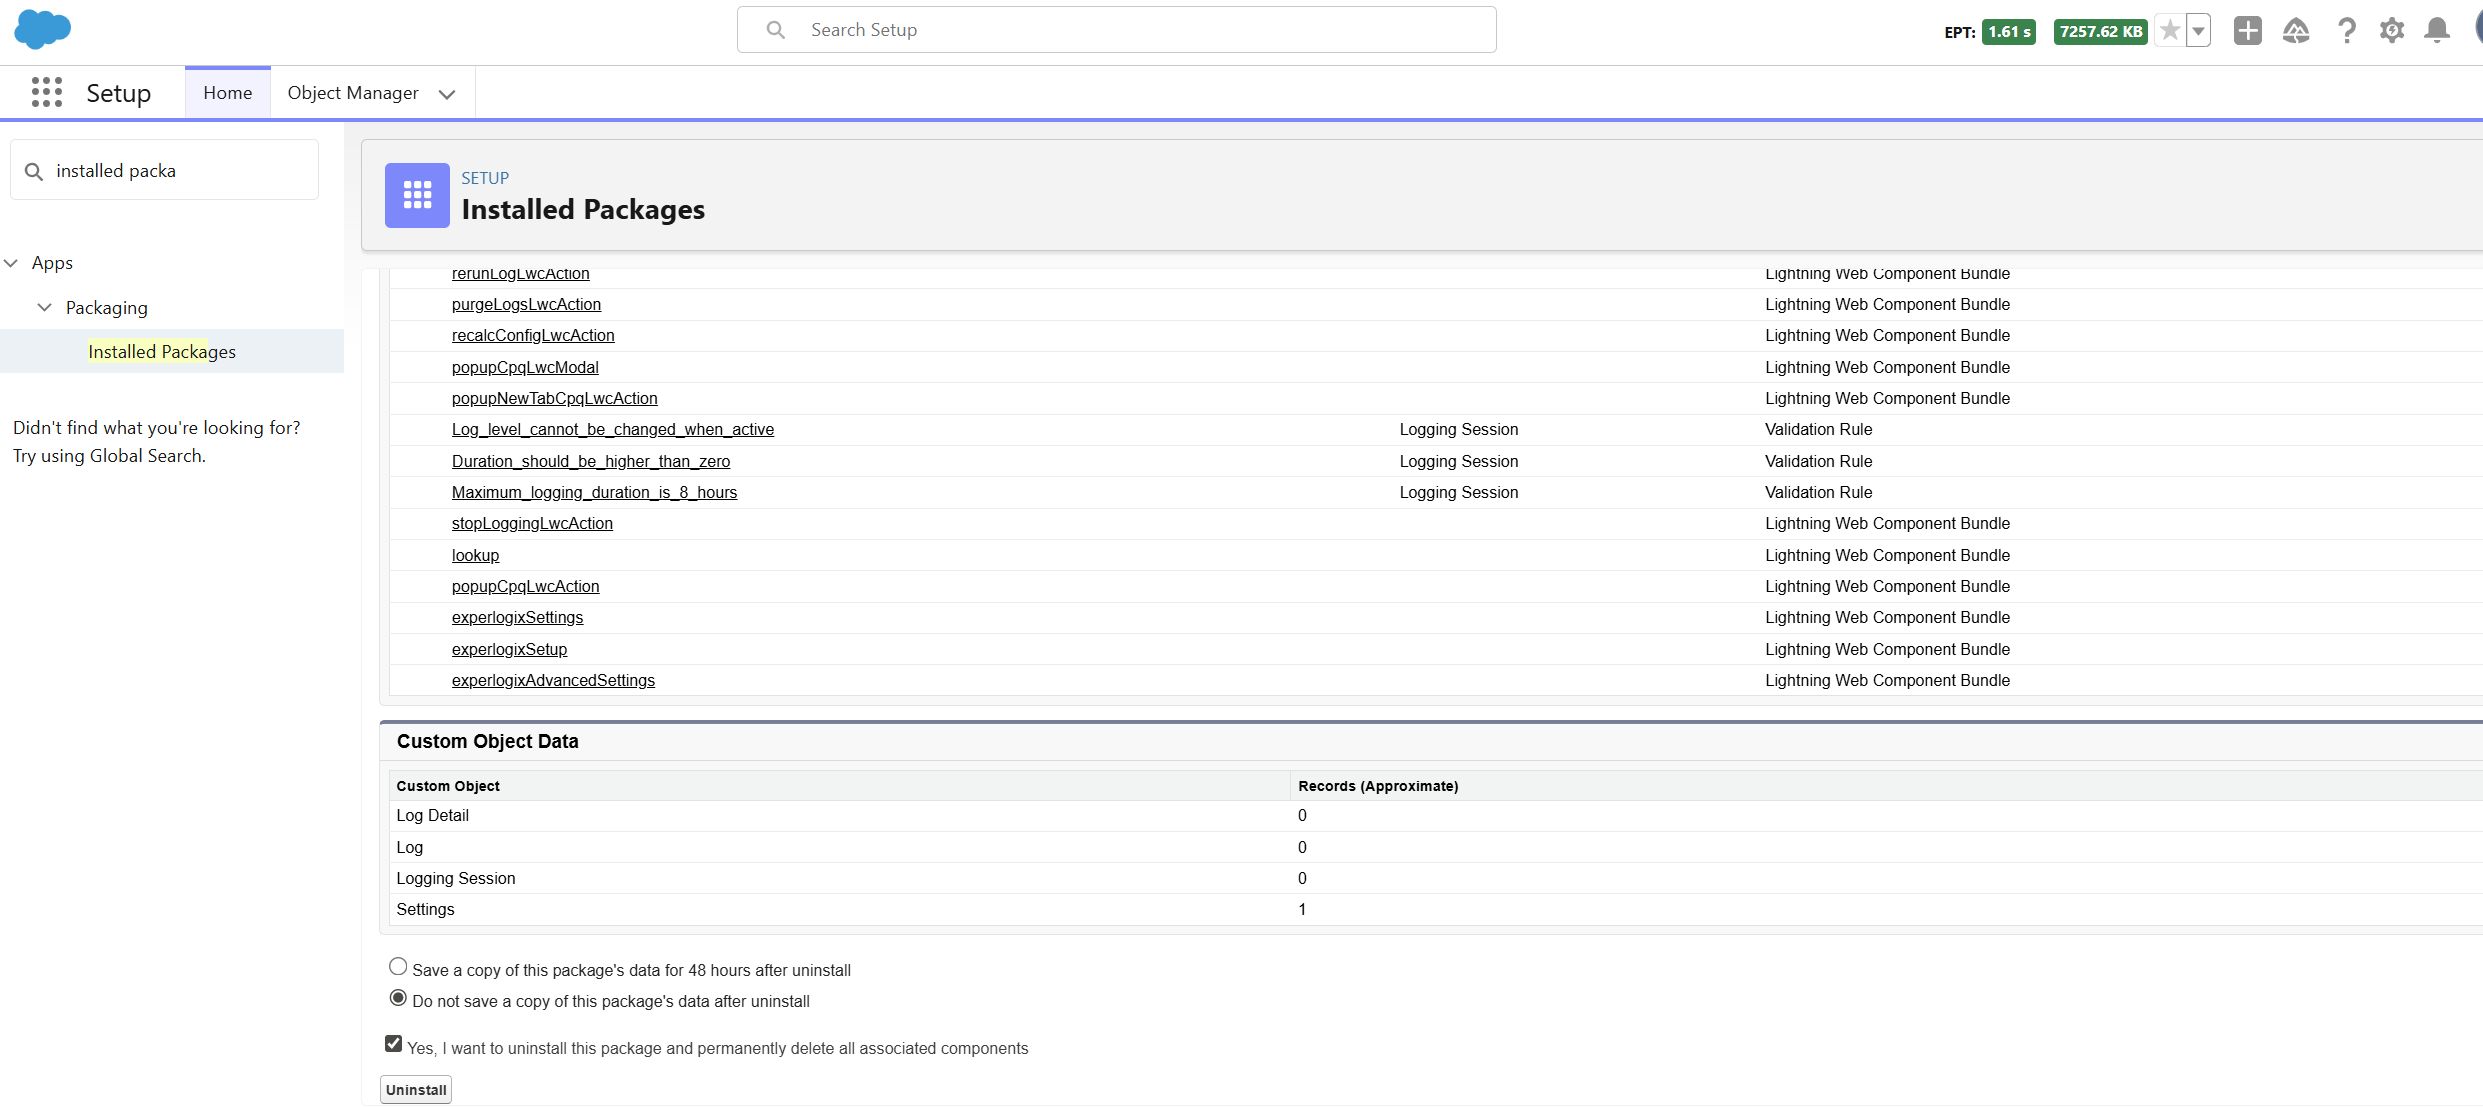
Select Do not save a copy of this package's data after uninstall. After dialog displays, select OK.
-
Check Yes, I want to uninstall this package and permanently delete all associated components.
-
Select Uninstall.
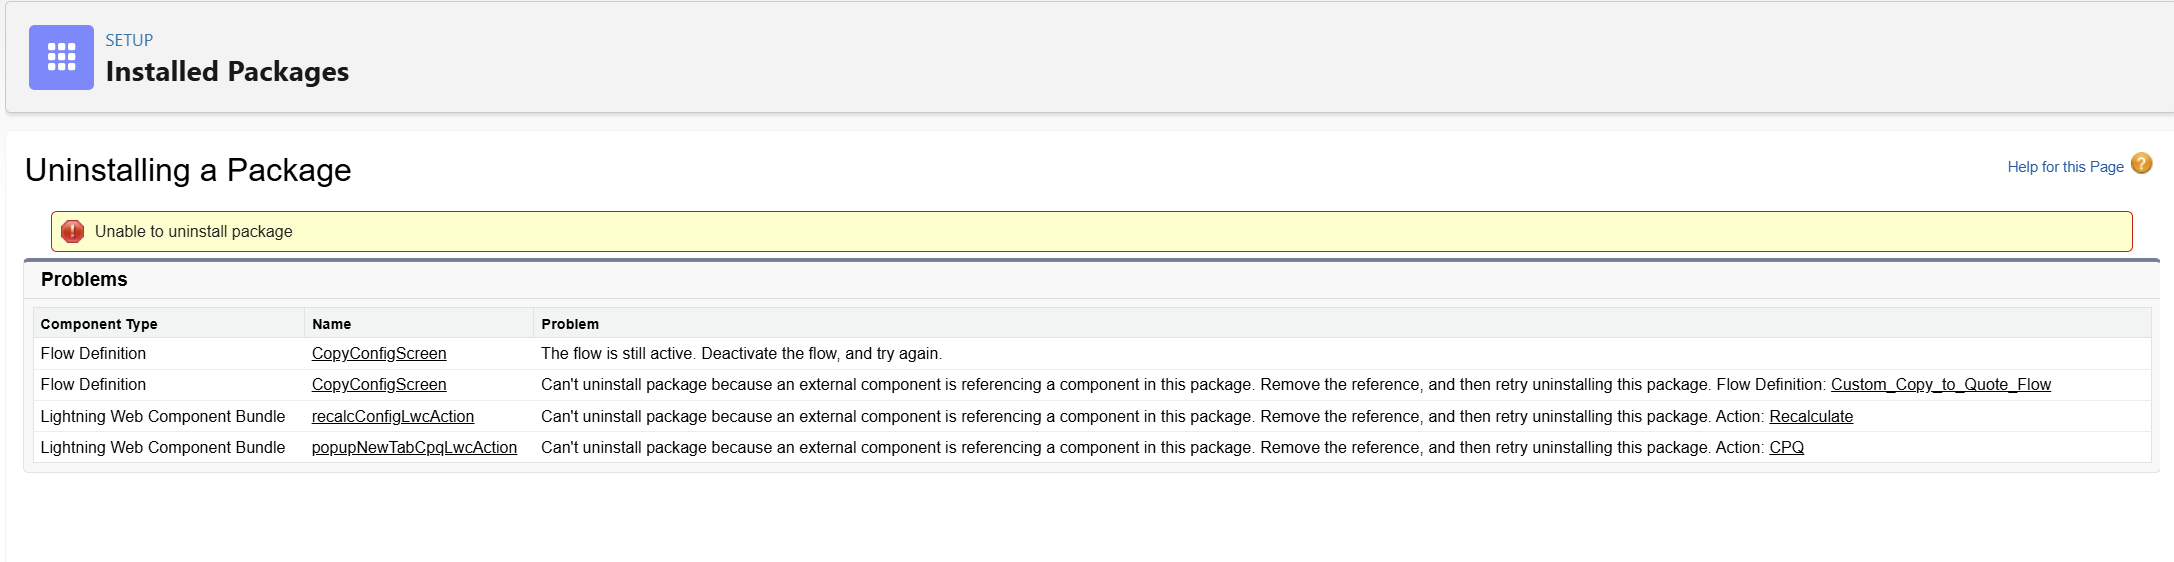
After the first attempt, most likely an Error screen will be shown. Keep this screen open, in case you close it, the uninstall process can be repeated - none of the data or configs are affected.
-
Select Uninstall .
Below is the example of how initial run might go. These references should be backed up and removed.
Dealing with QuickActions (Lightning Web Component references)
Backup of Quick Actions
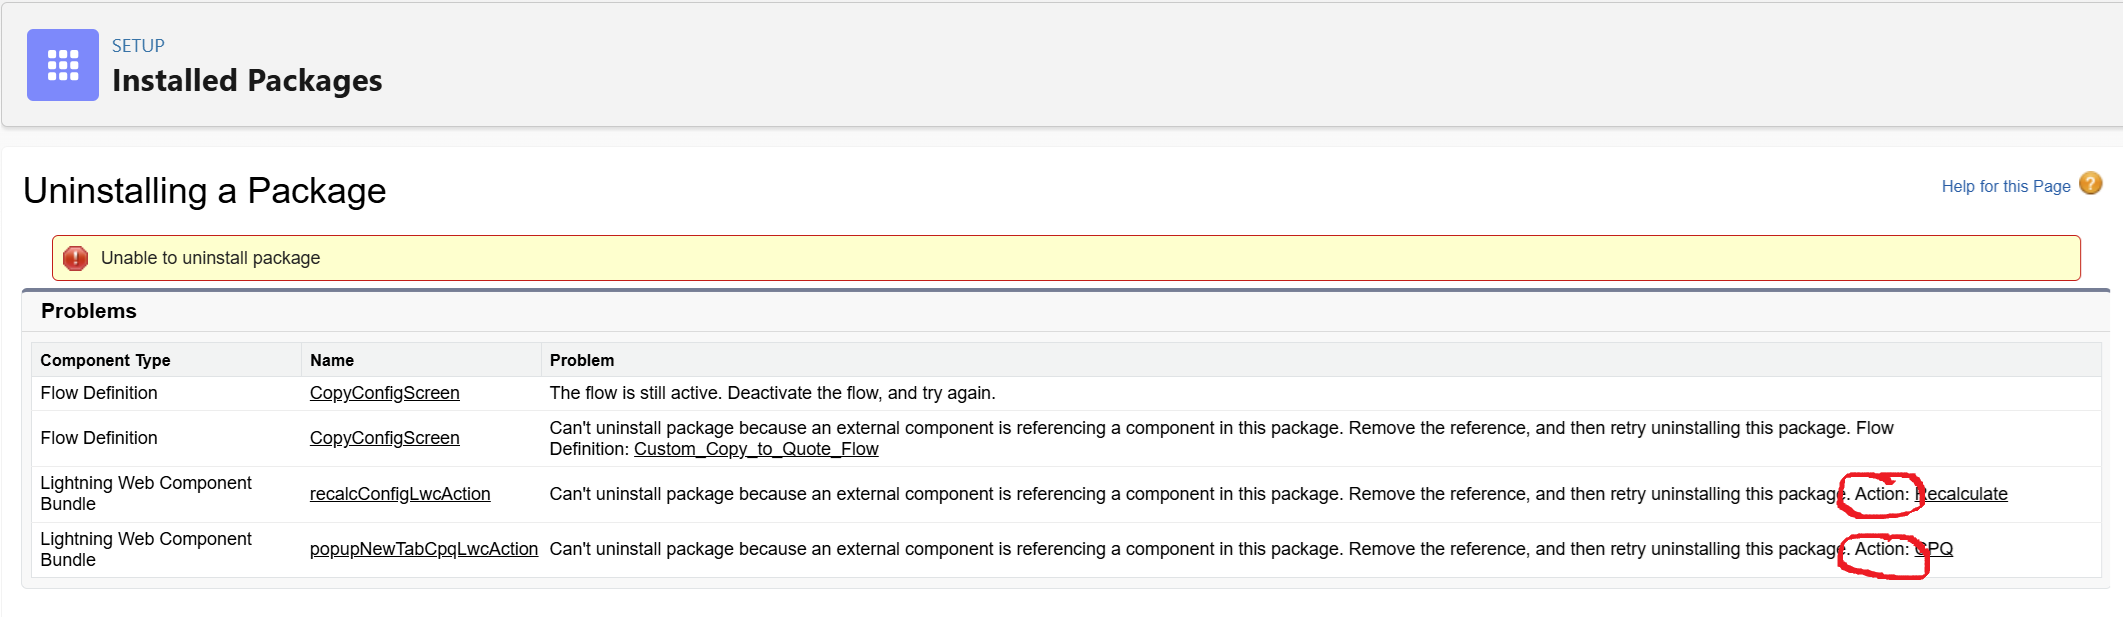
Quick action references are highlighted by the following line. The word "action" tells that this is a quick action. Lightning Web Component Bundle means that the reference is made to LWC.
Creation of the cpq-quick-actions-backup-package.xml File
The package file for data retrieval has to be created first.
-
Create a cpq-quick-actions-backup-package.xml and paste the following data into it.
<?xml version="1.0" encoding="UTF-8"?>
<Package xmlns="http://soap.sforce.com/2006/04/metadata">
<types>
<members>Quote.CPQ</members>
<members>Quote.Recalculate</members>
<name>QuickAction</name>
</types>
<version>62.0</version>
</Package>
Everything inside <members></members> are given for the reference and has to be updated with actual values. If there are no values, for example for flexypage, remove all members and keep it empty:
<types>
<name>QuickAction</name>
</types>
While on Uninstallation failed page from the Initial Uninstallation Run step, for every Lightning Web Component dependent action repeat the following:
-
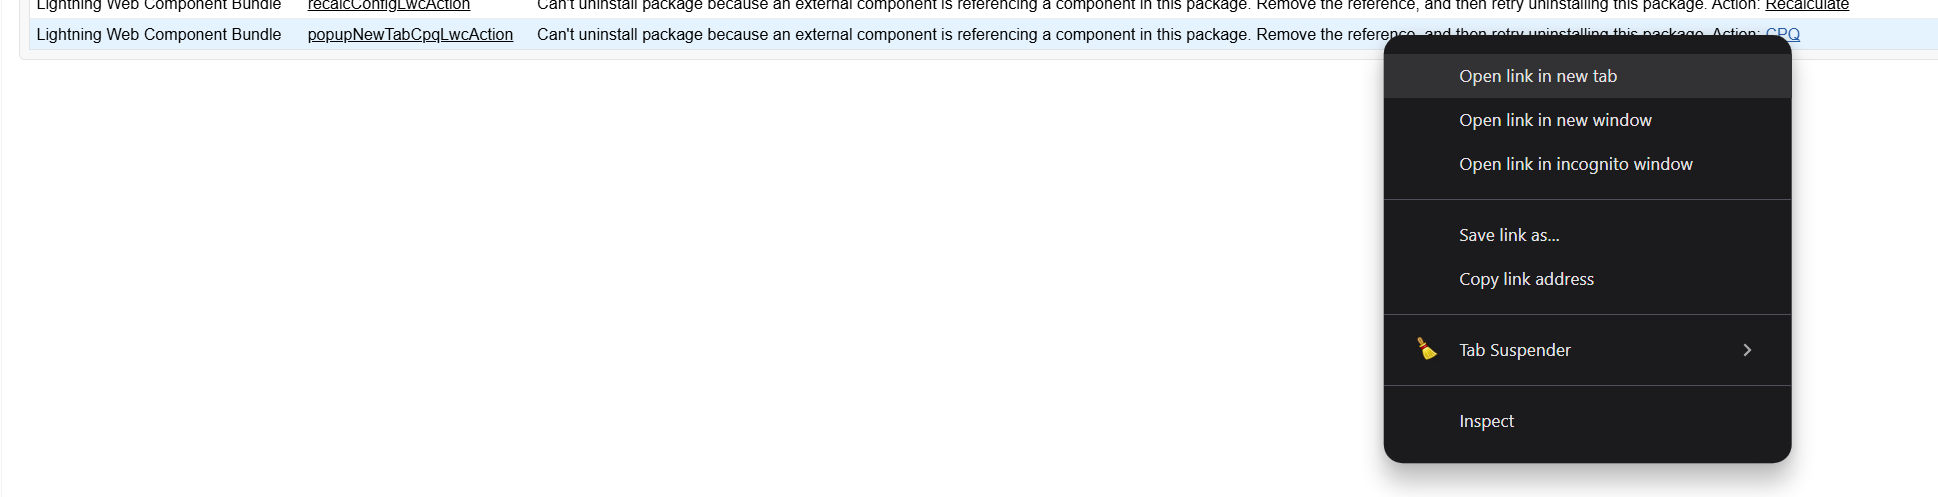
Right click on the action name and Open in a new window.
-
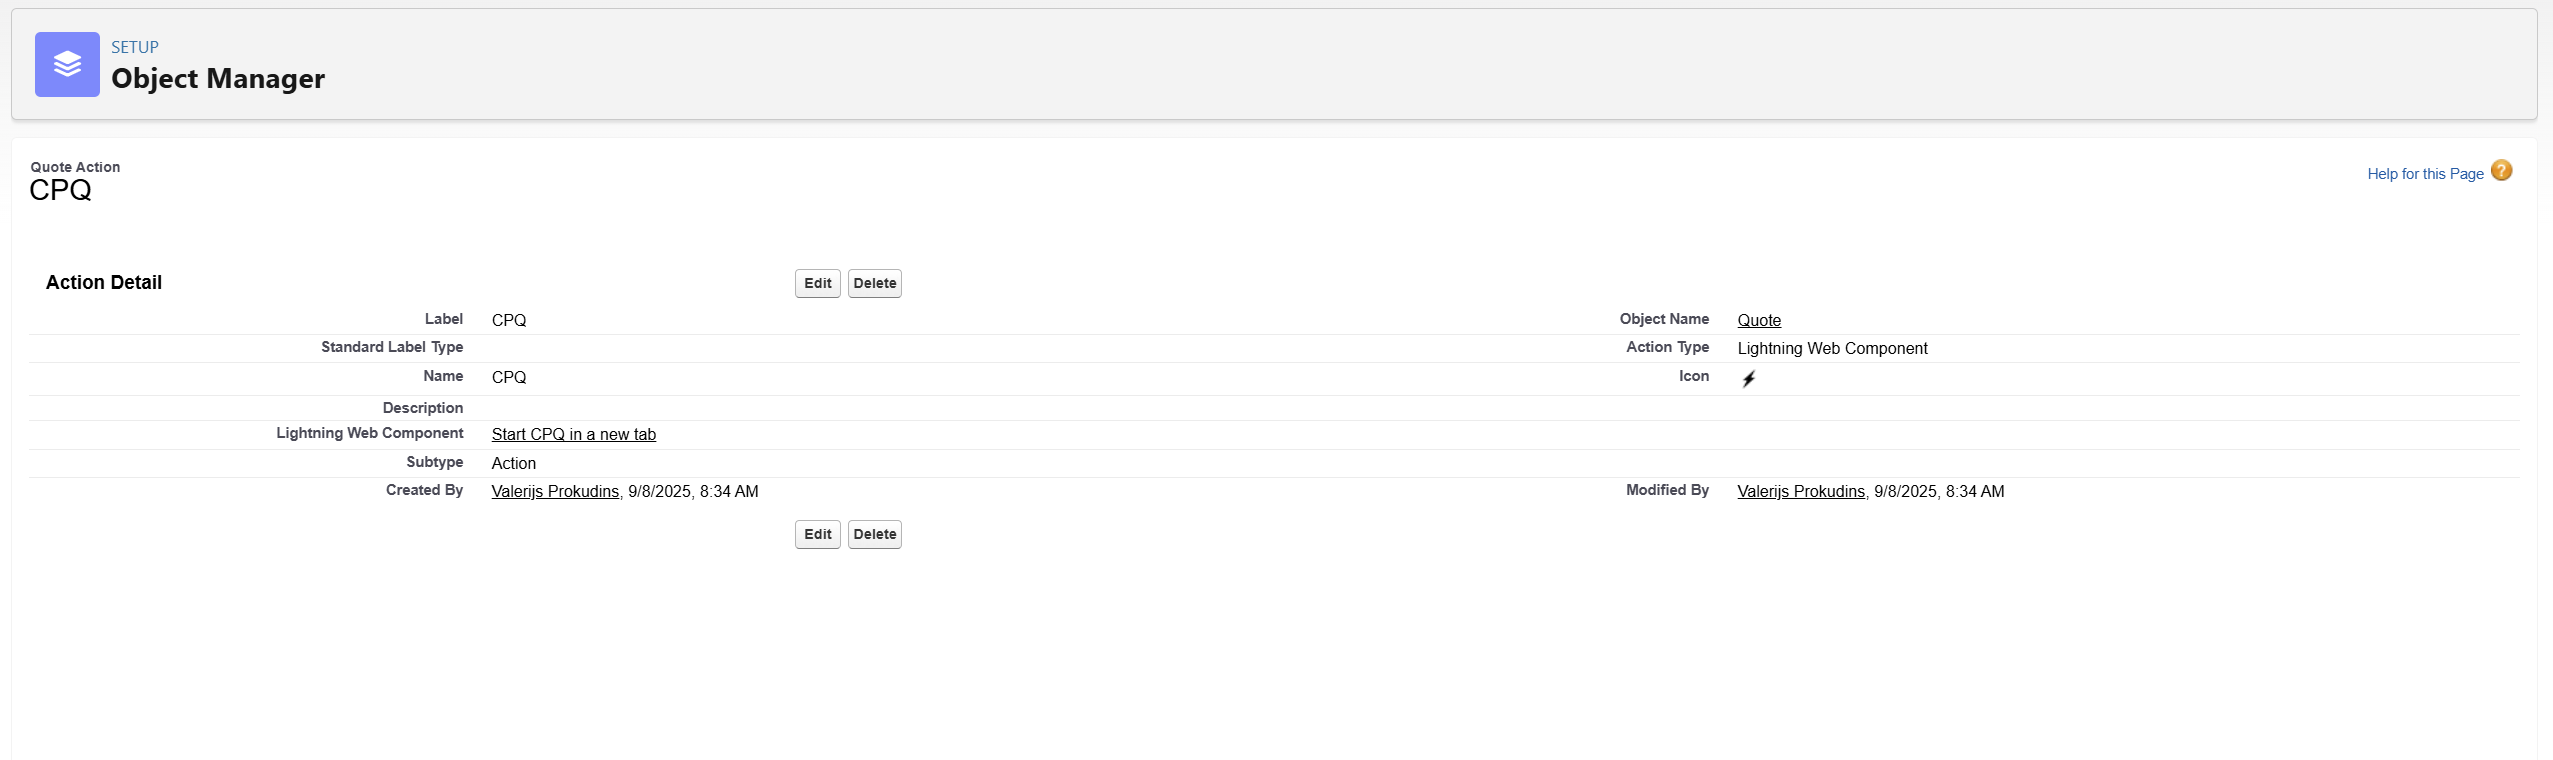
When the Quick action page opens, note the Name and Object Name field values.
-
Add a member item to cpq-quick-actions-backup-package.xml file in the format ObjectName.Name.
-
Repeat until all QuickActions are mentioned in the *cpq-quick-actions-backup-package.xml file.
QuickAction Backup Using Workbench
-
Navigate to https://workbench.developerforce.com/
-
Select the Environment type.
-
Select Login with Salesforce.
-
Select Migration > Retrieve.
-
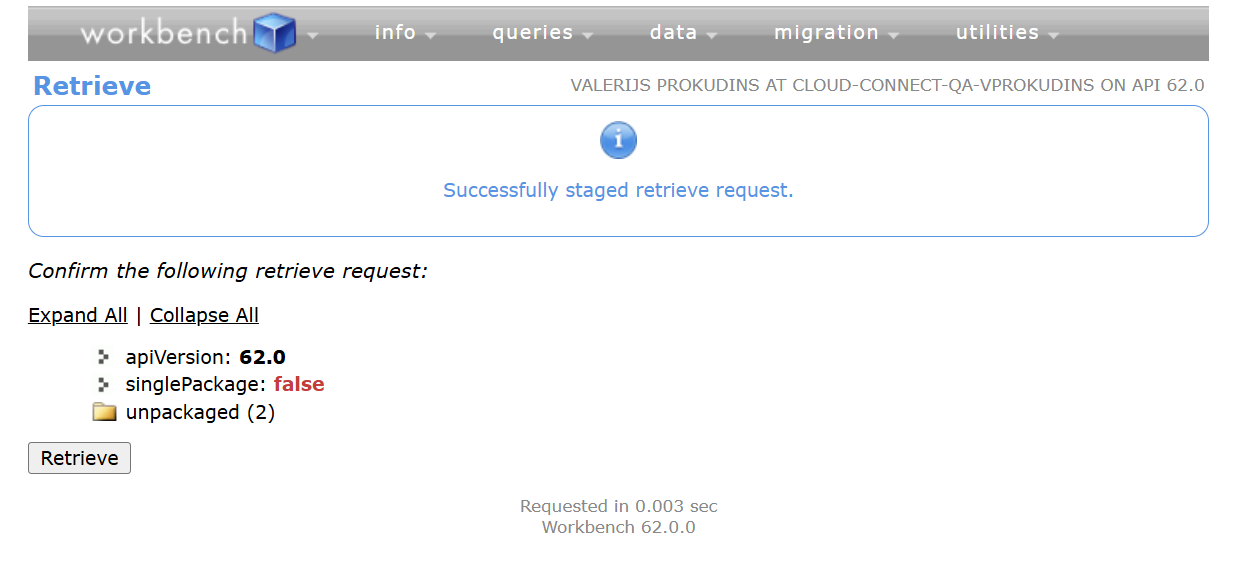
Select the cpq-quick-actions-backup-package.xml file and select Next.
-
Select Retrieve
-
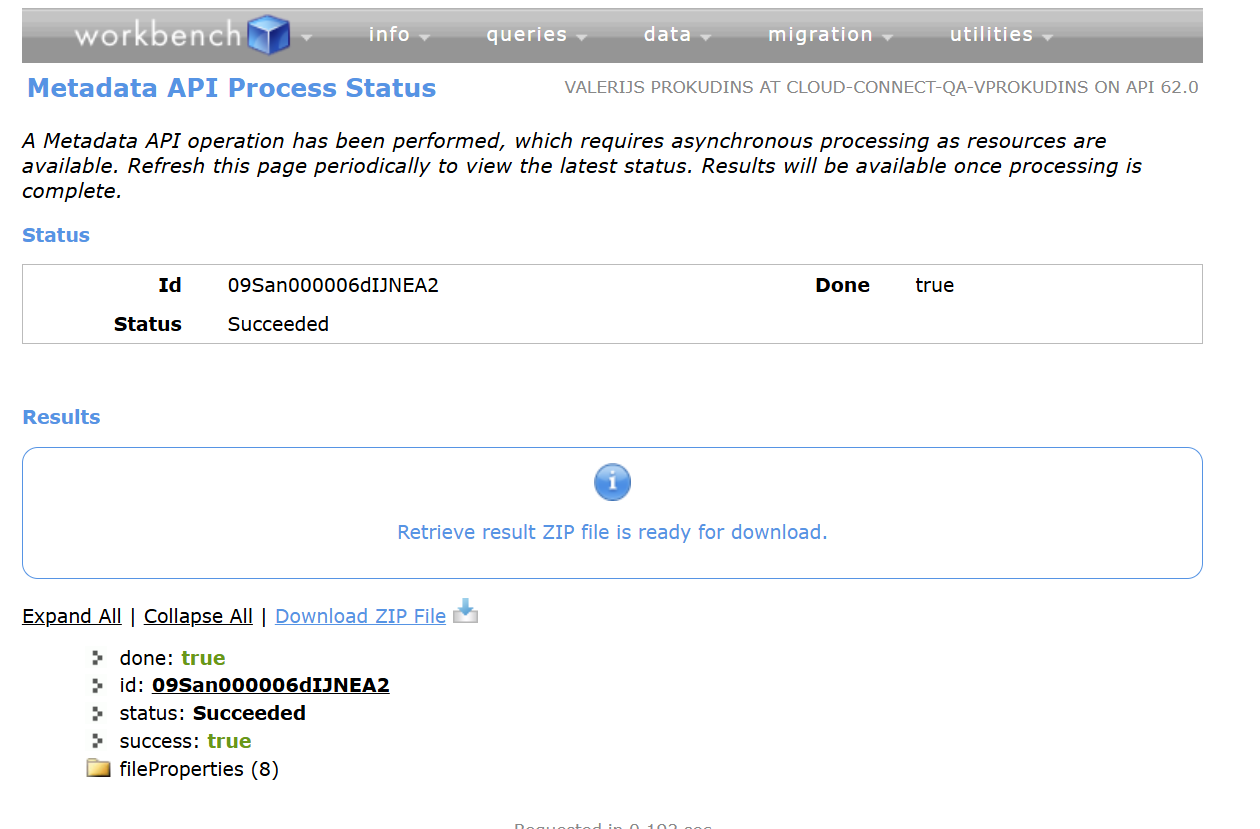
Wait for the results and download the zip file.
-
Locate the file and rename it to QuickActionsBackup.zip.
Backup of the Layouts and FlexiPages
Creation of the cpq-layouts-and-flexipages-backup-package.xml File
Once all Quick Actions have been backed up, they can be safely removed. However, before doing so, any Page Layouts and FlexiPages that reference these Quick Actions must also be backed up and cleaned. This step was not performed earlier because identifying which layouts reference the Quick Actions requires first attempting to delete the Quick Actions themselves. This process will reveal the dependencies that need to be updated.
-
Create a cpq-layouts-and-flexipages-backup-package.xml and paste the following data into it.
<?xml version="1.0" encoding="UTF-8"?>
<Package xmlns="http://soap.sforce.com/2006/04/metadata">
<types>
<members>Quote-Quote Layout</members>
<members>Custom__c-Custom Layout</members>
<name>Layout</name>
</types>
<types>
<members>Quote_Record_Page</members>
<name>FlexiPage</name>
</types>
<version>62.0</version>
</Package>
While on Uninstallation failed page from the Initial Uninstallation Run step, for every Lightning Web Component dependent action repeat the following:
<types>
<name>FlexiPage</name>
</types>
-
Return to Uninstallation failure screen from Initial Uninstallation Run step or run the uninstall again.
-
For every Lightning Web Component dependent action repeat the following:
This step loops through multiple items, please do not remove references from layouts and flexipages before this step is fully completed and layouts and flexipages are backed up.
-
Right click on the action name and select Open in a new window.
-
Select Delete and OK.
-
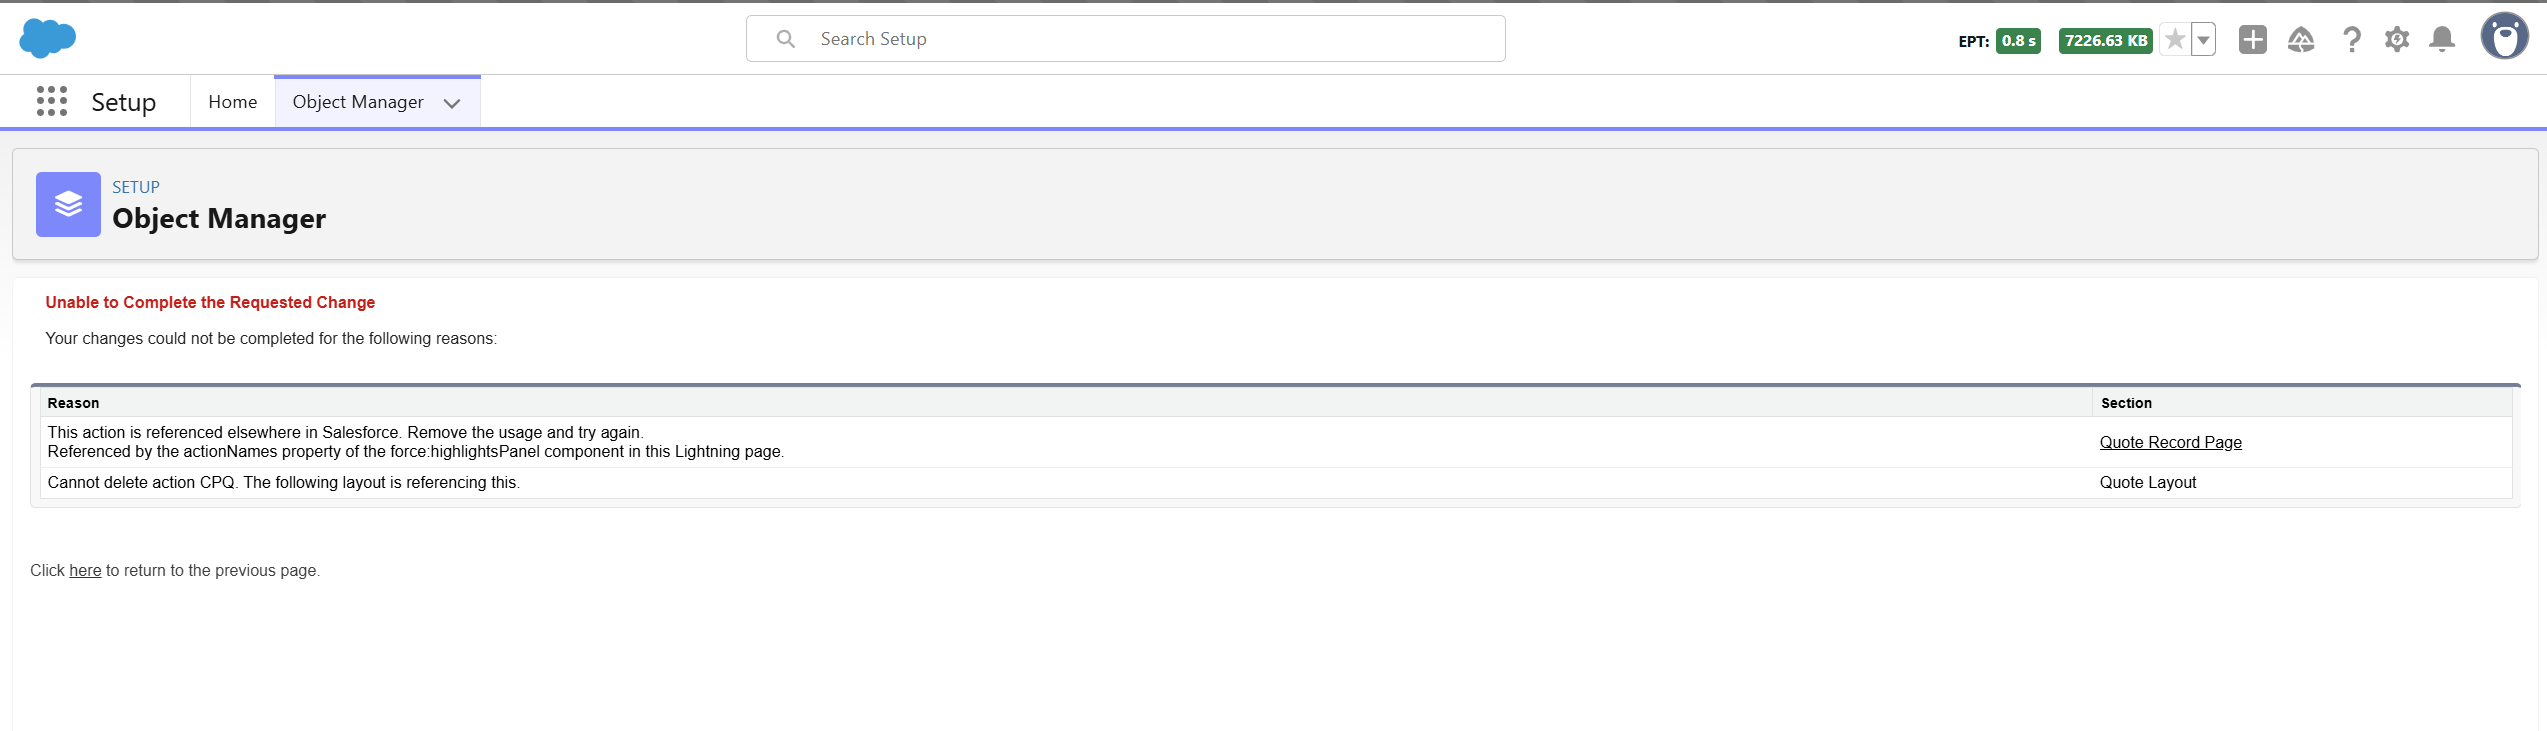
If the deletion was sucessful, proceed to the next QuickAction. In most cases an error is thrown showing where this QuickAction is referenced.
Backup file preparation for Lightning Pages(Flexipages)
-
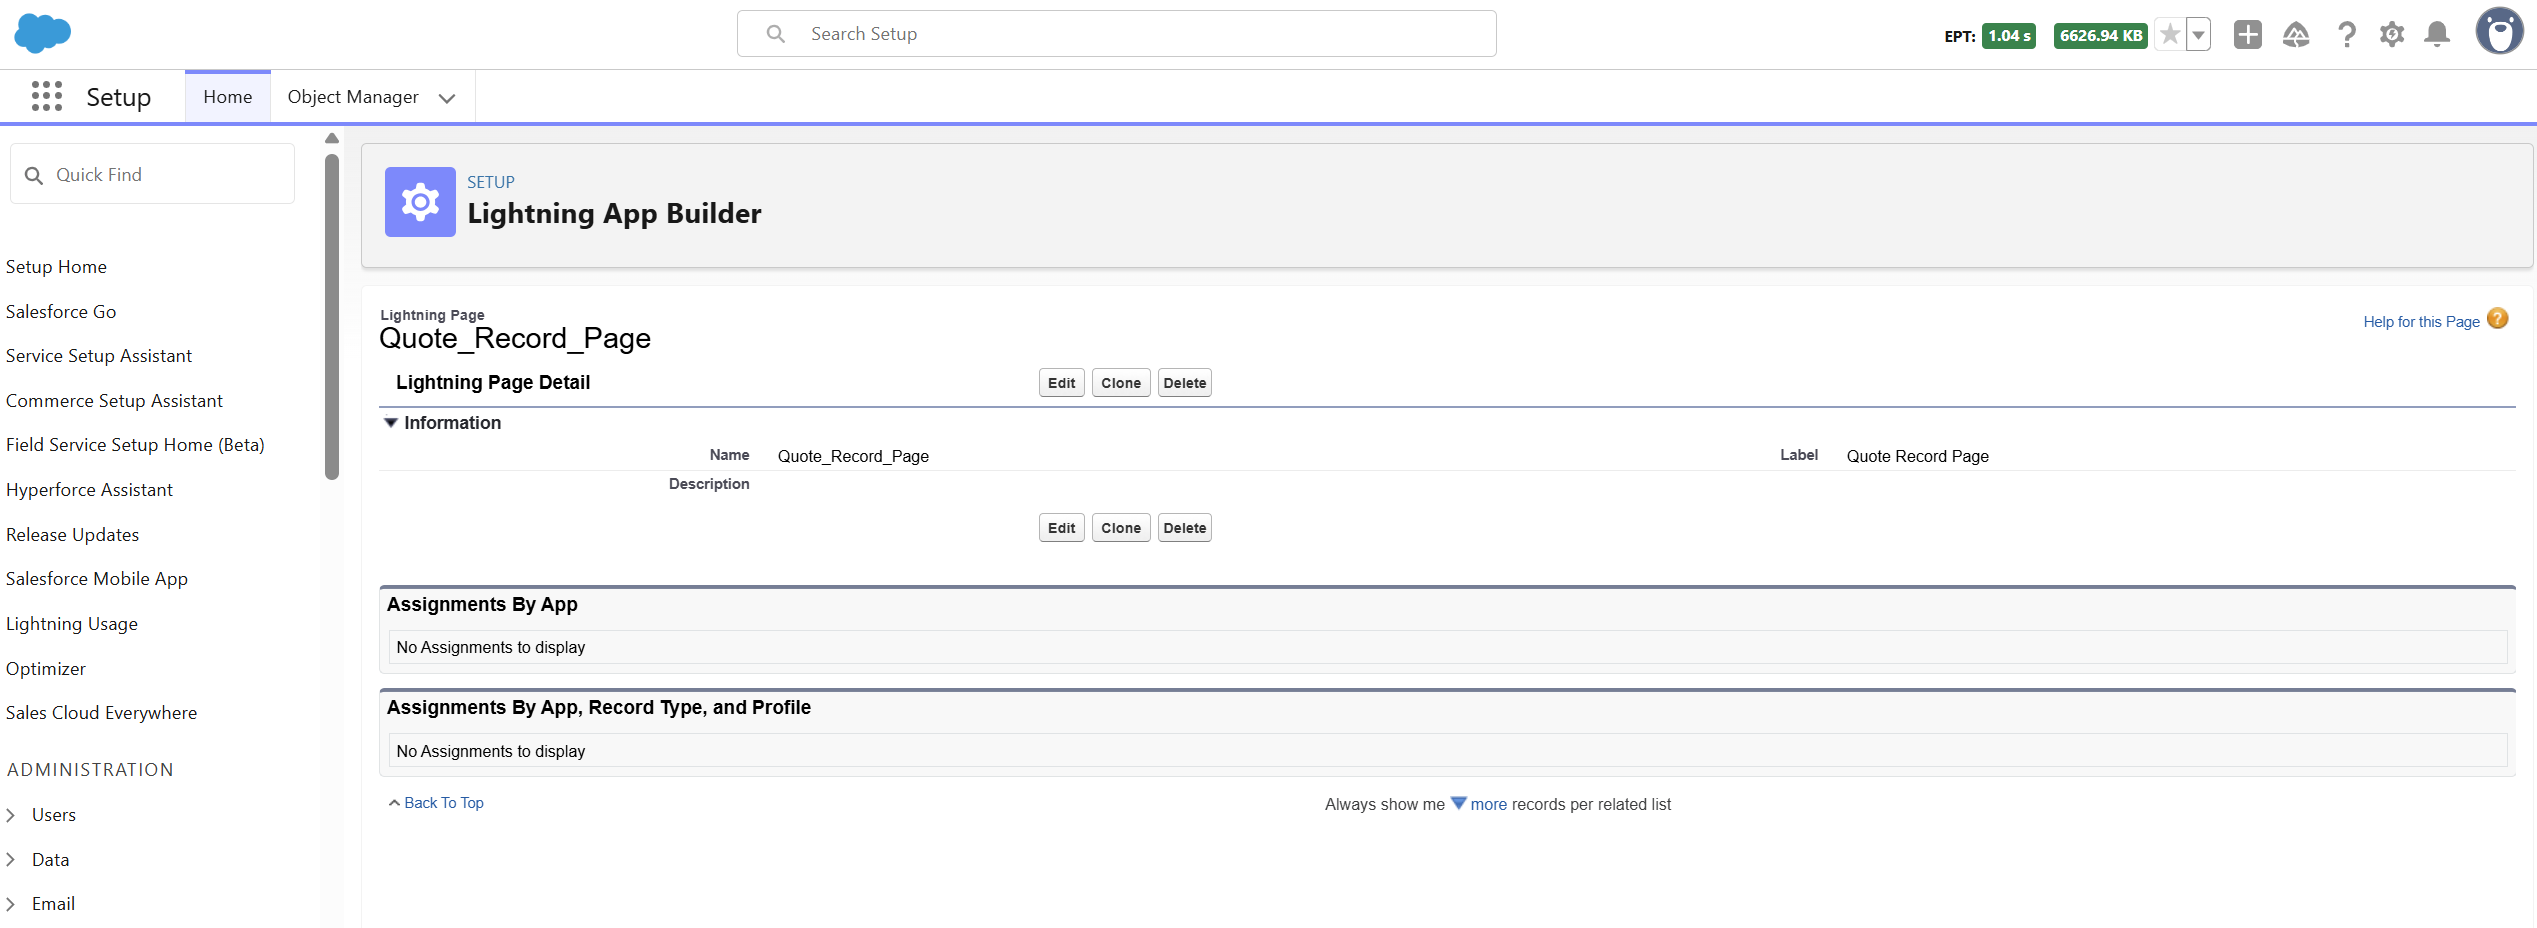
For record page type of references(Flexipage) open link in a new window to get to the Lightning Page(Flexipage) screen
-
Note the Name field's value and add a new into the cpq-layouts-and-flexipages-backup-package.xml to part of the file.
<members>Quote_Record_Page</members>. The Name can differ from Label so it is very important to add the name and not label.
Backup File Preparation for Page Layouts
For layout items add the Layout Name as a new member into Layout part of the cpq-layouts-and-flexipages-backup-package.xml file. The Format is <ObjectName>-<Layout name>
<member>Quote-Quote Layout</member>
Layouts and Flexipage Backup Using the Workbench
-
After completing the file, navigate to https://workbench.developerforce.com/
-
Select the Environment type.
-
Select Login with Salesforce.
-
Select Migration > Retrieve.
-
Select the cpq-quick-actions-backup-package.xml file and select Next.
-
Select Retrieve.
-
Wait for the results and download the zip file.
-
Locate the file and rename it to LayoutsandFlexipagesBackup.zip.
Cleanup of the Layouts and FlexiPage
Cleanup of the Layouts
Once all Page Layouts have been backed up, the Quick Actions can be removed. For each layout listed in the cpq-layouts-and-flexipages-backup-package.xml file, complete the following steps:
-
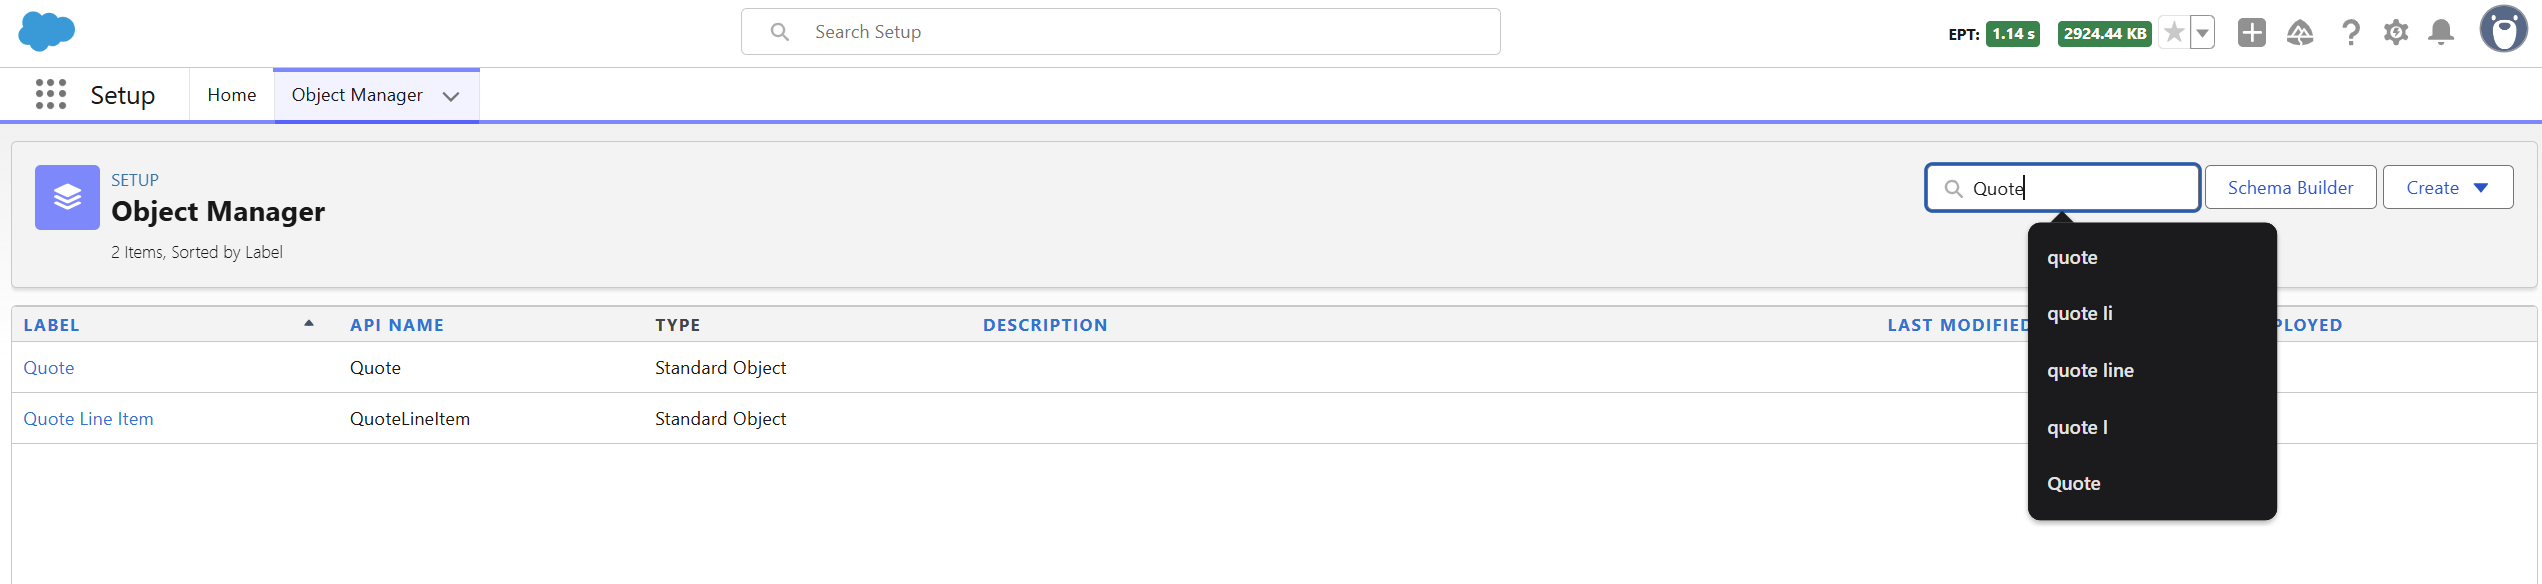
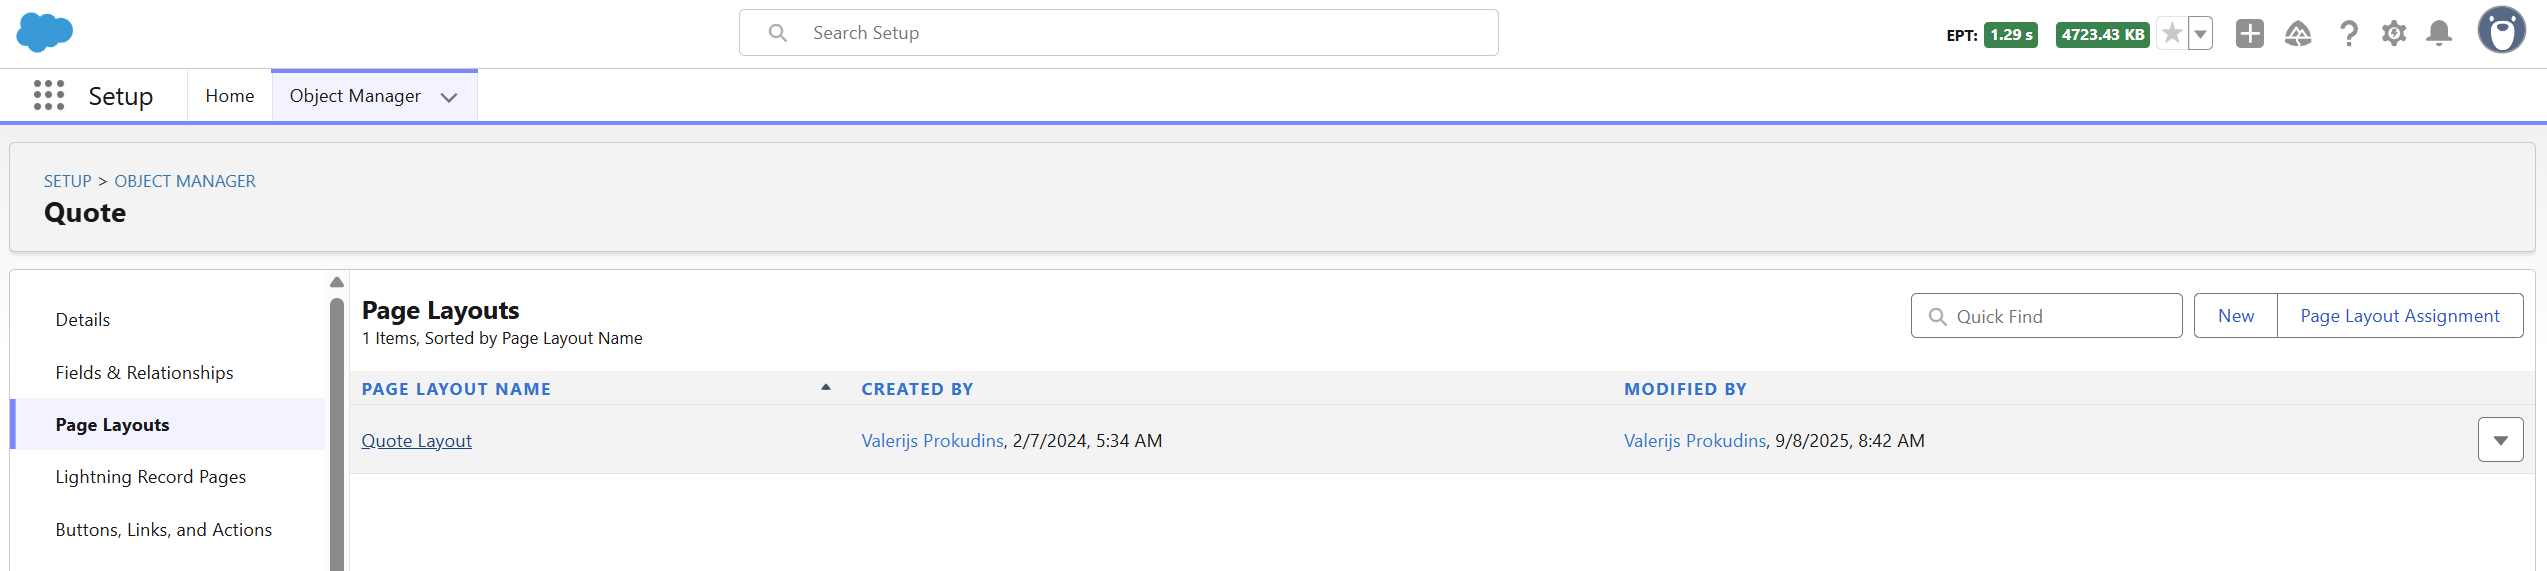
Navigate to Setup > Object Manager and quick find for desired object.
-
Navigate to Page Layouts and select the required Layout.
-
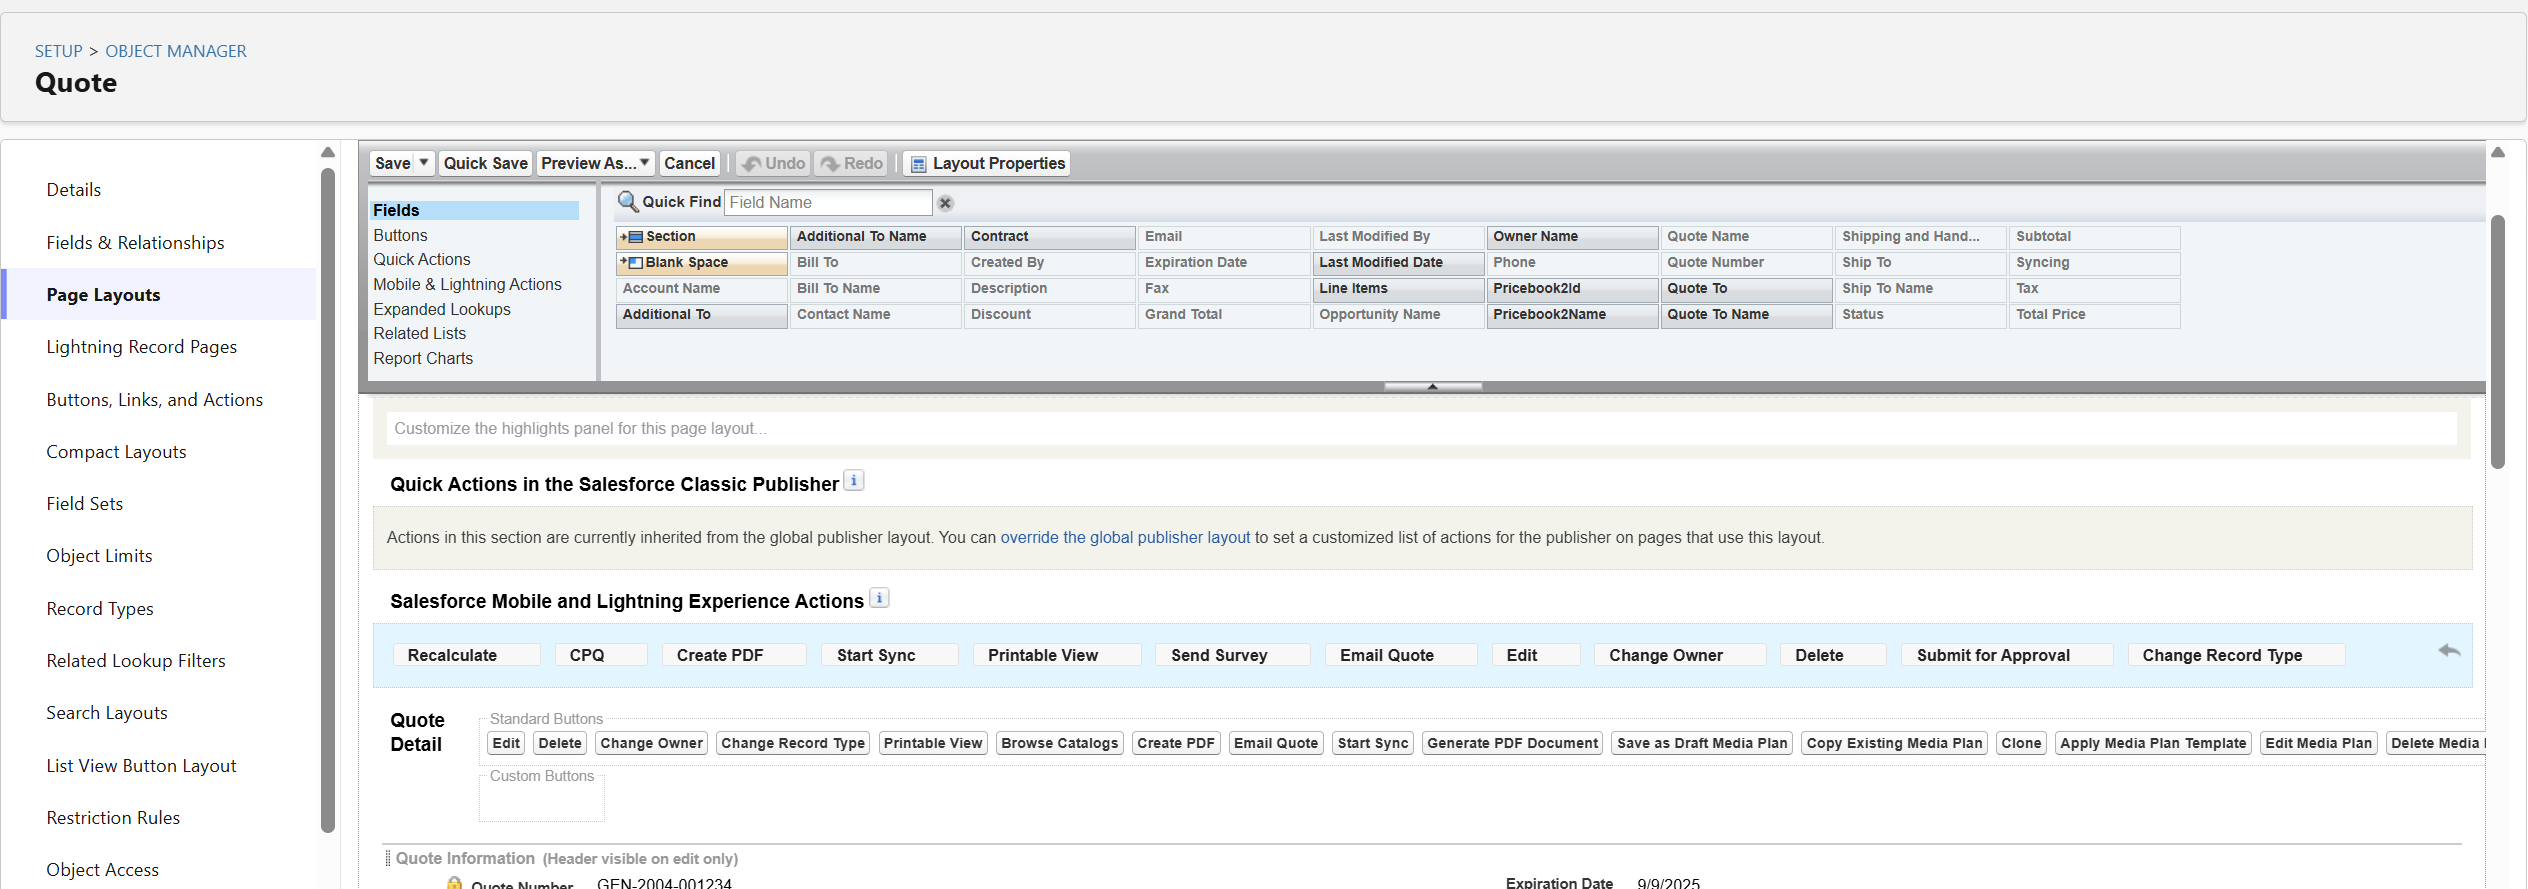
Remove the required quick actions from the layout by dragging them back to the pane.
-
Save the Layout.
Cleanup of the Flexipages
Using cpq-layouts-and-flexipages-backup-package.xml for reference.
-
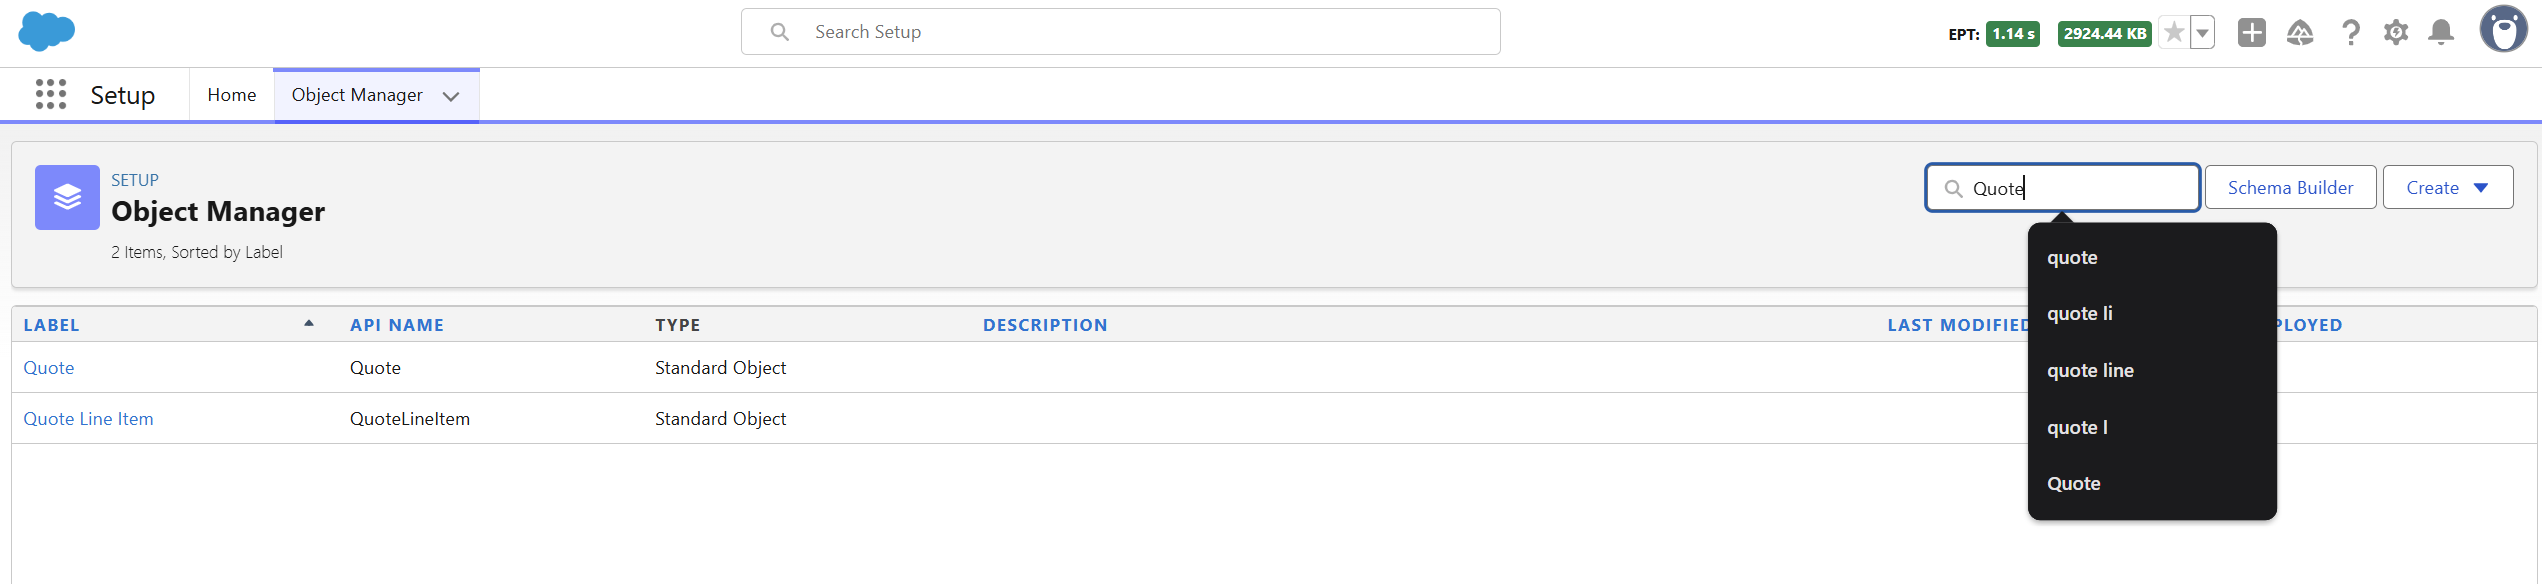
Navigate to Setup >Object Manager and quick find for desired object.
-
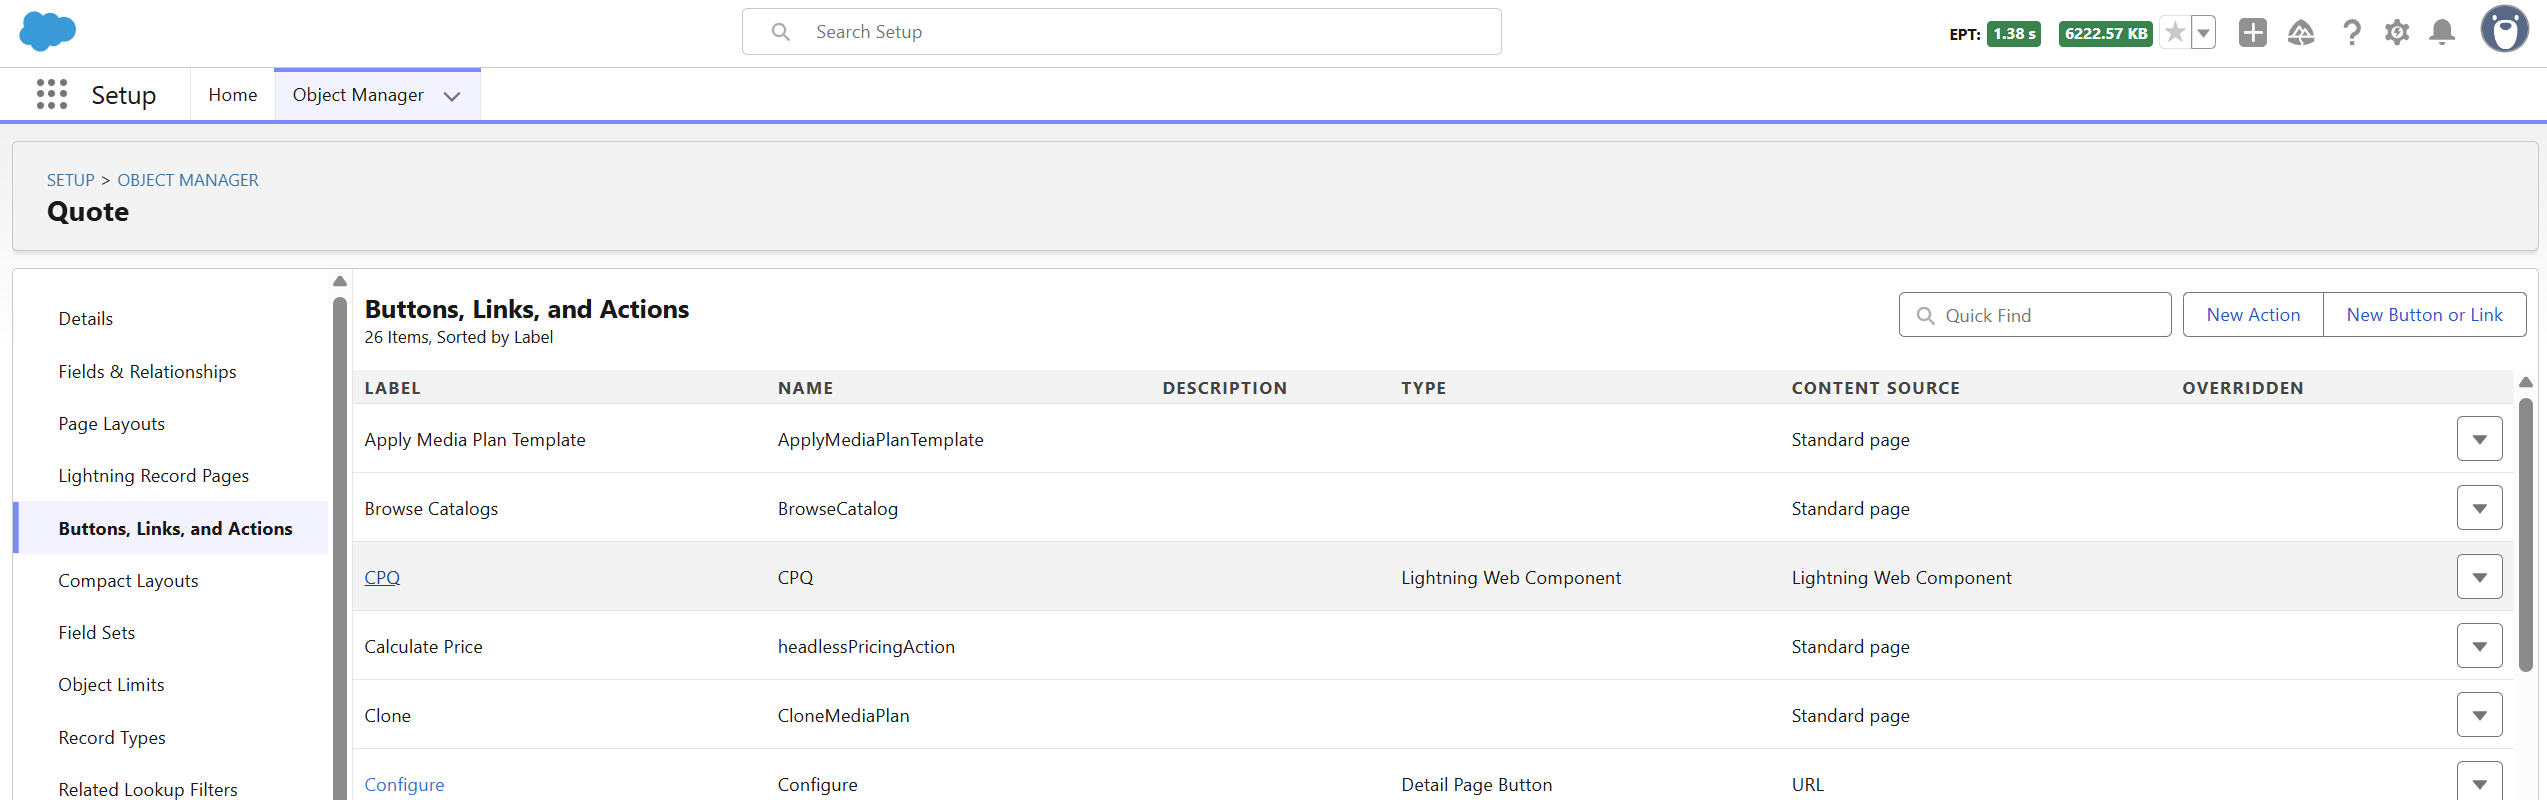
Navigate to Buttons, Links and Actions and select the desired action.
-
Select Delete and OK. We expect the error screen again.
-
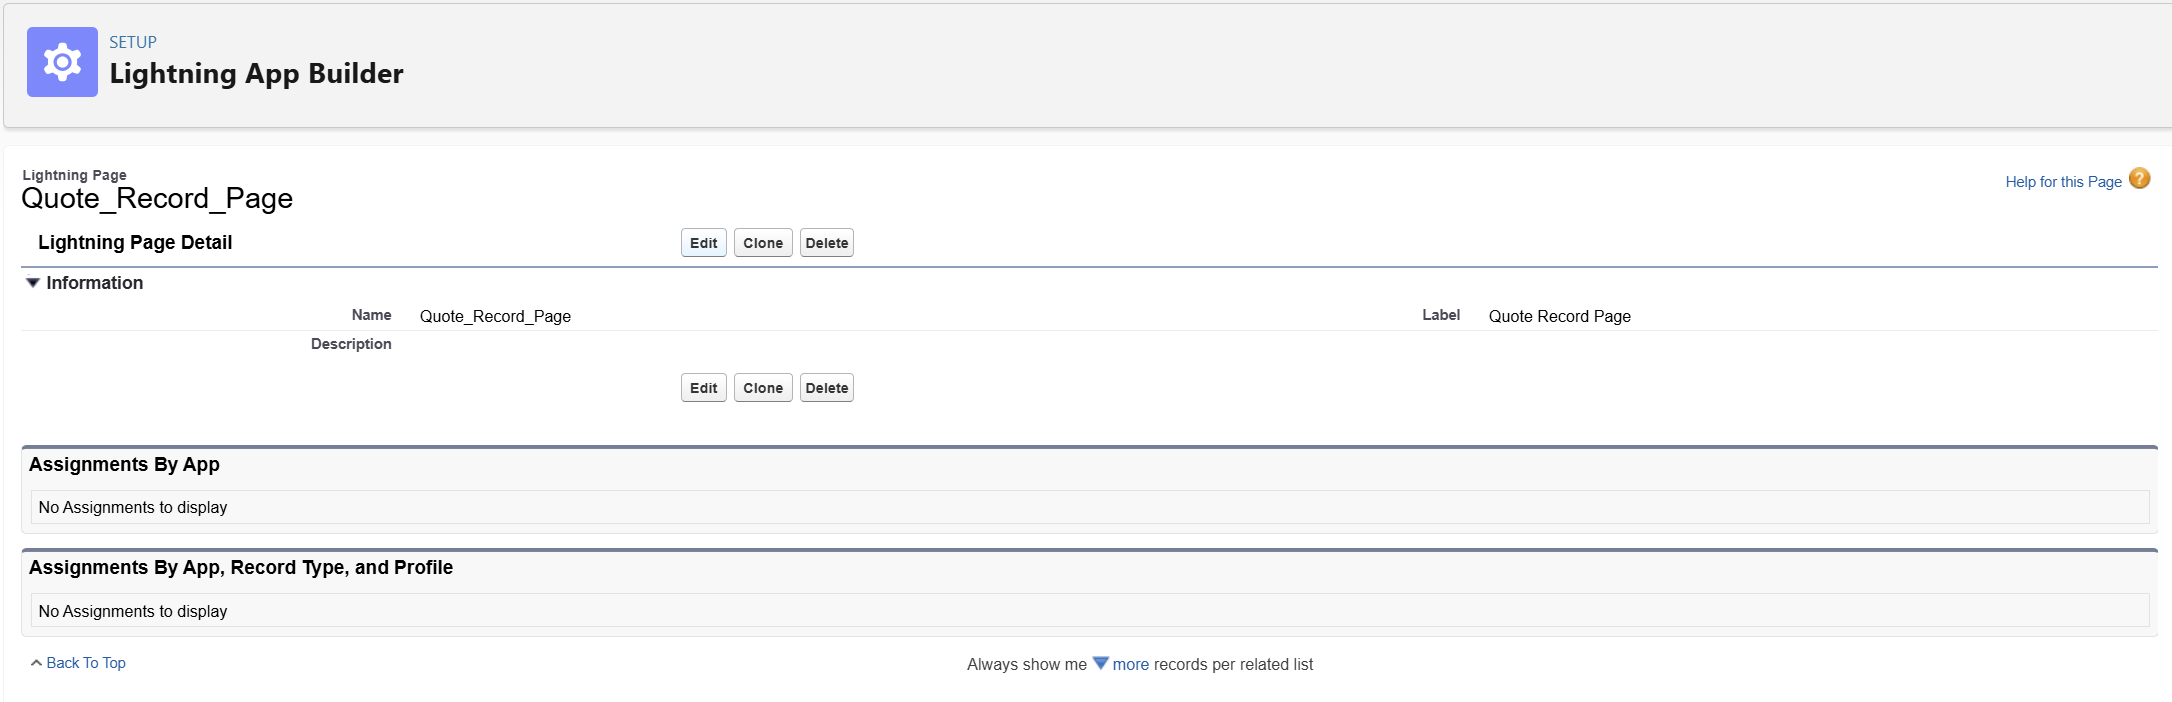
Open the Flexipage by following its link.

-
Select Edit on the lightning page screen.
-
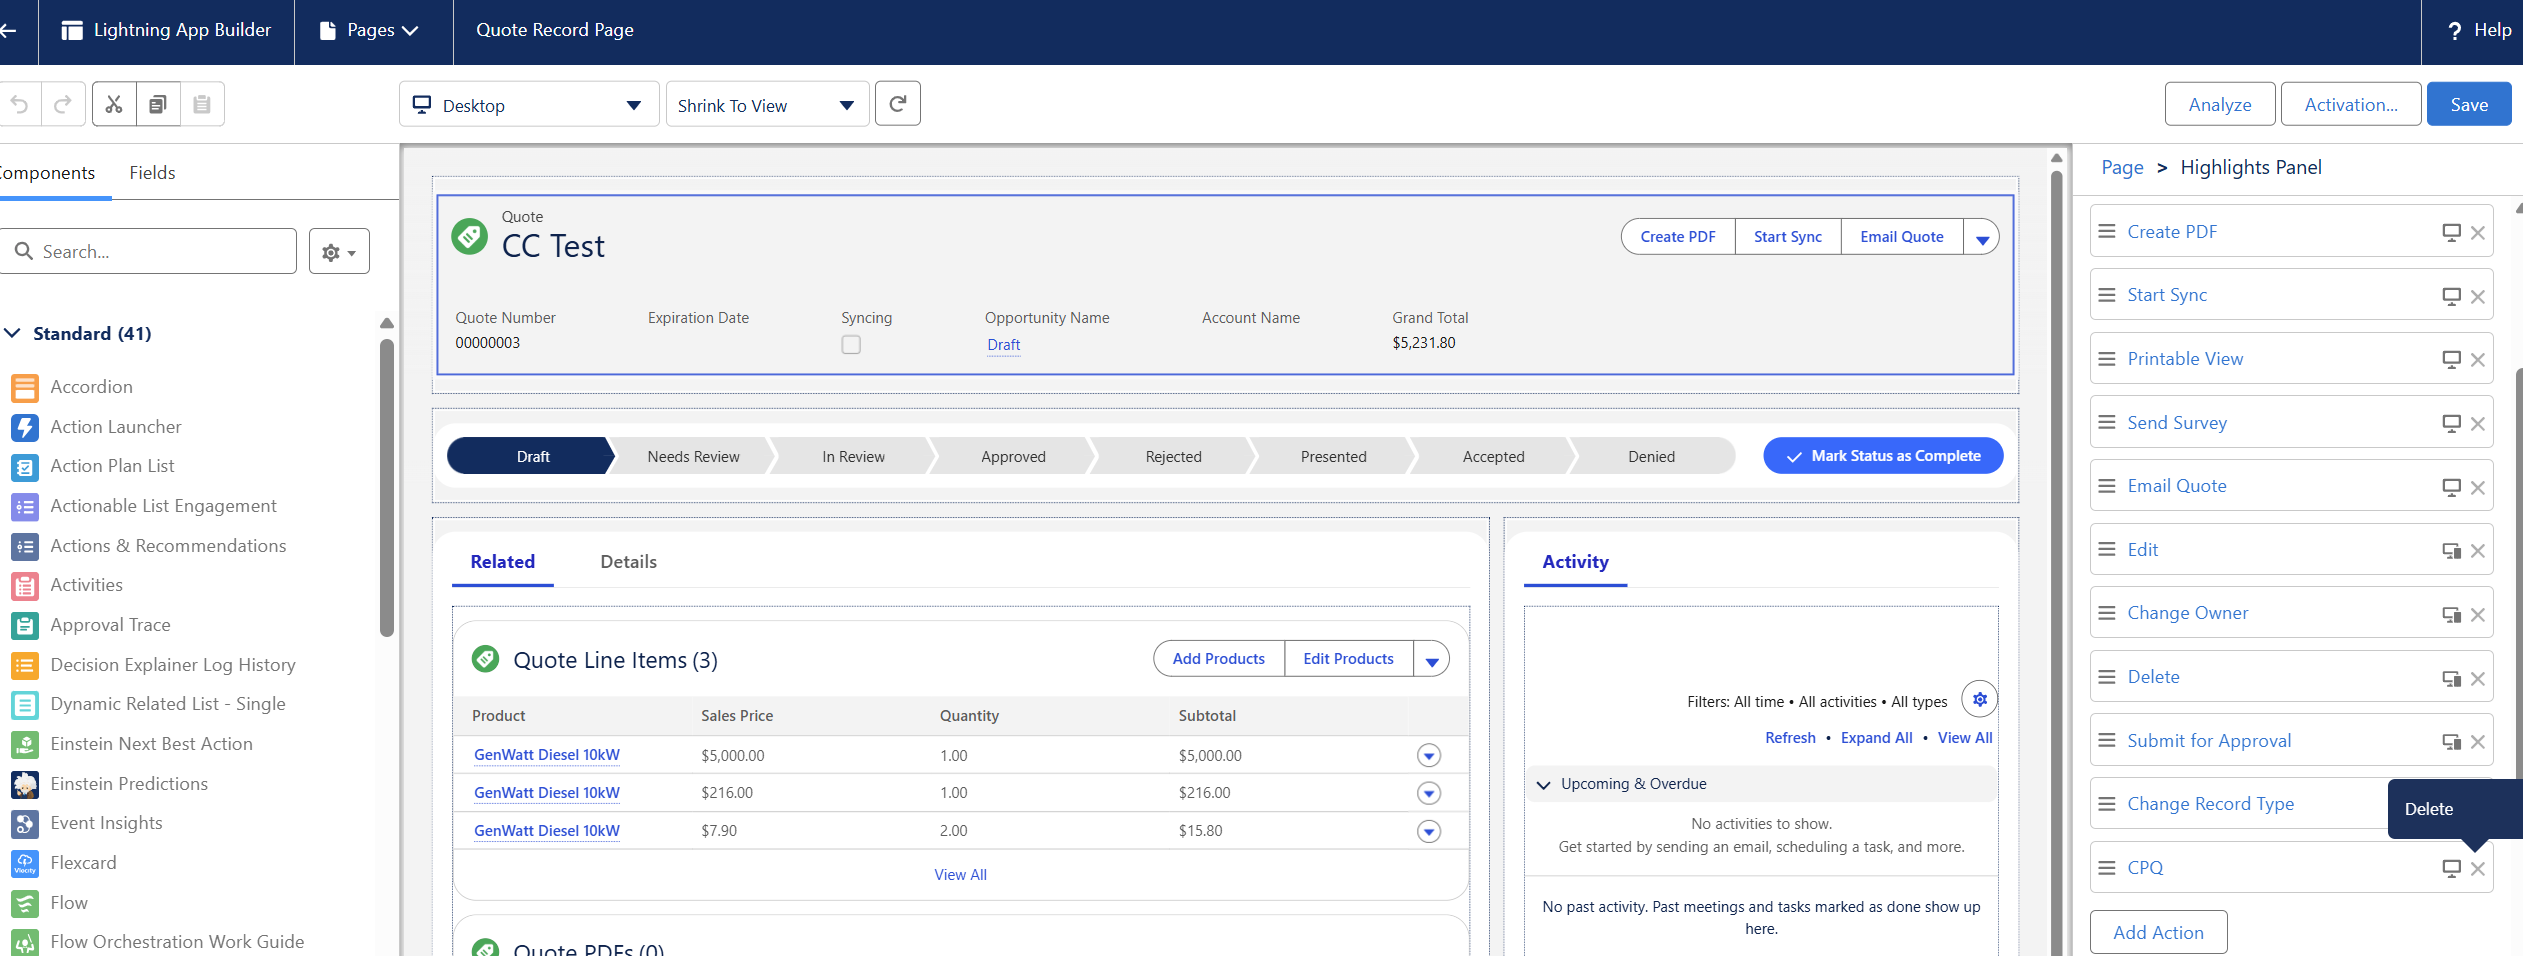
Select the Header Component to open Dynamic Actions panel.
-
Scroll down and delete the desired Quick Action.
Removal of the Quick Actions
Use QuickActionsBackup.zip for reference and repeat for every QuickAction.
-
Navigate to Setup > Object Manager and quick find for desired object.
-
Navigate to Buttons, Links and Actions and select the desired action.
-
Select Delete and OK.
Dealing with CopyConfigurationScreen Flow References
In this step, custom flows referring CopyConfigurationScreen are backed up and removed.
Verify if there are References to CopyConfiguration Flow
-
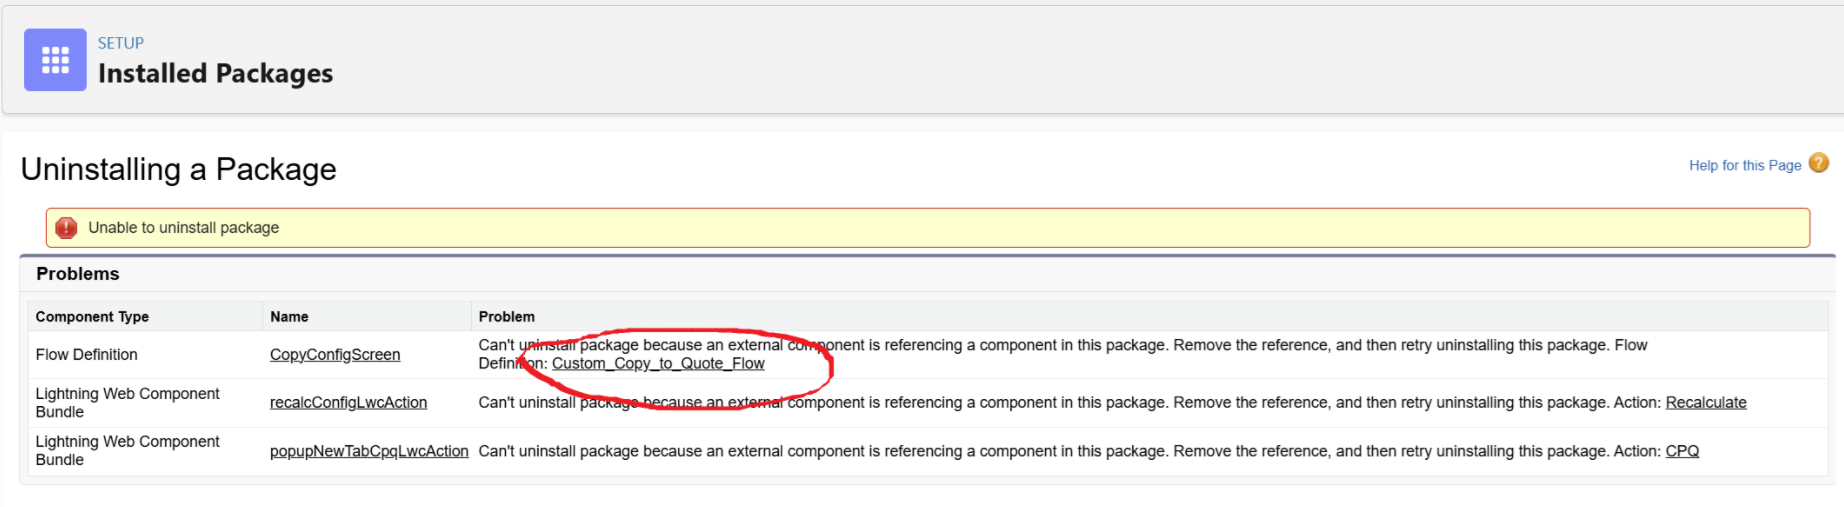
Get Back to Uninstallation failure screen fromInitial Uninstallation Run or run the uninstall again.
-
CopyConfigurationScreen references are marked with red. If there are not references, proceed to Final uninstallation run.
Creation and Population of the ustom-copy-flows-package.xml File
-
Create the custom-copy-flows-package.xml file with the following contents
<?xml version="1.0" encoding="UTF-8"?>
<Package xmlns="http://soap.sforce.com/2006/04/metadata">
<types>
<members>FLOW_NAME</members>
<name>Flow</name>
</types>
<types>
<members>FLOW_NAME</members>
<name>FlowDefinition</name>
</types>
<version>62.0</version>
</Package>
For each CopyConfigurationScreen reference add a <member> into the custom-copy-flows-package.xml file, so according to the example. The Api Name of the flow is provided in the uninstallation failed screen and can be copied as is.
<members>Custom_Copy_To_Quote_Flow</members>
If there are multiple version of the flow and old version are required to be backed up - add members with a version number followed by -. Note that the metadata file for last version will not have -# prefixed and will just have the name of the flow(Custom_Copy_To_Quote_Flow). FlowDefinition file will control which version is active.
<members>Custom_Copy_To_Quote_Flow-1</members>
<members>Custom_Copy_To_Quote_Flow-2</members>
<members>Custom_Copy_To_Quote_Flow-3</members>
Custom Copy Configuration Flows Backup using Workbench
-
After completing the file, navigate to https://workbench.developerforce.com/
-
Select the Environment type.
-
Select Login with Salesforce.
-
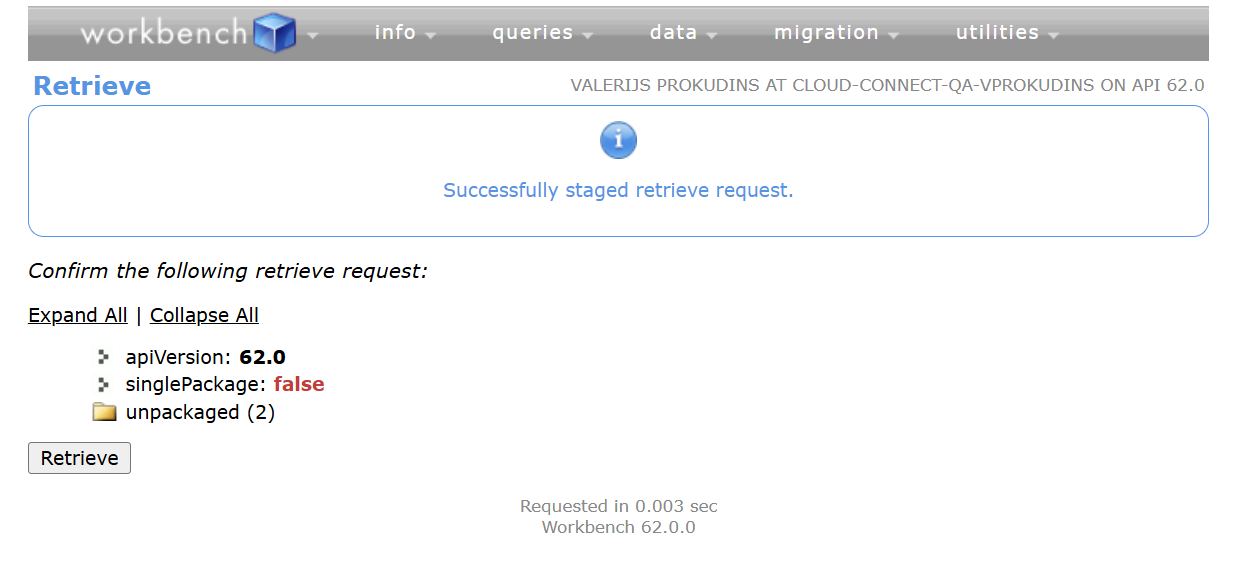
Select Migration > Retrieve.
-
Use the custom-copy-flows-package.xml file and select Next.
-
Select Retrieve.
-
Wait for the results and download the zip file.
-
Locate the file and rename it to CustomCopyFlowsBackup.zip.
CopyConfigScreen Reference Removal from Custom Copy Configuration Flows
Should be done after Custom Copy Configuration Flows Backup using Workbench step. Iterate through custom-copy-flows-package.xml file to process all required flows.
-
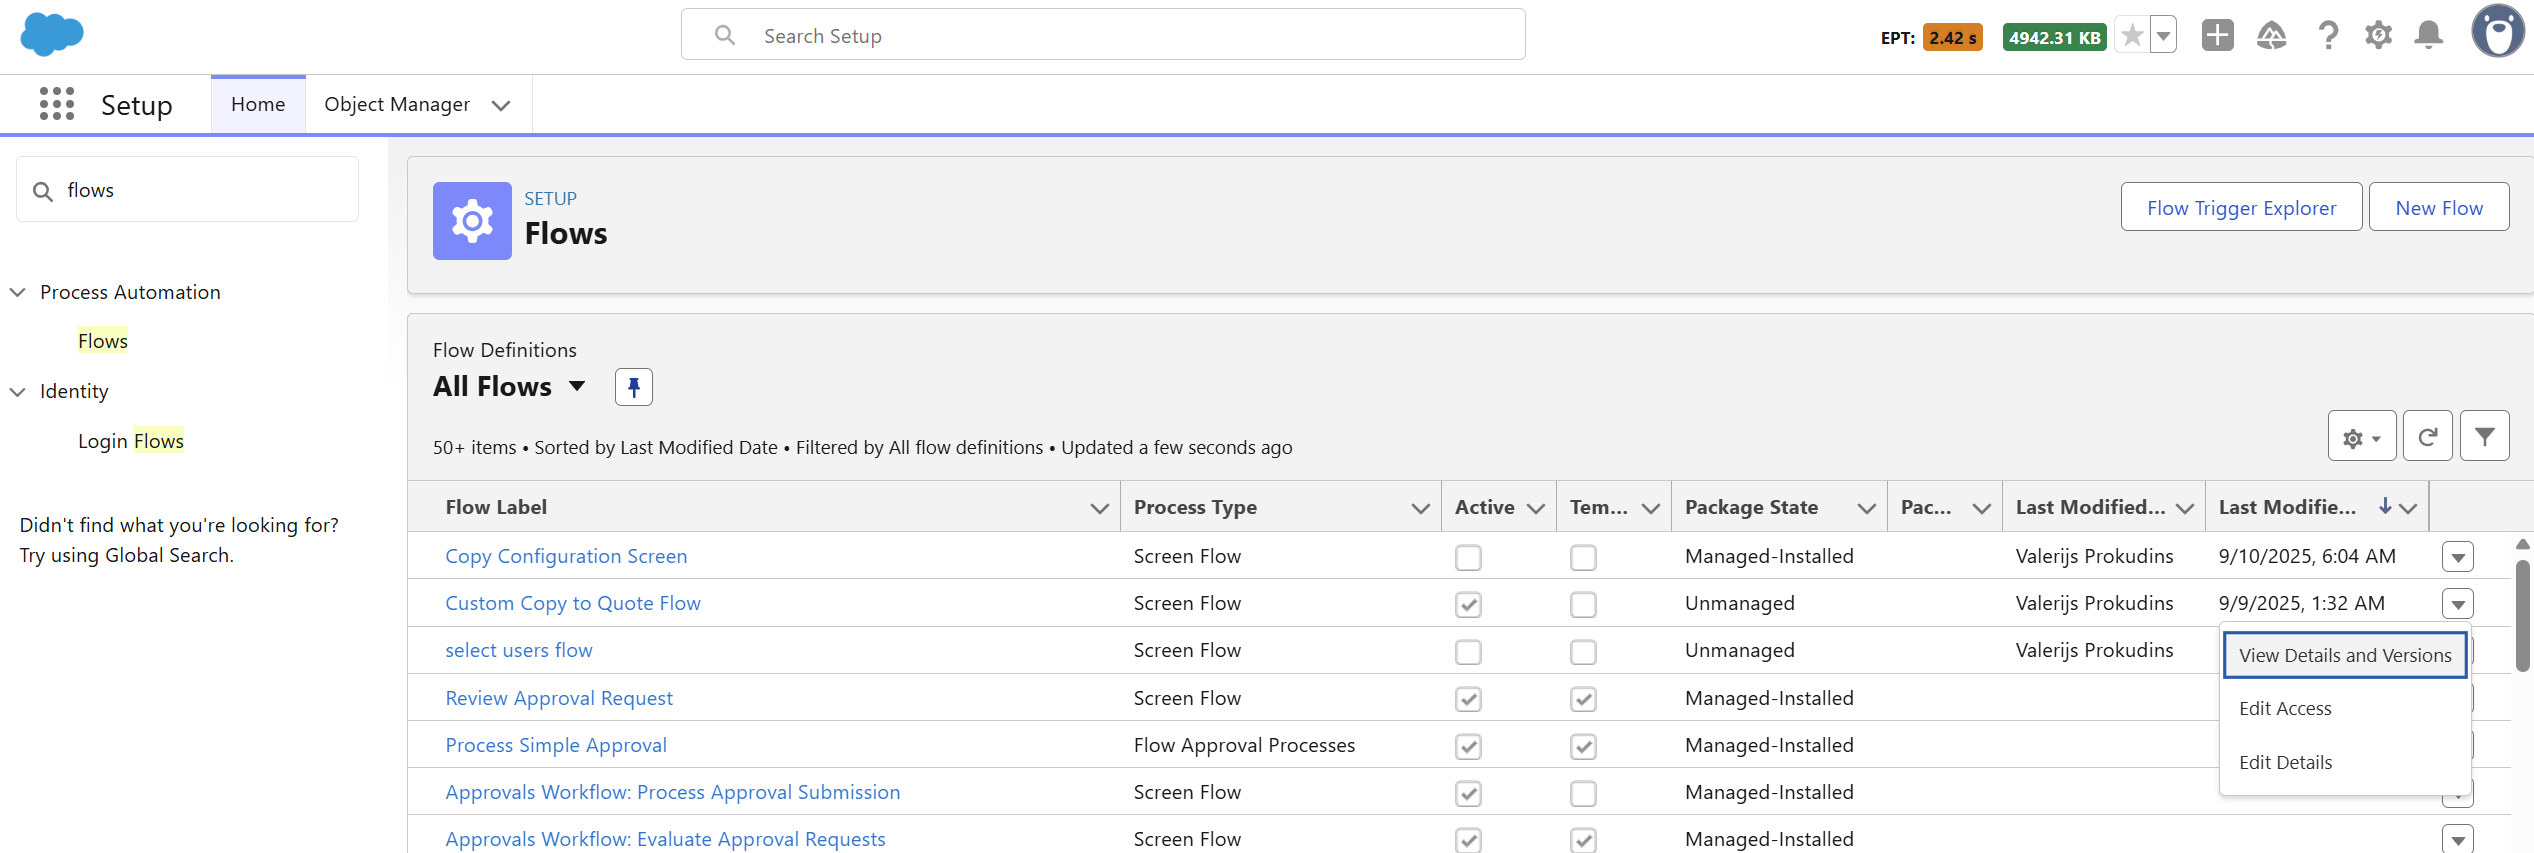
Navigate to Setup > Flows.
-
On the far right of the required flow click the dropdown icon and select View Details and Versions.
-
Remove all inactive version of the flow using the Del link.
-
Select OK in the dialog.
-
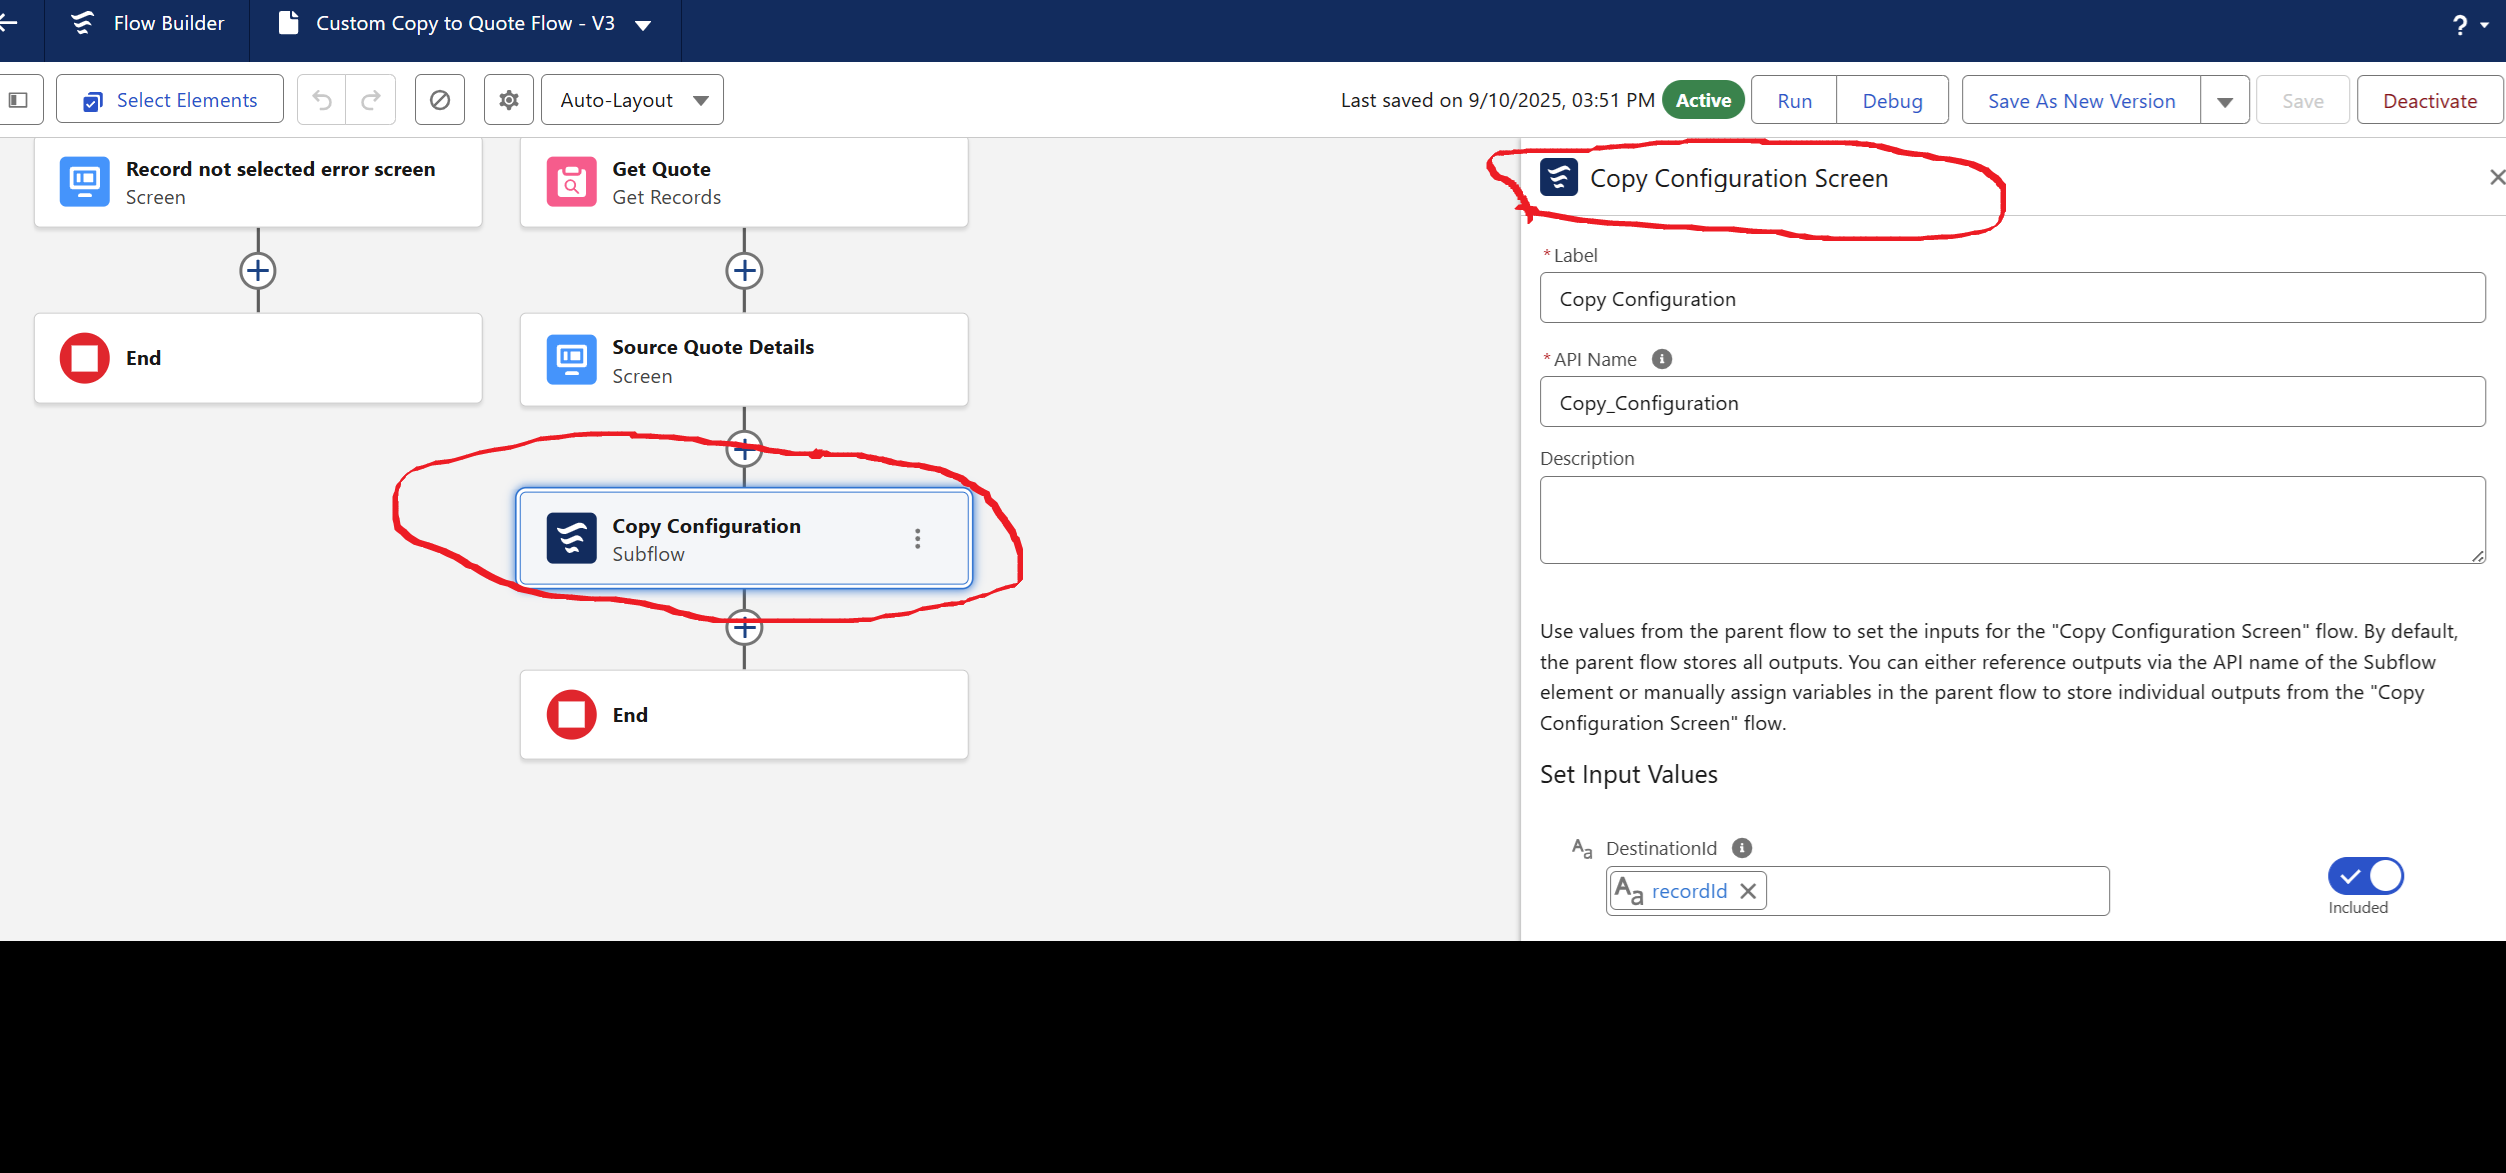
Open the active version using Open link

-
Locate a Subflow element that references Copy Configuration Screen.
-
Select the ellipsis on the element and then Delete the element.
-
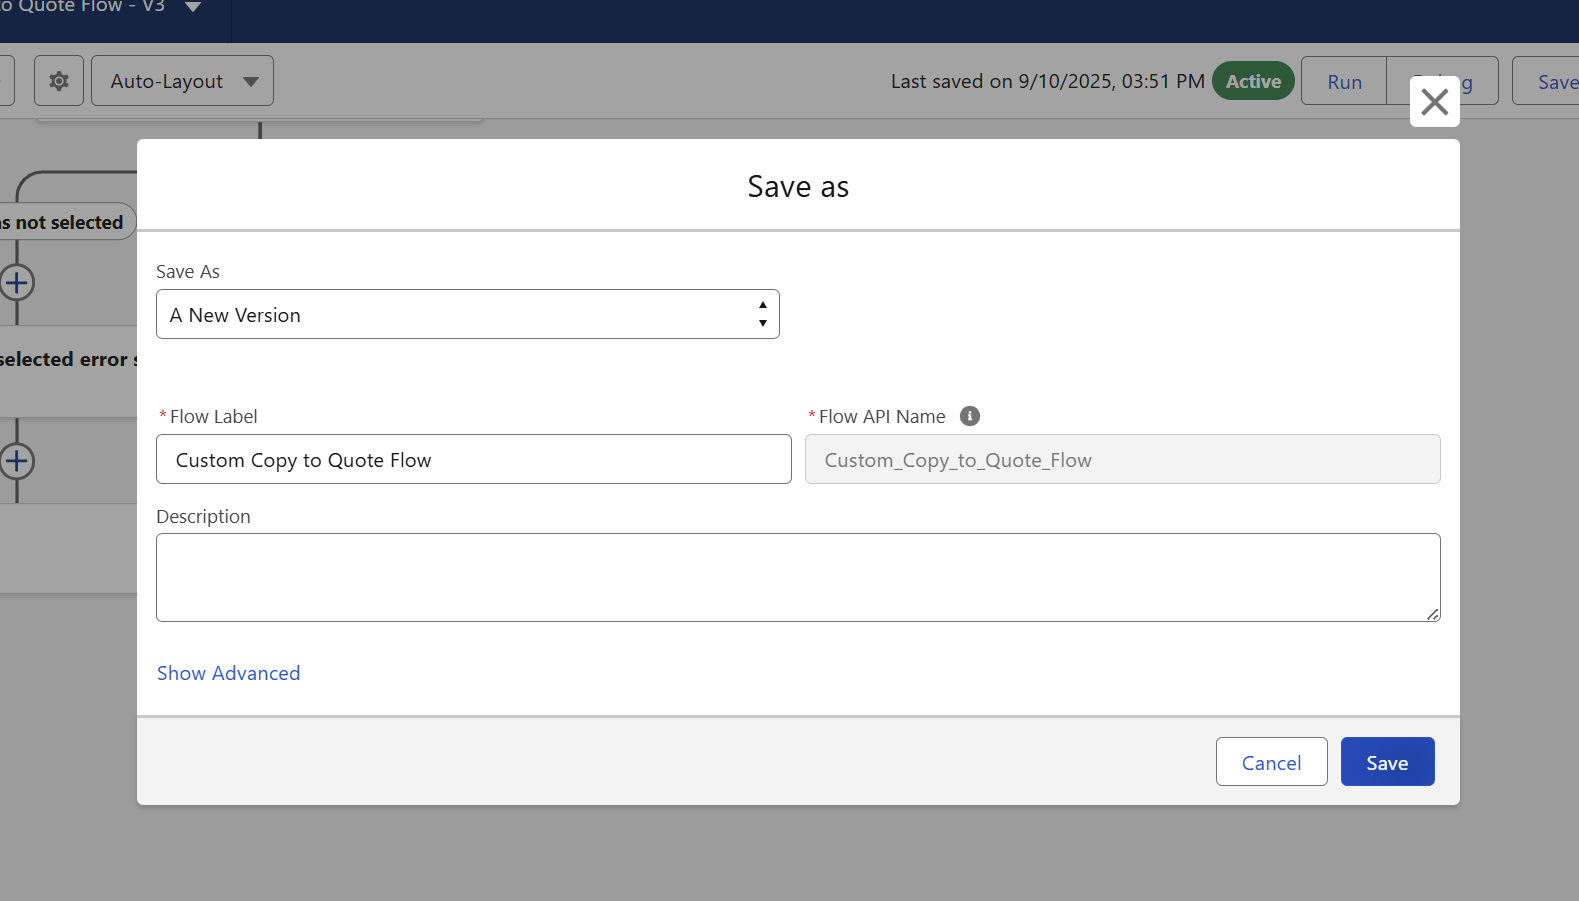
Select Save As New Version.
-
Select Save.
-
Select Activate.

-
Go back to Setup > Flows.
-
Locate the same flow and select View Details and Versions.
-
Remove one last inactive version(the version that was overwritten by the change in this step.
-
Select OK in the dialog. Now the active version is not referring to the CopyConfigScreen flow.
Final Uninstallation Run
In this step, an uninstallation process of the main package in initiated after backing up and removing all references.
-
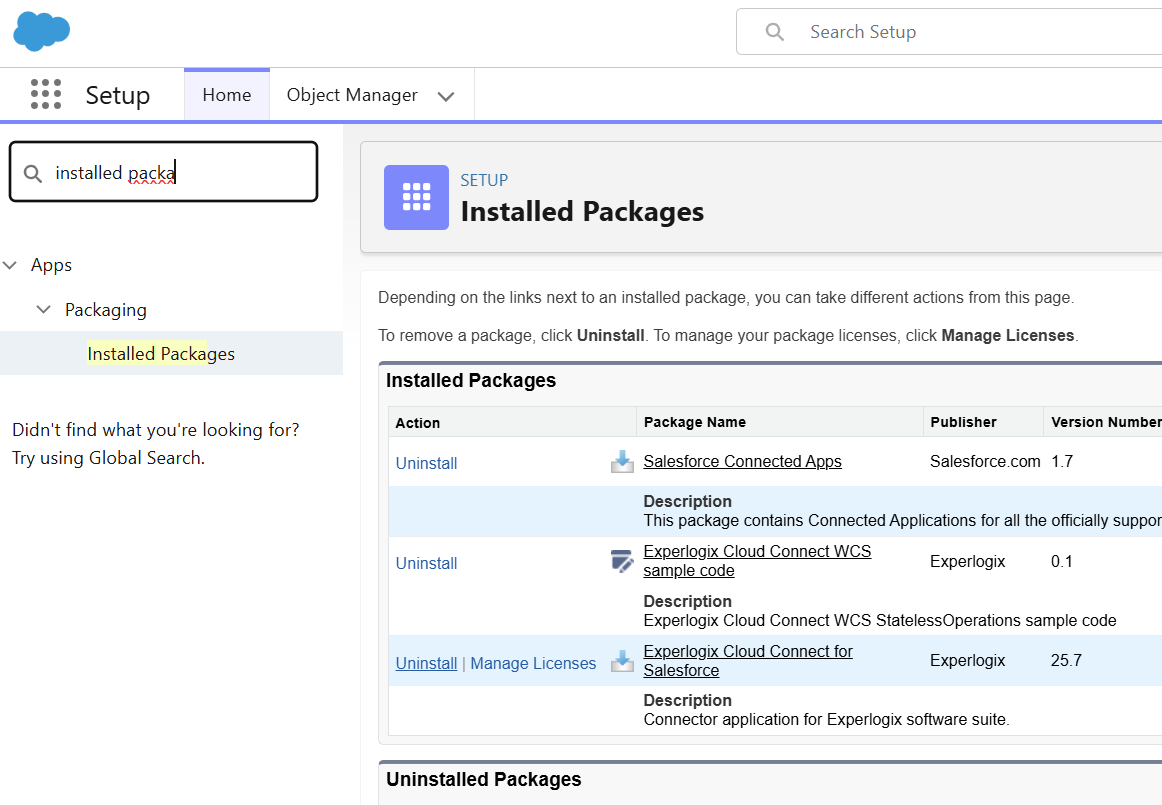
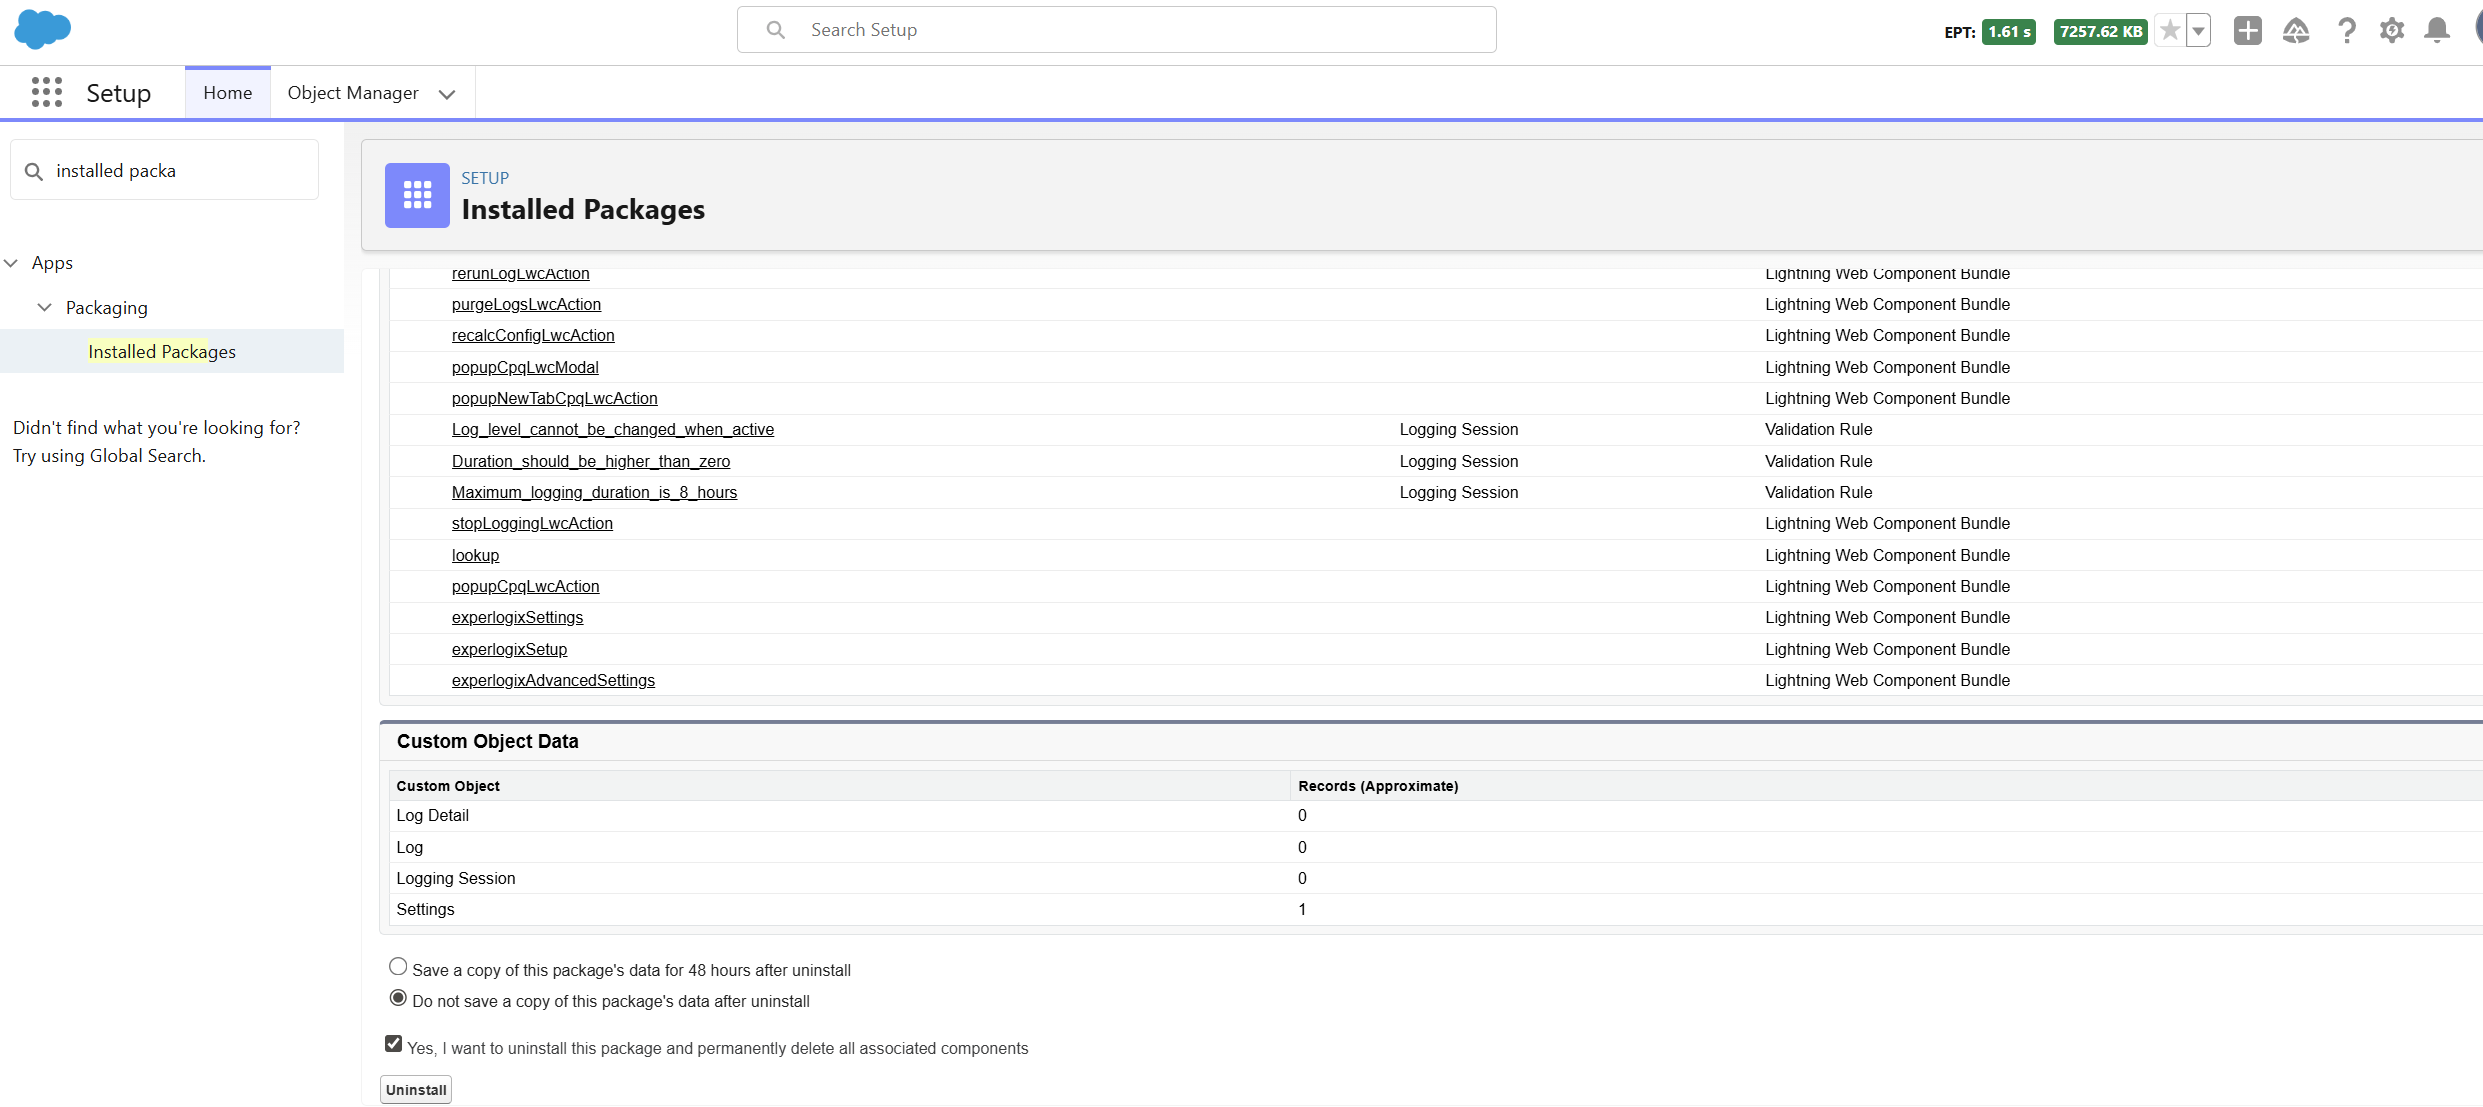
Navigate to Setup > Installed Packages.
-
Select Uninstall link next to Experlogix Cloud Connect for Salesforce package.
-
Select Do not save a copy of this package's data after uninstall.
-
After dialog displays, select OK.
-
Check Yes, I want to uninstall this package and permanently delete all associated components.
-
Select Uninstall.
-
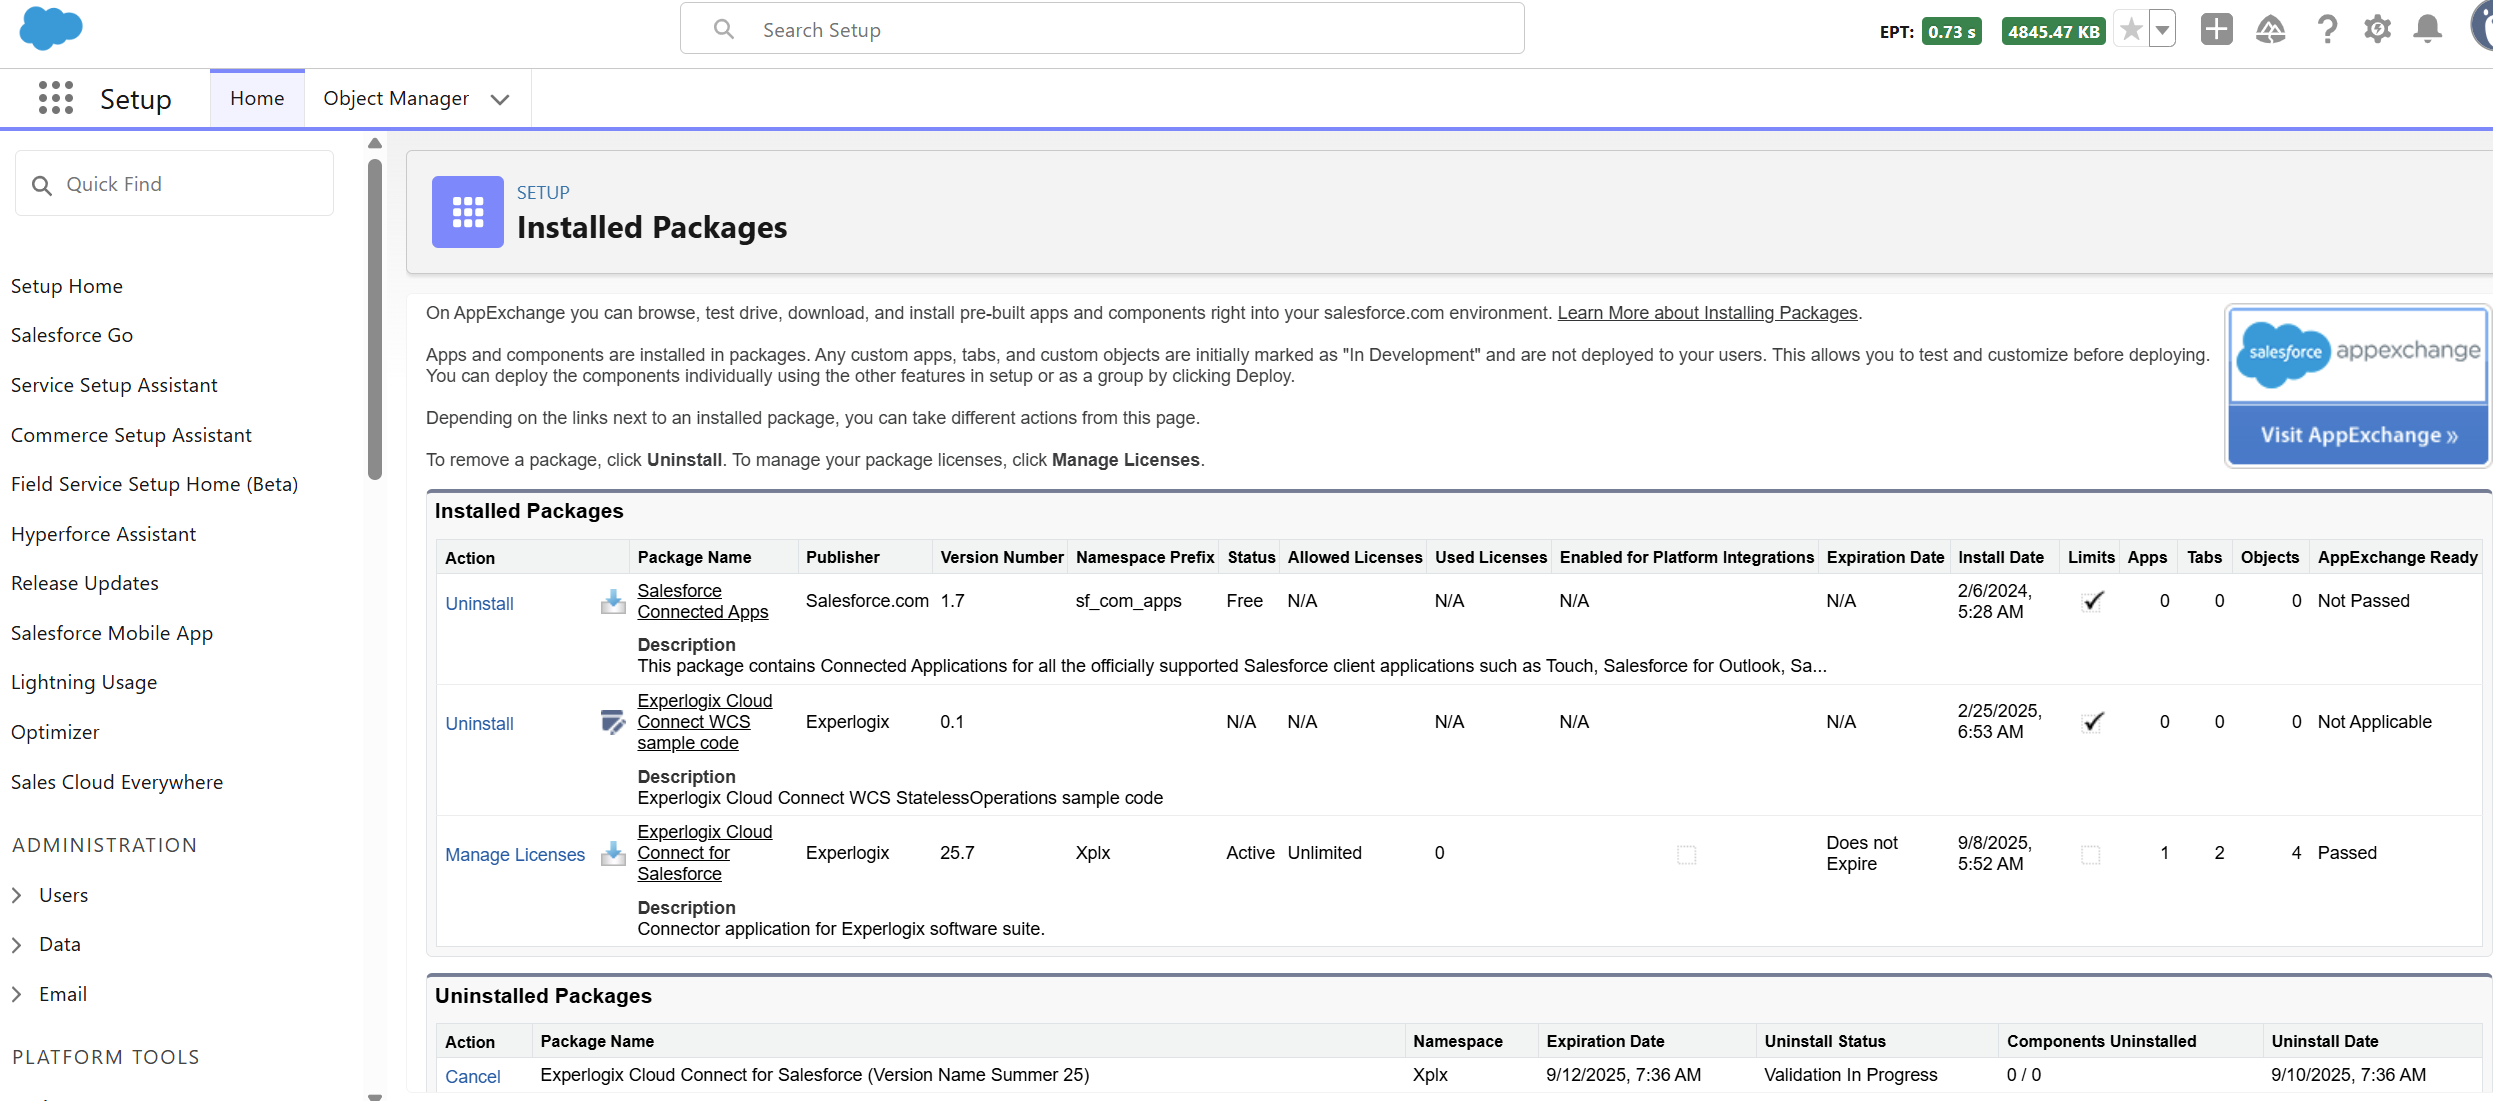
Select Uninstall. The uninstallation can be monitored in the Setup-Installed Packages.
Installation of the new packages
Core package installation
Use the following link to install the Experlogix Cloud Connect For Salesforce package.
Before the release, for internal testing use this link.
CPQ Extension package installation
Use the following link to install the Experlogix Cloud Connect - CPQ Extension package.
Before the release, for internal testing use this link.
CPQ Buttons For Salesforce Classic UI package installation
Not every customer is using this extension. Install only if it was uninstalled during previous phases. Use the following link to install the Experlogix Cloud Connect - CPQ Buttons For Salesforce Classic UI package.
Before the release, for internal testing use this link.
CPQ Action Templates package installation
Not every customer is using this extension. Install only if it was uninstalled during previous phases. Use the following link to install the Experlogix Cloud Connect - CPQ Action Templates package.
Before the release, for internal testing use this link.
Restoration of Removed Dependencies
Now, when the packages have been reinstalled all removed settings have to be brought back.
Acquire Renewed Experlogix Permission Set Ids
-
Navigate to Dataloader.io.
-
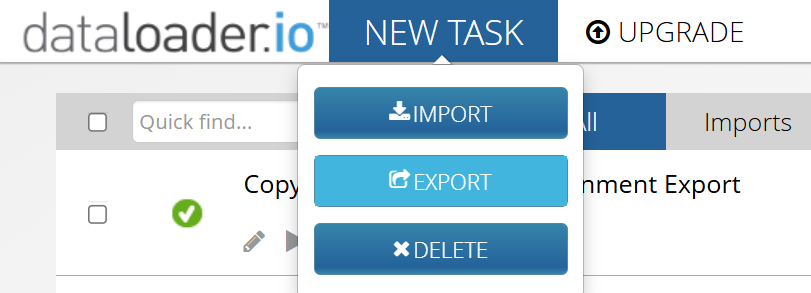
Select New Task & Export.
-
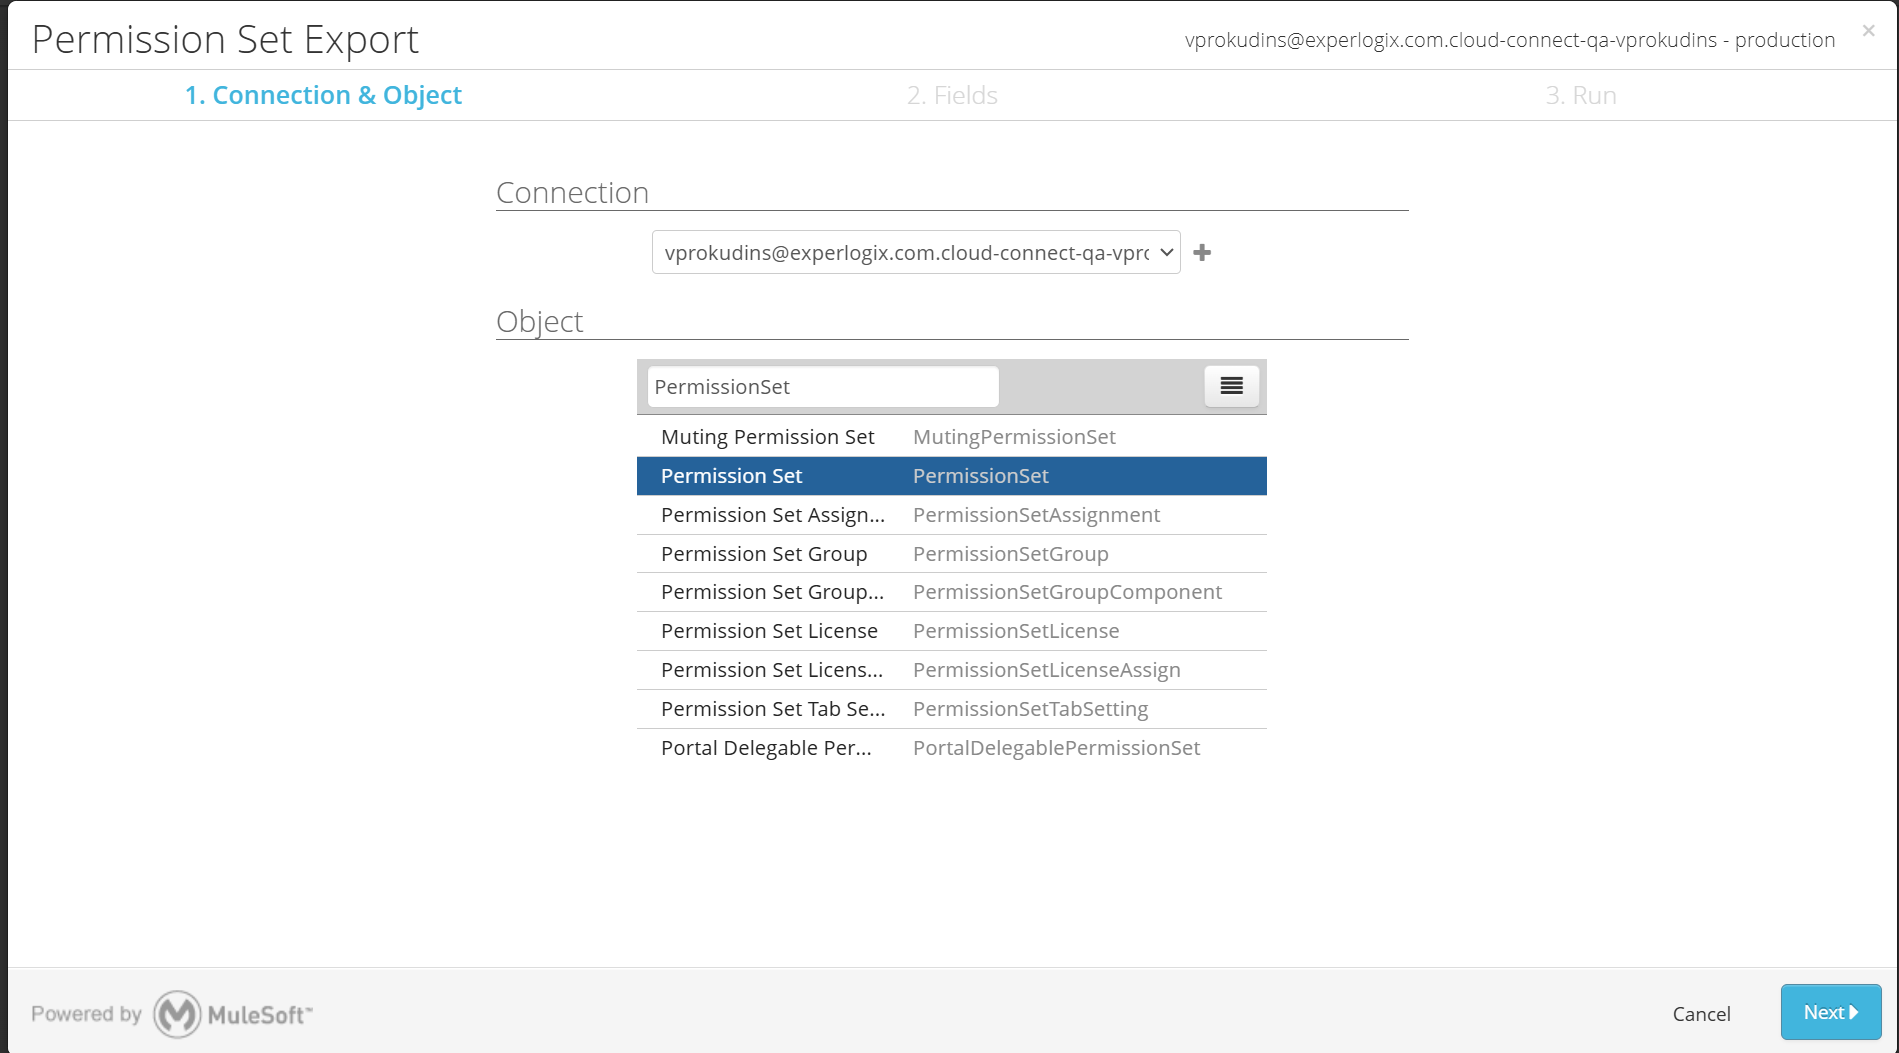
Select PermissionSet as the object.
-
Select Next.
-
Expand SOQL Query and paste in the following query:
SELECT Id, Name FROM PermissionSet WHERE Name IN ('Experlogix_Logger_Admin', 'Experlogix_Settings_Admin', 'Experlogix_Settings_User', 'Experlogix_CPQ_User', 'Experlogix_Buttons_Classic') -
Select Close in the dialog.
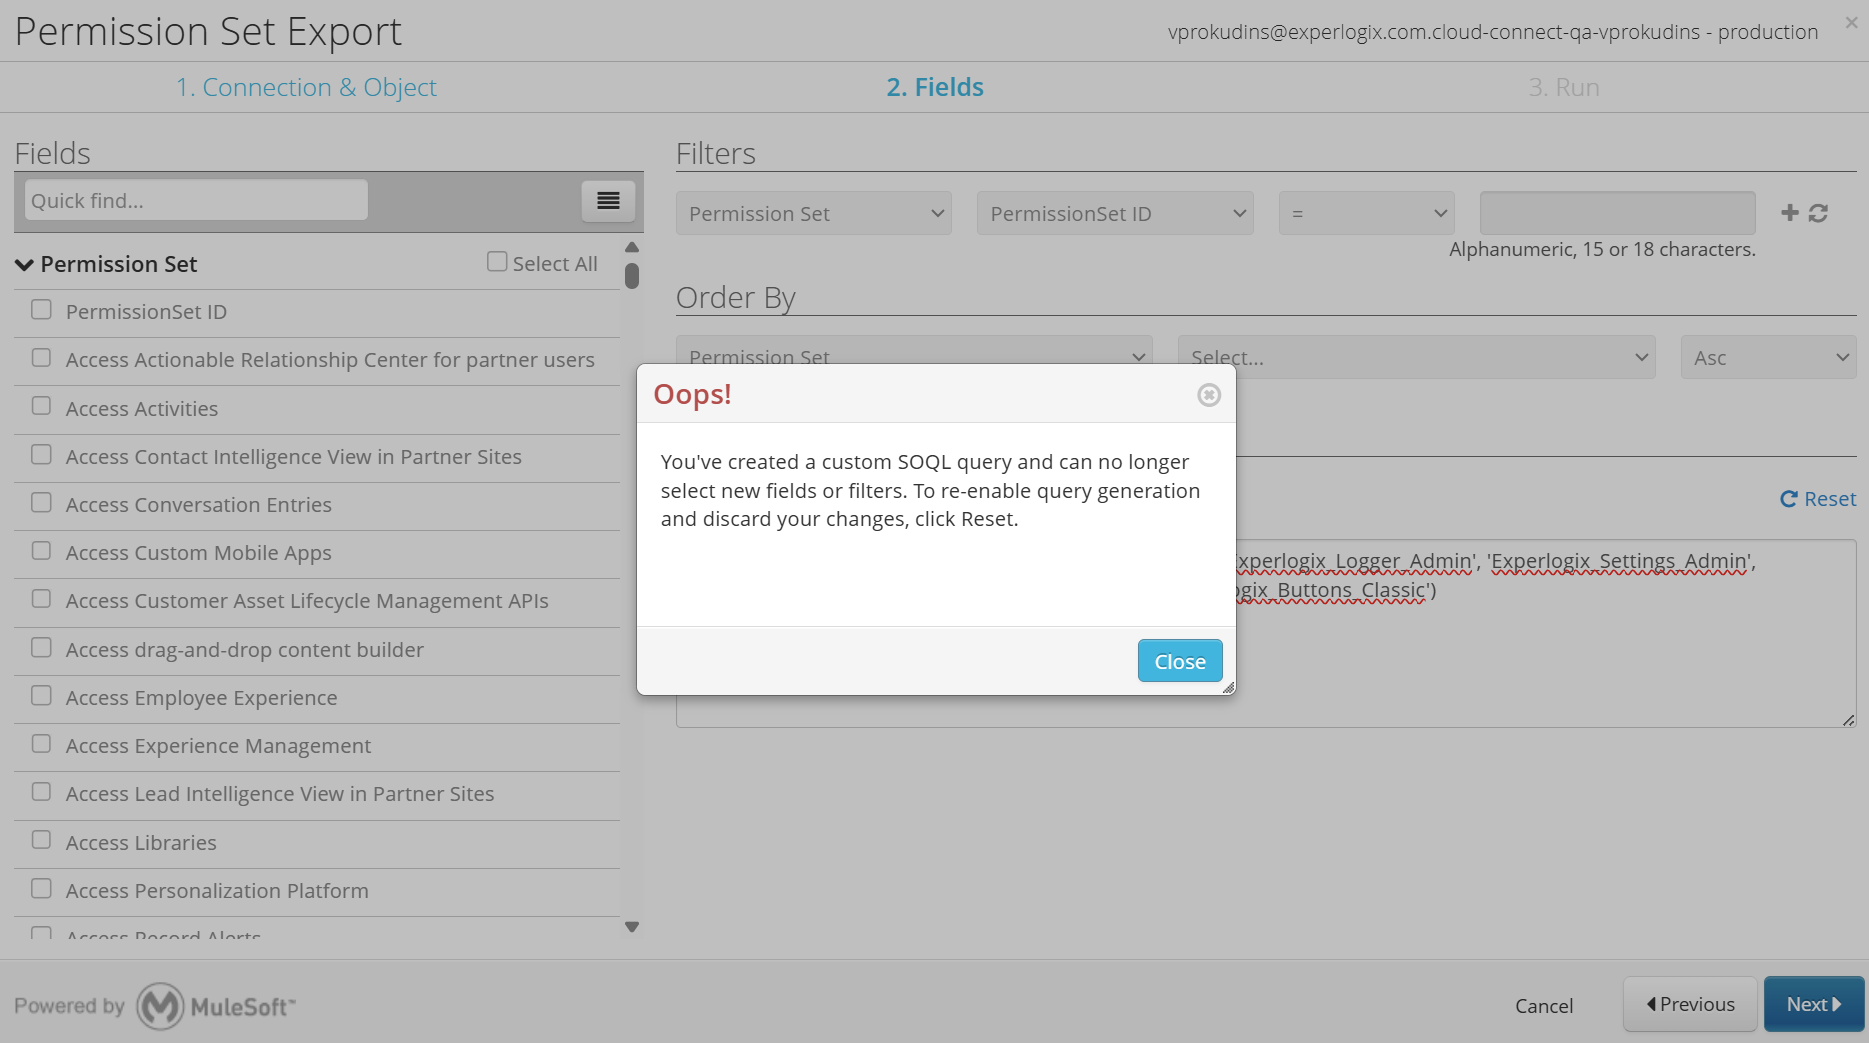
-
Select Next.
-
Select Save & Run.
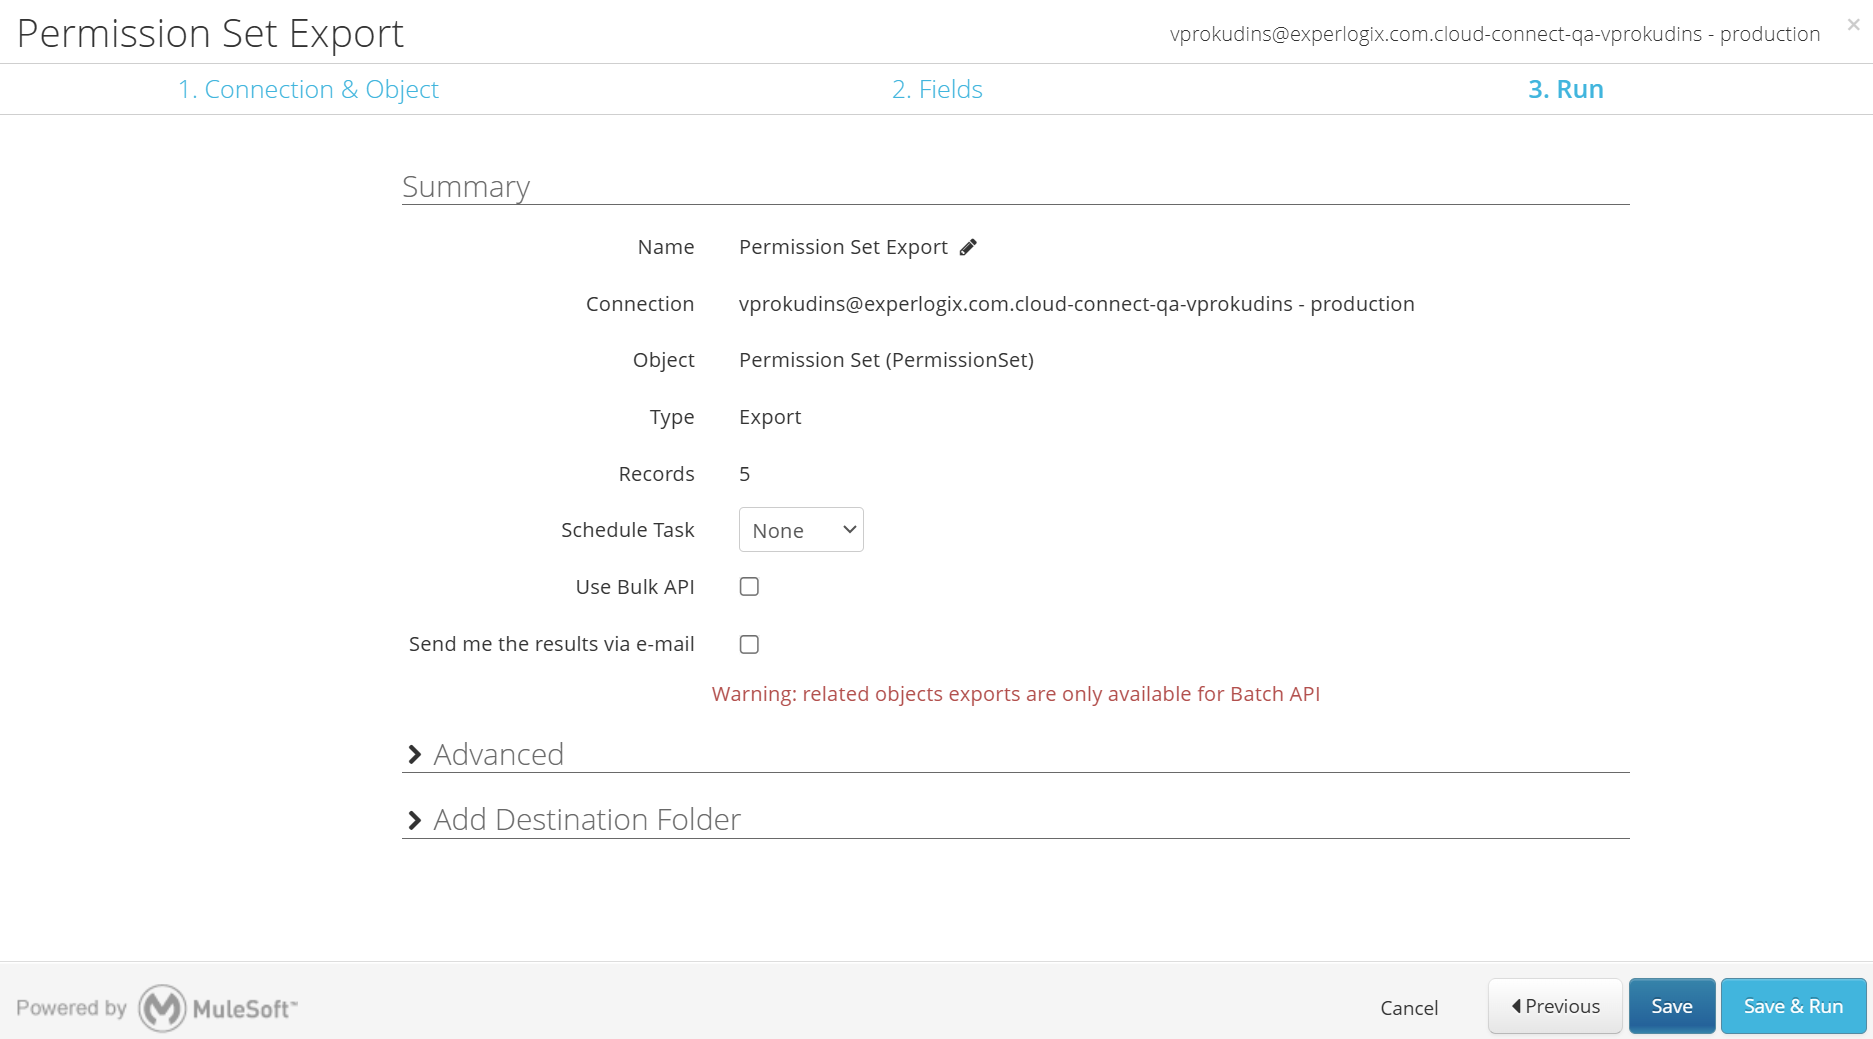
-
Wait for the job to finish (1-2min) and refresh the screen.
-
Select Successes to download export results.
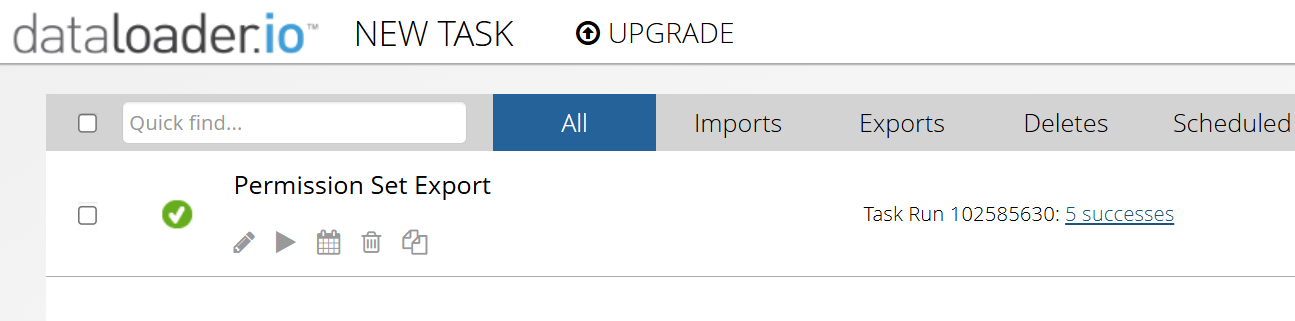
-
Name this file NewPermissionSetIds.csv.
Apply New Permission Set IDs to PermissionSetAssignmentExport.csv
After the packages have been uninstalled, all associated components are deleted. When the packages are reinstalled, these components are regenerated with new IDs. As a result, the backup files created earlier still reference the old, deleted IDs. In this step, a combination of data exports is used to update the contents of the PermissionSetAssignmentExport.csv backup file so that it references the new component IDs before being reimported into Salesforce.
-
Create a copy of PermissionSetAssignmentExport.csv and name it PermissionSetAssignmentImport.csv.
-
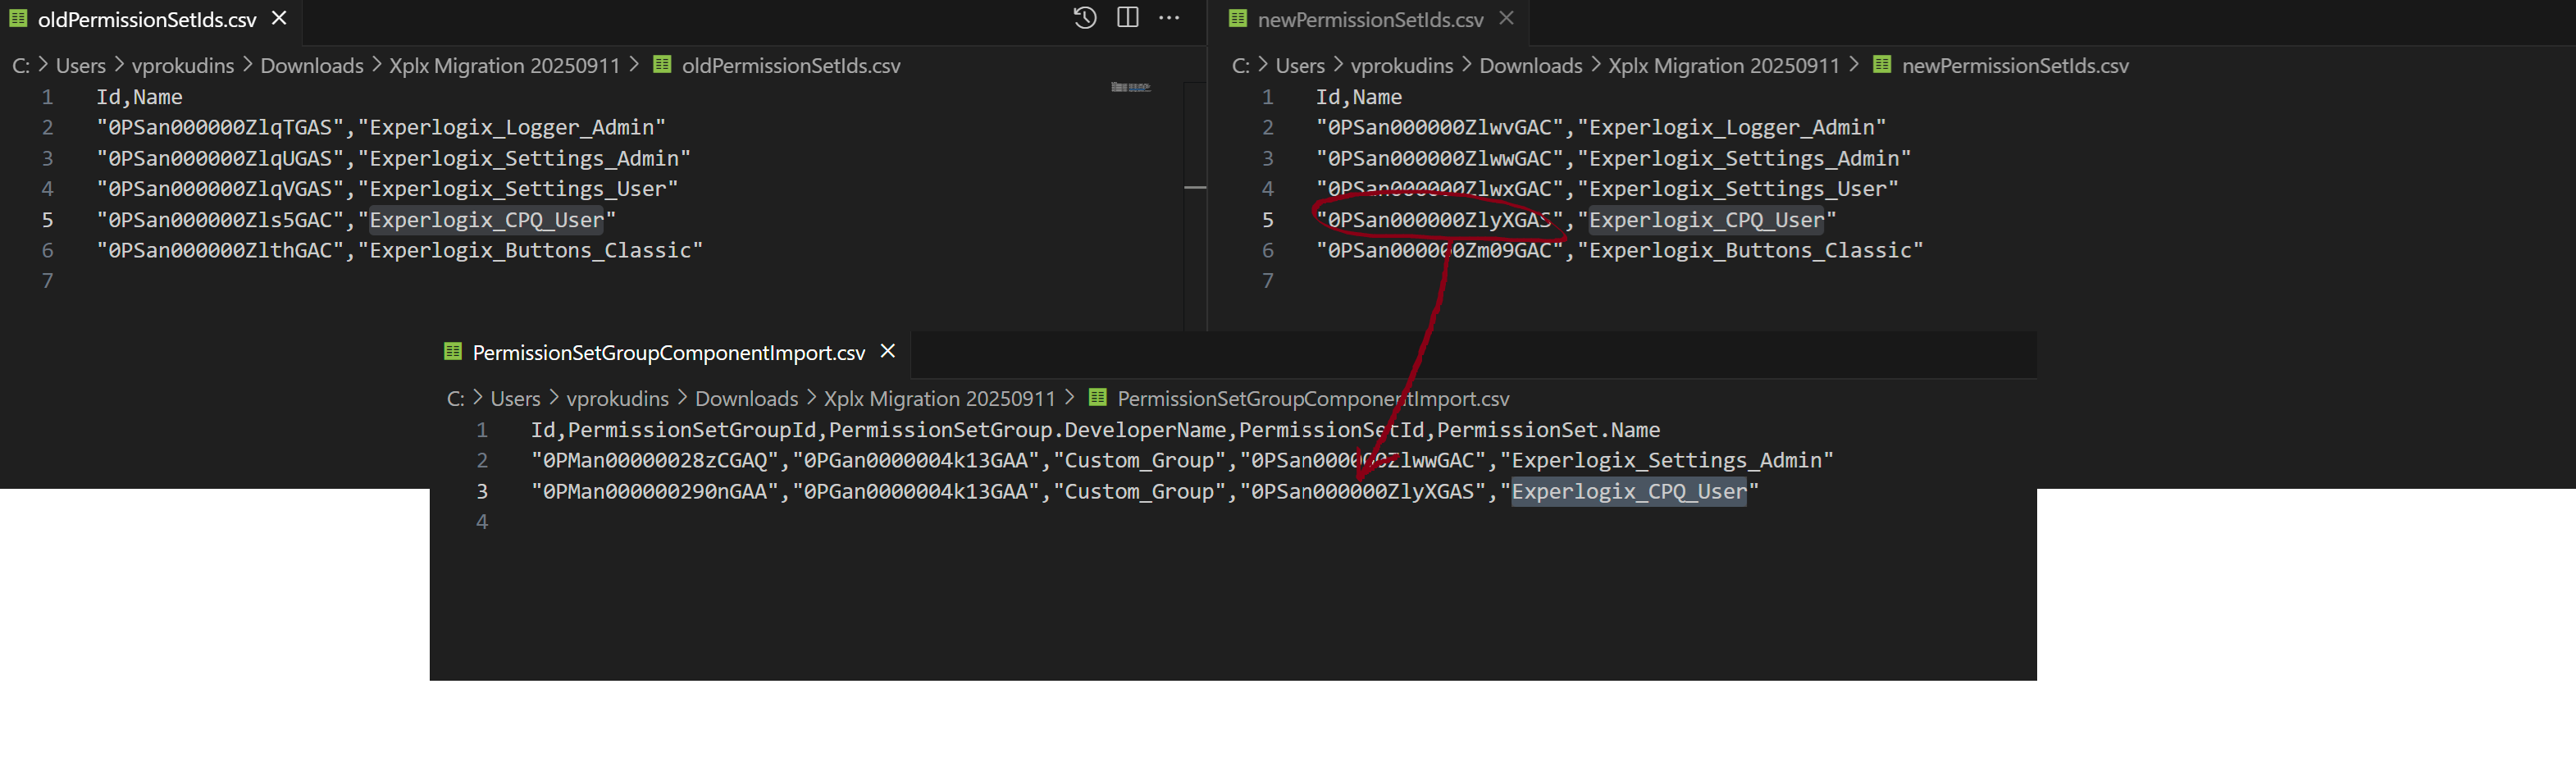
For each Id in OldPermissionSetIds.csv file, using a PermissionSet.Name field value, match a corresponding Id from NewPermissionSetIds.csv file and replace the old ID with the new ID in PermissionSetAssignmentImport.csv. Every record's PermissionSetId should get an updated value.
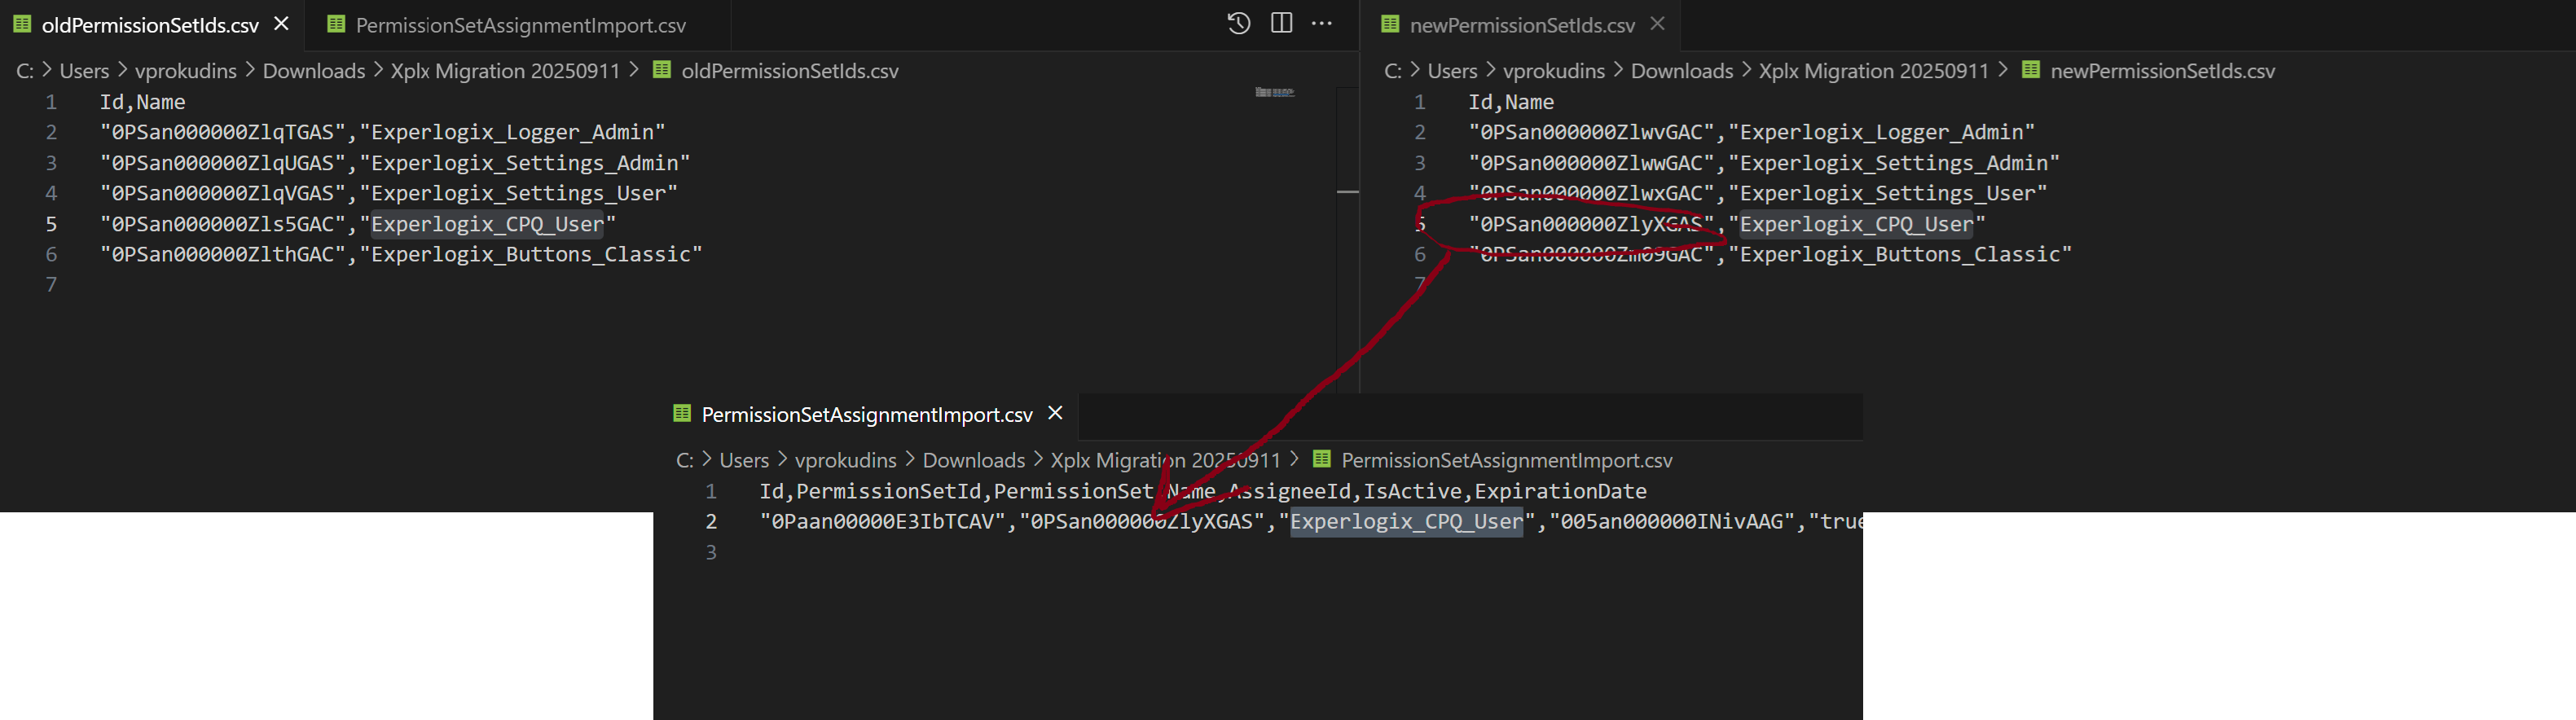
Apply new Permission Set Ids to PermissionSetGroupComponentExport.csv
Similar to the previous step, the old Permission Set IDs must be replaced with the new IDs from the latest export. Update the PermissionSetGroupComponentExport.csv backup file accordingly before reimporting it into Salesforce.
-
Create a copy of PermissionSetGroupComponentExport.csv and name it PermissionSetGroupComponentImport.csv.
-
For each Id in OldPermissionSetIds.csv file, using a PermissionSet.Name field value, match a corresponding Id from NewPermissionSetIds.csv file and replace the old Id with the New Id in PermissionSetGroupComponentImport.csv. Every record's PermissionSetId should get an updated value.
Restoration of Permission Set Assignments
-
Navigate to Dataloader.io.
-
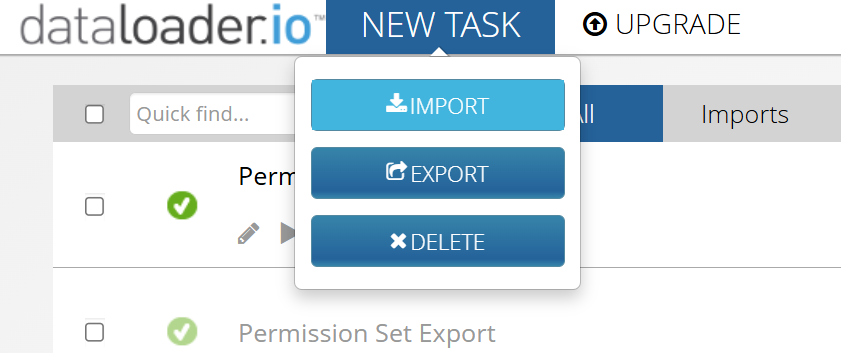
Select New Task & Import.
-
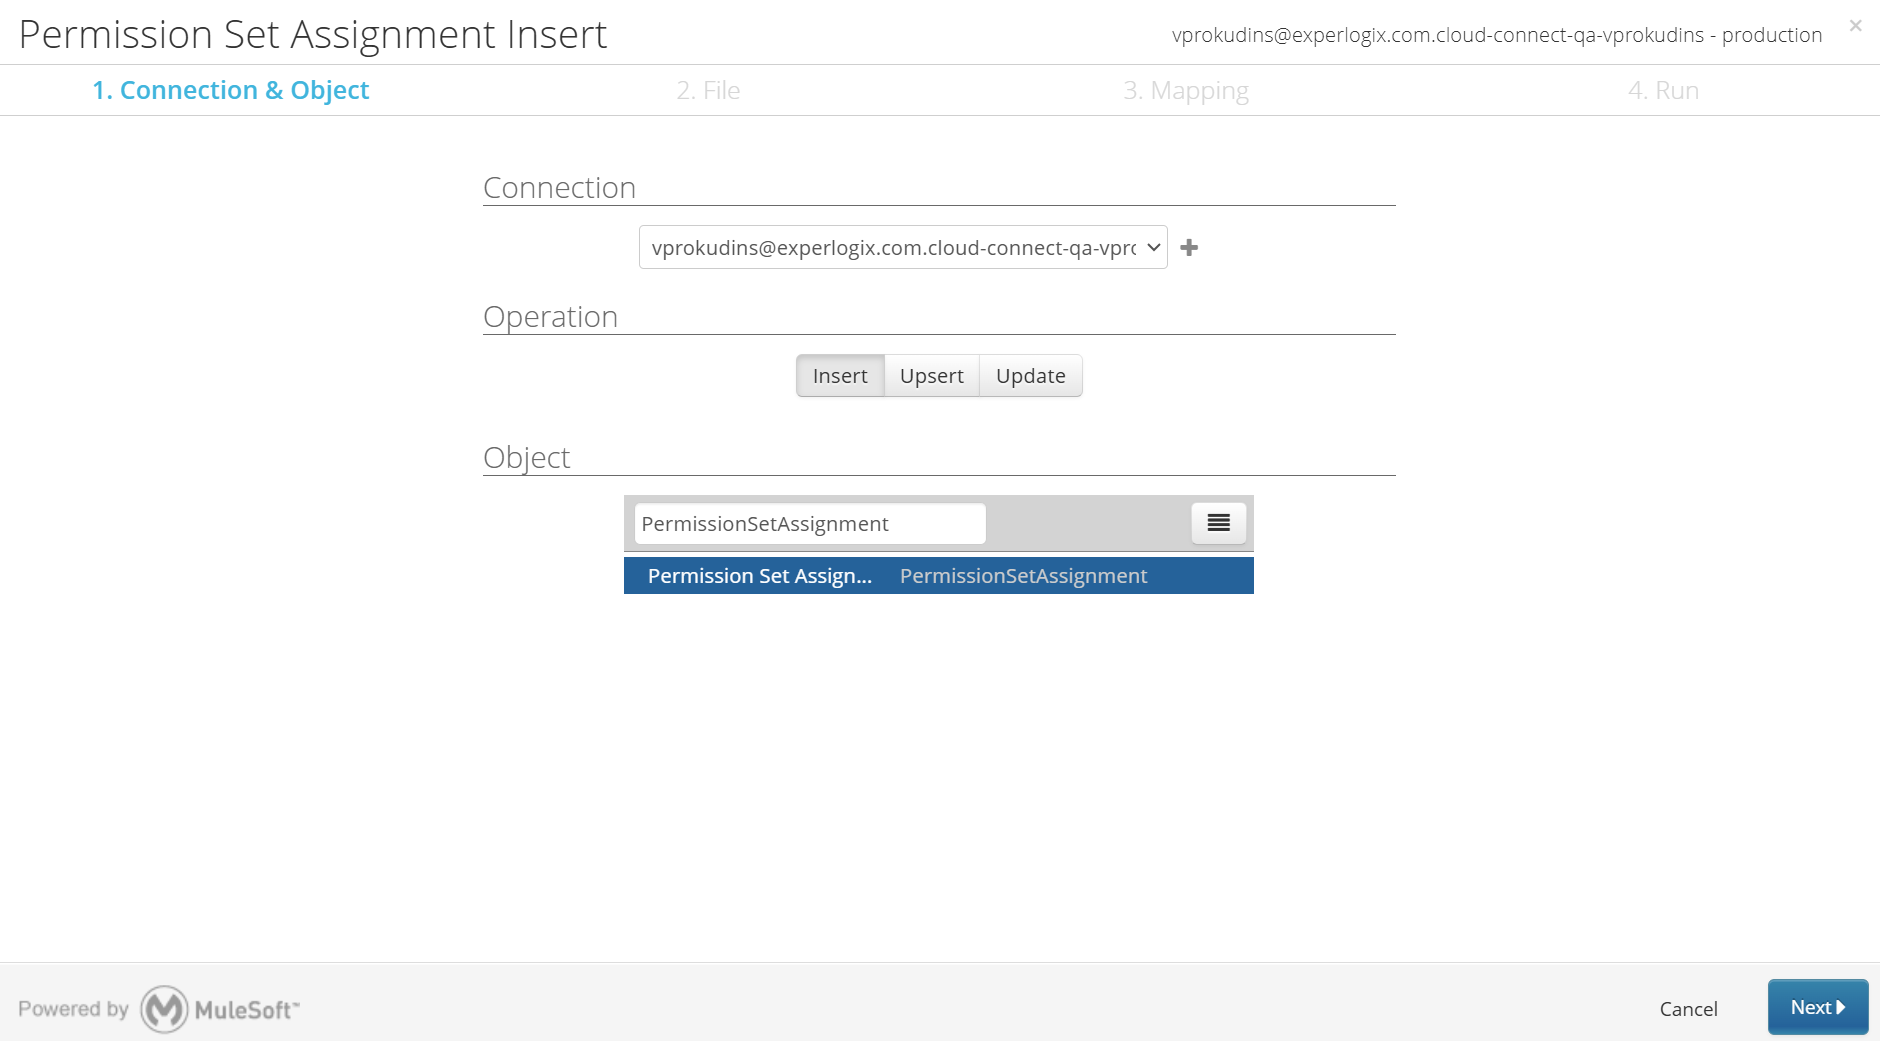
Select PermissionSetAssignment.
-
Select Next.
-
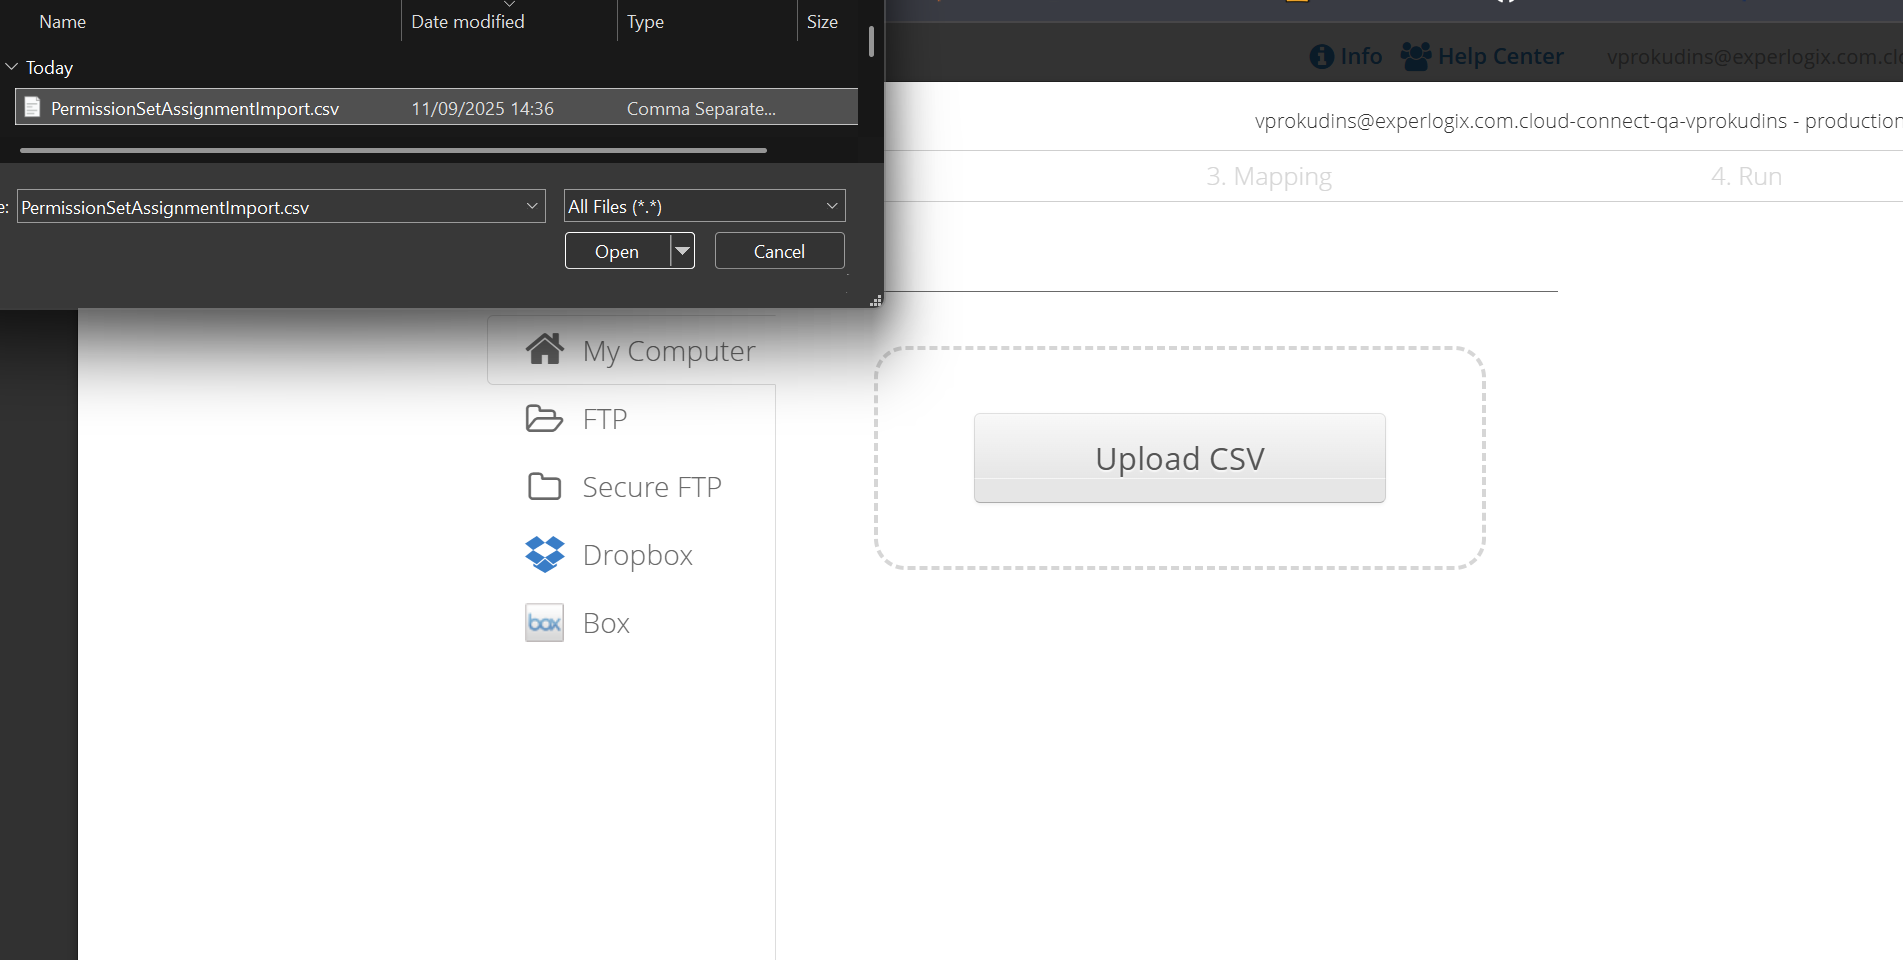
Select the PermissionSetAssignmentImport.csv file created in the Apply New Permission Set IDs to PermissionSetAssignmentExport.csv.
-
Select Next.
-
Keep the default mapping and select Next.
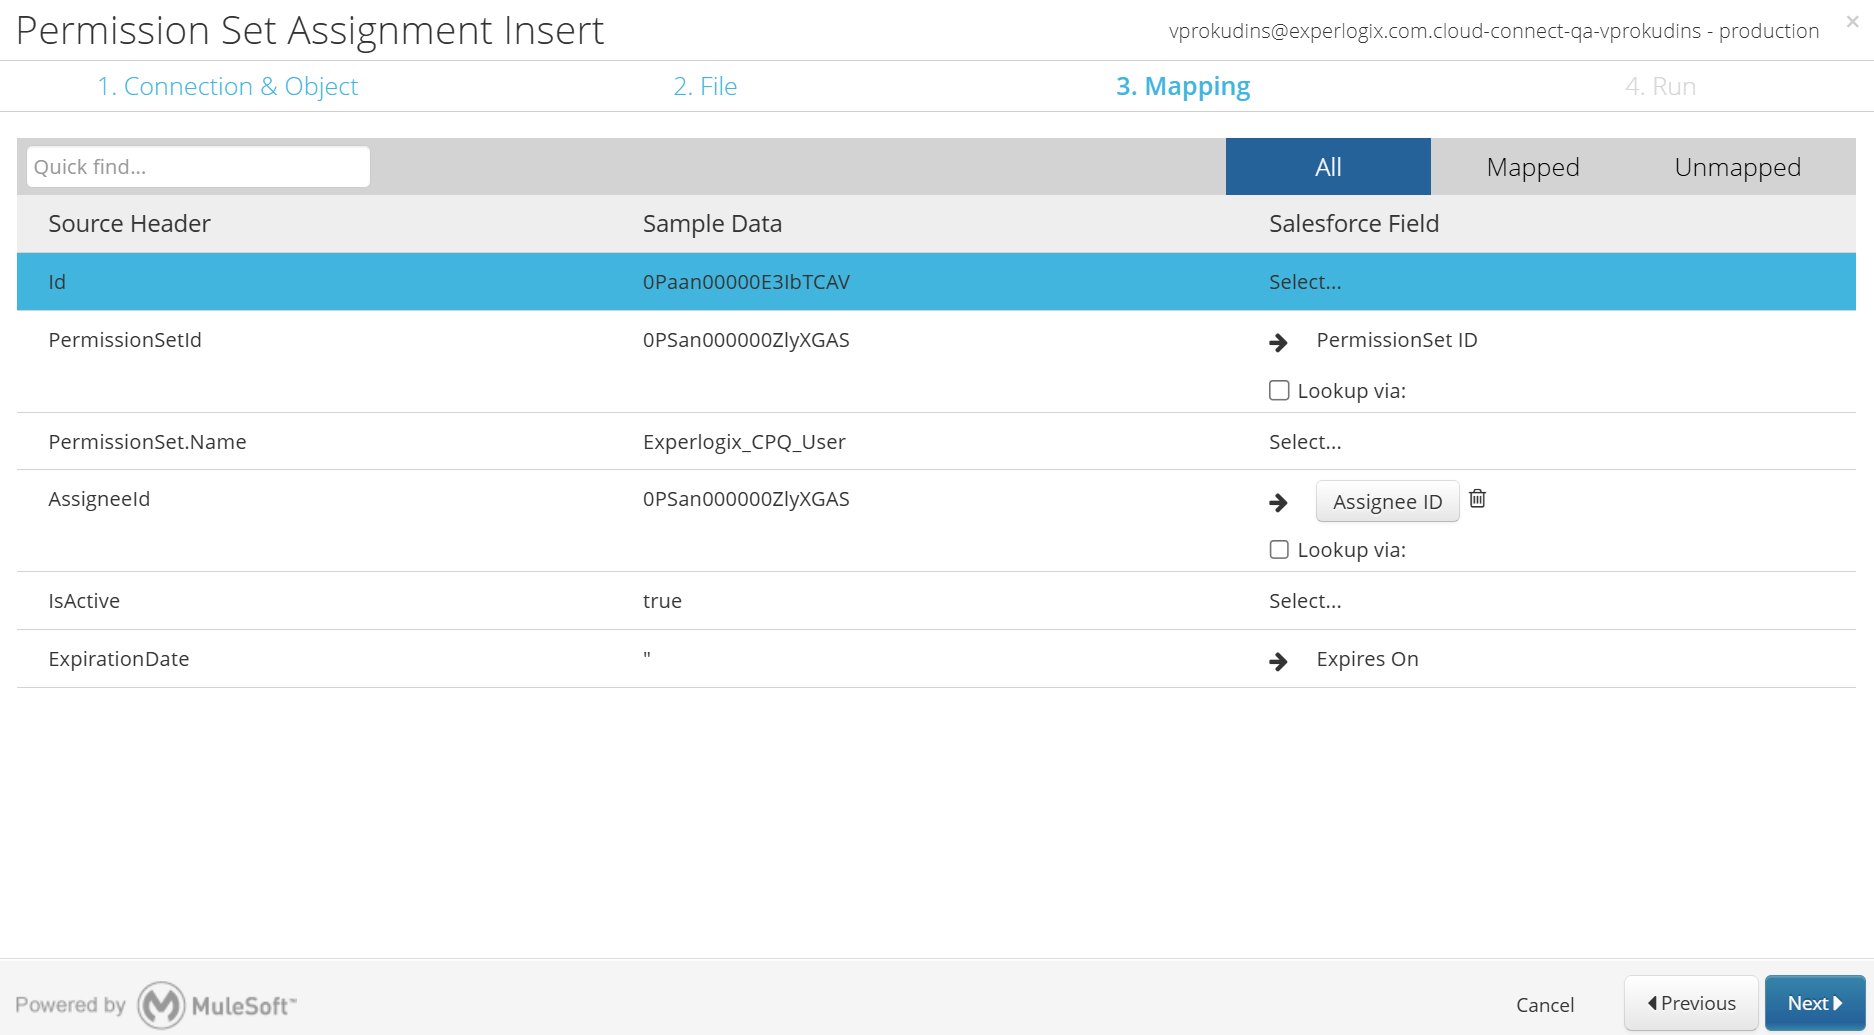
-
Select Save & Run.
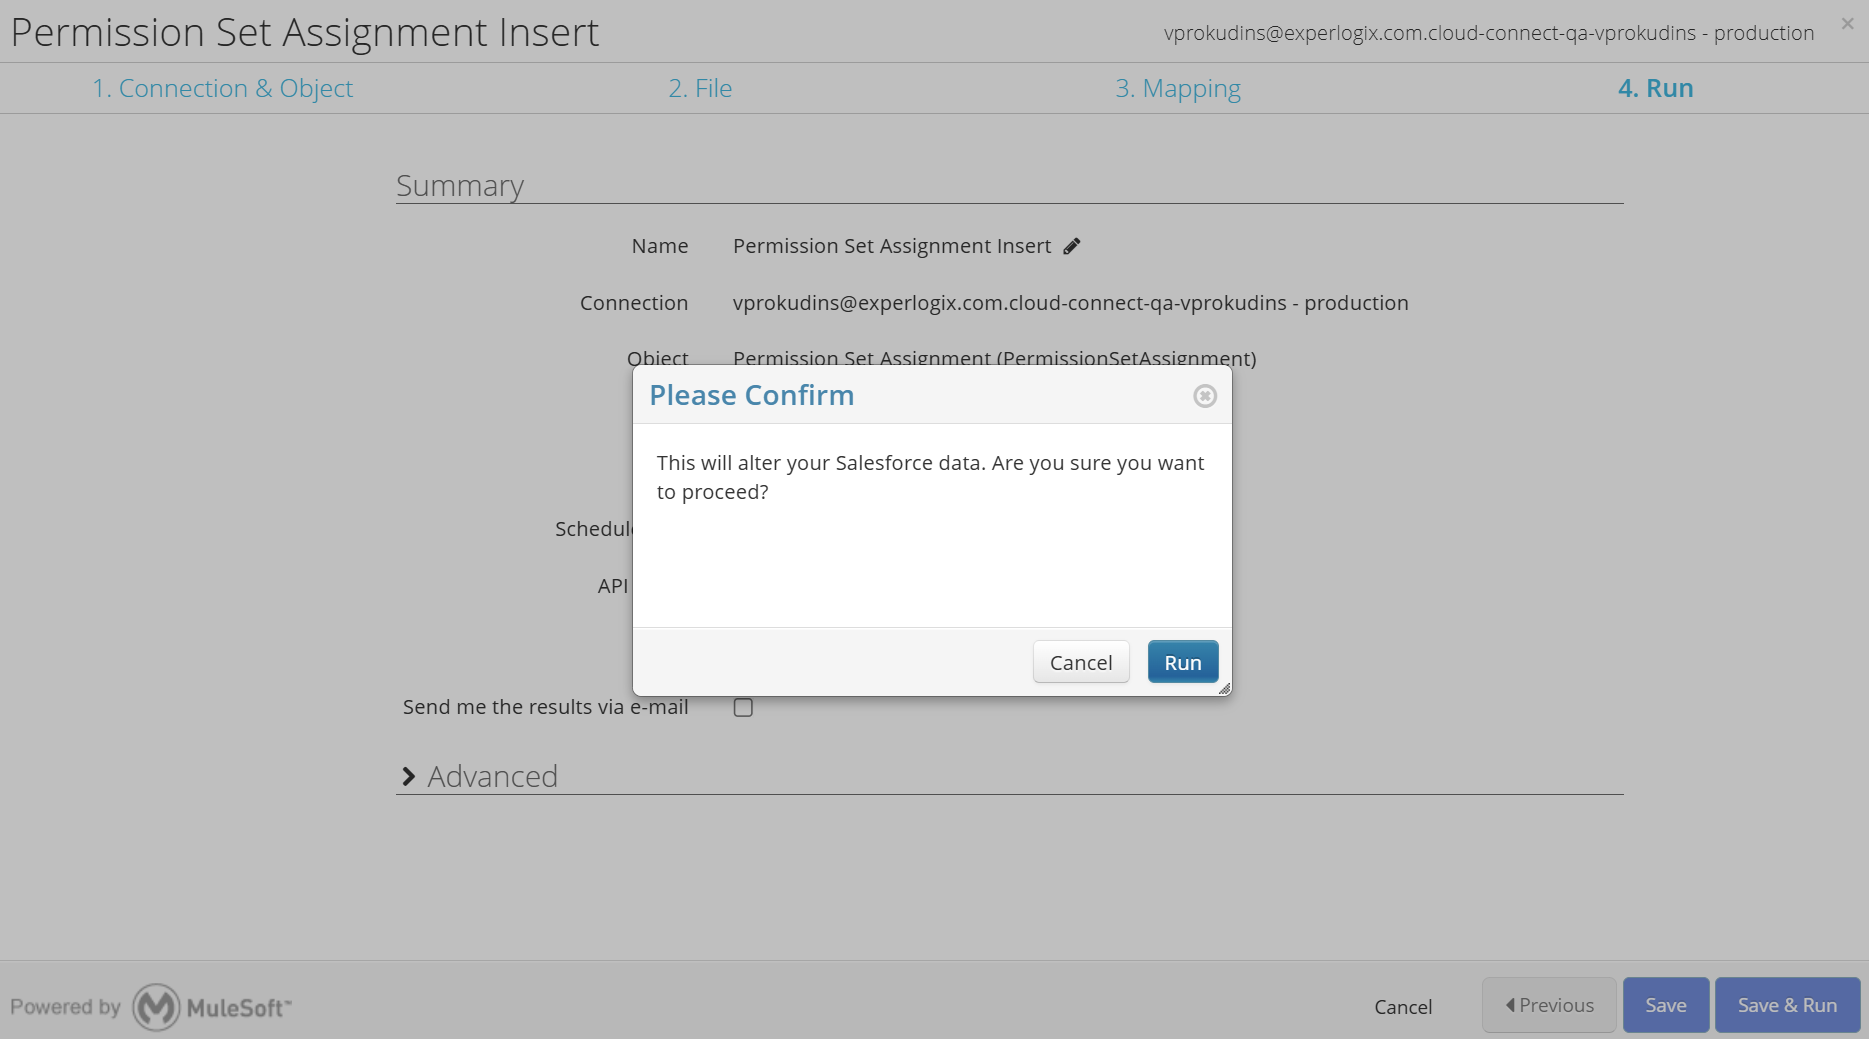
-
Select Run.
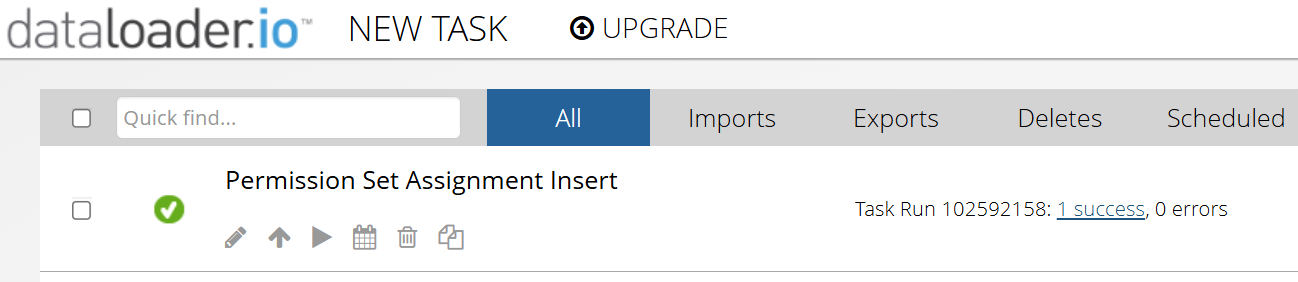
-
Verify that the result is successful.
Restoration of Permission Set Group Assignments
-
Navigate to Dataloader.io.
-
Select New Task & Import.
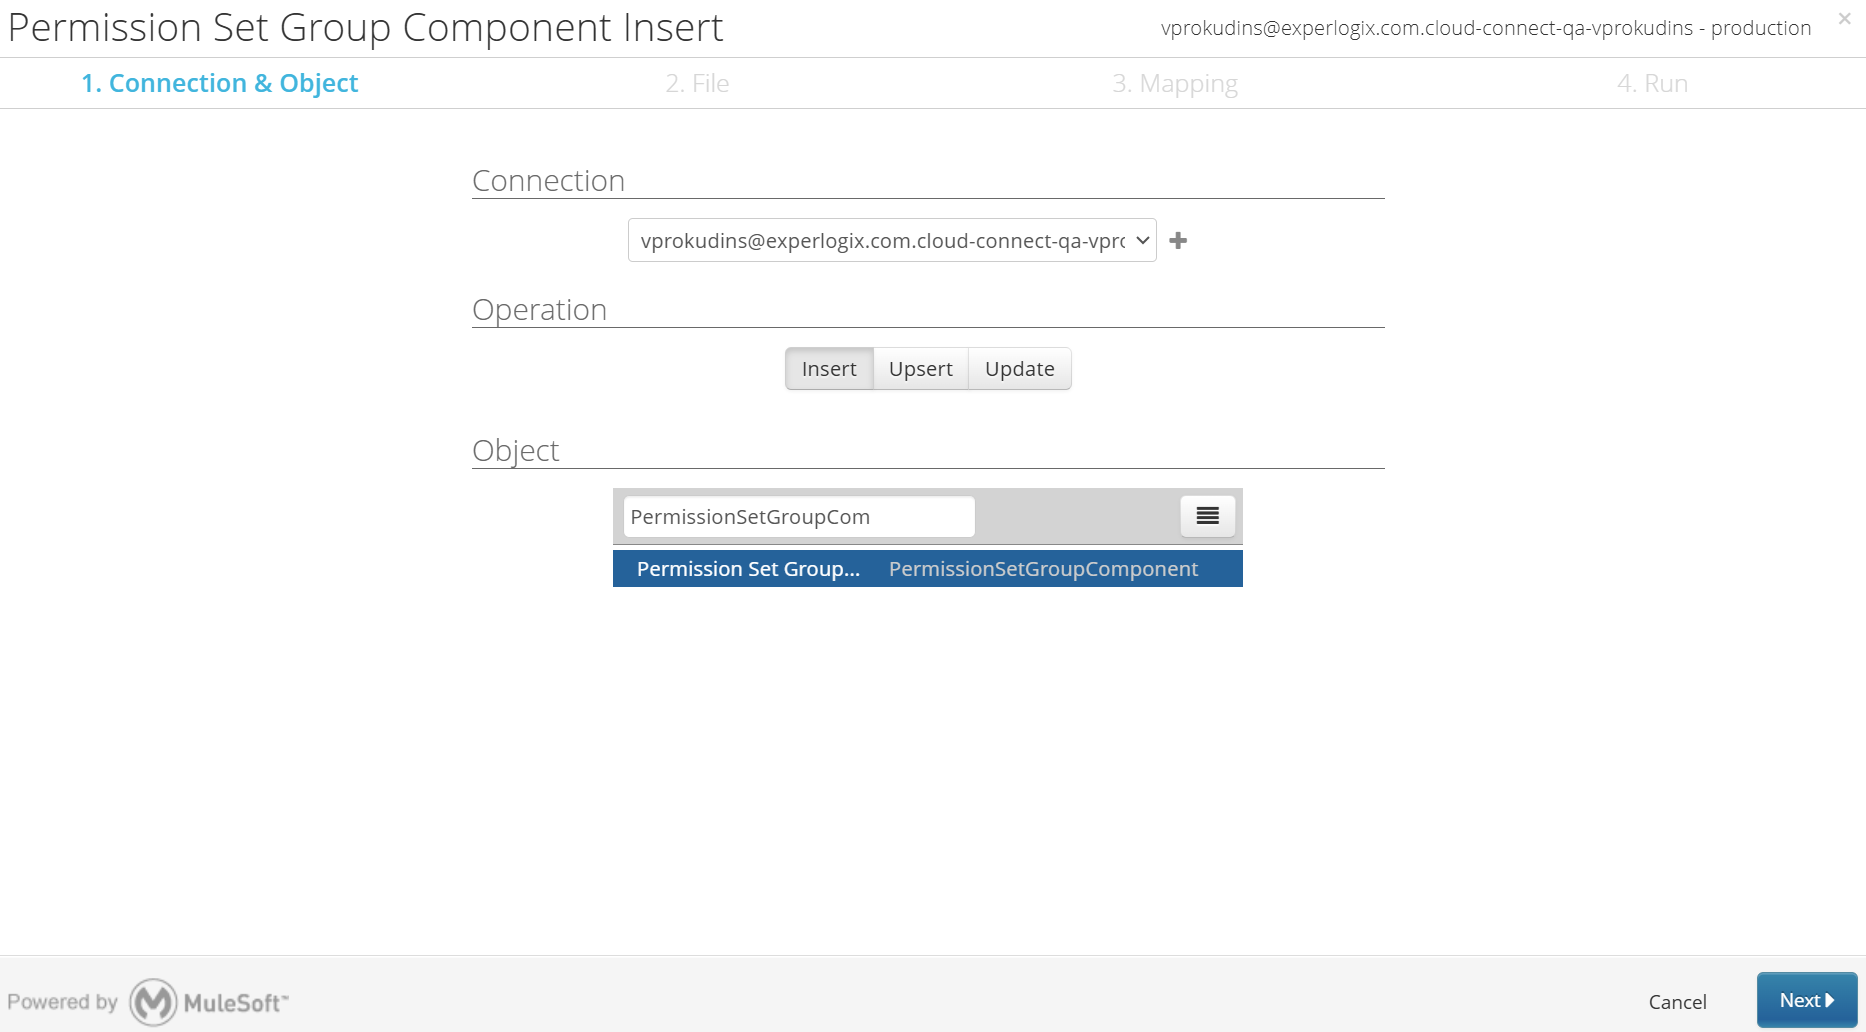
-
Select PermissionSetGroupComponent.
-
Select Next.
-
Select PermissionSetGroupComponentImport.csv file created in the Apply new Permission Set Ids to PermissionSetGroupComponentExport.csv step.
-
Select Next.
-
Keep the default mapping and select Next.
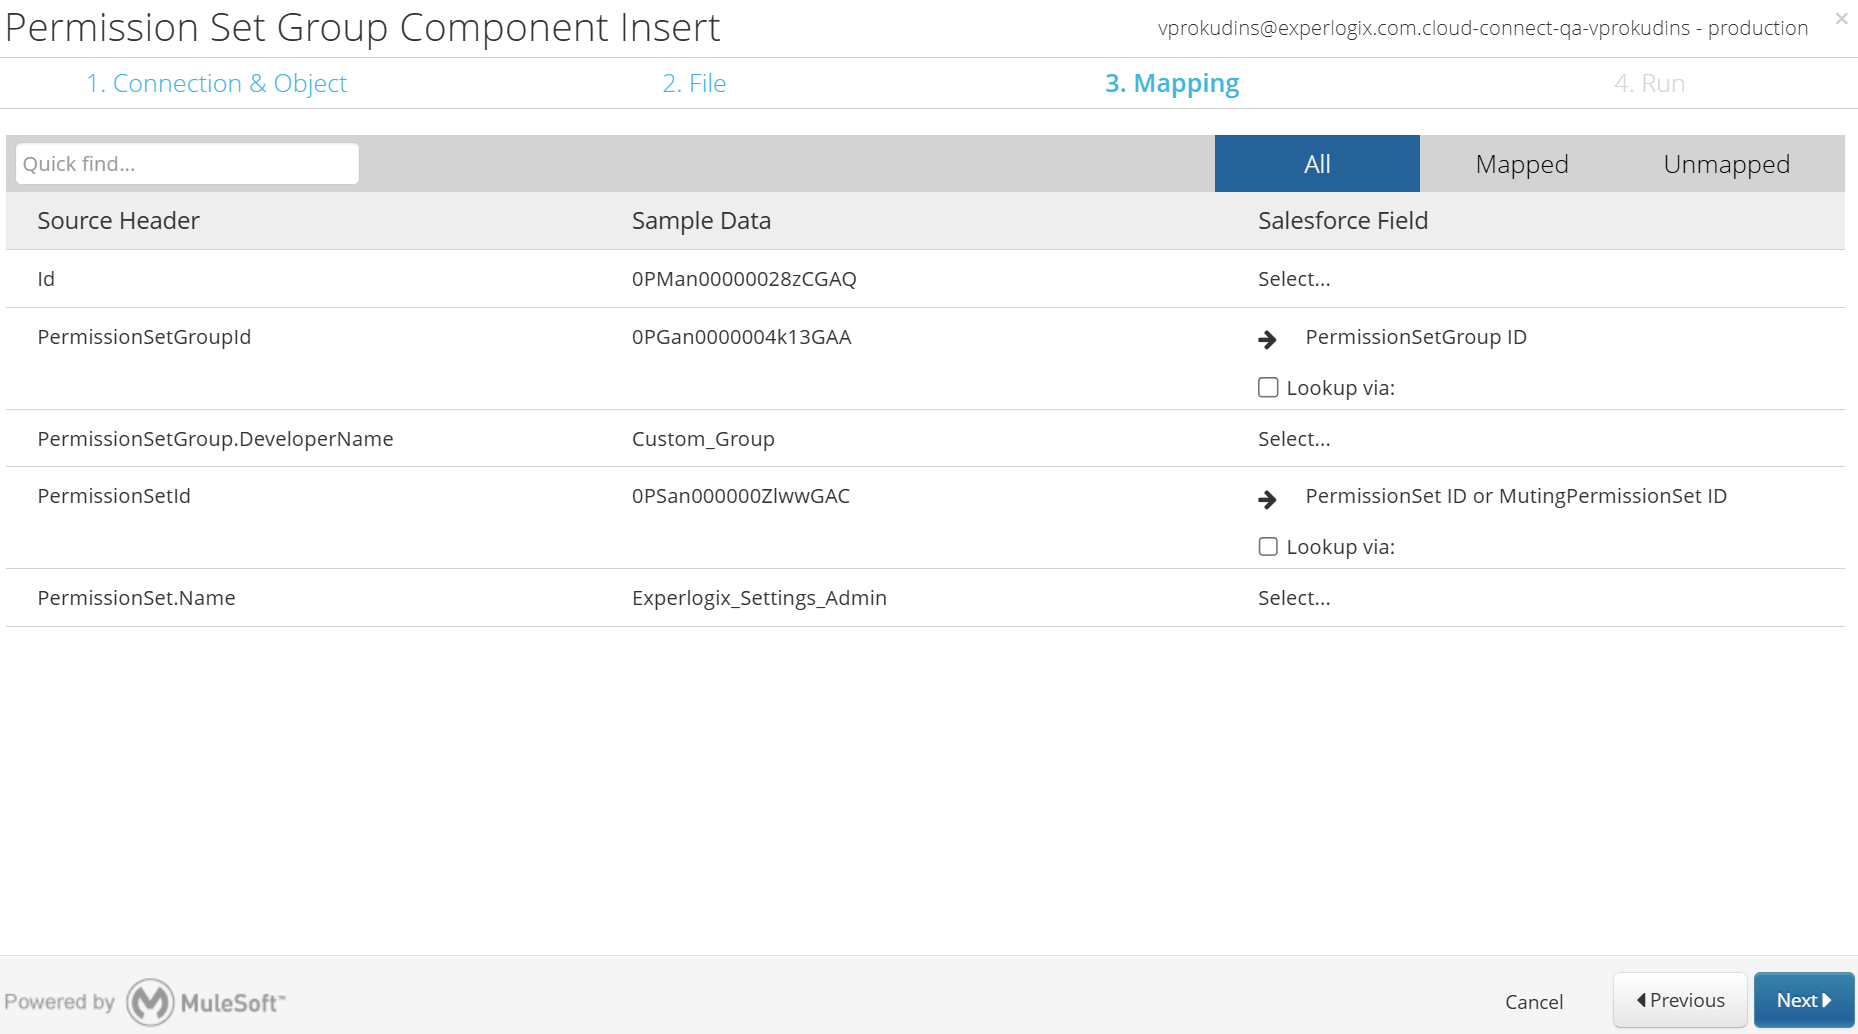
-
Select Save & Run.
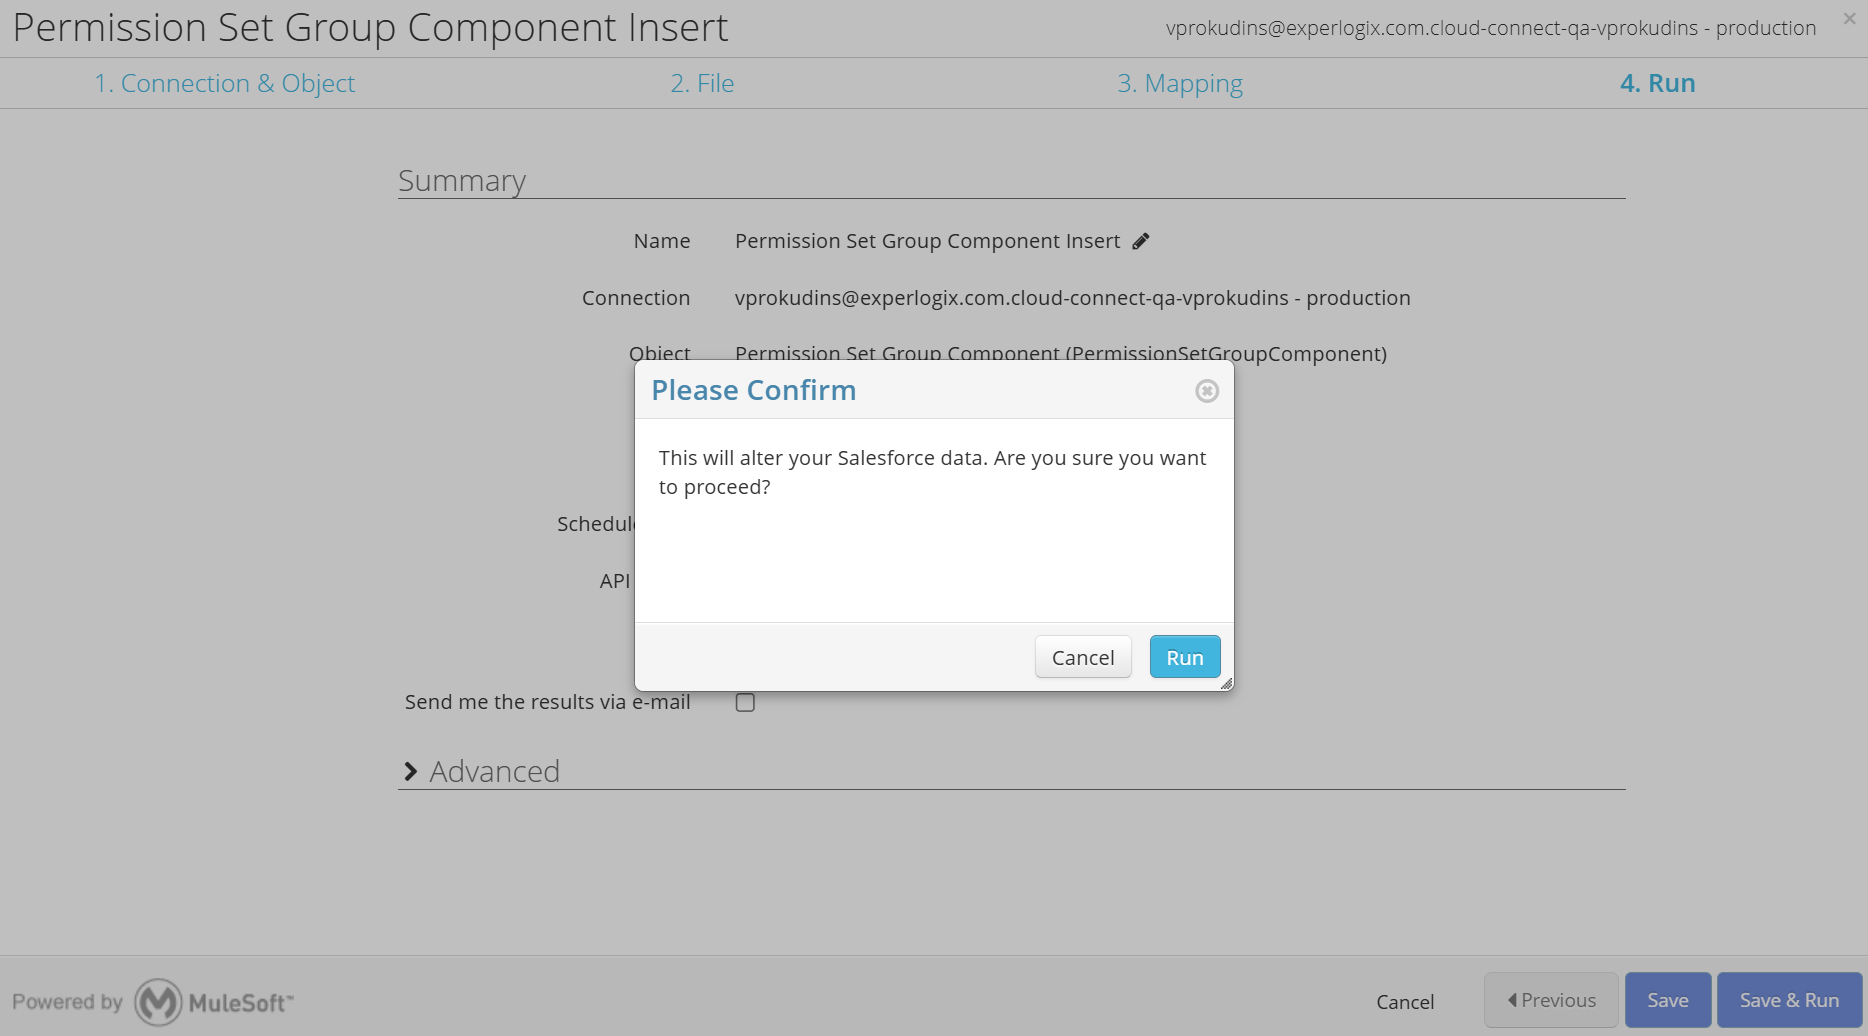
-
Select Run.
-
Verify that the result is successful.

Restoration of Cloud Connect Settings
Once the packages are installed, the Experlogix application along with the Setup page should be available again.
-
Navigate to the Experlogix app → Connection Settings.
-
Import the settings backup that was created during the Experlogix Connection Settings backup step.

Restoration of Flows
Restoration of Copy Configuration customized template flows.
Work with filenames and package.xml
-
Unpack CopyConfigurationFlowTemplateBackup.zip and rename the folder to CopyConfigurationFlowTemplateImport.
-
Remove the Xplx__ prefix from all filenames.
-
Edit the package.xml file to remove all Xplx__ references.
-
Pack the folder back to zip so the result file is named CopyConfigurationFlowTemplateImport.zip.
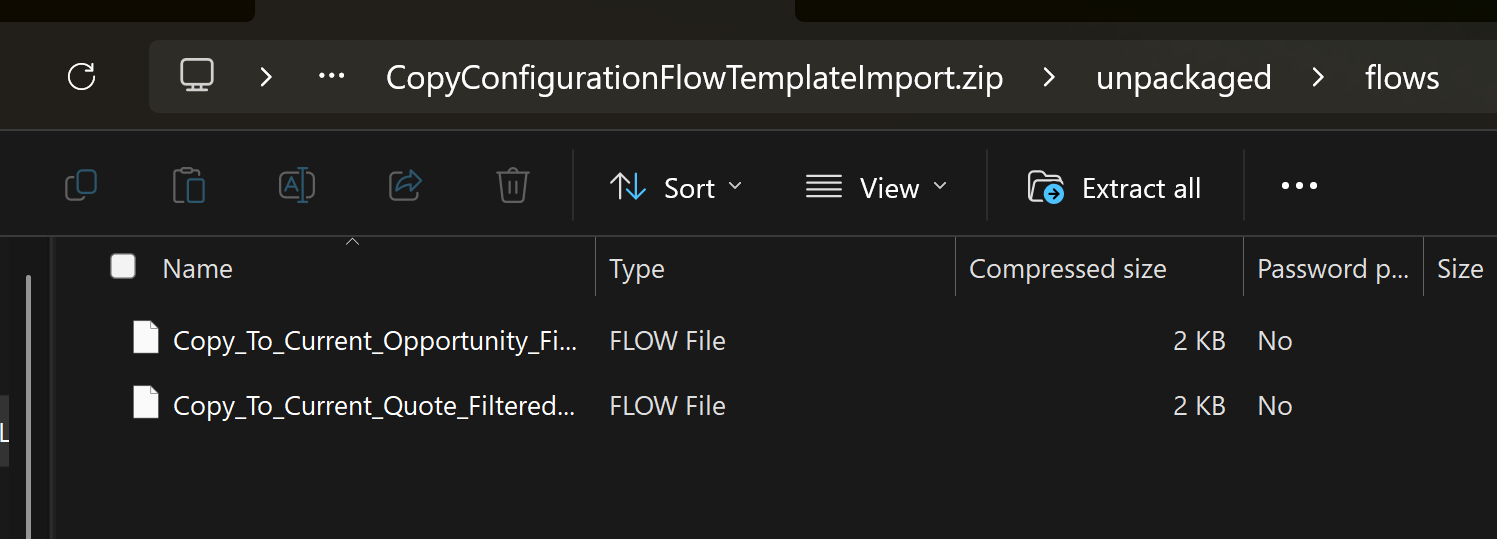
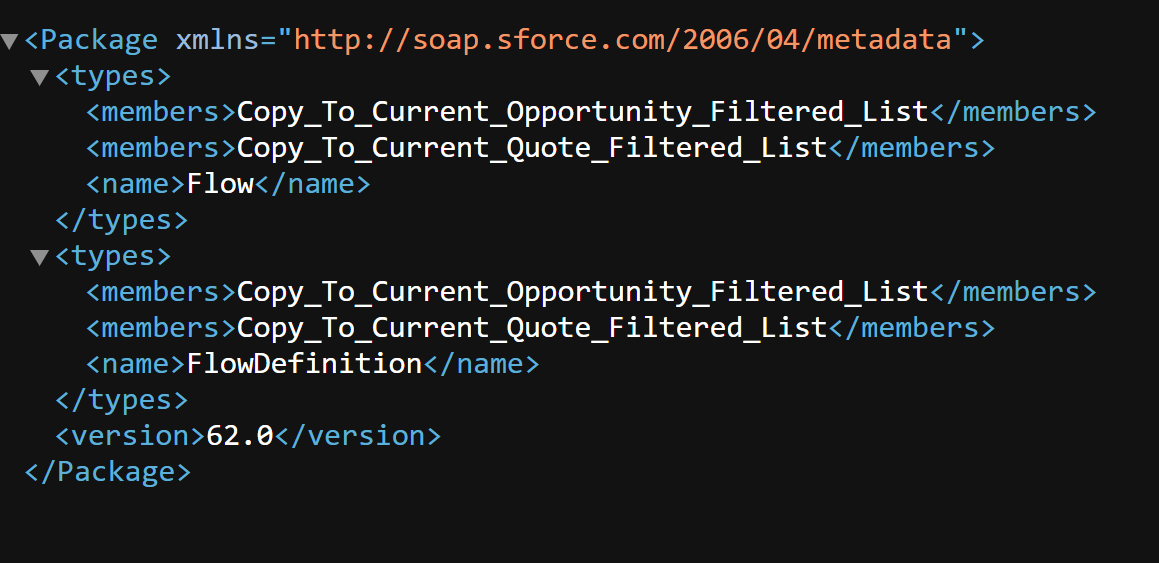
Deployment of CopyConfigurationFlowTemplateImport.zip using Workbench
-
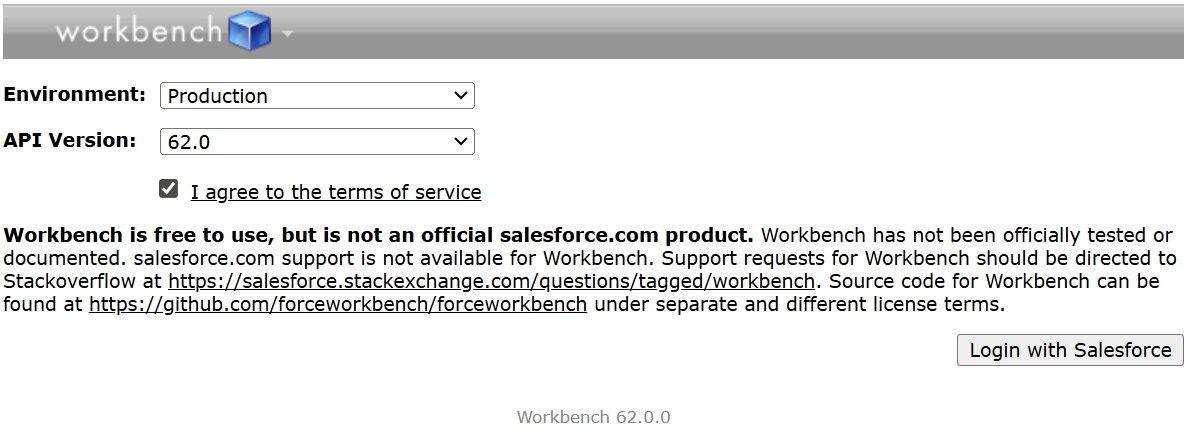
Navigate to https://workbench.developerforce.com/.
-
Select the Environment type and select Login with Salesforce.
-
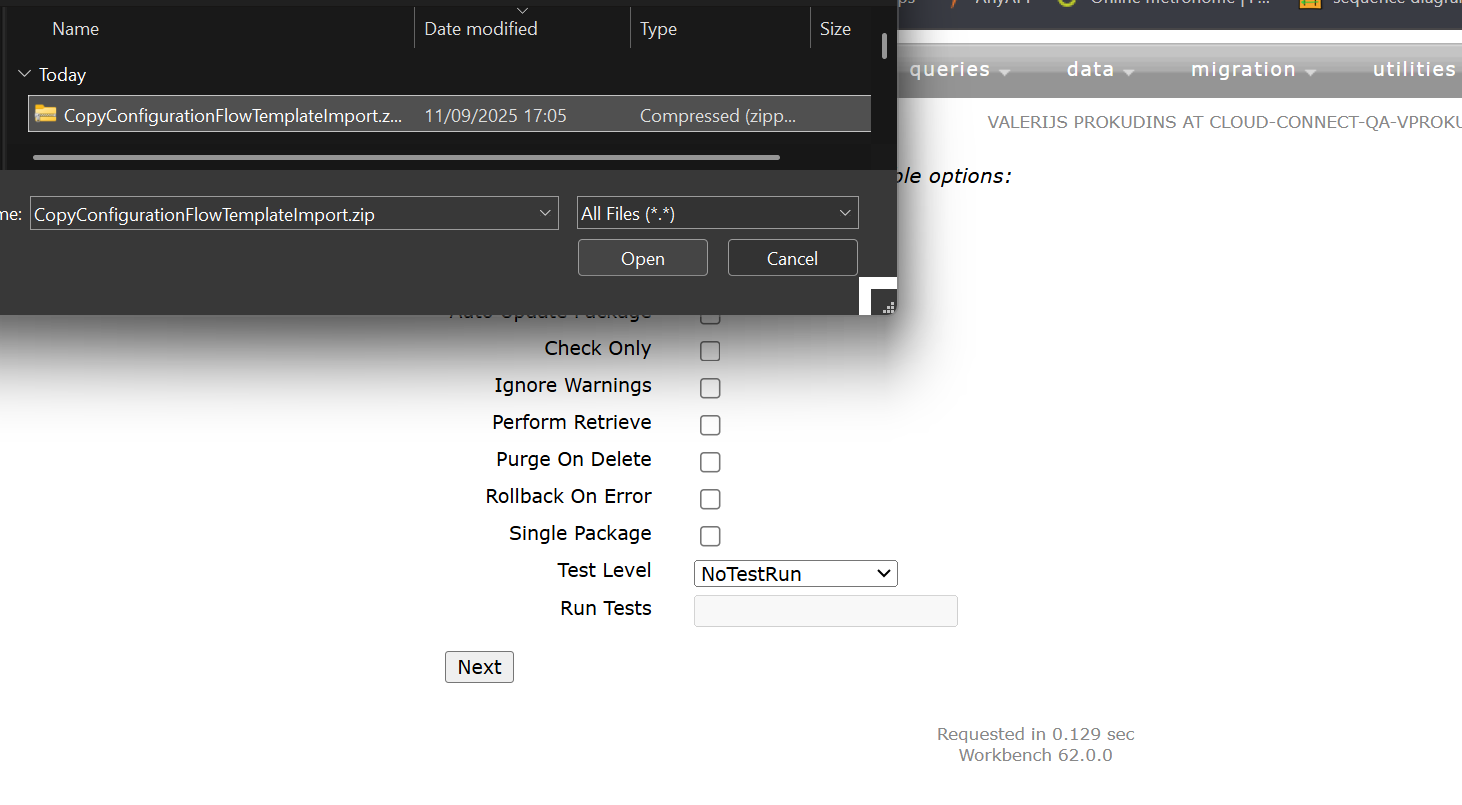
Select Migration > Deploy.

-
Select CopyConfigurationFlowTemplateImport.zip file.
-
Select Next.
-
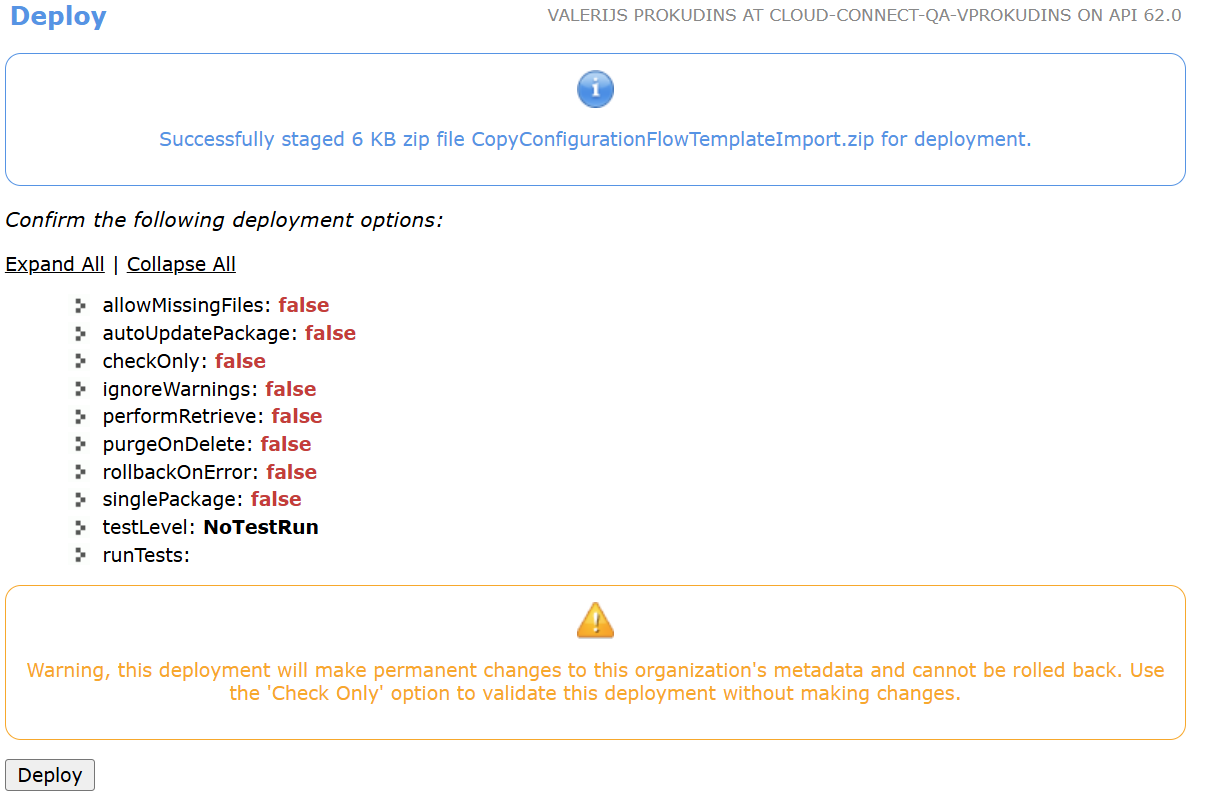
Select Deploy.
Restoration Of QuickActions
-
Navigate to https://workbench.developerforce.com/.
-
Select the Environment type and select Login with Salesforce.
-
SelectMigration > Deploy.
-
Select QuickActionsBackup..zip file.
-
Select Next.
-
Select Deploy.
Restoration of Layouts and Flexipages
-
Navigate to https://workbench.developerforce.com/.
-
Selectthe Environment type and select Login with Salesforce.
-
SelectMigration > Deploy.
-
Select QuickActionsBackup..zip file.
-
Select Next.
-
Select Deploy.
The flows will lose Xplx prefix, so either reinstalled Copy flows package should be used and modifications reimplemented, or buttons should be updated not to refer to Xplx__ prefix.
Restoration of Customer flows referring CopyConfigurationScreen
-
Navigate to https://workbench.developerforce.com/.
-
Selectthe Environment type and select Login with Salesforce.
-
SelectMigration > Deploy.
-
SelectQuickActionsBackup..zip file.
-
Select Next.
-
Select Deploy.