
Data can be migrated between source and target environments using the Cloud Connect Import and Export functionality. This page provides steps for importing and exporting Experlogix settings in Microsoft Dynamics 365 CE.
Prerequisites
The following access is required to perform the import and export of Experlogix settings:
-
Microsoft Dataverse with a corresponding security role
-
Microsoft Excel
Export settings
-
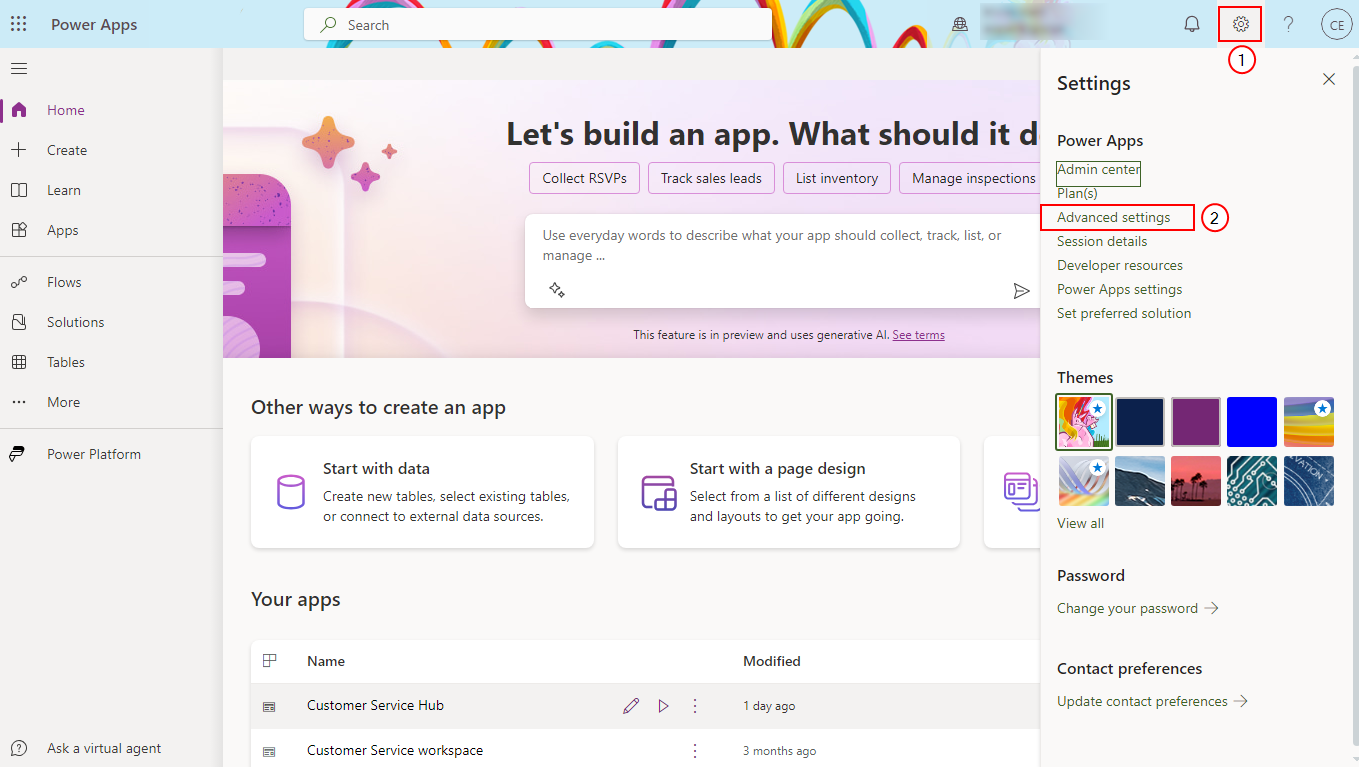
On the Microsoft Dynamics 365 CE home page, at the upper-right corner of the screen, select the Settings icon.
-
Select Advanced Settings.
The Settings page displays.
-
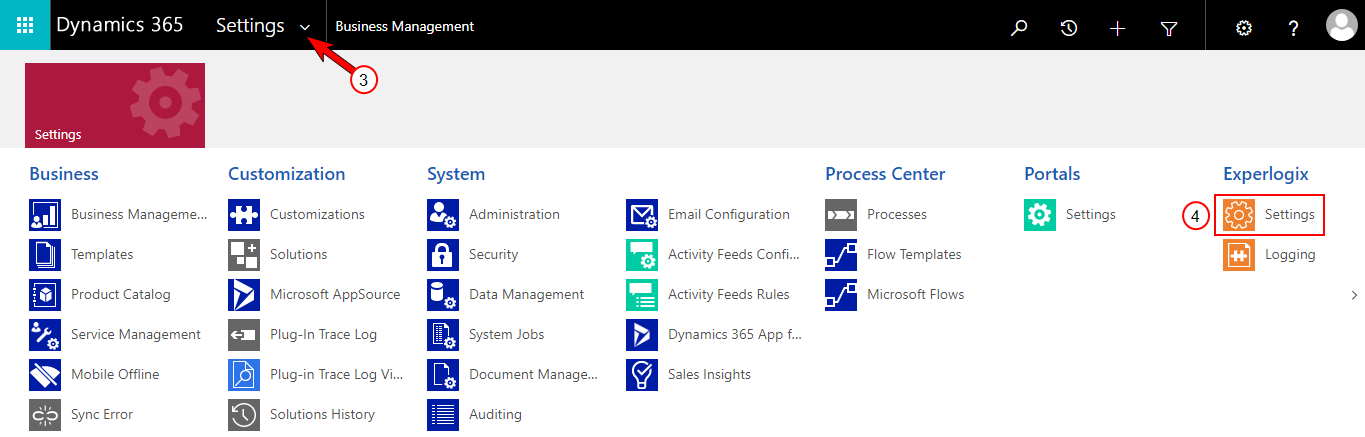
At the upper-left corner, select the Settings dropdown arrow to view the Settings options.
-
Under the Experlogix column, select Settings.
The Settings page displays.
-
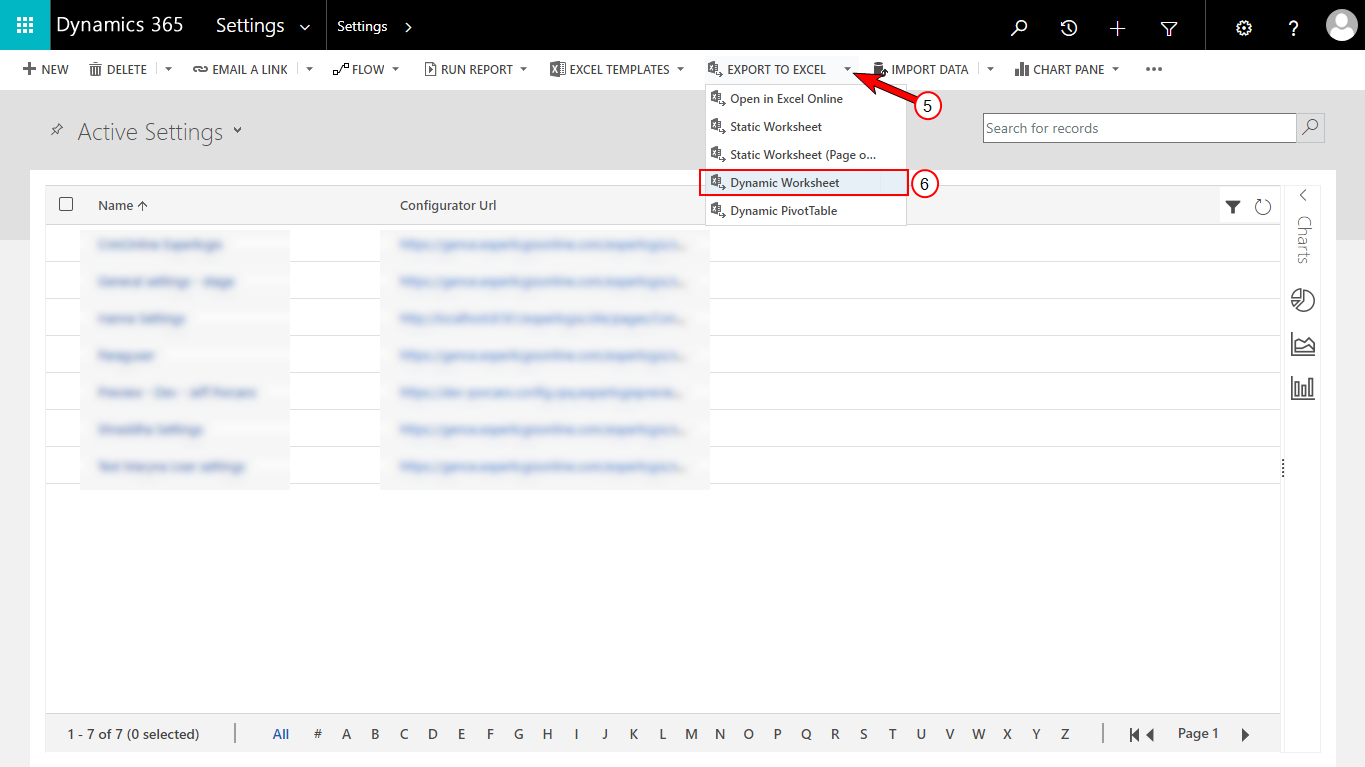
At the top, select the EXPORT TO EXCEL dropdown.
-
Select Dynamic Worksheet.
The Edit Columns dialog box displays.
-
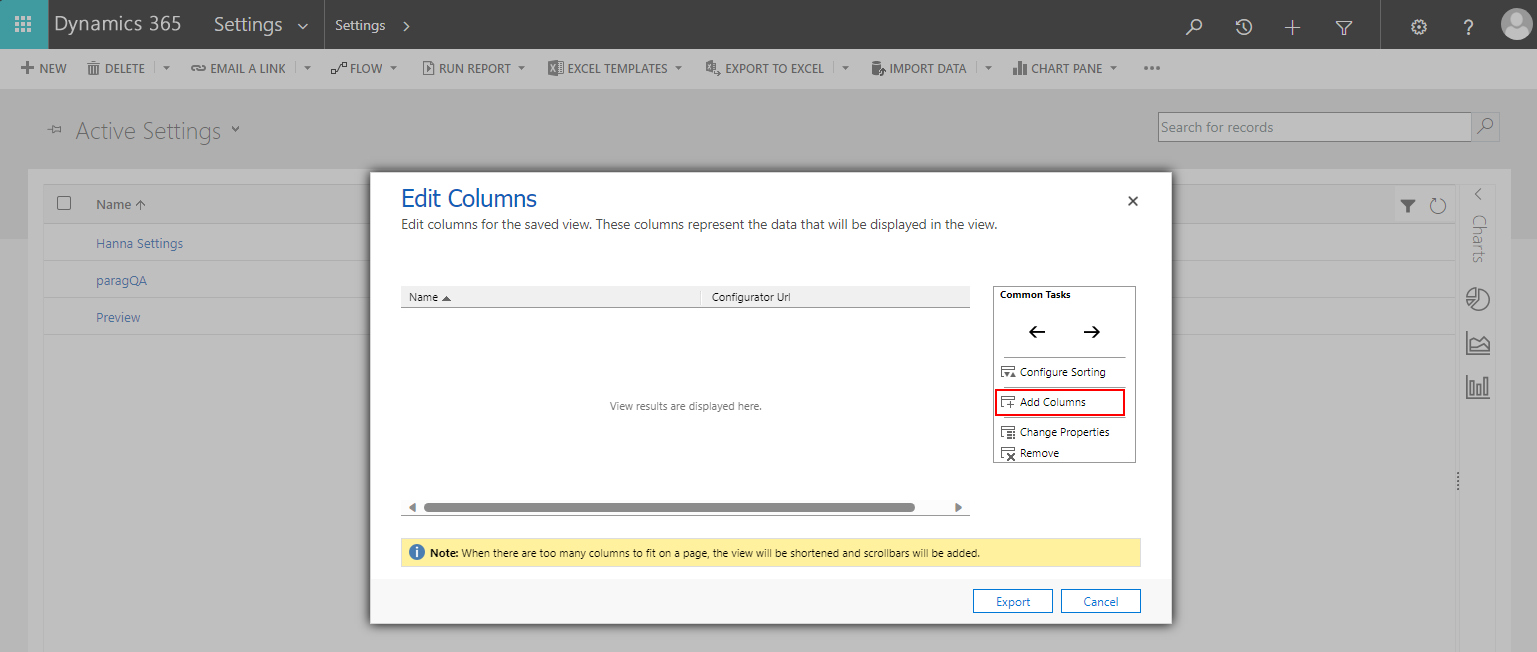
From the Common Tasks pane on the right, select Add Columns.
-
Select the checkboxes for the required columns.
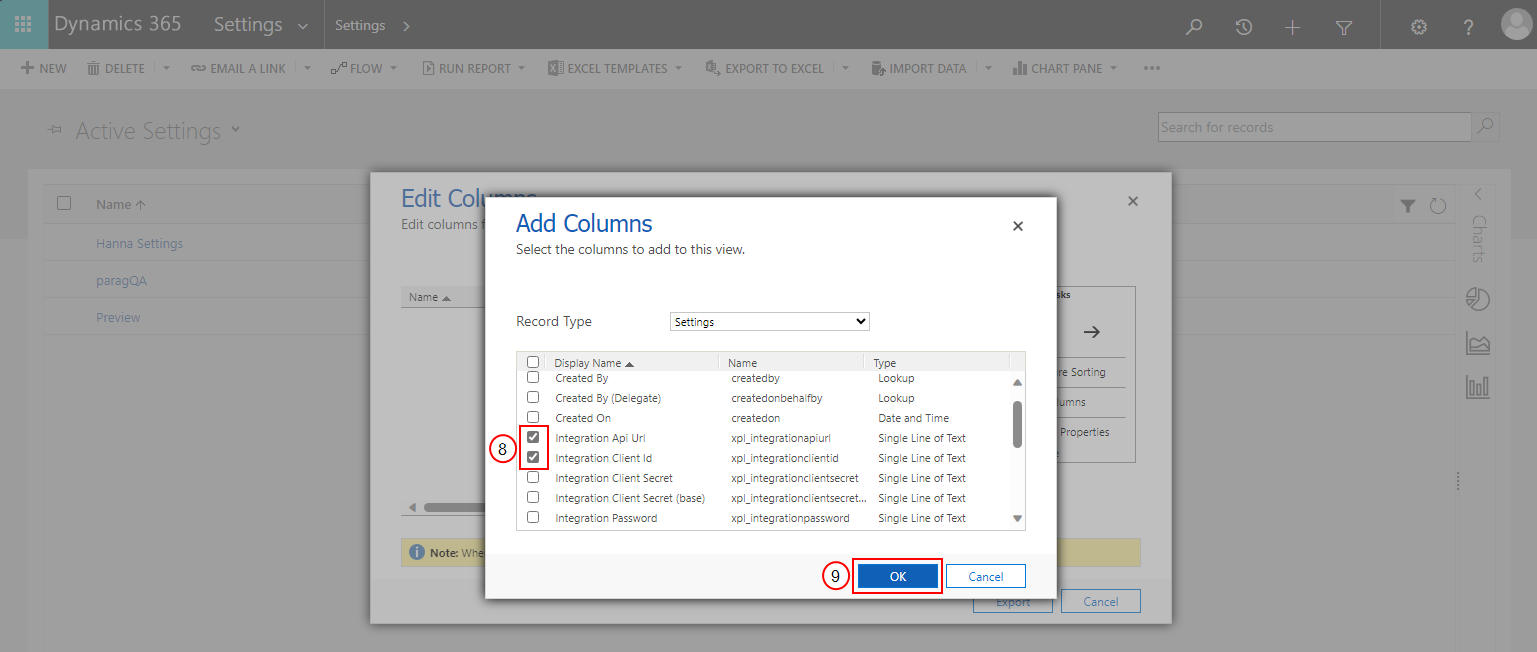
The checkboxes selected in the image below are for this scenario. You can select the columns as per your requirements.
-
Select the OK button.
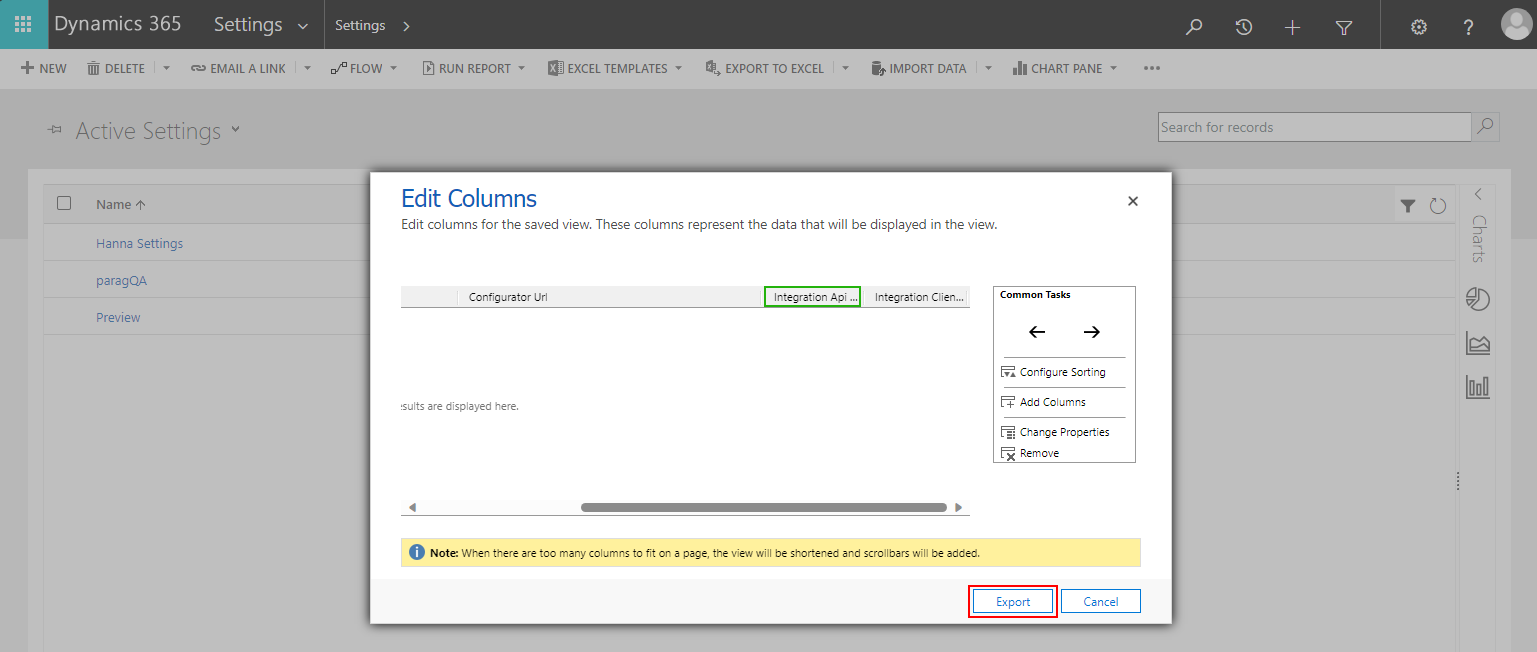
The columns are added and displayed in the Edit Columns dialog box.
-
Select the Export button.
-
Save the Excel file as a .CSV file.
Import settings
After completing the import process, follow the instructions in the Populate password and secret section.
-
On the Microsoft Dynamics 365 CE home page, at the upper-right corner of the screen, select the Settings icon.
-
Select Advanced Settings.
The Settings page displays.
-
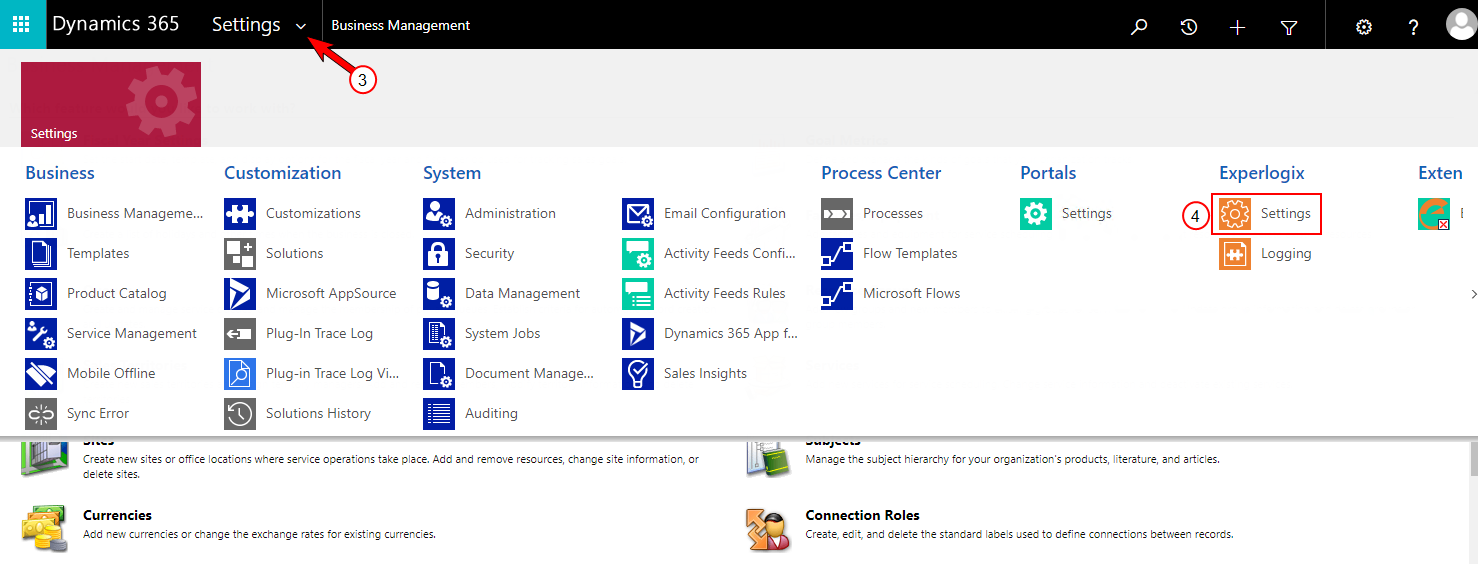
At the upper-left corner, select the Settings dropdown arrow to view the Settings options.
-
Under the Experlogix column, select Settings.
-
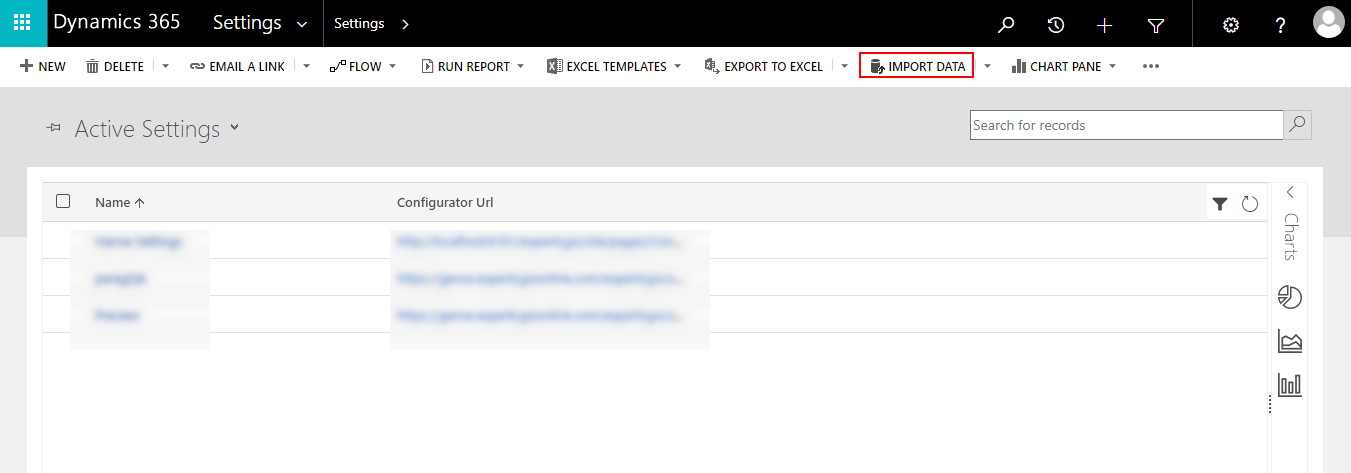
At the top, select IMPORT DATA.
-
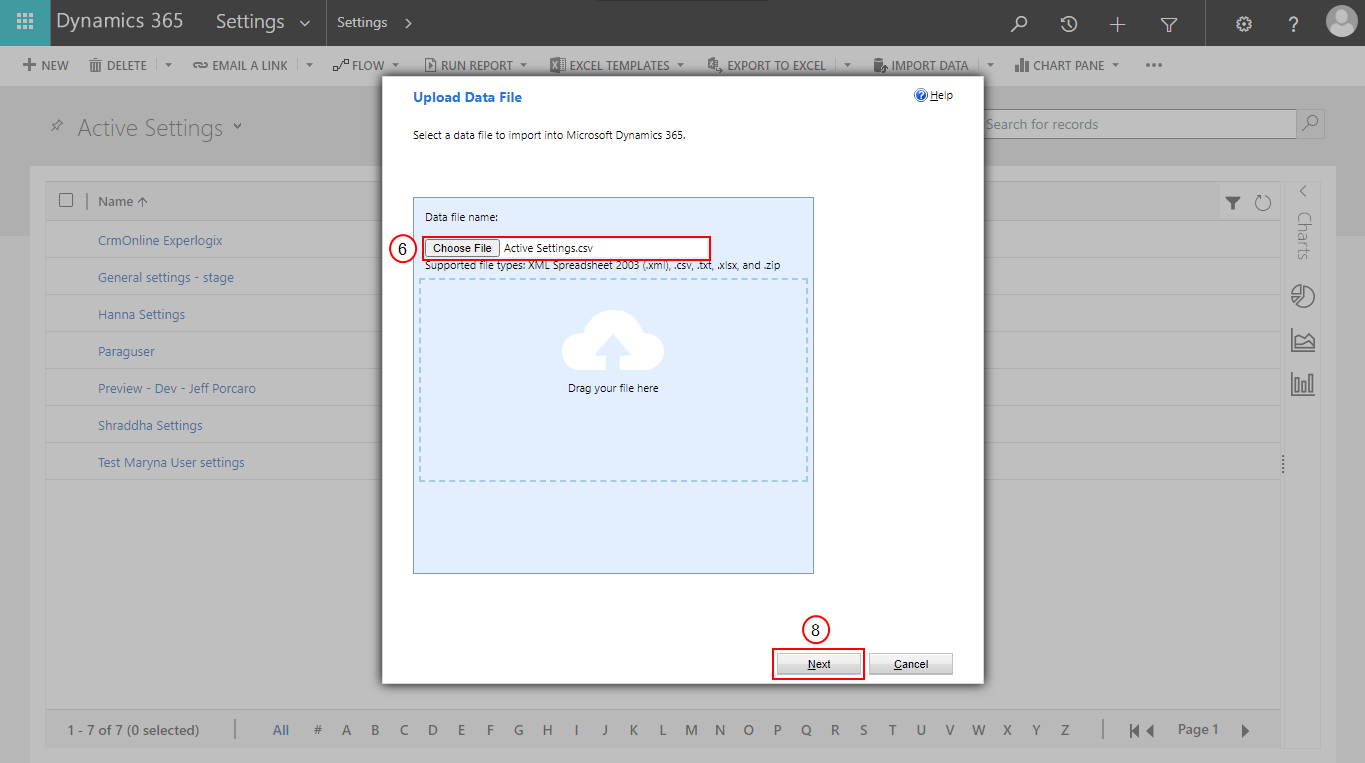
In the Upload Data File dialog box, select Choose File.
-
Select the required .CSV file.
-
Select the Next button.
-
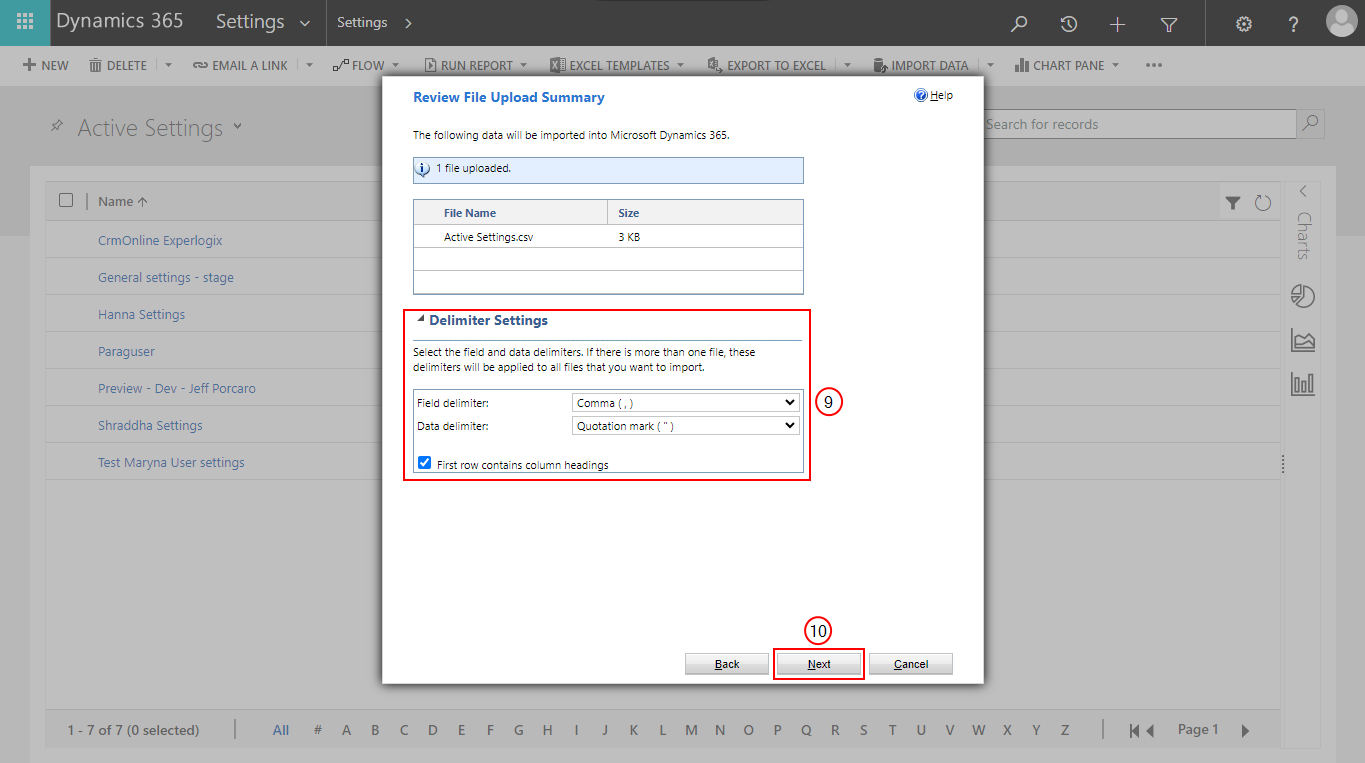
In the Review File Upload Summary dialog box, set the Delimiter settings.
-
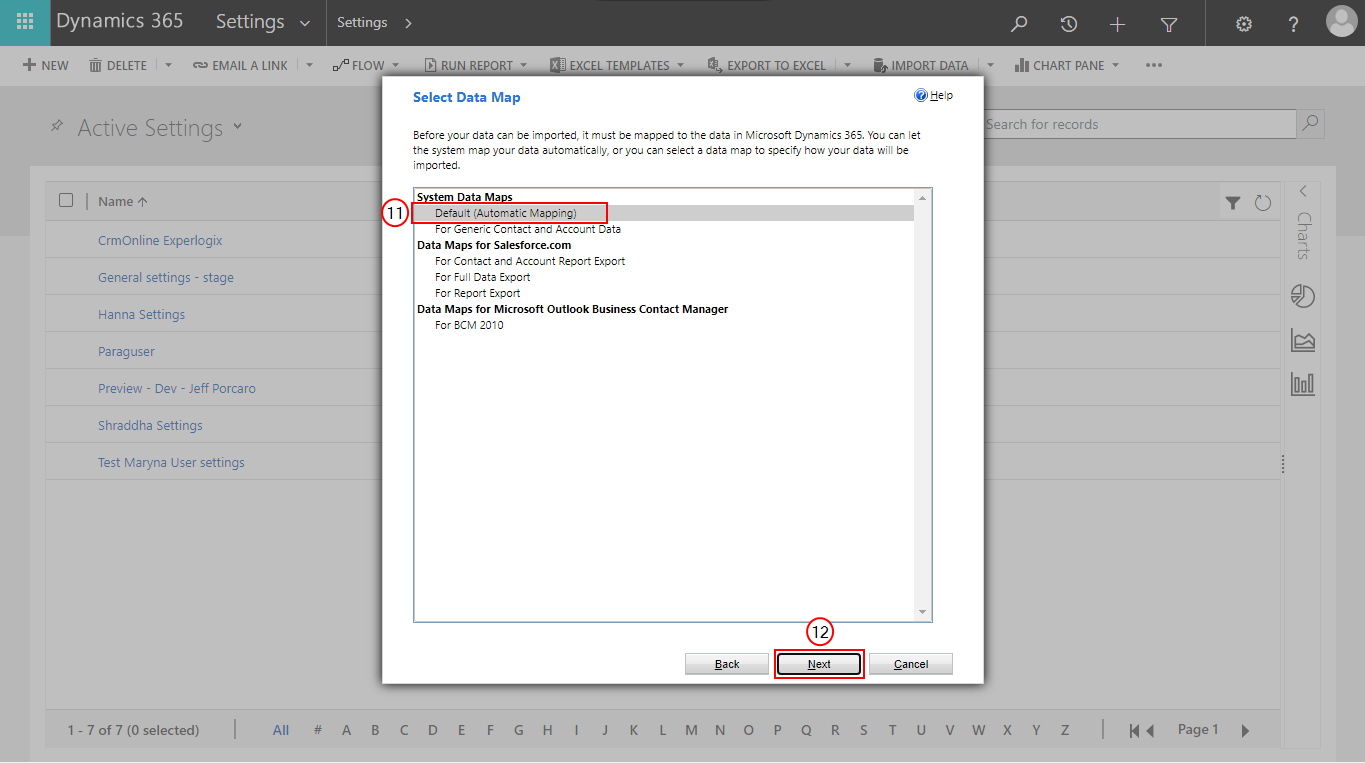
Select the Next button. The Select Data Map dialog box displays.
-
Select Default (Automatic Mapping).
-
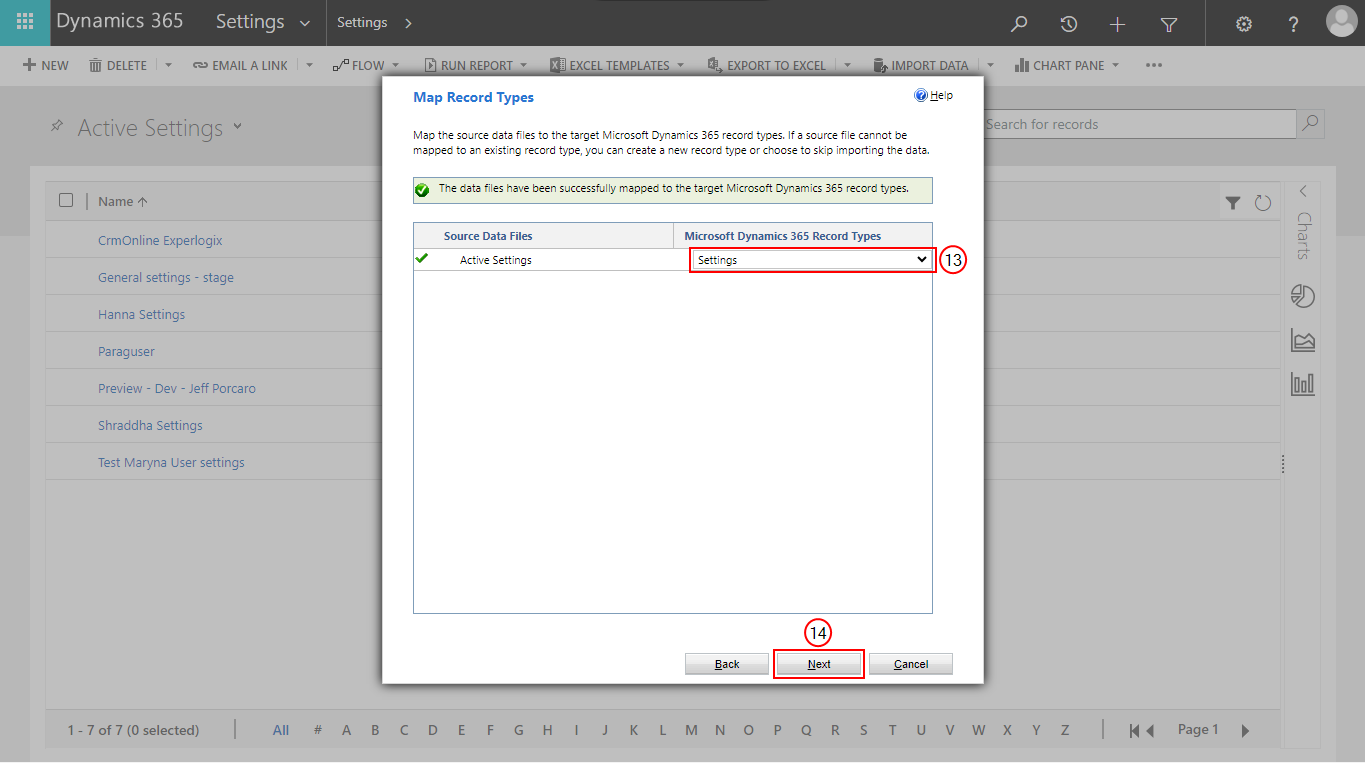
Select the Next button. The Map Record Types dialog box displays.
-
From the Microsoft Dynamics 365 Record Types dropdown menu, select Settings.
-
Select the Next button. The Map Fields dialog box displays.
-
Select the required map fields./inf
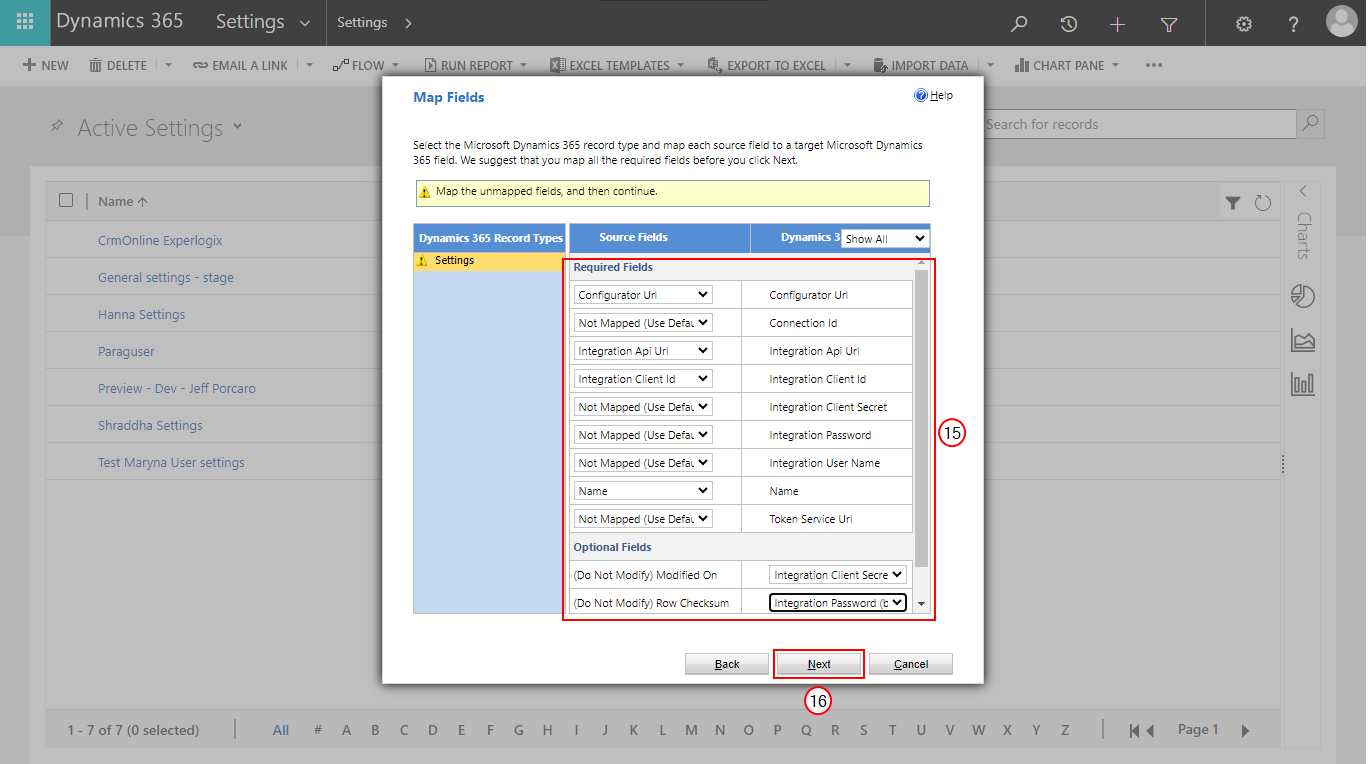
You should also map the fields with (base) keyword at the end of the name.
-
Select the Next button.
-
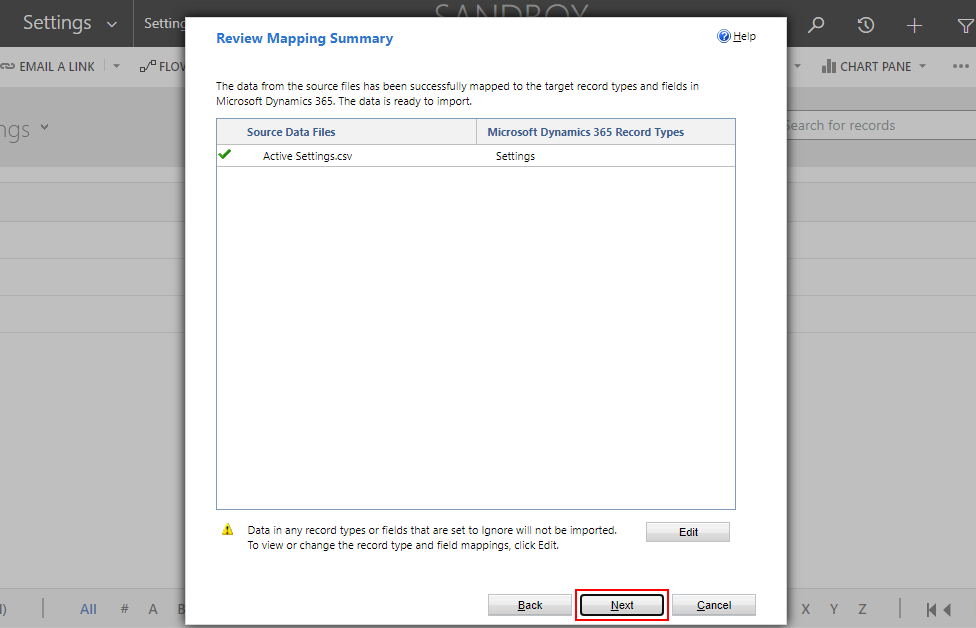
On the Review Mapping Summary dialog box, select the Next button.
-
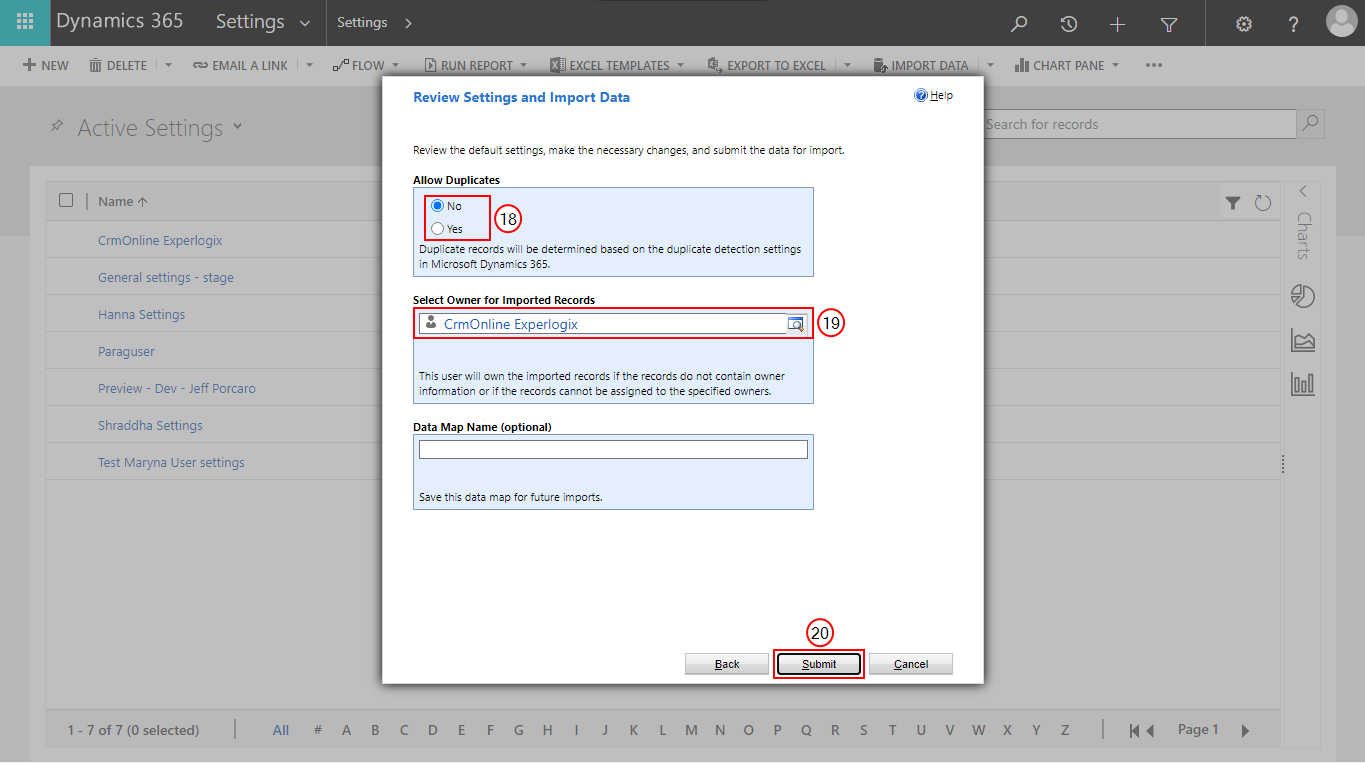
In the Review Settings and Import Data dialog box, select the required option for Allow Duplicates.
-
From the Select Owner for imported Records field, select the required value.
-
Select the Submit button.
-
Select Finish.
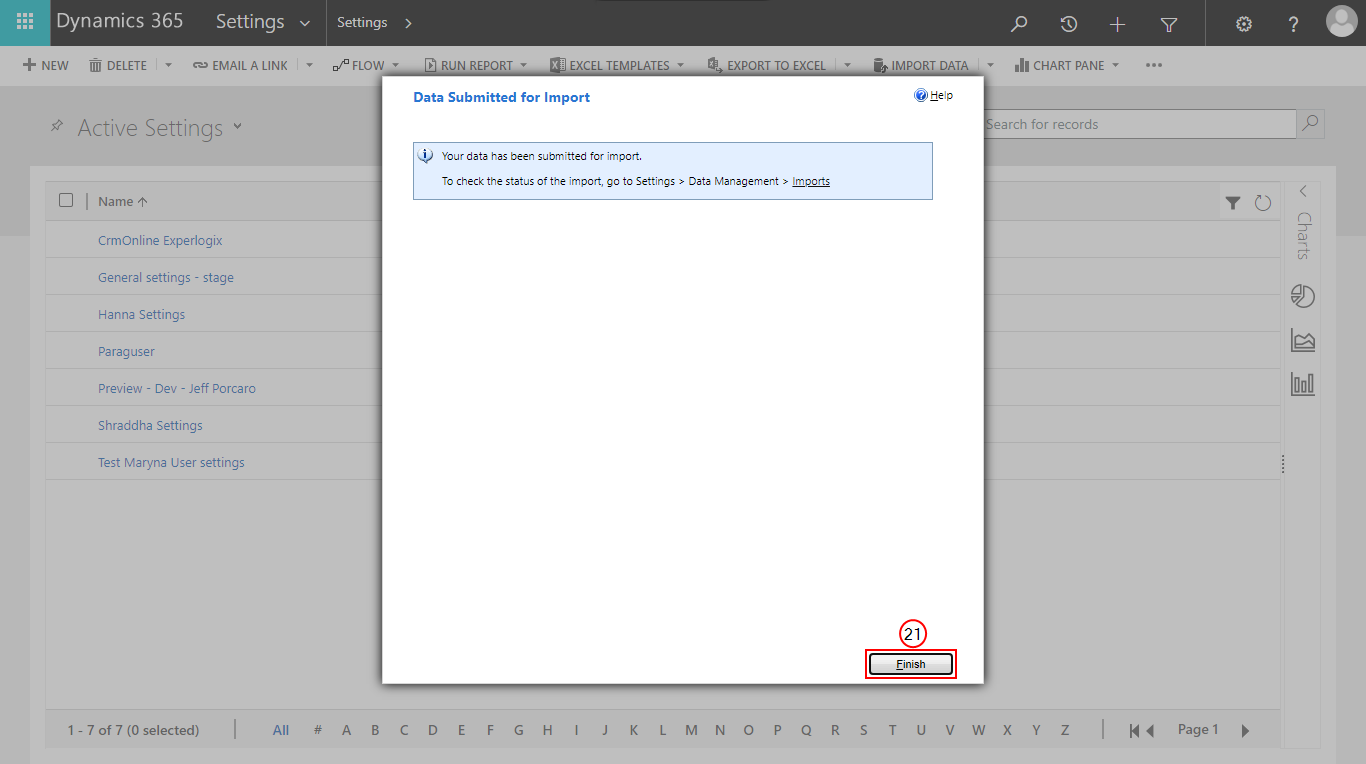
This completes the import process.
To view the import results, select Advanced settings>Data Management>Imports.
Populate password and secret
The Integration Client Secret and Integration password must be entered again after the import process on the Experlogix Settings form in Microsoft Dynamics 365 CE. This is required as those values are encrypted in the database and cannot be decrypted. For information on accessing the Settings form in Microsoft Dynamics 365 CE, see Setup Cloud Connect for Microsoft Dynamics 365 CE.
Select the Verify button after re-entreing the Client Secret and Integration password to ensure that the Microsoft Dynamics 365 CE Settings work as expected.