
This guide explains how to set up your Microsoft Dynamics 365 BC development environment, including creating an AL project, adding necessary Experlogix dependencies, and downloading symbols. It also covers creating custom buttons within Microsoft Dynamics 365 BC to enhance user interactions by tailoring the user interface to closely match your custom needs. You’ll create a new AL project, add your Experlogix dependencies, and implement a button on a selected page to improve user interaction.
Prerequisites
-
Experience with Application Language(AL) Programming
-
Access to a development environment
-
Visual Studio Code
The process we describe in this guide in this content leverages Visual Studio Code, which is our recommended tool however similar tools can achieve the same outcomes.
-
Completion of the dependency installation steps. See Set up Cloud Connect for Microsoft Dynamics 365 BC for more information
-
The person developing the custom buttons must have the XPL-ADMIN role in Microsoft Dynamics 365 BC. See Microsoft Dynamics 365 BC User Roles for more information on user roles.
Creating and Configuring the AL Project
Complete the following steps to create an AL project, add the Experlogix dependency, and download the required symbols. After completing these steps, you'll have everything you need to create custom buttons and functionality.
Creating AL Project
Follow the Microsoft documentation to create and set up your new AL project environment.
Adding the Experlogix Dependency
-
In Visual Studio Code, inside your AL project, locate the existing app.json file. By default, it will appear similar to this example:
{ "id": "432f4f31-bd2f-4b9b-a1fd-d44f539dac0c", "name": "ALProject6", "publisher": "Default publisher", "version": "1.0.0.0", "brief": "", "description": "", "privacyStatement": "", "EULA": "", "help": "", "url": "", "logo": "", "dependencies": [], "screenshots": [], "platform": "1.0.0.0", "application": "20.0.0.0", "idRanges": [ { "from": 50100, "to": 50149 } ], "resourceExposurePolicy": { "allowDebugging": true, "allowDownloadingSource": false, "includeSourceInSymbolFile": false }, "runtime": "9.0" } -
Add the following information to the dependencies array within your app.json. Ensure you replace with the version number found in your Microsoft Dynamics 365 BC environment under Experlogix Settings:
"dependencies": [
  {
    "appId": "65273e15-45fd-45d0-96cd-9e3421edfc83",
    "name": "Experlogix",
    "publisher": "Experlogix",
    "version": "<Your Version>"
  }
]
Verify the exact version number required for your environment by checking the Experlogix Settings page in Microsoft Dynamics 365 BC. You can always locate your setting by searching for Experlogix Settings in the search bar in Microsoft Dynamics 365 BC.
Downloading Symbol Files
After adding your dependency, download the Experlogix symbol files.
-
Open Visual Studio Code.
-
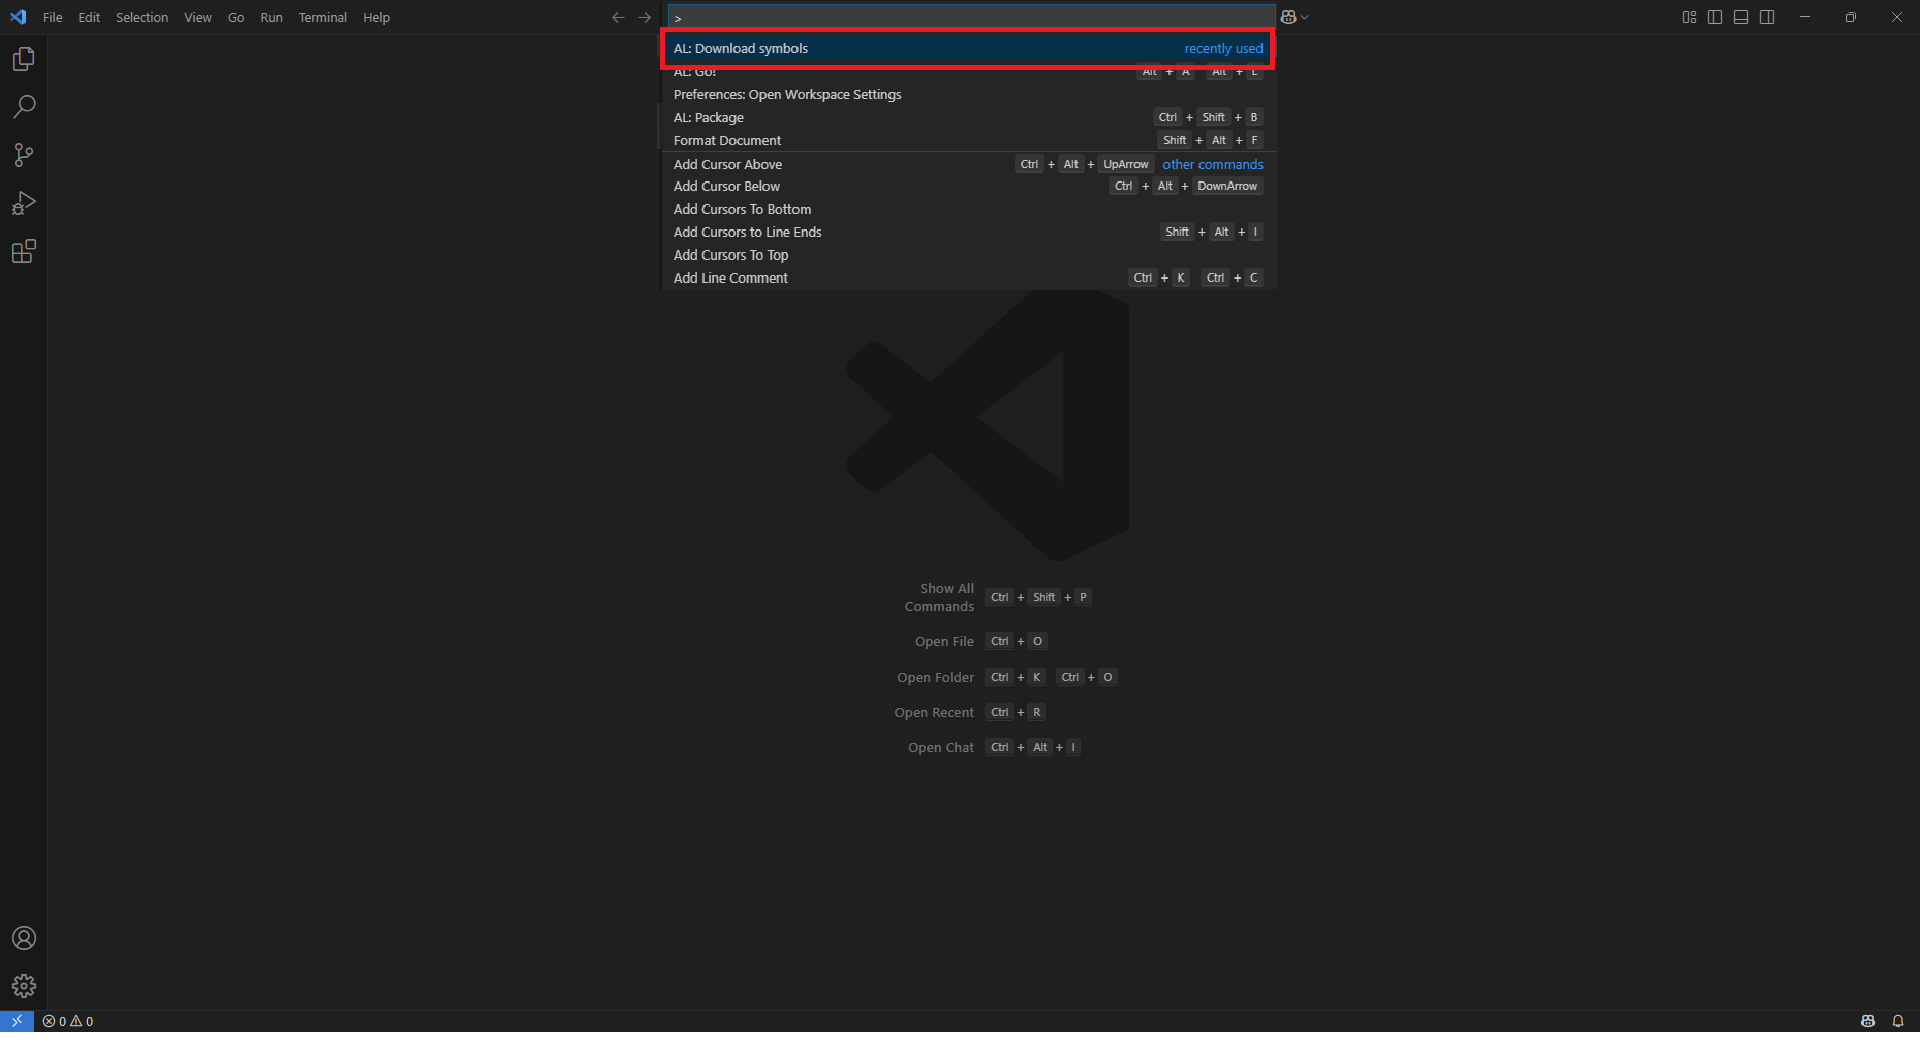
Press Ctrl+Shift+P, type AL: Download Symbols, and select the command.
-
Verify that the symbols download successfully and no errors are shown.
-
After running the command, Visual Studio Code displays a notification. Ensure there are no error messages indicating issues with the download.
-
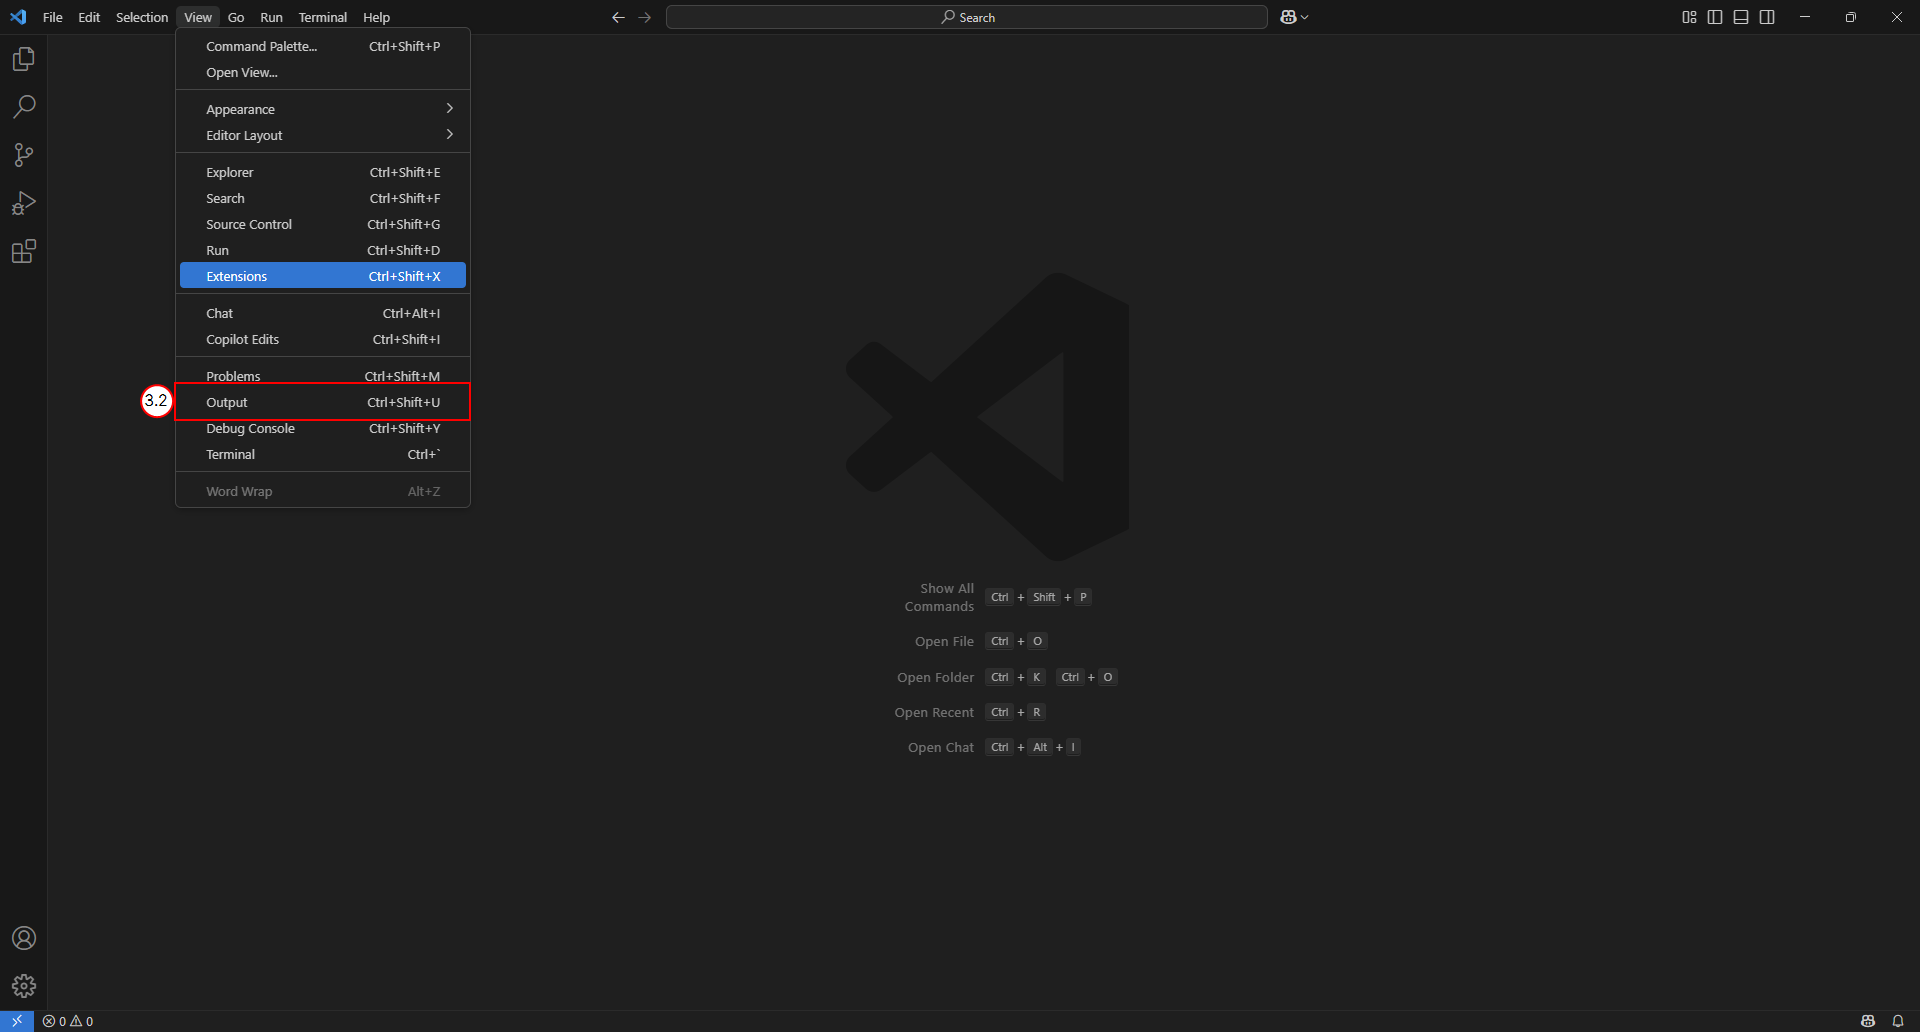
Select View > Output) and select AL Language from the dropdown. Look for messages confirming the successful download of symbols.
-
Troubleshooting Issues Downloading Symbols File
-
Check Internet Connection: Ensure you have a stable internet connection.
-
Verify Configuration: Double-check your launch.json file for correct settings and authentication details.
-
Permissions: Ensure you have the necessary permissions to download symbols in your Business Central environment. To download symbols, a user must have either Super permission or D365 Extension MGT permission assigned to them. For more details, see this community discussion from Dynamics.
Make an Extension to the Required Page
Before customizing the functionality of a page, it is essential to create an extension that modifies the required page. To create an extension in Microsoft Dynamics 365 BC, follow the guide provided by Microsoft. For more details, see Development in AL for BC.
Create an Extension for the Required Page
This section outlines the process for creating and implementing a custom button in Microsoft Dynamics 365 BC. Follow the steps below to create an extension and add a custom button.
-
Identify the page where you want to add the button.
-
Use the following code template to create the extension.
pageextension 50000 "<YOUR EXTENSION NAME>" extends "<YOUR PAGE>"
{
    layout
    {
        addlast(content)
        {
            // Add a group to organize custom controls on the page
            group(CPQ1)
            {
                ShowCaption = false; // Hides the group caption for cleaner UI
            }

            // Add a user control for handling CPQ configurations
            usercontrol(CPQCCController; "CPQ BrowserControl2")
            {
                ApplicationArea = All; // Ensure this control is available in all application areas
                trigger OnBrowserClosing()
                begin
                    CurrPage.Update(); // Refresh the page when the browser control closes
                end;
            }
        }
    }
    actions
    {
        addlast("<BUTTON LOCATION>") // Specify the location where the button will be added
        {
            action("Experlogix Configure")
            {
                Caption = 'Experlogix Configure'; // Button label
                Image = LaunchWeb; // Icon for the button
                ApplicationArea = All; // Ensure the button is accessible in all areas
                Promoted = true; // Mark the button as promoted for visibility in the ribbon
                PromotedIsBig = true; // Display the button prominently as a large icon
                PromotedCategory = Process; // Categorize the button under "Process"
                trigger OnAction()
                var
                    ConfigurationHelper: Codeunit "CPQ CC Configure Helper"; // Helper codeunit for configuration
                    ConfigRef: RecordRef; // Reference to the current record
                begin
                    ConfigRef.GetTable(Rec); // Get the current table data
                    CurrPage.CPQCCController.configureInTab(ConfigurationHelper.getConfigureUrl(Rec)); // Open the configurator with the appropriate URL
                end;
            }
        }
    }
}
Add a Role to the Button
Role-based access control ensures that only authorized users can interact with specific buttons. This section describes how to restrict button visibility by assigning roles and configuring permissions in AL. To restrict button visibility exclusively to users with a designated role, follow these steps.
-
Add an OnOpenPage trigger to the extension page created in Create an Extension for the Required Page.
-
Update the code with the required role names based on your use case.
trigger OnOpenPage() var SecurityRolesUser: Record "Access Control"; begin // Set the username filter to the current user SecurityRolesUser.SetRange("User Name", UserId); // Replace '<Role name>' with the actual role ID required for the button SecurityRolesUser.SetRange("Role ID", '<Role name>'); // Verify if the user has the role assigned if not SecurityRolesUser.IsEmpty() then ExperlogixConfigure := true else ExperlogixConfigure := false; end; -
Replace <Role name> with the specific role required to access the button.
Additional BC Roles
Experlogix CPQ for D365 Business Central Roles
-
Xpl-Project – Configure Price Quote
-
Xpl-Sales – Configure Price Quote
Experlogix Documents for D365 Business Central
-
XPL-SFAdmin – Document Automation
-
XPL-User – Document Automation
-
XPL-Designer – Document Automation
Experlogix Digital Commercefor D365 Business Central
-
XPL-DCADMIN – Digital Commerce Admin
Experlogix Portal
-
XPL-PORTALADMIN – Portal Admin
Security Configuration
Adhering to security best practices is crucial when customizing Microsoft Dynamics 365 BC. This section covers how to configure security settings for your extension in general but each organization security configurations, roles and requirements will be different.
-
Assign the custom button to a security privilege.
Ensure the extension adheres to your organization’s security standards; see Extending AL objects: security model.
-
Assign the custom button to a privilege.
-
Test visibility by switching to a user account with the specified role to verify that the custom button is visible and functional.
-
Confirm access is restricted when logged in with a role that lacks permissions by switching to a user role without the permission to see the custom button.