
.
This guide explains how to configure and enable the Recalculate Configuration headless flow in Cloud Connect CPQ for Salesforce. You’ll learn how to add a Recalculate Configuration quick action button to page layouts and how to build a custom screen flow that allows users to trigger a recalculation of configuration logic for a selected record—without opening the Configurator.
This feature is useful when business logic or pricing changes require the system to recalculate and persist configuration results automatically.
Prerequisites
Before configuring this feature, ensure the following items are correctly set up:
-
Cloud Connect Salesforce 25.12 or later
-
Integration API Settings in Salesforce configured and tested successfully
-
Cloud Connect Configurator URL in Admin Center configured and tested
-
Web Configuration Migration Service enabled
-
Stateless Configurator Webservice enabled
Creating a Custom Recalculate Configuration Flow on any Object
The recalculation functionality is provided as a managed subflow, which requires only the recordId of the object whose configuration must be recalculated.
You will create a simple Screen Flow that allows the user to review the selected record and initiate recalculation.
Flow and Variables Creation
-
Navigate to Setup > Flows.
-
Select New Flow.
-
Select Screen Flow.
-
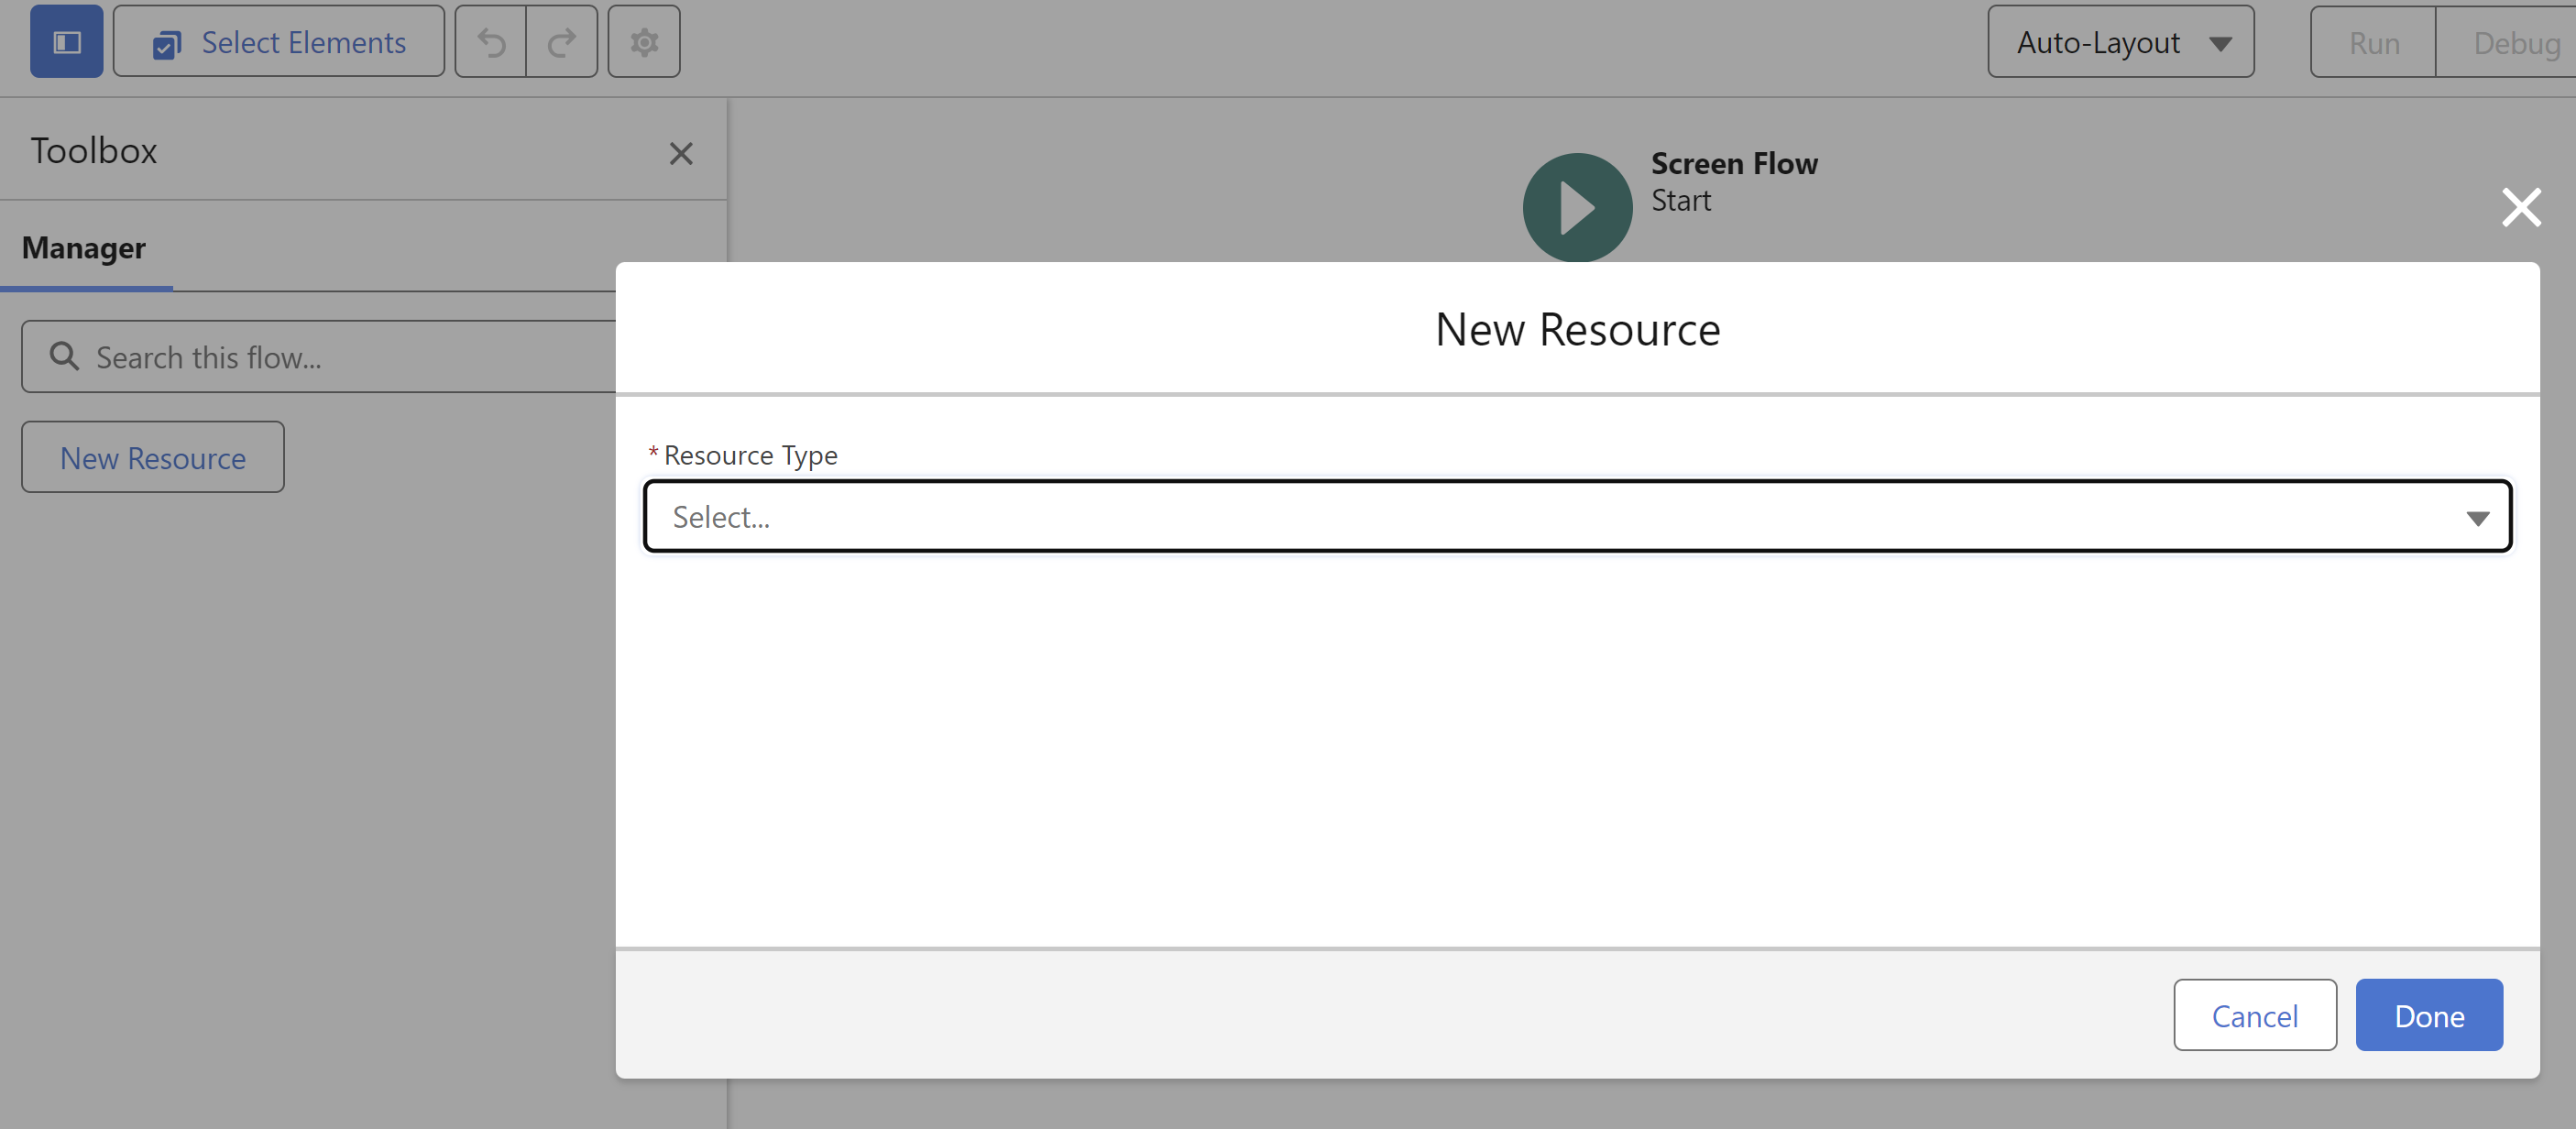
In the Toolbox pane, select New Resource.
-
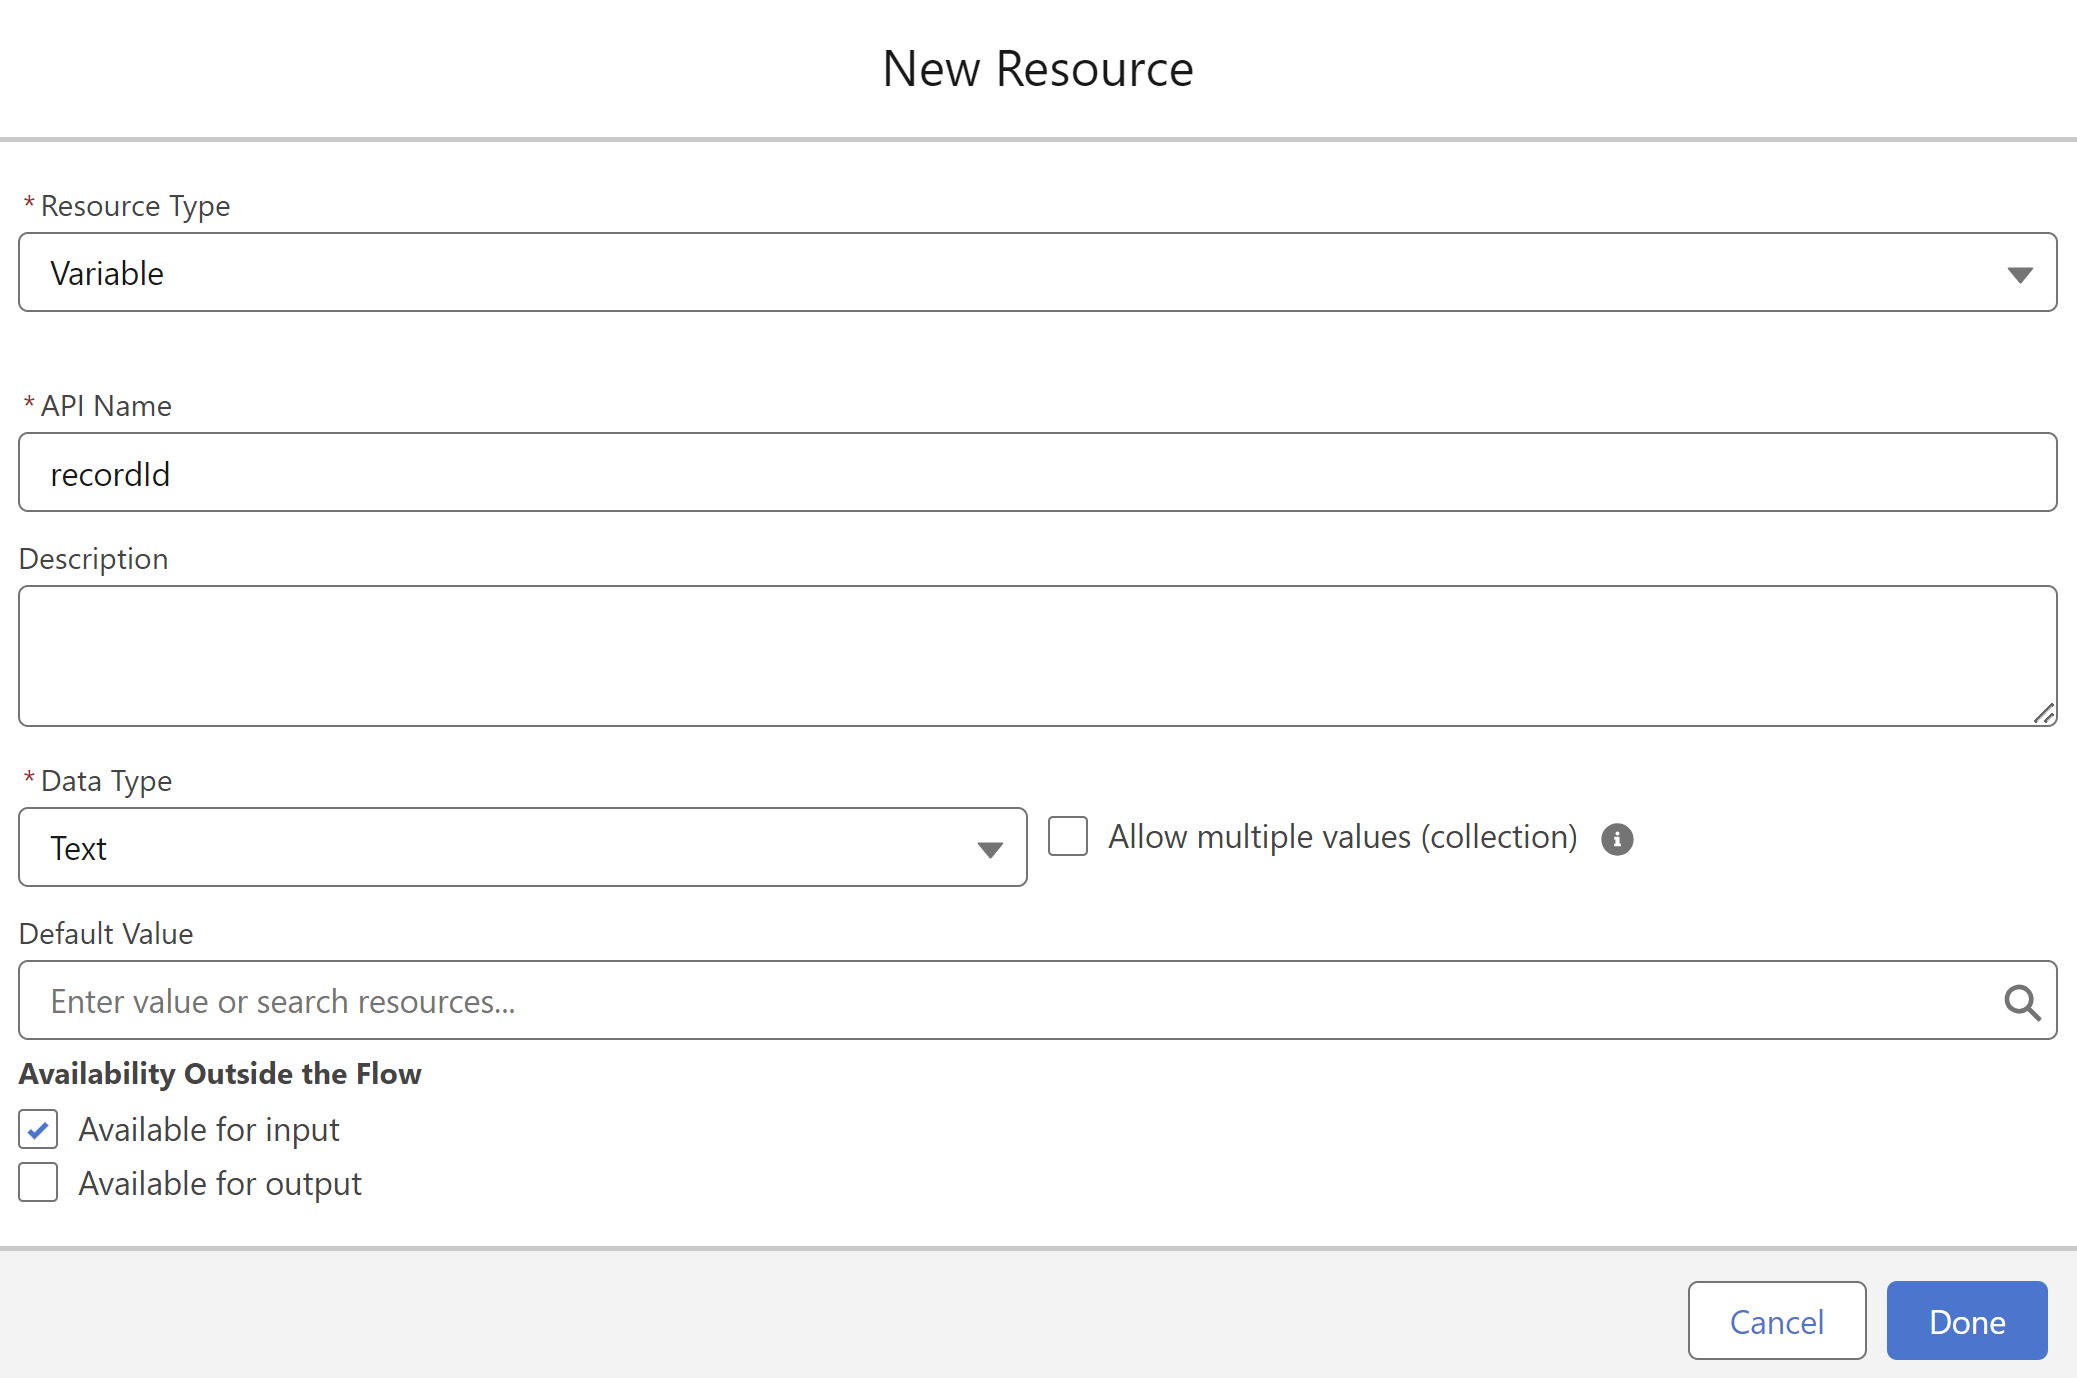
Configure the Resource as follows, then ensure it is available for use as an input variable.
|
Field |
Value |
|---|---|
|
Resource Type |
Variable |
|
API Name |
|
|
Data Type |
Text |
|
Availability |
Select Available for input |
Create the Source Opportunity Selection Screen
This screen allows users to select the record from which the configuration will be applied.
-
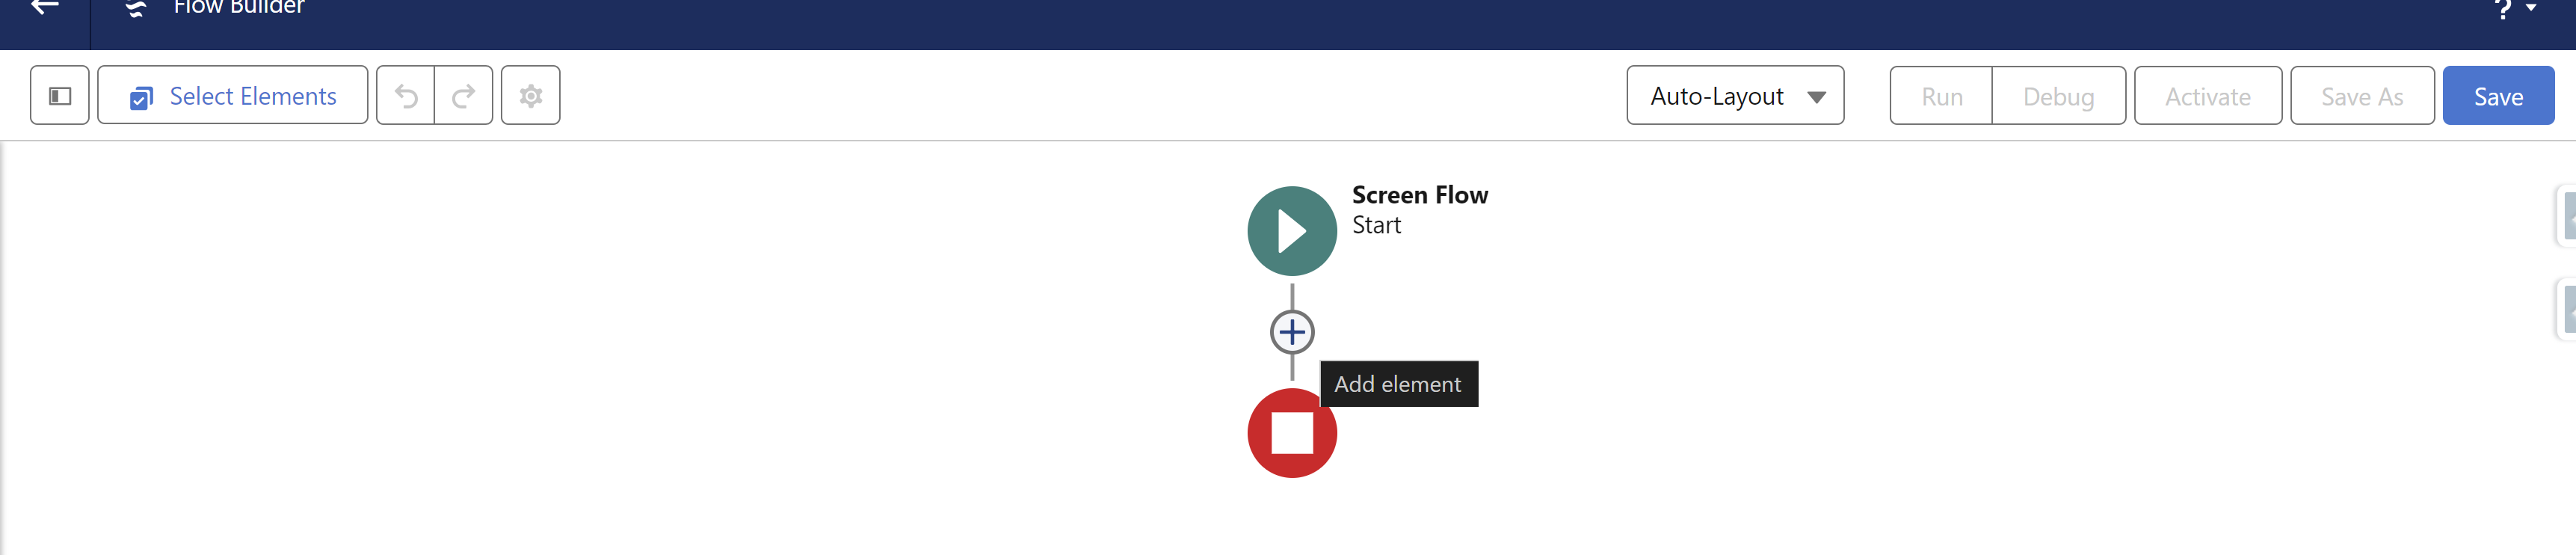
Create a new element after the Start element of the flow.
-
Select Screen as the Type.
-
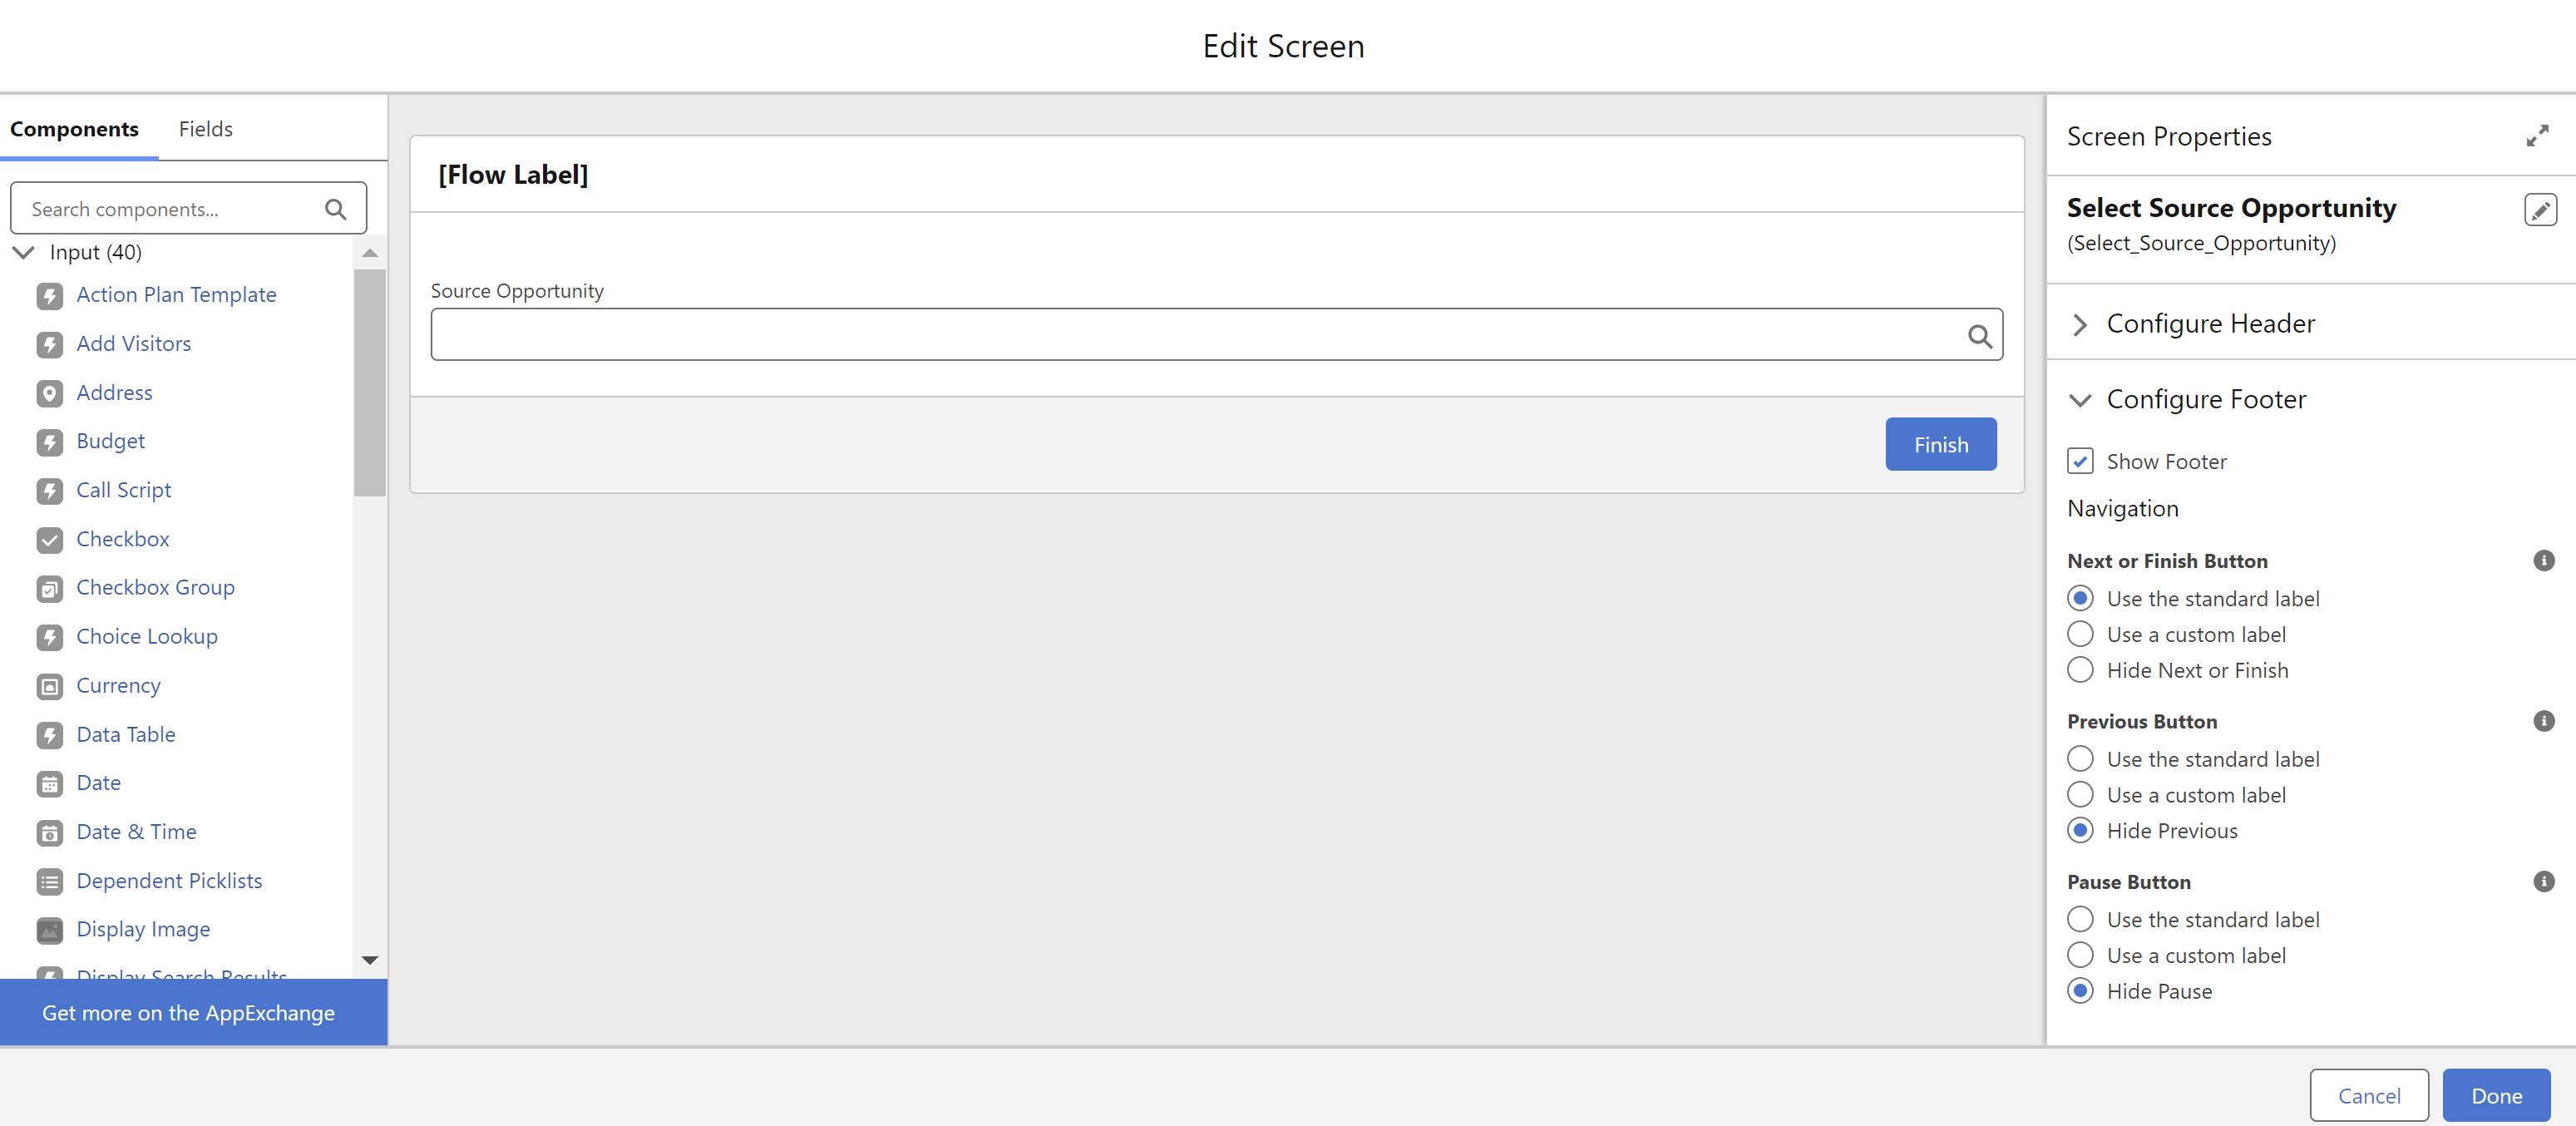
Enter Select Source Opportunity as the label (or use Quote if applicable). The API Name defaults to Select_Source_Opportunity.
-
Hide the Pause and Previous buttons in the Screen footer settings.
-
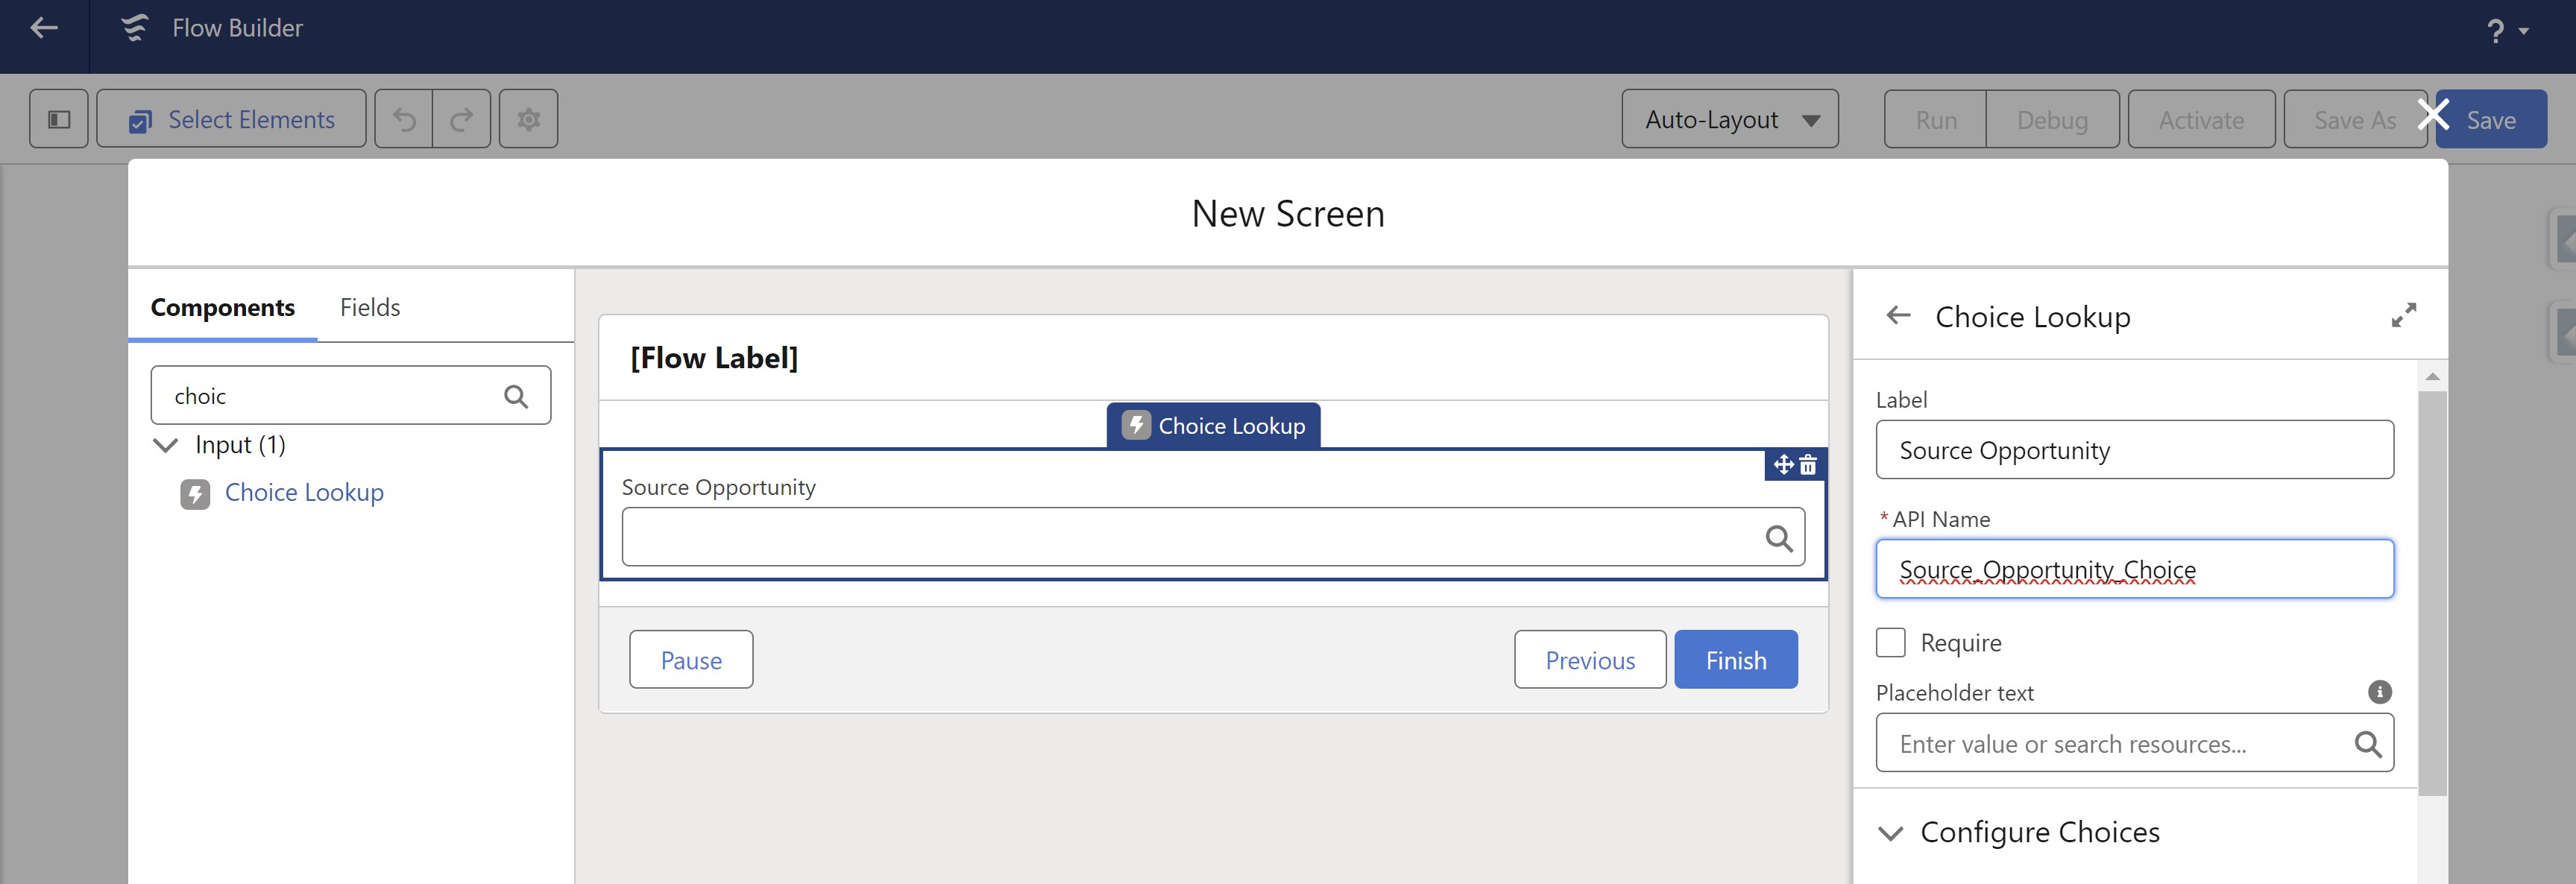
From the Components pane, drag a Choice Lookup component onto the screen.
-
Label it Source Opportunity and set the API name to Source_Opportunity_Choice.
-
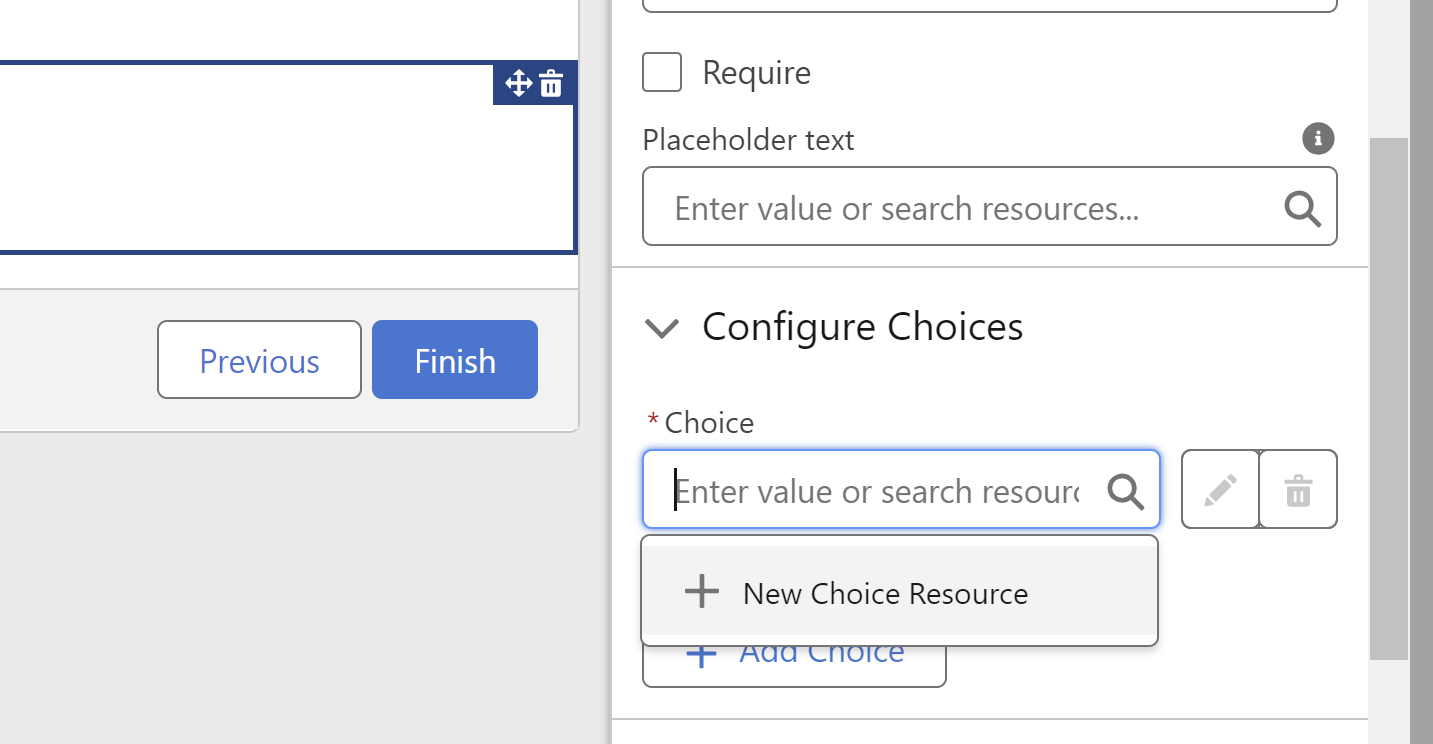
In the Configure Choices section, select New Choice Resource.
-
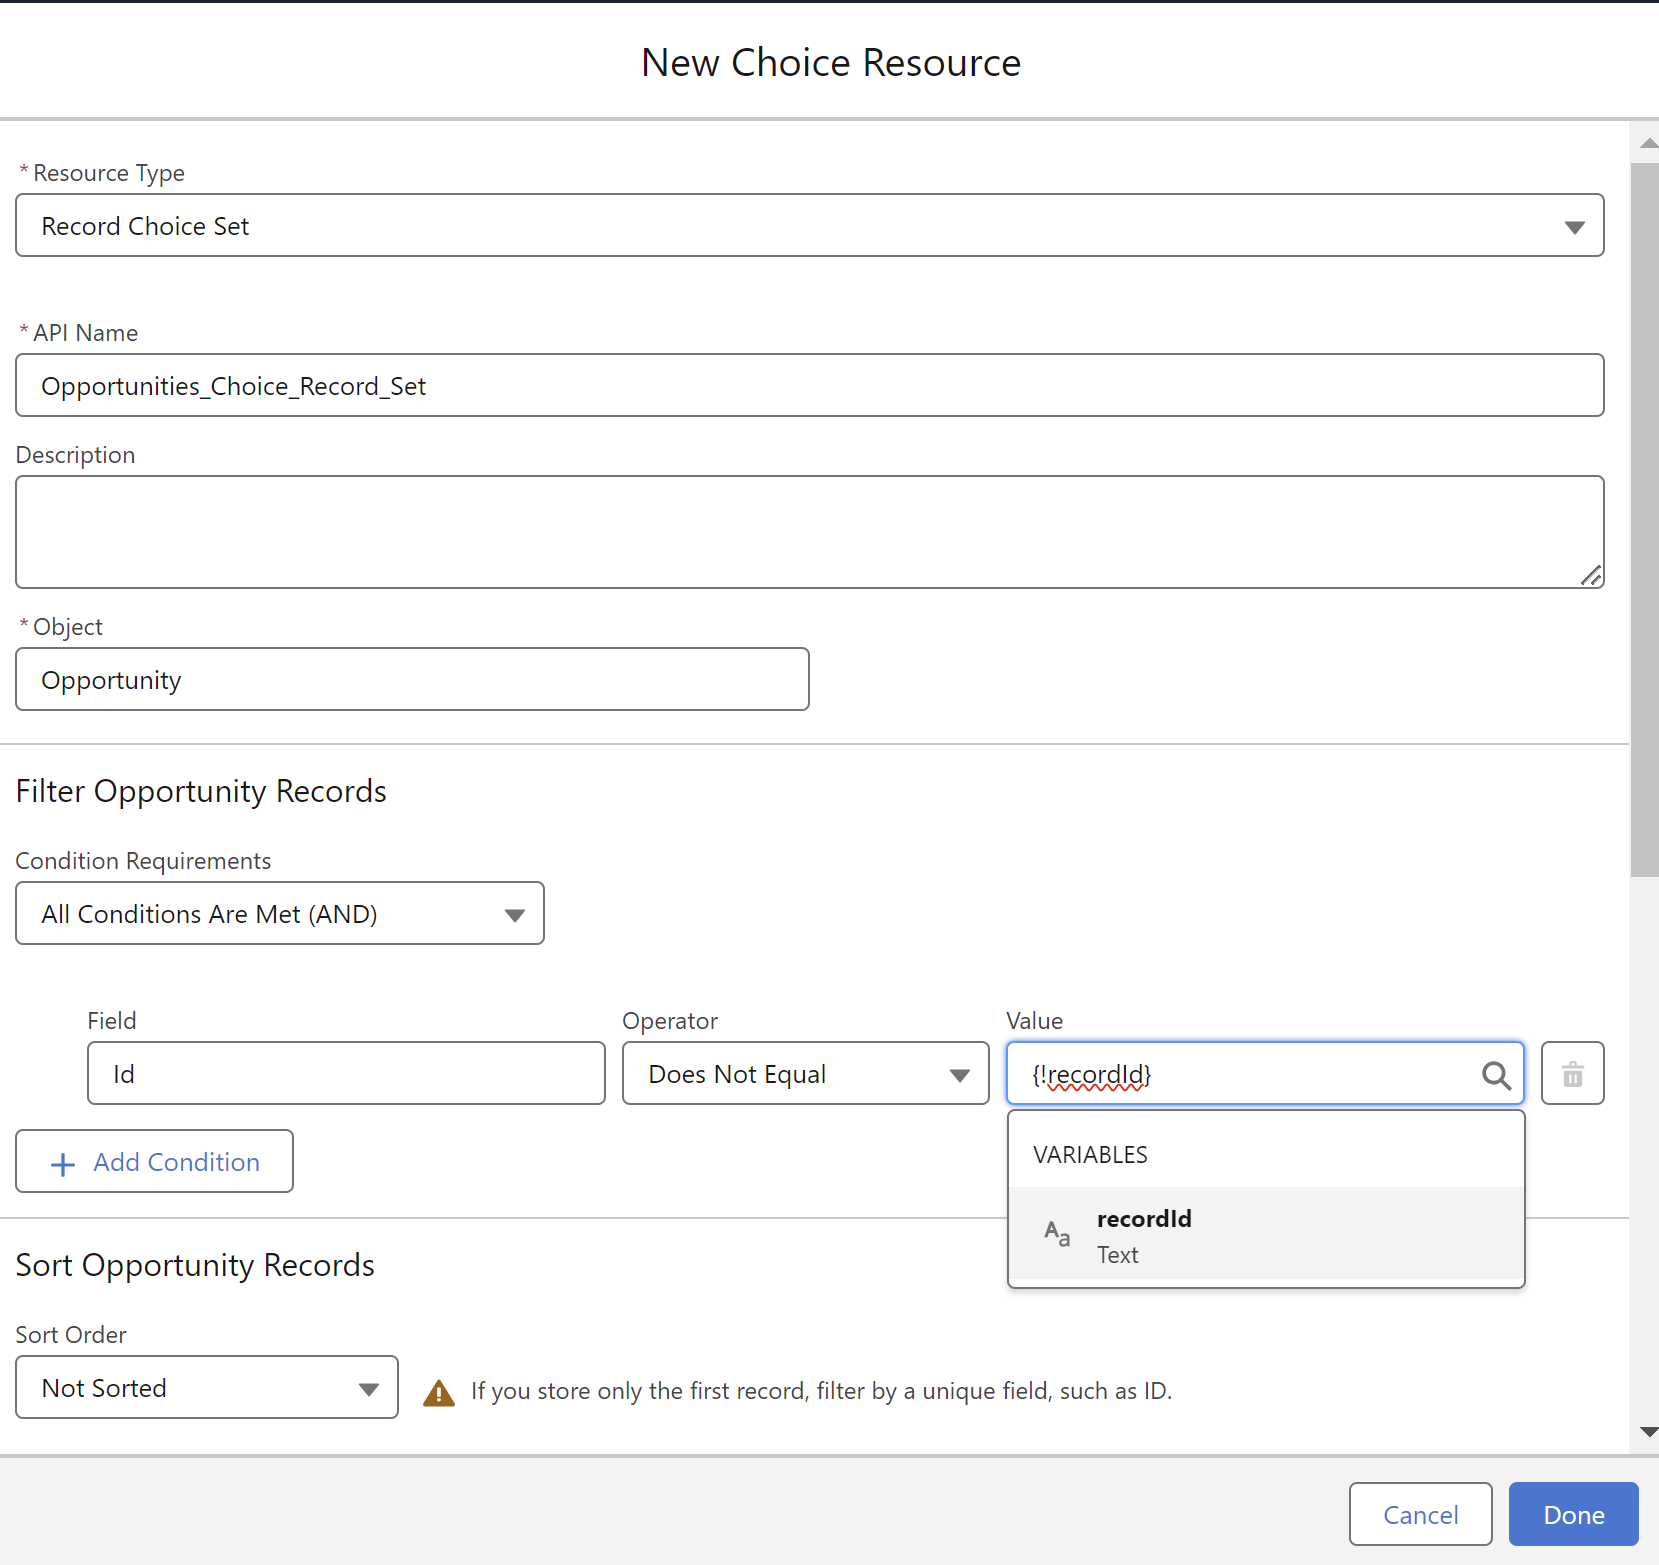
Configure the Record Choice Set as shown below.
|
Field |
Value |
|---|---|
|
Resource Type |
Record Choice Set |
|
API Name |
|
|
Object |
Opportunity (or Quote) |
|
Filter |
|
-
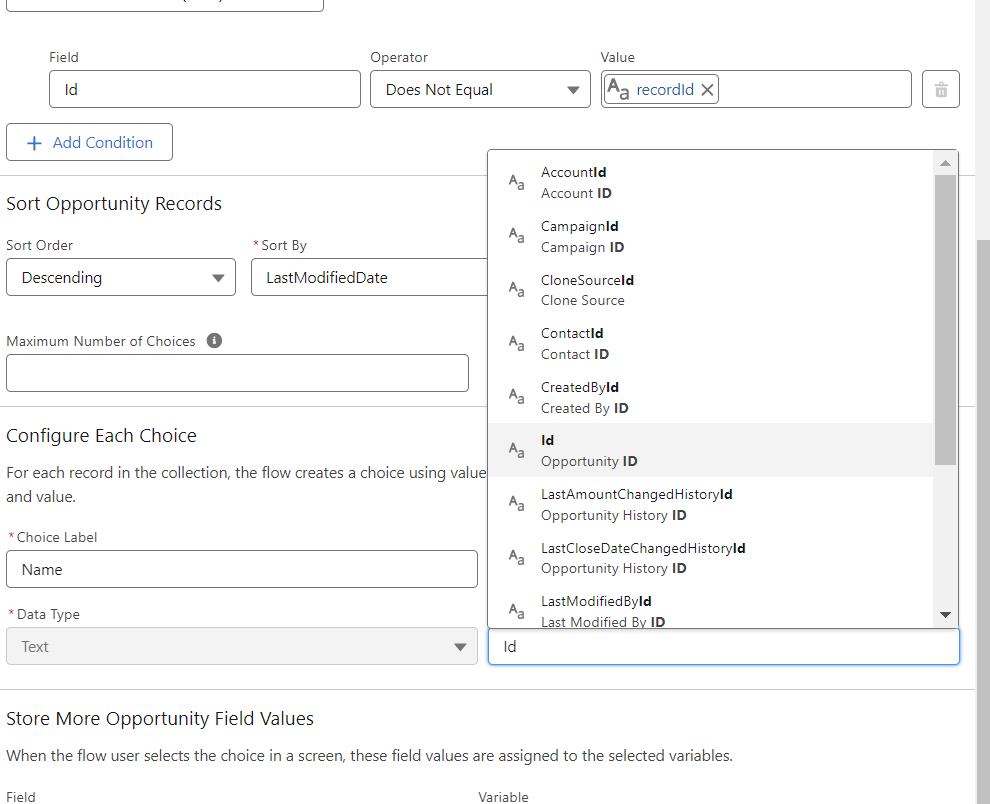
Configure how each Choice is displayed.
|
Field |
Value |
|---|---|
|
Choice Label |
Name |
|
Data Type |
Text |
Create the Source Opportunity Not Selected Error Screen
If the user does not select a record, display an error message.
-
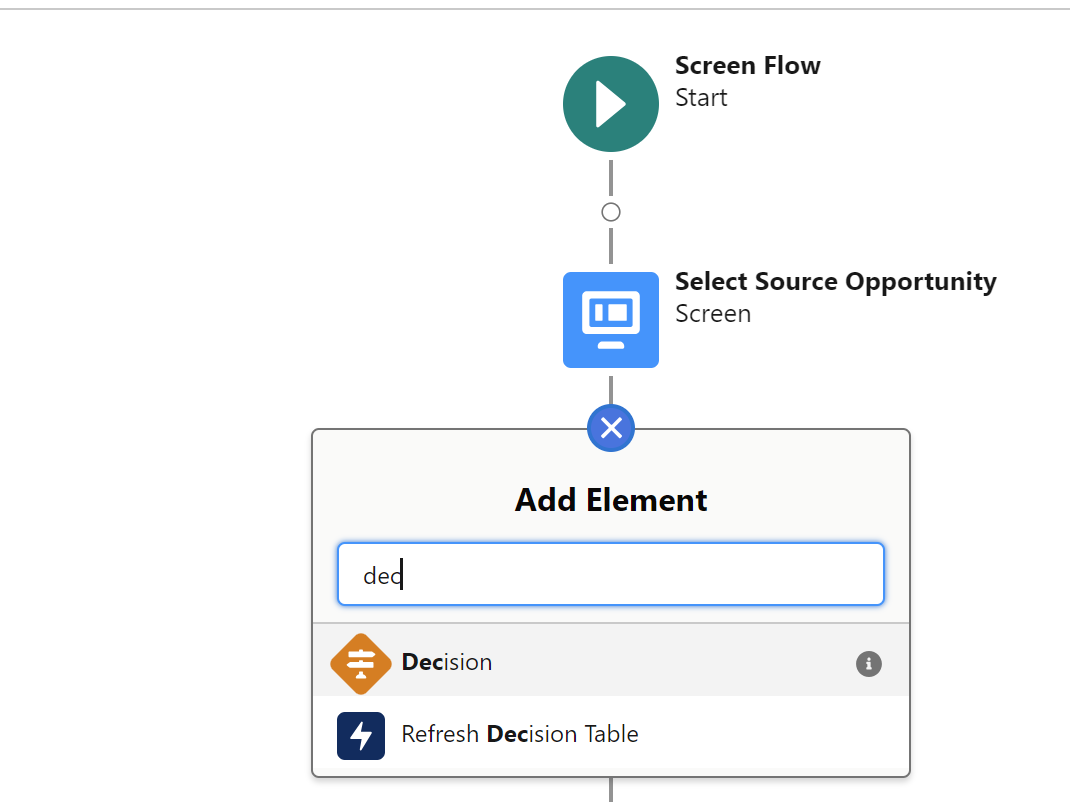
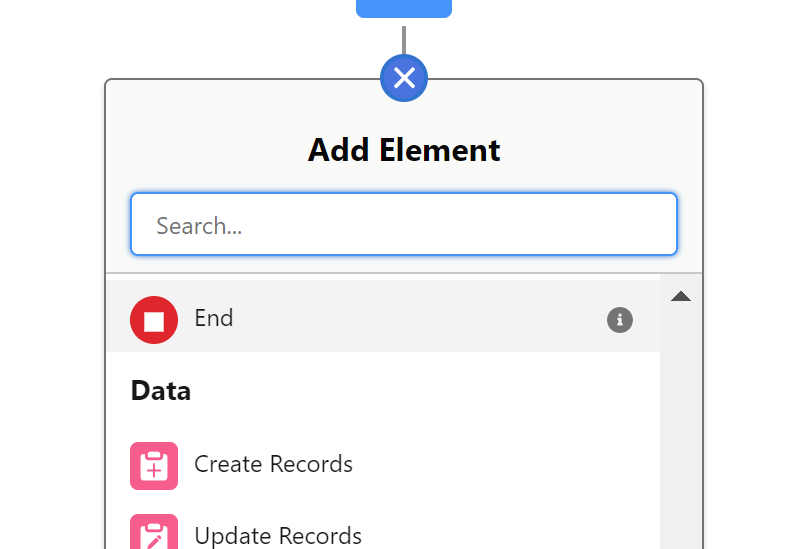
Add a new Decision element after the Select Source Opportunity screen.
-
Set up Record Not Selected as follows.
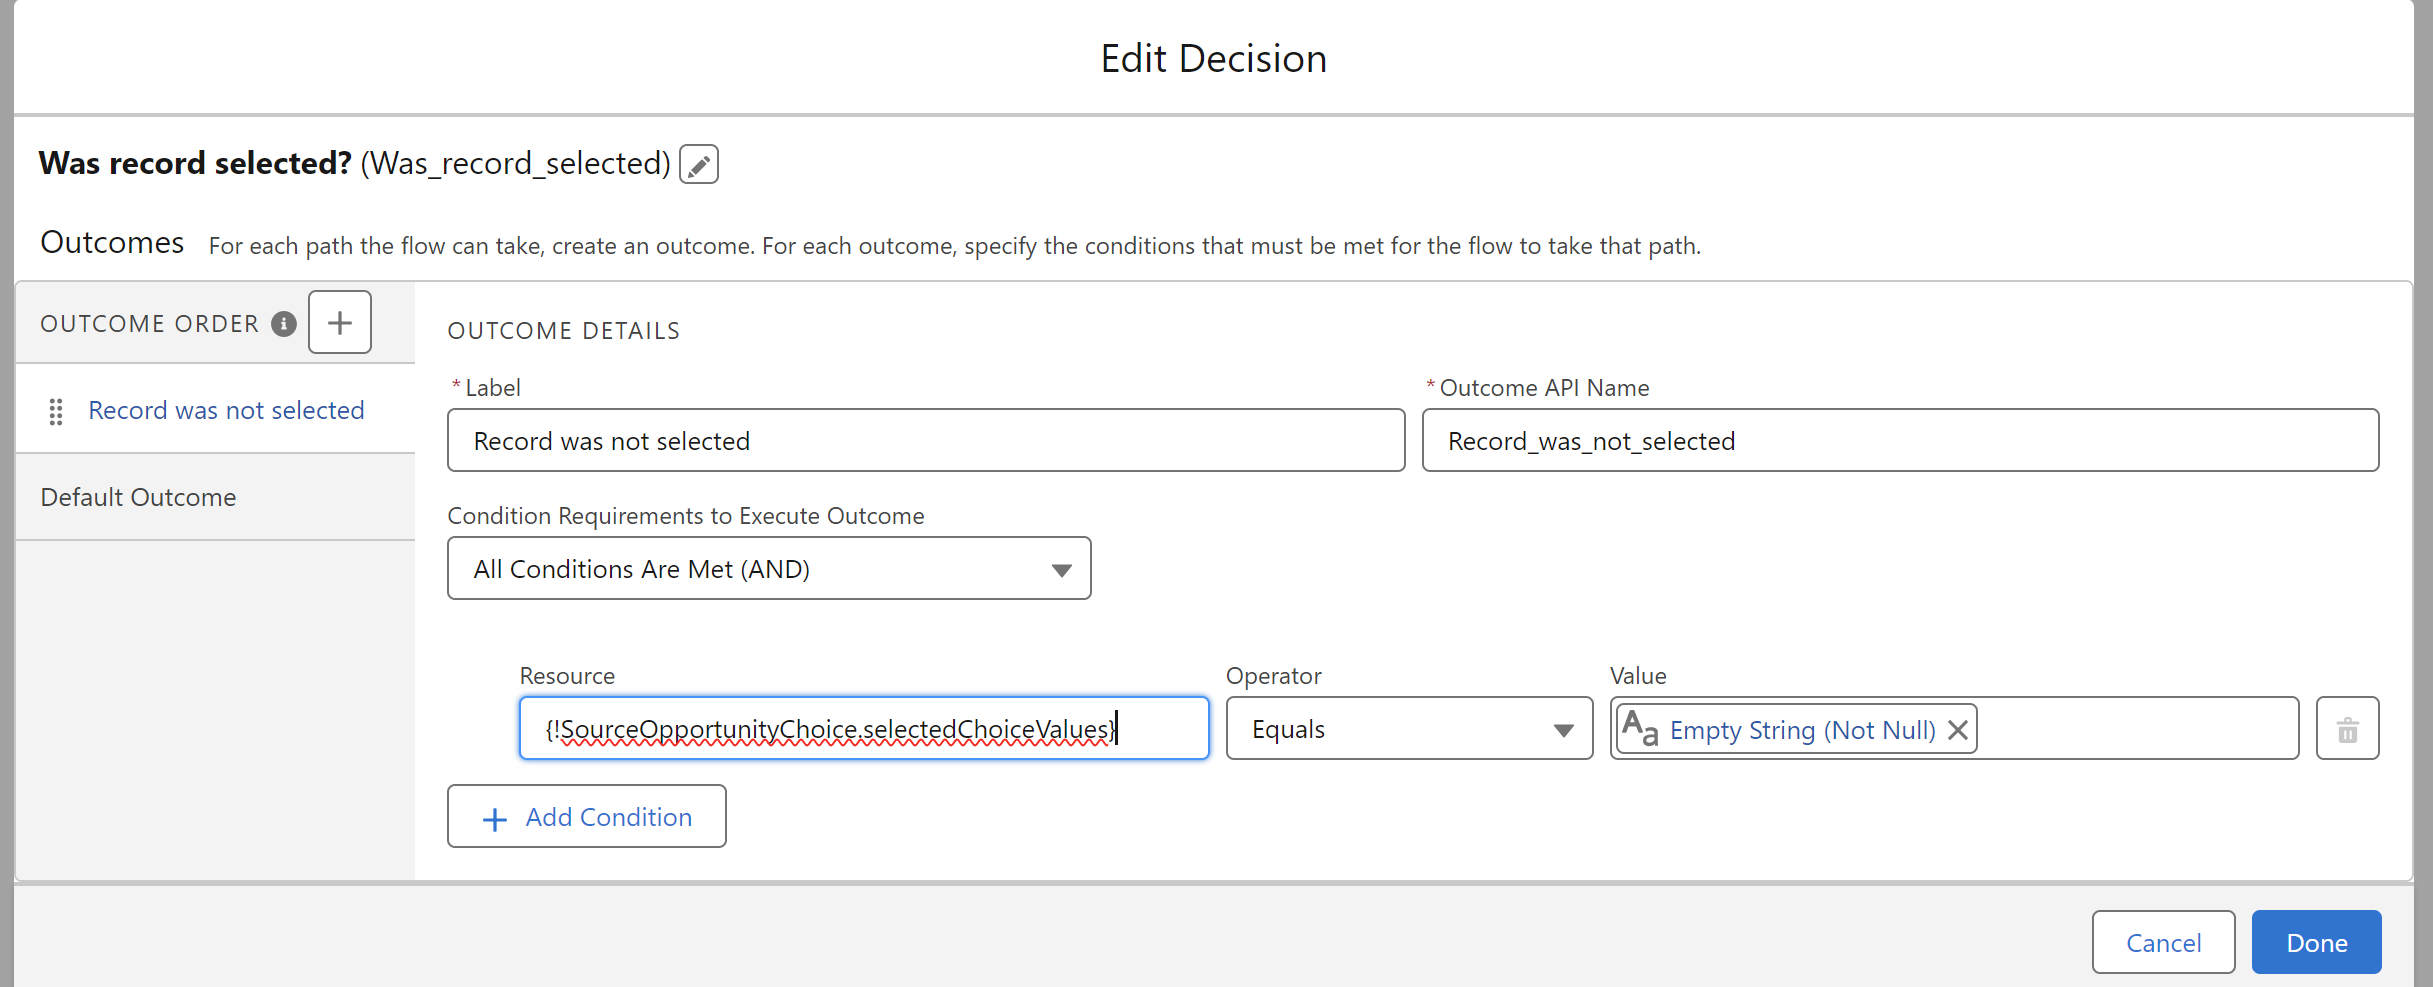
|
Field |
Value |
|---|---|
|
Label |
Record was not selected |
|
Outcome API Name |
|
|
Condition Logic |
All Conditions Are Met (AND) |
|
Condition |
|
-
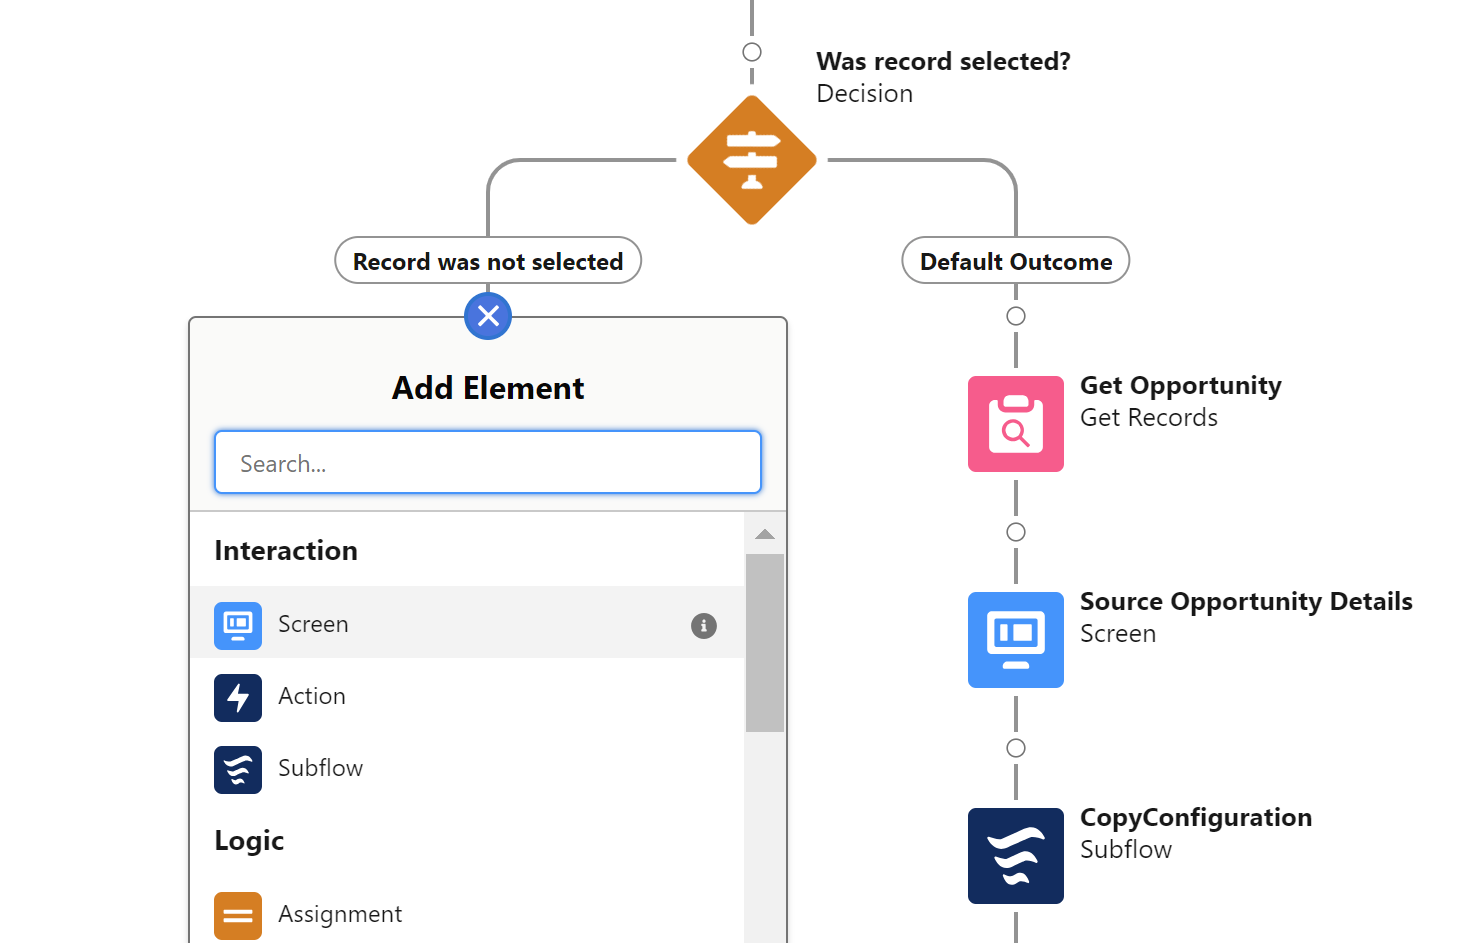
Add a Screen element to inform the user that a Source Record was not selected.
-
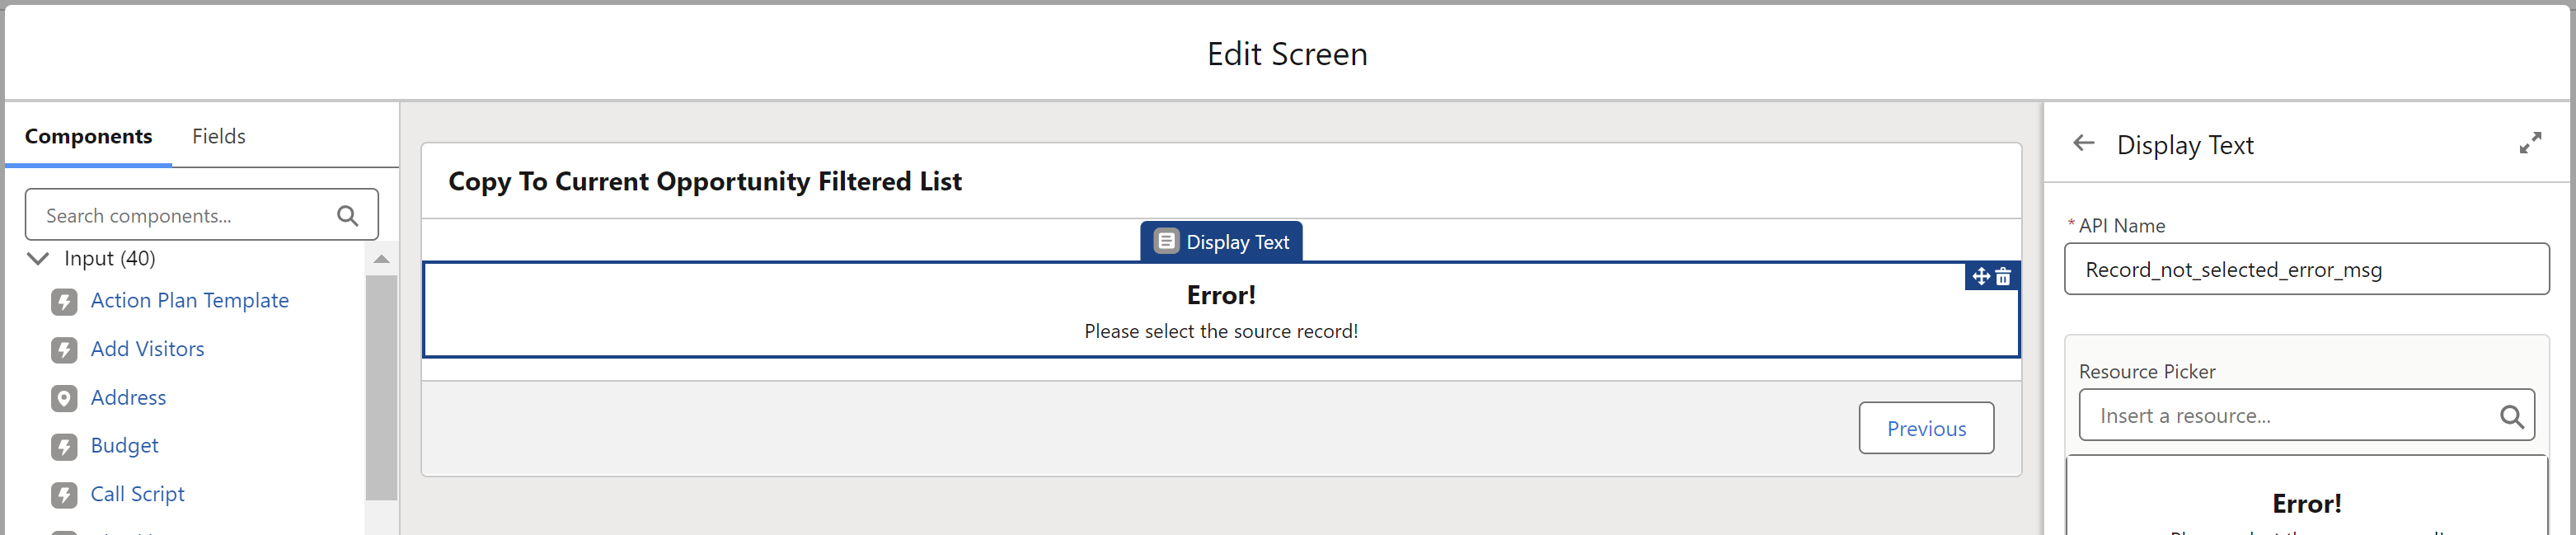
Add the required Error message text using a Display Text component.
-
Configure footer buttons as needed.
-
Add an End element after the error message screen.
Create the Source Opportunity Verification Screen
After the user selects a record, show them the key details for confirmation.
-
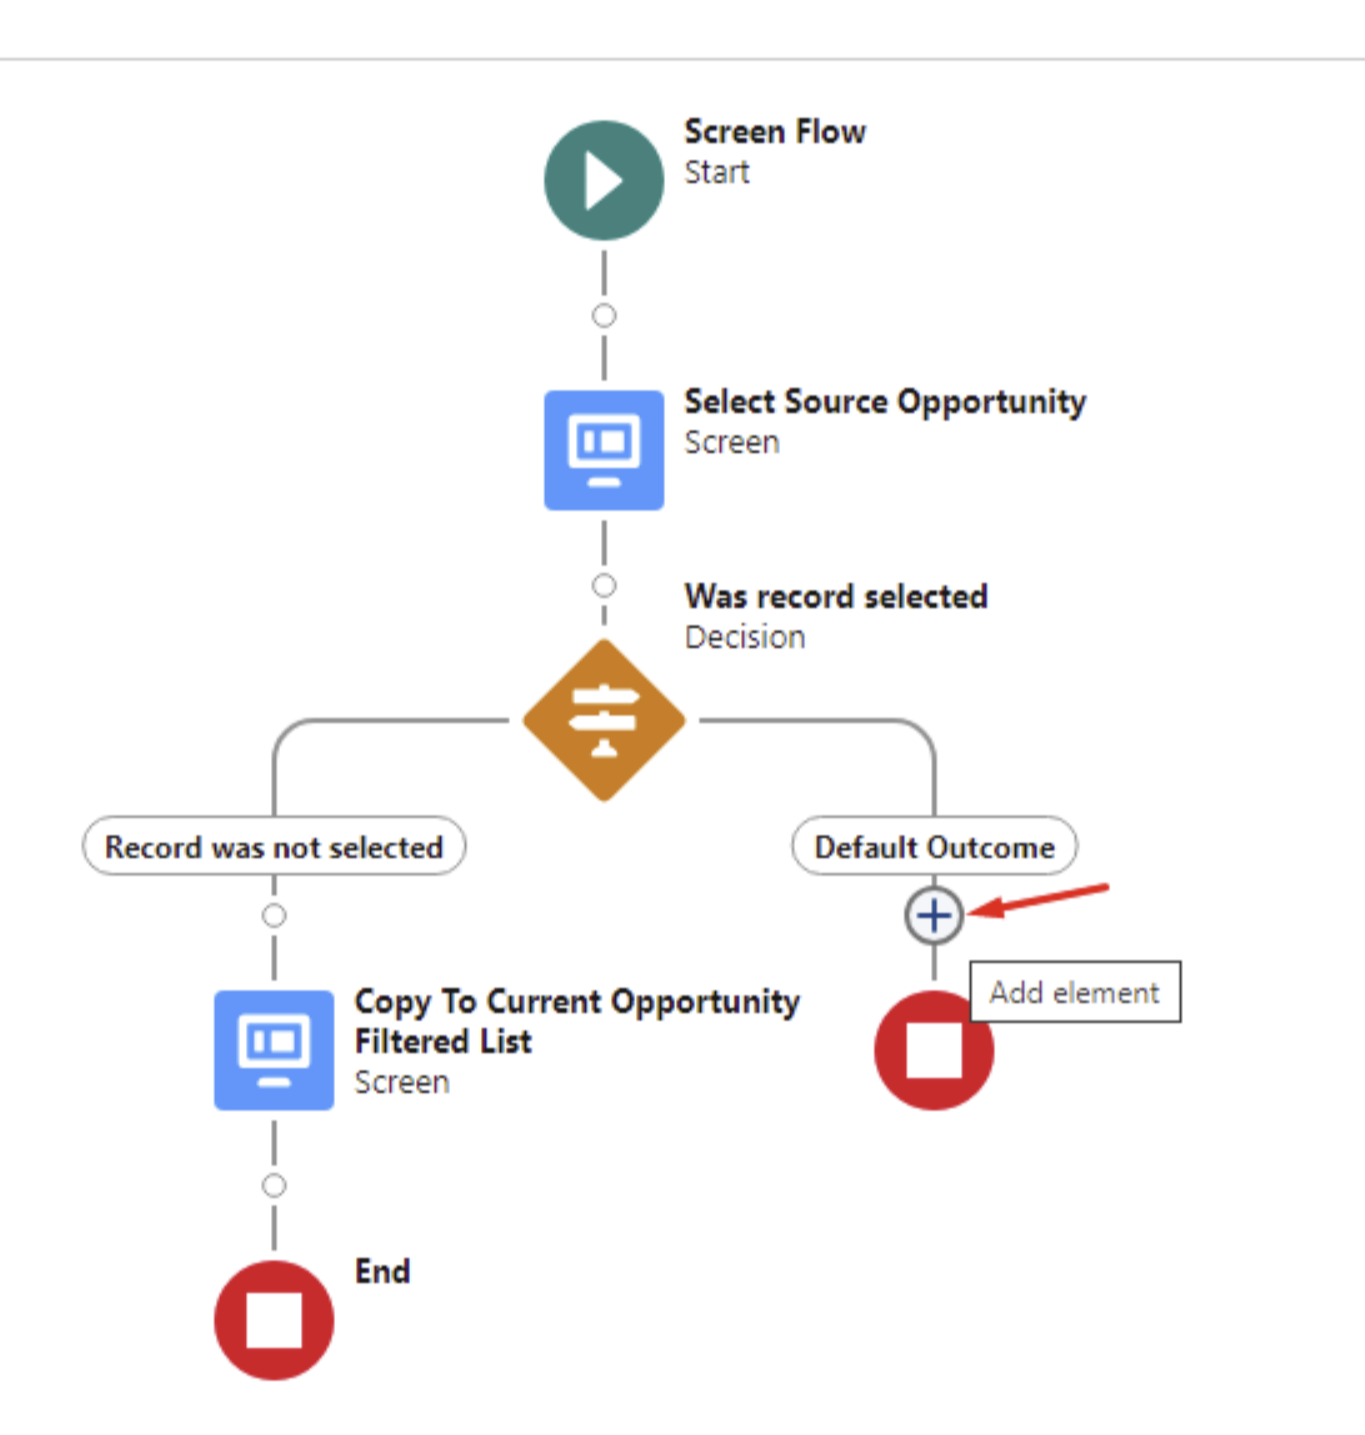
Under the Default Outcome path, add a new Get Records element.
-
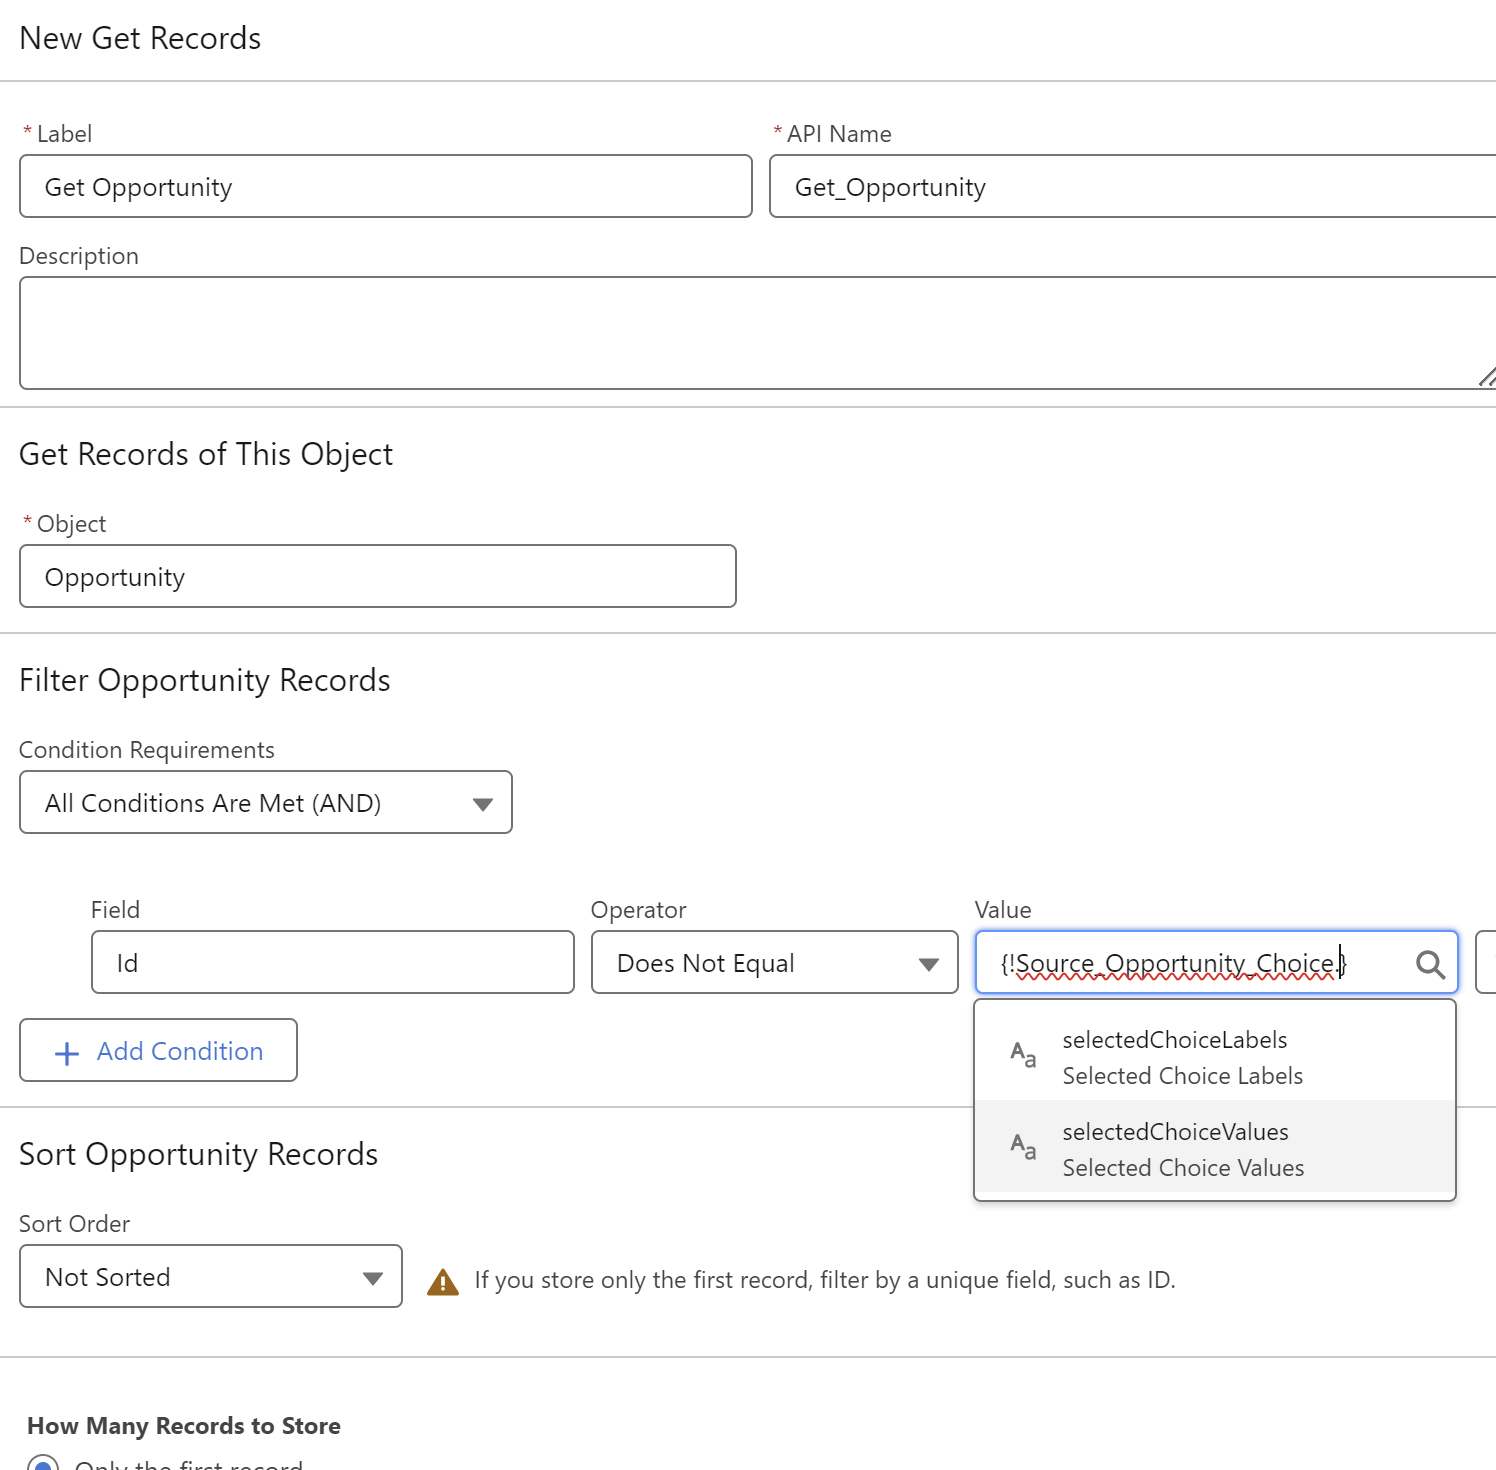
Set up Get Records as follows.
|
Field |
Value |
|---|---|
|
Label |
Get Opportunity |
|
API Name |
|
|
Object |
Opportunity |
|
Condition Requirements |
All Conditions Are Met (AND) |
|
Condition |
|
-
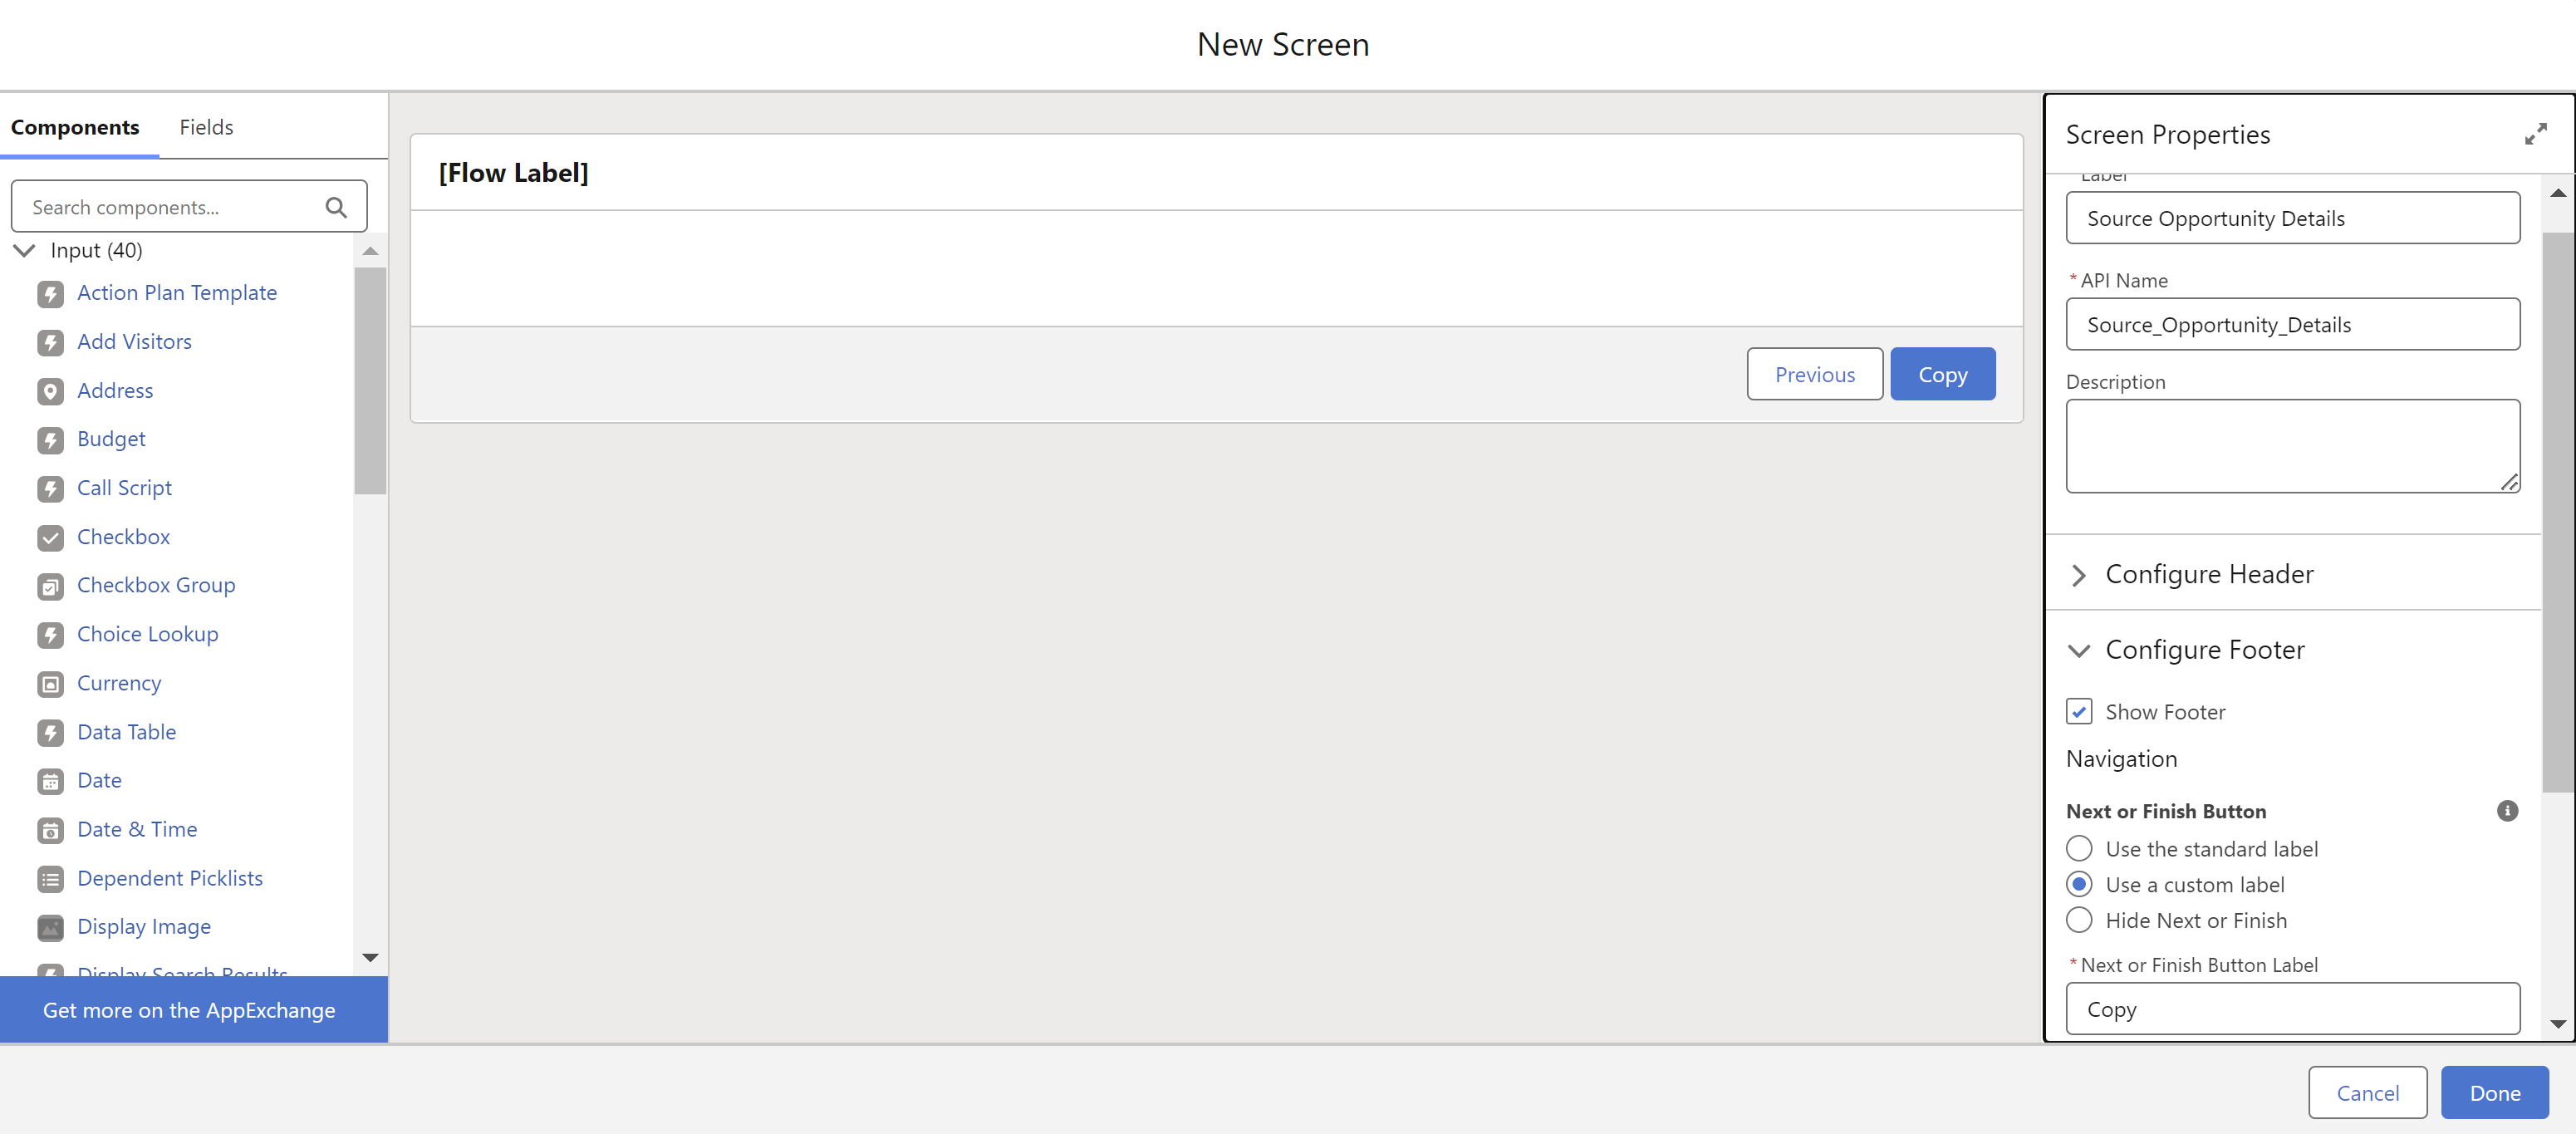
Add a new Screen element and name it Source Opportunity Details/Source_Opportunity_Details.
-
In the Next or Finish Button Label field, enter Copy.
-
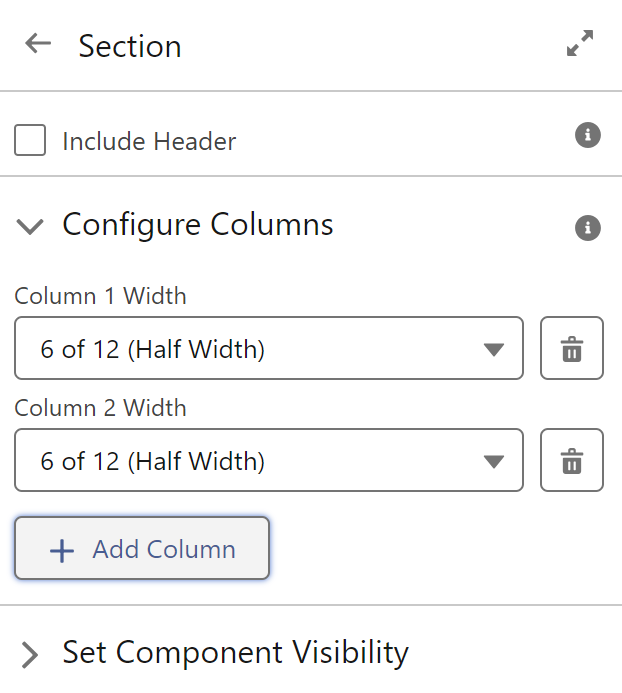
Add a new Section component and create an extra column.
-
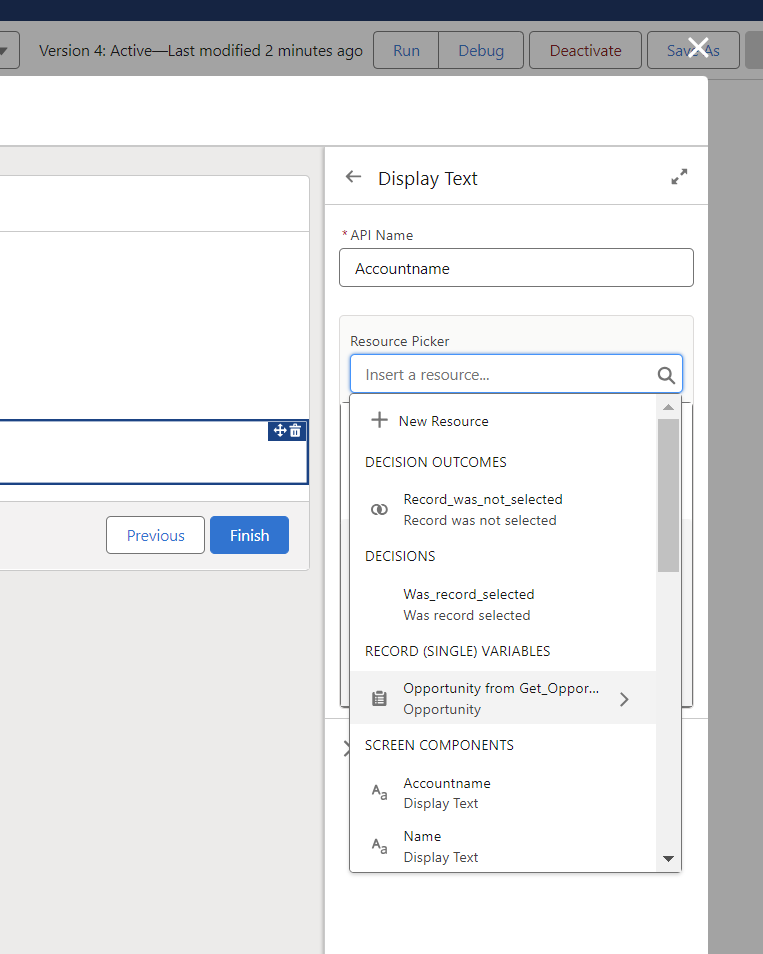
Using the Display Text component, build the verification layout. Fields may vary depending on your object or business requirements.
-
To reference data from the selected Opportunity, use the Get Opportunity element via the Resource Picker.
Recalculate Configuration Managed Subflow Utilization
Use these steps to add the Recalculate subflow.
-
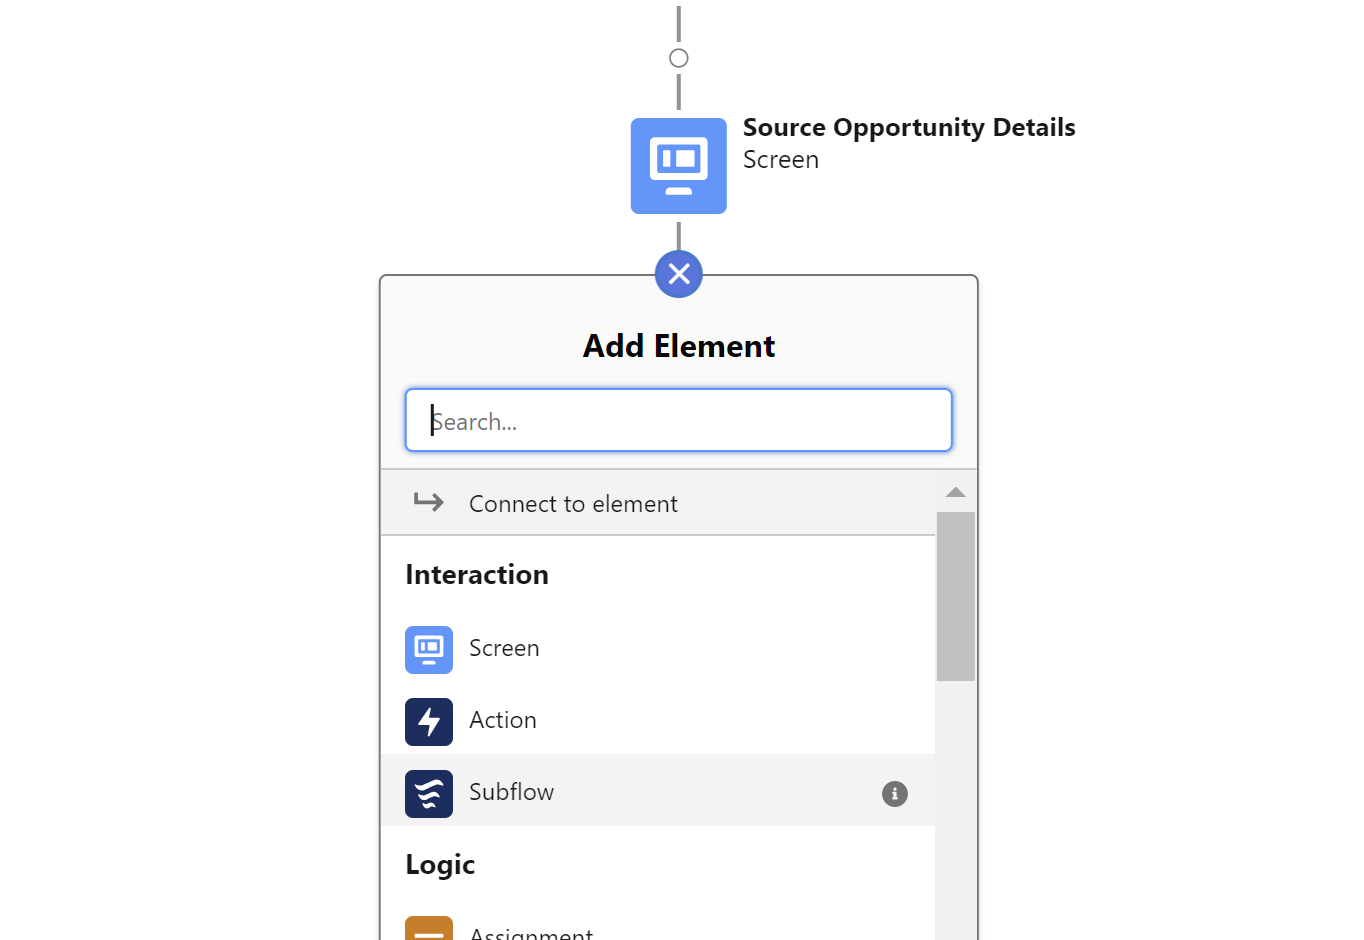
Add a new Subflow element.
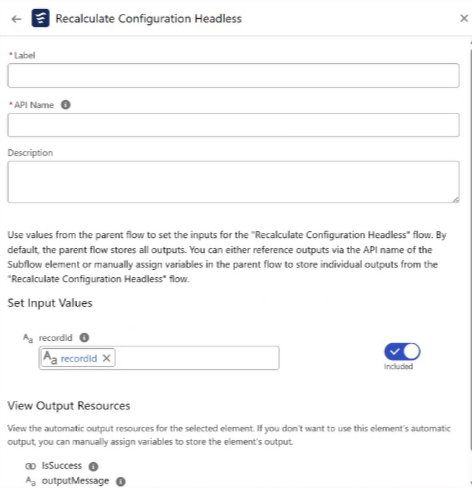
-
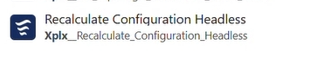
Choose Recalculate Configuration Headless/Xplx_RecalculateConfiguration_Headless.
-
Set up the subflow as follows:
|
Field |
Value |
|---|---|
|
Label |
Recalculate Configuration |
|
API Name |
|
|
recordId |
|
-
Save and activate the flow.
-
In the Flow Label field, enter Recalculate Configuration to Current Opportunity.
-
In the Flow API Name field, enter Recalculate_Configuration_to_Current_Opportunity.
-
Create a Quick Action for Flow Action Type
To allow users to launch your flow directly from an object record page, create a Quick Action.
-
Navigate to Setup > Object Manager > Opportunity > Buttons, Links, and Actions.
-
Select New Action.

Only Action will work properly. Referencing this from a Button or Link will limit functionality.
-
For Action Type, select Flow.
-
Select the Screen Flow you created.
-
For the Label, enter Recalculate Configuration to Current Opportunity (or a label appropriate for object).
-
Enter an API Name.
-
Select Save.
Create a Quick Action for Lightning Web Component Action Type
To allow users to launch your flow directly from an object record page, create a Quick Action.
-
Navigate to Setup > Object Manager > Opportunity > Buttons, Links, and Actions.
-
Select New Action.
Only Action will work properly. Referencing this from a Button or Link will limit functionality.
-
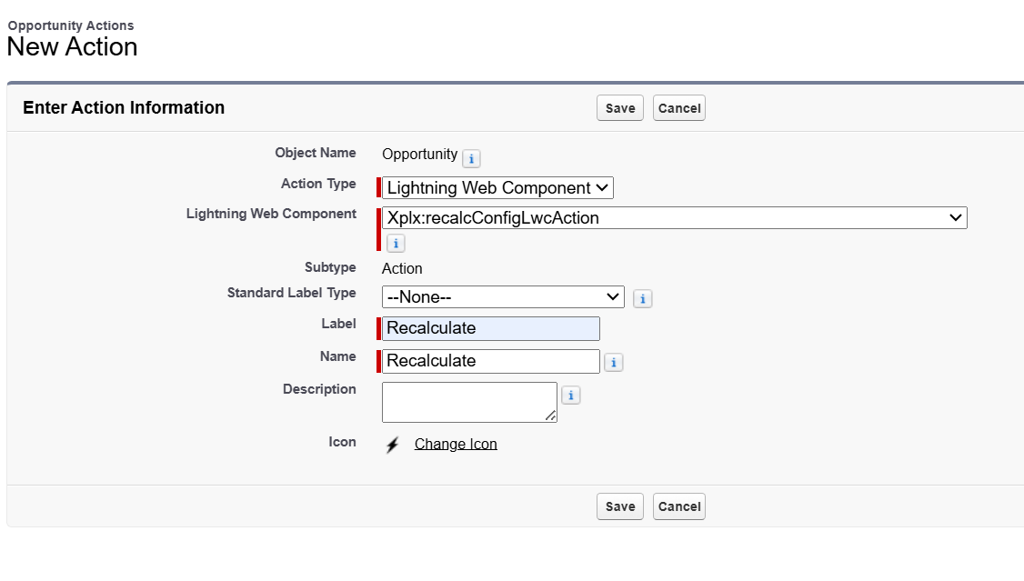
For Action Type, select Lightning Web Component.
-
For the Lightning Web Component, select the Xplx:recalcConfigLwcAction you created.
-
For the Label, enter Recalculate (or a label appropriate for object).
-
For the Name, enter Recalculate
-
Select Save.
Add the Quick Action to the Opportunity Layout
Add the quick action to the layout to surface the managed action directly on the object record page for end users. Add the packaged 'Recalculate Configuration to Current Opportunity' action to the layout.
-
In Salesforce, navigate to Setup > Object Manager > Opportunity/Quote > Page Layouts.
-
Select the required layout.
-
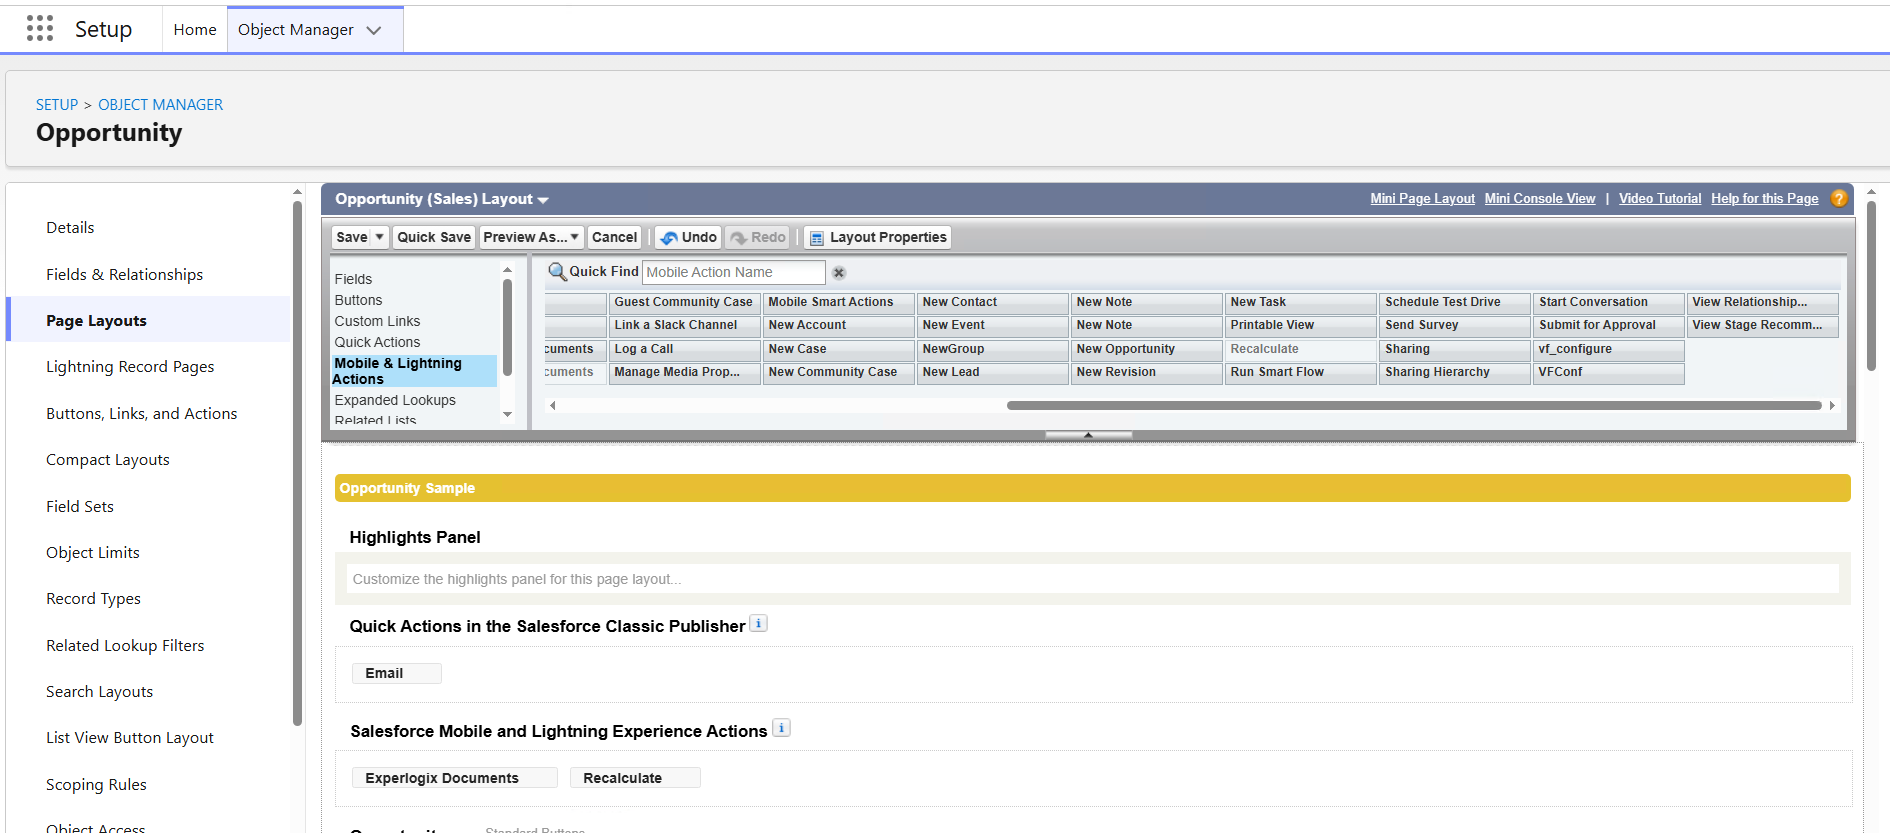
Select Mobile & Lightning Actions in the toolbar.
-
Drag Recalculate Configuration to Current Opportunity to the Salesforce Mobile and Lightning Experience Actions section.
-
Select Save.
If Dynamic Actions are enabled, see Adding Buttons to Layouts Using Dynamic Actions instead.