
The Power Automate needs a solution to be imported. This page provides the information needed to complete the “Import a Solution” dialog.
Prerequisites
-
Dynamics CRM, Microsoft Dynamics 365 CE, Power Platform, and Power Automate experience
-
User access to Power Automate
-
Flow shared with the user
-
User specified in the environment variable has:
-
User rights
-
Is linked to a default team in Design Center with Modeler rights
-
Install
Use the following steps to install the solution:
-
Import the solution in Power Automate. For more information on importing a solution, see Import solution.
-
Open the Import a solution page for the imported solution and add the Environment Variables values.
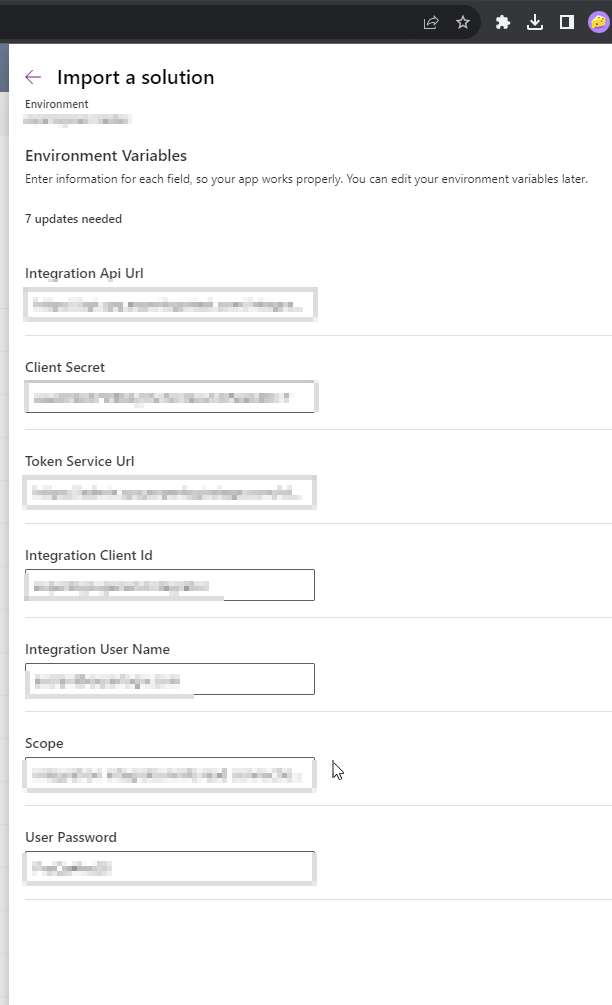
Determine where your organization is deployed by navigating to Admin Center. If your organization is deployed to another cluster, please change the environment values accordingly (CPQ2 etc.). For CPQ, it would be https://api.cpq.experlogix.com/integrations for the integration API URL and https://admin.cpq.experlogix.com/identity/connect/token
The following example values contain the integration API URL and Token Service URL for CPQ.
|
Field Name |
Example Value/Source |
|---|---|
|
Integration API URL |
https://api.cpq.experlogix.com/integrations |
|
Client Secret |
Please create a ticket with Customer Care to get the client ID and secret. |
|
Token Service URL |
https://admin.cpq.experlogix.com/identity/connect/token |
|
Integration Client Id |
Organization-specific Client ID |
|
Integration User Name |
Please create a local user name in Admin Center. Create a Freshdesk ticket to give this user sufficient rights. |
|
Scope |
integration integrationinfo:read connection:read organization:read |
|
Password |
Please create a local user name in Admin Center and enter the password here. Create a Freshdesk ticket to give this user sufficient rights. |