
The Cloud Connect migration includes both functional and technical aspects. This page provides instructions for migrating from the classic integration to Cloud Connect. The page includes functional information such as software setup, user interface configurations, and the use of tools like the MsAx configurator. It also lists the limitations and supported integrations, with specific prerequisites and assumptions.
Supported Integrations:
-
Microsoft Dynamics 365 BC: Experlogix CPQ version 24.2 and above
-
Microsoft Dynamics 365 CE
-
Microsoft Dynamics 365 F&OExperlogix CPQ version 24.3 and above
-
Salesforce
Prerequisites
-
A backup of the various instances is created by the customer of their ERP_ or CE database before migrating. A backup is required as the existing integrator deletes the configuration from the host when receiving the delete message.
It's always prudent to create backups of your databases, particularly when upgrading or migrating. Ensure that you are able to restore the database, if required.
-
The ERP_ and CRM_PropertiesERP and CRM Propertiesare used for manually migrating the ERP and CRM Properties to a standard process map.
-
Cloud connect is setup and users can create, save, and edit configurations normally
-
Experlogix CPQ 24.1 or newer is installed
Common setup
Ensure that the common setup is completed by creating the following:
-
Two Configurator SitesConfiguratorSite
-
Classic Integration: The classic integration site is set up.
-
Cloud Connect integration: TheCloud Connectintegration site is set up.
-
-
Process Design: The process design has been set up for Cloud Connect and validated to ensure it functions as expected.
-
Admin Center: The migration URL needs to be added to the connection string in the Admin Center. For verification purposes, legacy URLs for each host system were used. The migration URL should point to the related classic Configurator site.
-
-
Common ClientId with sufficient permissions for the Classic and Cloud Connect Configurator. This is the clientId for the Configurator and STS.
Ensure that the classic Configurator URL is a valid URL. For information on resolving the error encountered when an underscore exists in the URL, see The SSL connection could not be established, see inner exception. The remote certificate is invalid.
Microsoft Dynamics 365 CE setup
In Microsoft Dynamics 365 CE, ensure that the application user has the following Experlogix rights:
-
Experlogix Configurator - Customizations Only
-
Experlogix Configurator - Publisher
-
Experlogix Configurator - User
-
Experlogix CPQ - Modeler
-
Experlogix CPQ - User
-
Experlogix CPQ - User Field Service
-
Experlogix CPQ - User Project Operations
-
Experlogix CPQ - View User
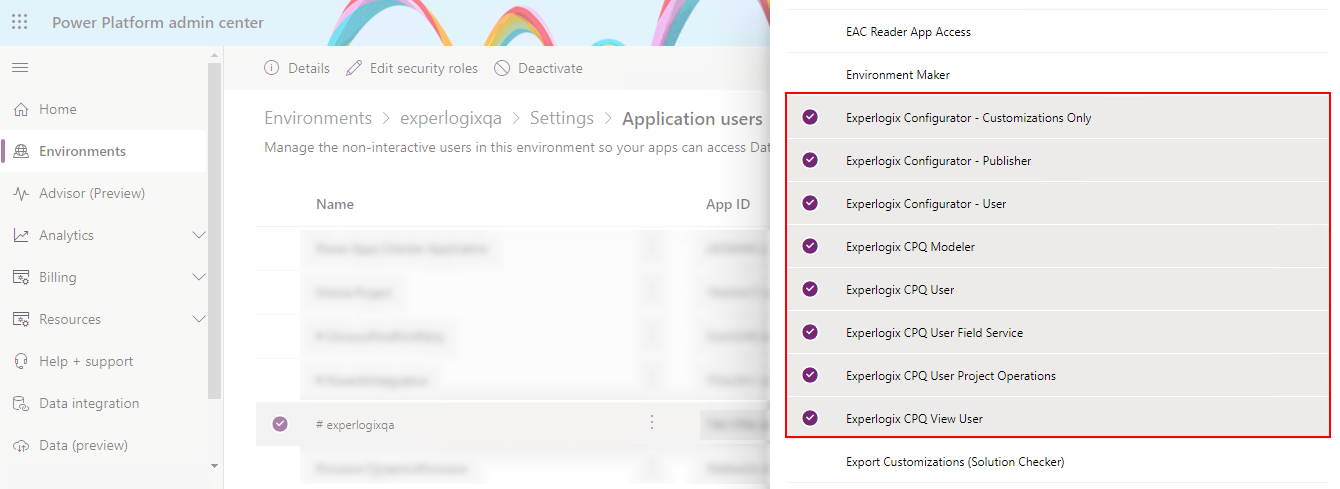
Assigning these rights enables the migration service to connect to Microsoft Dynamics 365 CE. See Manage Roles for Application Users for more information.
Microsoft Dynamics 365 F&O setup
To setup the Configurator with the MsAx integrator, assign the rights as provided in this section. The following two authentication options are available for Microsoft Dynamics 365 F&O integration:
-
User Token access
-
Uses current logged-in user access
-
Minimum requirements – Experlogix security privileges
-
-
(Optional) Service Account
-
Minimum requirements – Experlogix security privileges
-
Additional requirements – Based on customer need
-
Ensure that the User or (optional) Service Account has the minimum Experlogix permissions by assigning the following Experlogix Privileges to their role.
Experlogix Security Privileges (Read-Only)
|
ExpBomConfigurationEntityView |
|
ExpBomHeaderEntityView |
|
ExpBomLineEntityView |
|
ExpBomVersionEntityView |
|
ExpCompanyInfoEntityView |
|
ExpConfigDimensionEntityView |
|
ExpConfigurationEntityView |
|
ExpCPQView |
|
ExpDocuRefEntityView |
|
ExpEcoResProductEntityView |
|
ExpEcoResProductMasterConfigurationView |
|
ExpEcoResProductVariantEntityView |
|
ExpEcoResReleasedProductEntityView |
|
ExpEcoResReleasedProductVariantEntityView |
|
ExpLeanProductAssignmentView |
|
ExpRouteVersionView |
|
ExpSalesOrderHeaderEntityView |
|
ExpSalesOrderLineEntityView |
|
ExpSalesQuotationHeaderEntityView |
|
ExpSalesQuotationLineEntityView |
|
ExpSystemUserEntityView |
|
SystemSecurityRoleEntityView |
|
SystemUserGroupUserListEntityView |
Experlogix Security Privileges (CRUD—create, read, update, and delete)
Assign the following CRUD security privileges:
|
Reference |
Identifier |
|---|---|
|
Privilege |
ExpCPQView |
|
Privilege |
ExpBomConfigurationEntityMaintain |
|
Privilege |
ExpBomHeaderEntityMaintain |
|
Privilege |
ExpBomLineEntityMaintain |
|
Entity |
BOMBillOfMaterialsLineV3Entity (Add to above Privilege and set to Grant CRUD) |
|
Privilege |
ExpBomVersionEntityMaintain |
|
Privilege |
ExpCompanyInfoEntityMaintain |
|
Privilege |
ExpConfigDimensionEntityMaintain |
|
Service Operation |
Experlogixservices.Getconfigdimensiontableid (Add to above Privilege and set to Grant) |
|
Privilege |
ExpConfigurationEntityMaintain |
|
Privilege |
ExpDocuRefEntityMaintain |
|
Privilege |
ExpEcoResProductEntityMaintain |
|
Privilege |
ExpEcoResProductMasterConfigurationMaintain |
|
Privilege |
ExpEcoResProductVariantEntityMaintain |
|
Privilege |
ExpEcoResReleasedProductEntityMaintain |
|
Privilege |
ExpEcoResReleasedProductVariantEntityMaintain |
|
Privilege |
ExpLeanAllocationKeyAssignmentMaintain |
|
Privilege |
ExpLeanProductAssignmentMaintain |
|
Privilege |
ExpSalesOrderHeaderEntityMaintain |
|
Privilege |
ExpSalesOrderLineEntityMaintain |
|
Privilege |
ExpSalesQuotationHeaderEntityMaintain |
|
Privilege |
ExpSalesQuotationLineEntityMaintain |
|
Privilege |
ExpSystemUserEntityMaintain |
|
Privilege |
SystemSecurityUserRoleDutyPrivilegeEntityView |
|
Privilege |
ExpRouteOperationPropertiesEntityMaintain |
|
Entity |
ExpRouteHeaderEntity (Add to above Privilege and set to Grant CRUD) |
|
Entity |
ExpRouteRouteOperationEntity (Add to above Privilege and set to Grant CRUD) |
|
Entity |
ExpRouteVersionEntity (Add to above Privilege and set to Grant CRUD) |
|
Privilege |
ExpRouteResourceRequirementMaintain |
The Identifier lists the above privileges and duties. Use the Identifier column while searching.
Depending on the nature of how the CPQ system is set up, additional permissions may be needed. For instance, Experlogix can be configured to update (write to) entities related to custom entities. The above Security privileges do not account for these discrepancies and must to be updated accordingly.
MsAx Configurator
After the appropriate permissions are granted and assigned, use the following steps to update the web.config file in Design Center.
-
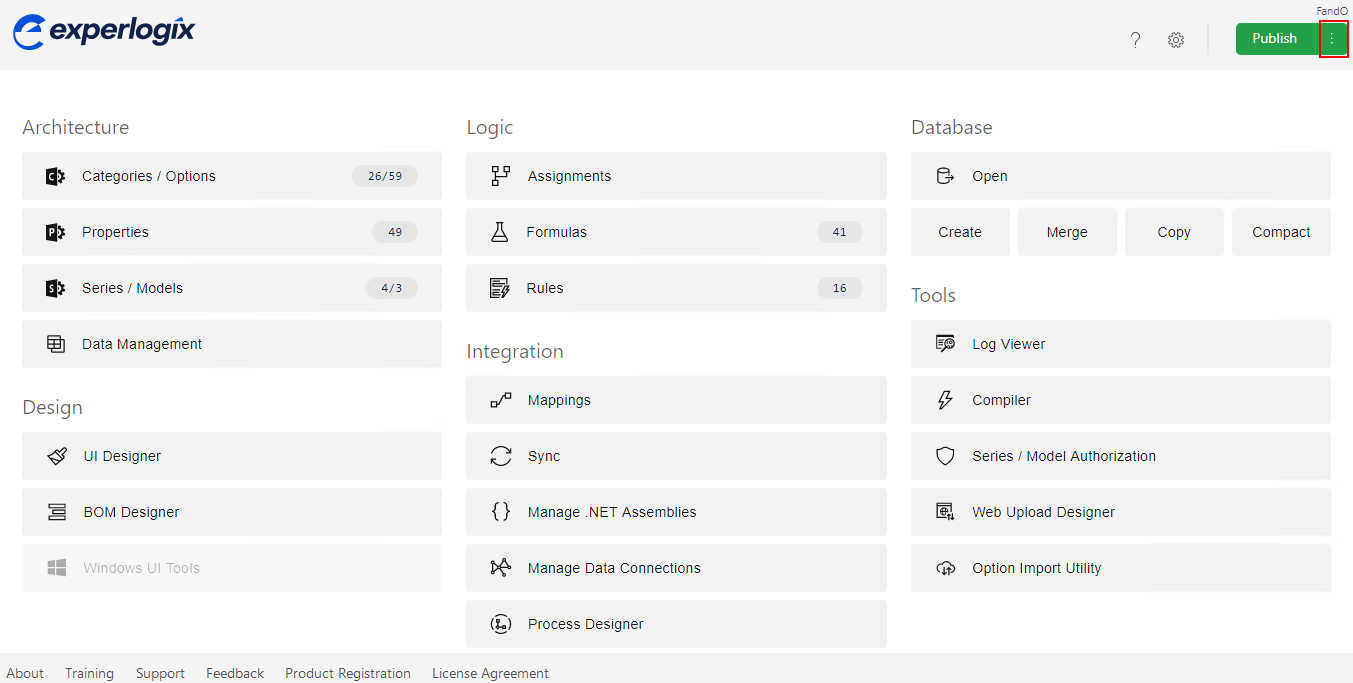
In Design Center, open the Publishing Toolkit.
-
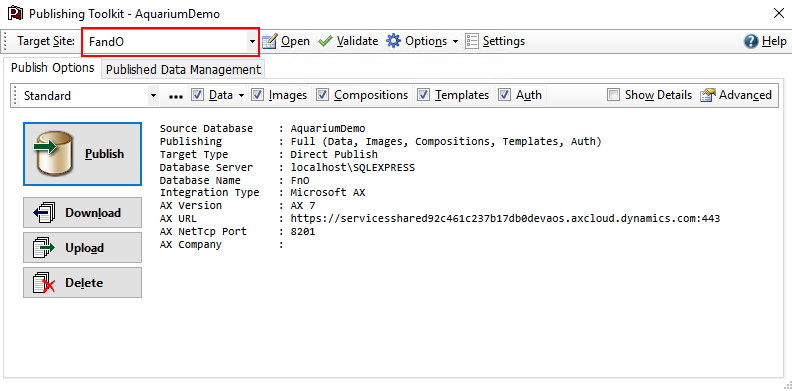
Select the F&O target site.
-
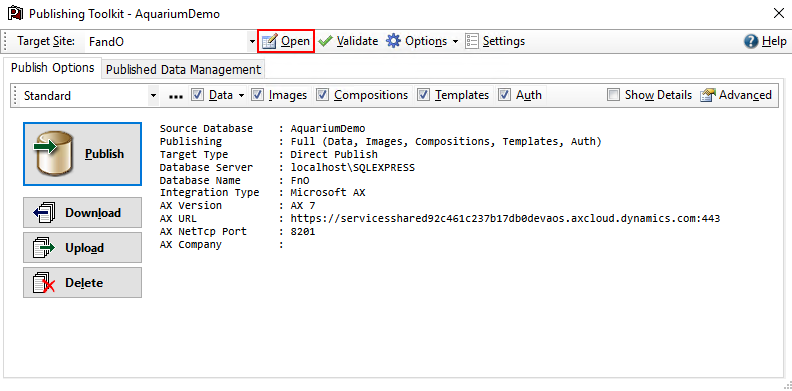
Select the Open button.
-
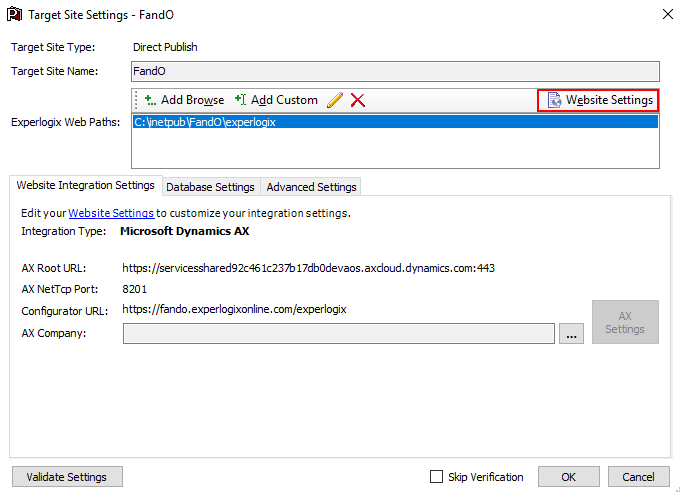
Select Website Settings. The Web.Config file opens in the Experlogix Config File Editor.
-
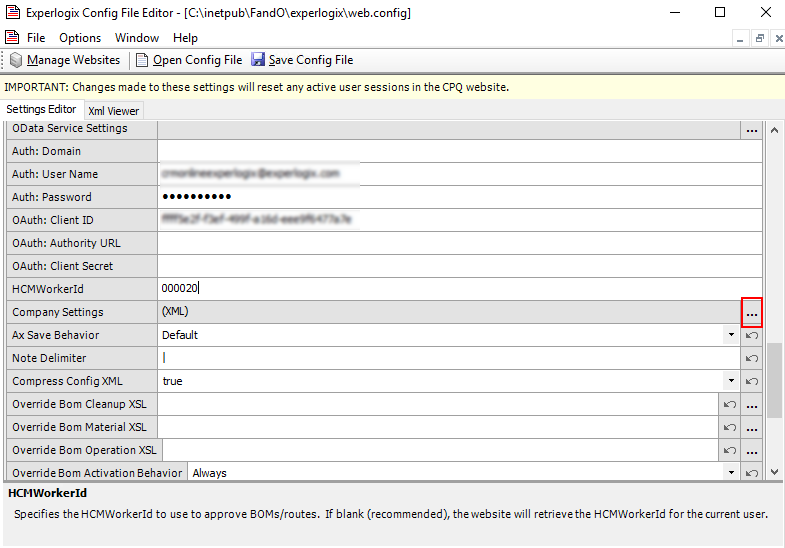
Select ellipsis for Company Settings.
-
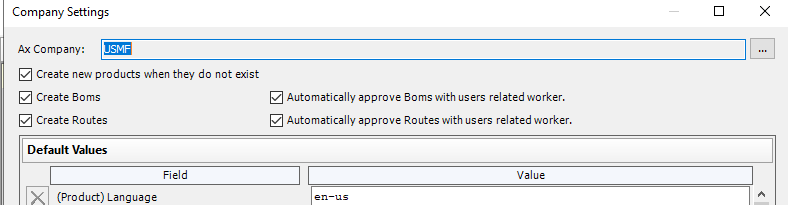
From the Ax company dropdown menu, select a company.
-
Select the Create Boms and Create Routes checkboxes, if required.
-
Select the OK button.
-
Select the XML viewer tab.
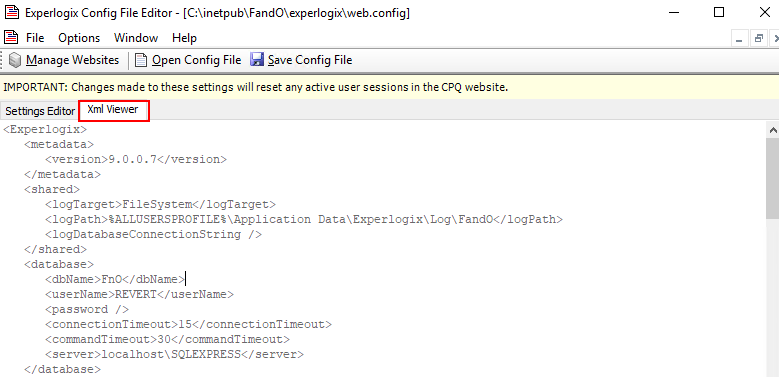
Ensure the following is listed in the web.config of the Configurator with the MsAx integrator:
<msaxIntegratorSettings>
  <hcmWorkerId>%1</hcmWorkerId>
  <companySettings>
    <company name="%2">
      <approveBillOfMaterials>%3</approveBillOfMaterials>
      <approveRoutes>%4</approveRoutes>
    </company>
</msaxIntegratorSettings>
-
Replace the following in the XML Viewer tab in the above code:
-
%1 with a valid worker with sufficient rights to approve BOMs and Routes. The example value is 000020
-
%2 with the Microsoft Dynamics 365 F&O Company name.
-
%3 with either true or false
-
%4 with either true or false
-
-
Select the Save Config File button.